Table of Contents
Advertisement
Advertisement
Table of Contents
Troubleshooting

Related Manuals for Yamaha RX-V350


Summary of Contents for Yamaha RX-V350
- Page 1 RX-V350 AV Receiver Ampli-tuner audio-vidéo OWNER’S MANUAL MODE D’EMPLOI...
-
Page 2: Important Safety Instructions
IMPORTANT SAFETY INSTRUCTIONS CAUTION RISK OF ELECTRIC SHOCK DO NOT OPEN CAUTION: TO REDUCE THE RISK OF ELECTRIC SHOCK, DO NOT REMOVE COVER (OR BACK). NO USER-SERVICEABLE PARTS INSIDE. REFER SERVICING TO QUALIFIED SERVICE PERSONNEL. • Explanation of Graphical Symbols The lightning flash with arrowhead symbol, within an equilateral triangle, is intended to alert you to the presence of uninsulated “dangerous... - Page 3 This product, when installed as indicated in the instructions contained in this manual, meets FCC requirements. Modifications not expressly approved by Yamaha may void your authority, granted by the FCC, to use the product. IMPORTANT : When connecting this product to accessories and/or another product use only high quality shielded cables.
- Page 4 This Class B digital apparatus complies with Canadian ICES-003. Since hearing damage from loud sounds is often undetectable until it is too late, YAMAHA and the Electronic Industries Association’s Consumer Electronics Group recommend you to avoid prolonged exposure from excessive volume levels.
-
Page 5: Table Of Contents
INTRODUCTION CONTENTS ... 1 FEATURES ... 2 GETTING STARTED ... 3 Supplied accessories ... 3 Installing batteries in the remote control ... 3 CONTROLS AND FUNCTIONS ... 4 Front panel ... 4 Remote control ... 6 Front panel display ... 8 PREPARATION CONNECTIONS ... -
Page 6: Features
In this case, the product has priority. Manufactured under license from Dolby Laboratories. “Dolby”, “Pro Logic”, and the double-D symbol are trademarks of Dolby Laboratories. “SILENT CINEMA” is a trademark of YAMAHA CORPORATION. FEATURES Sound field features N Dolby Pro Logic/Dolby Pro Logic II decoder N Dolby Digital/Dolby Digital + Matrix 6.1 Decoder... -
Page 7: Getting Started
Supplied accessories Please check that you received all of the following parts. Remote control SYSTEM POWER POWER POWER STANDBY POWER MD/CD-R TUNER SLEEP D-TV/CBL V-AUX 6CH INPUT AUDIO DISC SKIP CODE SET VOLUME – – – MUTE INPUT MUTE HALL JAZZ ROCK ENTERTAINMENT... -
Page 8: Controls And Functions
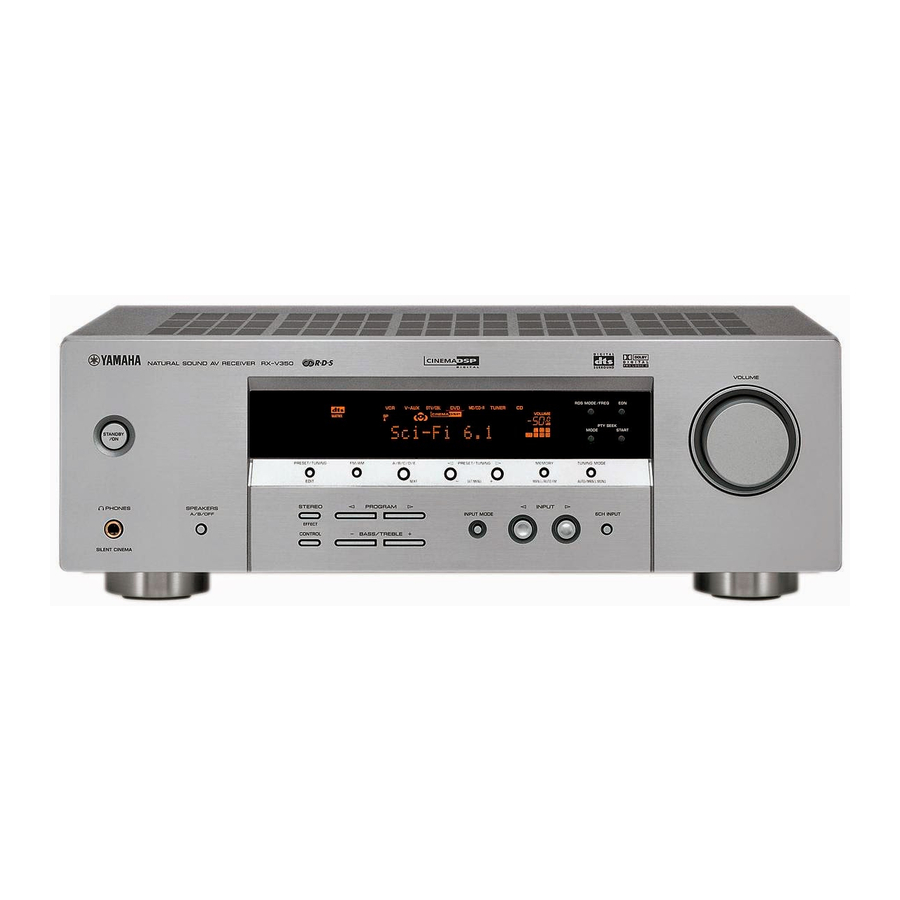
CONTROLS AND FUNCTIONS Front panel STANDBY PHONES SPEAKERS A/B/OFF SILENT CINEMA 1 STANDBY/ON Turns on this unit or sets it to the standby mode. When you turn on this unit, you will hear a click and there will be a 4 to 5-second delay before this unit can reproduce sound. - Page 9 0 VOLUME Controls the output level of all audio channels. This does not affect the OUT (REC) level. PHONES (SILENT CINEMA) Allows you to enjoy DSP effects when listening with headphones. w SPEAKERS A/B/OFF Selects the set of front speakers connected to the A or B terminals.
-
Page 10: Remote Control
CONTROLS AND FUNCTIONS Remote control This section describes the controls and functions of the remote control when it is set in AMP mode. Please make sure to select AMP mode before beginning operation. See “REMOTE CONTROL FEATURES” on page 43 to operate other components with this remote control. -
Page 11: Using The Remote Control
r MUTE Mutes the sound. Press again to restore the audio output to the previous volume level. t 6.1/5.1 Switches on or off the Dolby Digital + Matrix 6.1 or DTS + Matrix 6.1 decoder. y STEREO Switches between normal stereo and DSP effect reproduction. -
Page 12: Front Panel Display
CONTROLS AND FUNCTIONS Front panel display SILENT CINEMA NIGHT MATRIX VIRTUAL DIGITAL ~~~~~~~~~~~~~~ 1 Decoder indicators When any of this unit’s decoders function, the respective indicator lights up. 2 SILENT CINEMA indicator Lights up when headphones are connected and a sound field program is selected (see page 26). -
Page 13: Connections
Before connecting components CAUTION Do not connect this unit or other components to the mains power until all connections between the components have been completed. • Be sure to connect the left channel (L), right channel (R), “+” (red) and “–” (black) properly. Some components require different connection methods and have different jack names. -
Page 14: Connecting Video Components
CONNECTIONS Connecting video components I Connecting a video monitor Connect the video input jack on your video monitor to the MONITOR OUT VIDEO jack. I Connecting a DVD player/digital TV/cable Connect the optical digital audio signal output jack on your component to the DIGITAL INPUT jack and connect the video signal output jack on the component to the VIDEO jack on this unit. -
Page 15: Connecting Audio Components
Connecting audio components I Connecting a CD player Connect the coaxial digital output jack on your CD player to the DIGITAL INPUT CD jack on this unit. • Use the AUDIO jacks on this unit to connect to a CD player that does not have a COAXIAL DIGITAL OUTPUT jack, or to record from CD players. -
Page 16: Connecting The Antennas
• A properly installed outdoor antenna provides clearer reception than an indoor one. If you experience poor reception quality, an outdoor antenna may improve the quality. Consult the nearest authorized YAMAHA dealer or service center about the outdoor antennas. FREQUENCY STEP switch... -
Page 17: Connecting An External Decoder
Connecting an external decoder This unit is equipped with 6 additional input jacks (FRONT left and right, CENTER, SURROUND left and right and SUBWOOFER) for discrete multi-channel input from a component equipped with a multi-channel decoder and 6 channel output jacks such as a DVD/Super Audio CD player. -
Page 18: Connecting The Speakers
1.8 m (6 ft) above the floor. Subwoofer The use of a subwoofer, such as the YAMAHA Active Servo Processing Subwoofer System, is effective not only for reinforcing bass frequencies from any or all channels,... -
Page 19: Speaker Connections
I Speaker connections Be sure to connect the left channel (L), right channel (R), “+” (red) and “–” (black) properly. If the connections are faulty, no sound will be heard from the speakers, and if the polarity of the speaker connections is incorrect, the sound will be unnatural and lack bass. -
Page 20: Speaker Connections
A center speaker can be connected to these terminals. SUBWOOFER jack When using a subwoofer with built-in amplifier, including the YAMAHA Active Servo Processing Subwoofer System, connect the input jack of the subwoofer system to this jack. This unit will direct low bass signals distributed from the front, center and/or surround channels to this jack in accordance with your SPEAKER SET selections. -
Page 21: Connecting The Power Supply Cords
Connecting the power supply cords VOLTAGE SELECTOR VOLTAGE SELECTOR REAR 110V-120V URROUND) 220V-240V N./SPEAKER N./SPEAKER (Asia and General models) I Connecting the AC power cord Plug the power cord into an AC wall outlet. I VOLTAGE SELECTOR (Asia and General models only) The VOLTAGE SELECTOR on the rear panel of this unit must be set for your local main voltage BEFORE plugging into the AC main supply. -
Page 22: Basic System Settings
The “BASIC” menu allows you to set some of the basic “SOUND” menu parameters with a minimum of effort. If you wish to configure the unit more precisely to suit your listening environment, use the more detailed parameters from the “SOUND”... -
Page 23: Set Menu
I Basic menu operation sequence SET MENU BASIC SOUND 1 SETUP Press j / i to alter the settings for each parameter. Use d to move to the next setting. 1 ROOM Choose from S/M/L. 2 SUBWOOFER Choose either of YES/NONE. 3 SPEAKERS Choose from 2/3/4/5 spk. -
Page 24: Setting The Unit To Match Your Speaker System
BASIC SYSTEM SETTINGS Setting the unit to match your speaker system Follow the instructions below to set the amplifier output to match the size of your room and speakers. Press u / d to cycle through parameters 1 through 4, and j / i to alter the parameter setting. -
Page 25: Playback
STANDBY PRESET/TUNING FM/AM A/B/C/D/E PRESET/TUNING MEMORY EDIT NEXT SET MENU MAN’L/AUTO FM PHONES SPEAKERS STEREO PROGRAM INPUT A/B/OFF INPUT MODE EFFECT CONTROL BASS/TREBLE SILENT CINEMA SYSTEM POWER POWER POWER STANDBY POWER MD/CD-R TUNER SLEEP D-TV/CBL V-AUX 6CH INPUT AUDIO DISC SKIP CODE SET VOLUME —... -
Page 26: Playing Video Sources In The Background
PLAYBACK Select a sound field program if desired. Use PROGRAM (or press AMP to select the AMP mode, then press one of the sound field program buttons repeatedly) to select a sound field program. See page 27 - 30 for details about sound field programs. -
Page 27: Input Modes And Indications
Input modes and indications This unit is equipped with 2 types of input jacks. Do the following to select the type of input signals you want to use. Press INPUT MODE repeatedly until the desired input mode is shown on the front panel display. -
Page 28: Selecting A Sound Field Program
PLAYBACK Selecting a sound field program You can enhance your listening experience by selecting sound field programs. For details about each program, see pages 27 – 30. STANDBY PRESET/TUNING FM/AM A/B/C/D/E PRESET/TUNING EDIT NEXT SET MENU SPEAKERS STEREO PROGRAM PHONES A/B/OFF INPUT MODE EFFECT... - Page 29 I Selecting PRO LOGIC or PRO LOGIC II You can listen to 2-channel sources decoded into four discrete channels by selecting PRO LOGIC or five discrete channels by selecting PRO LOGIC II in program No. 9 (refer to the list on page 29). VOLUME —...
-
Page 30: Virtual Cinema Dsp
PLAYBACK I Virtual CINEMA DSP With Virtual CINEMA DSP, you can enjoy all sound field programs without surround speakers. It creates virtual speakers to reproduce a natural sound field. You can listen to virtual CINEMA DSP by setting “1C SURROUND LR” in the set menu to NON. Sound field processing changes to Virtual CINEMA DSP automatically. -
Page 31: Digital Sound Field Processing (Dsp)
The traditional stereo system that uses only two speakers is not capable of recreating a realistic sound field. YAMAHA’s DSP requires four effect speakers to recreate sound fields based on the measured sound field data. The processor controls the strength and delay time of the signals output from the four effect speakers to localize the virtual sound sources and fully encompass the listener. -
Page 32: Cinema Dsp
It recreates comprehensive movie sound design in your audio room. In CINEMA DSP sound field programs, YAMAHA’s exclusive DSP processing is added to the Front left and right, and Center channels, so the listener can enjoy realistic dialogue, depth of sound, smooth transition between sound sources, and a surround sound field that goes beyond the screen. - Page 33 I For movie programs Program MOVIE Spectacle THEATER 1 Sci-Fi MOVIE Adventure THEATER 2 General Straight Decode Enhanced Mode Straight Decode This unit is equipped with various precise decoders; • Dolby Digital/DTS decoder for multi-channel reproduction of the original sound •...
-
Page 34: Sound Field Effects
Dolby Pro Logic II decodes Dolby Surround software into 5 discrete full-range channels (3 channels in front and 2 channels in surround). There are 2 modes; MOVIE for movies and MUSIC for 2-channel audio sources. These programs use YAMAHA’s tri-field DSP processing on each of the Dolby Digital or DTS signals for the front, left surround, and right surround channels. -
Page 35: Tuning
There are 2 methods of tuning; automatic and manual. Automatic tuning is effective when station signals are strong and there is no interference. I Automatic tuning STANDBY PRESET/TUNING FM/AM A/B/C/D/E PRESET/TUNING MEMORY EDIT NEXT SET MENU MAN'L/AUTO FM PHONES SPEAKERS STEREO PROGRAM INPUT... -
Page 36: Presetting Stations
TUNING Presetting stations I Automatically presetting FM stations You can use the automatic preset tuning feature to store FM stations. This function enables the unit to automatically tune in to FM stations with strong signals, and to store up to 40 (8 stations in 5 groups, A1 through E8) of those stations in order. - Page 37 I Manually presetting stations You can store up to 40 stations (8 stations x 5 groups) manually. STANDBY PRESET/TUNING FM/AM A/B/C/D/E PRESET/TUNING MEMORY EDIT NEXT SET MENU MAN'L/AUTO FM PHONES SPEAKERS STEREO PROGRAM INPUT A/B/OFF INPUT MODE EFFECT CONTROL BASS/TREBLE SILENT CINEMA Tune in to a station.
-
Page 38: Selecting Preset Stations
TUNING Selecting preset stations You can tune any desired station simply by selecting the preset station number under which it was stored. STANDBY PRESET/TUNING FM/AM A/B/C/D/E PRESET/TUNING MEMORY EDIT NEXT SET MENU MAN'L/AUTO FM SPEAKERS STEREO PROGRAM INPUT PHONES A/B/OFF INPUT MODE EFFECT CONTROL... -
Page 39: Sleep Timer
Use this feature to automatically set this unit in the standby mode after a certain amount of time. The sleep timer is useful when you are going to sleep while this unit is playing or recording a source. The sleep timer can only be set with the remote control. •... -
Page 40: Recording
Recording adjustments and other operations are performed on other recording components. Refer to the operation instructions for these components for details on their operation . STANDBY PRESET/TUNING FM/AM A/B/C/D/E PRESET/TUNING MEMORY EDIT NEXT SET MENU MAN'L/AUTO FM PHONES SPEAKERS STEREO PROGRAM INPUT A/B/OFF... -
Page 41: Set Menu
You can set the following parameters on the set menu to obtain a better sound from the unit. Change the settings to reflect the needs of your listening environment. Set menu list The set menus are divided by use and function into the 4 categories listed here. -
Page 42: Sound 1 Speaker Set (Speaker Mode Settings)
SET MENU Press j / i once to enter the setup mode of the selected item. The last setting you adjusted appears on the front panel display. Depending on the menu item, press u/d to select a sub item. Press j / i repeatedly to change the menu item setting. - Page 43 I 1B FRONT (front speaker mode) Choices: LRG (large), SML (small) Select this if you have large front speakers. The unit directs the entire range of the front left and right channel signals to the front left and right speakers. Select this if you have small front speakers.
-
Page 44: Sound 2 Sp Distance (Speaker Distance)
SET MENU SOUND 2 SP DISTANCE (speaker distance) Use this feature to manually input the distance of each speaker and adjust the delay applied to respective channel. Ideally, each speaker should be the same distance from the main listening position. However, this is not possible in most home situations. -
Page 45: Sound 5 Center Geq (Center Graphic Equalizer)
SOUND 5 CENTER GEQ (center graphic equalizer) Use this feature to adjust the built-in 5-band graphic equalizer so that the center speaker tonal quality matches that of the left and right front speakers. You can select the 100 Hz, 300 Hz, 1 kHz, 3 kHz, or 10 kHz frequencies. Control range (dB): –6 to +6 Initial setting: 0 dB for 5-band Press d to select a higher frequency and u... -
Page 46: Option 1 Display Set
SET MENU OPTION 1 DISPLAY SET I DIMMER Use this to adjust the brightness of the front panel display. Control range: –4 to 0 OPTION 2 MEM. GUARD (memory guard) Use this feature to prevent accidental changes to sound field program parameter values and other system settings. Choices: ON, OFF Select ON to protect: •... -
Page 47: Remote Control Features
REMOTE CONTROL FEATURES In addition to controlling this unit, the remote control can also operate other A/V components made by YAMAHA and other manufacturers. To control other components, you must set up remote control with the appropriate manufacturer codes. Control area... -
Page 48: Setting Manufacturer Codes
– V-AUX – – You can control this unit and other Yamaha tuners only. You can only set TV manufacturer codes for the D-TV/CBL buttons. Press and hold CODE SET. With CODE SET depressed, press an input selector button to select the component you want to set up. -
Page 49: Controlling Other Components
Controlling other components Once you set the appropriate manufacturer codes, you can use this remote to control your other components. Note that some buttons may not correctly operate the selected component. Use the input selector buttons to select the component you want to operate. The remote control automatically switches to the appropriate control mode for that component. -
Page 50: Setting The Speaker Levels
SETTING THE SPEAKER LEVELS Adjusting the speaker levels during playback You can adjust the output level of each speaker while listening to sound playback. VOLUME – – – MUTE INPUT MUTE HALL JAZZ ROCK ENTERTAINMENT MUSIC TV THTR MOVIE1 MOVIE2 /DTS NIGHT 6.1/5.1... -
Page 51: Editing Sound Field Parameters
EDITING SOUND FIELD PARAMETERS Changing parameter settings The initial sound field program settings will provide you with an excellent listening experience as they are. But you can create an original listening environment by altering some settings. Note • The editable parameters vary depending on the sound field program you select. -
Page 52: Sound Field Parameter Descriptions
EDITING SOUND FIELD PARAMETERS Sound field parameter descriptions You can adjust the values of certain digital sound field parameters so the sound fields are recreated accurately in your listening room. Not all of the following parameters are found in every program. I DSP LEVEL Function: This parameter adjusts the level of all the DSP effect sounds within a narrow range. -
Page 53: Troubleshooting
Refer to the chart below when this unit does not function properly. If the problem you are experiencing is not listed below or if the instruction below does not help, set this unit to standby mode, disconnect the power cord, and contact the nearest authorized YAMAHA dealer or service center. I General... - Page 54 TROUBLESHOOTING Problem No sound from the The output level of the center speaker is center speaker. set to minimum. “SOUND 1A CENTER” on the set menu is set to NON. One of the HiFi DSP programs (1 to 4) has been selected (except for 5ch Stereo). The source encoded with a Dolby Digital or DTS signal does not have a center channel signal.
- Page 55 Problem There is noise interfer- This unit is too close to the digital or high- ence from digital or frequency equipment. high-frequency equipment, or this unit. The unit suddenly turns The internal temperature has become too into standby mode. high and the overheat protection circuitry has been activated.
-
Page 56: Resetting The Factory Presets
TROUBLESHOOTING I Remote control Problem The remote control does Wrong distance or angle. not work nor function properly. Direct sunlight or lighting (from an inverter type of fluorescent lamp, etc.) is striking the remote control sensor of this unit. The batteries are weak. The manufacture code has not correctly set. -
Page 57: Glossary
Based on a wealth of actually measured data, YAMAHA CINEMA DSP uses YAMAHA original sound field technology to combine Dolby Pro Logic, Dolby Digital and DTS systems to provide the visual and audio experience of movie theater in the listening room of your own home. - Page 58 I SILENT CINEMA YAMAHA has developed a natural, realistic sound effect DSP algorithm for headphones. Parameters for headphones have been set for each sound field so that accurate representations of all the sound field programs can be enjoyed using headphones.
-
Page 59: Specifications
AUDIO SECTION • Minimum RMS Output Power for Front, Center, Surround 1 kHz, 0.1% THD, 6 Ω [U.S.A. and Canada models] ... 100 W [Other models] ... 90 W 1 kHz, 0.7% THD, 6 Ω [U.S.A. and Canada models] ... 103 W [U.K., Europe, Australia and Korea models] ... - Page 60 LIST OF MANUFACTURER CODES LISTE DES CODES DES FABRICANTS Yamaha 299 292 Admiral 292 293 Aiwa 294 276 283 284 Akai 295 296 Alba Bell&Howell Bestar Blaupunkt 229 222 Blue sky Brandt Brocsonic Bush Clatronic Craig Croslex Curtis Mathis 297 226...
- Page 61 376 377 Thorn 393 396 Toshiba 335 369 389 Universum 396 327 376 W.WHouse Wards 395 396 336 362 DVD player Yamaha 699 622 623 647 Denon 623 624 Funai Hitachi Kenwood Mitsubishi Onkyo 632 633 634 Panasonic 623 635...
- Page 62 YAMAHA ELECTRONICS (UK) LTD. YAMAHA HOUSE, 200 RICKMANSWORTH ROAD WATFORD, HERTS WD18 7GQ, ENGLAND YAMAHA SCANDINAVIA A.B. J A WETTERGRENS GATA 1, BOX 30053, 400 43 VÄSTRA FRÖLUNDA, SWEDEN YAMAHA MUSIC AUSTRALIA PTY, LTD. 17-33 MARKET ST., SOUTH MELBOURNE, 3205 VIC., AUSTRALIA...