
Related Manuals for UMAX Technologies Astra 3400


Summary of Contents for UMAX Technologies Astra 3400
- Page 1 Astra 3400 / AstraNET e-3420 Color scanner Operation Manual UMAX Data Systems, Inc.
- Page 2 Adobe Systems, Inc. Other names and trademarks appearing herein are trademarks of their respective holders. Copyright Copyright 2000 UMAX Data Systems, Inc. All Rights Reserved. No part of this publication may be reproduced, transmitted, transcribed, stored in a retrieval system, or translated into any language or computer language, in...
-
Page 3: Important Safeguards
Important Safeguards Read all of the instructions. Save these instructions for later use. Follow all warnings and instructions marked on the product. When replacement parts are required, be sure that service technicians have used replacement parts that conform to at least the same safety standards with regard to fire, electric shock, or other hazards. -
Page 4: Table Of Contents
Contents ........1 LANCE AT CANNER ......... 4 USH BUTTON ONFIGURING ........15 OMPLETING YOUR FIRST ............. 28 ROUBLESHOOTING ............. 30 AINTENANCE ............32 PECIFICATIONS ..............33 LOSSARY... -
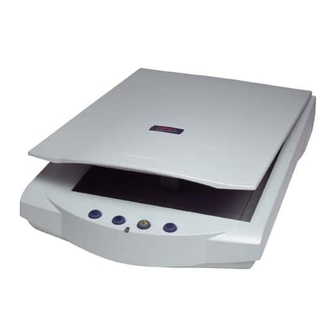
Page 5: A Glance At Your
A Glance at Your Scanner A Glance at Your Scanner The Front View • • Œ Œ Ž Ž • • Œ Œ Document Cover The plastic cover over the object glass which can be raised and lowered over a document. •... -
Page 6: The Rear View
The Rear View • • ‘ ‘ • • Power Adapter Receptacle The power adapter is plugged in here ‘ ‘ 4-Pin USB Connector. - Page 7 Push buttons on the front panel The defining feature of the Astra 3400/AstraNET e-3420 is its push button functionality. You can scan an image to e-mail, perform OCR, or even use the scanner as a copy machine by pushing the buttons on the front panel of the scanner.
-
Page 8: Push Buttonc
Push button Configuring Push button Configuring Before proceeding with the steps below, please finish the hardware and software installation first. Refer to Quick Start Guide. For Windows users Configuring the Scan button Values 1. Click on the VistaAccess icon in the Taskbar with the right mouse button. -
Page 9: Configuring The Copy Button Values
6. Push the Scan button. The scanner will start the scanning process and scan the image to the specified image editing software. Note: If the application you want to scan is not shown in the Scan Destination drop-down list, click the Add button. The Add Application window opens. - Page 10 3. Click on the Copy icon to open the window that contains the variables you are adjusting. 4. Select the printer driver you want to use to print the copies, the type of image you are scanning, the desired resolution, a scanning intensity level, and the size of the scanned image, by clicking on the arrow to the right of each field.
- Page 11 window appears. 3. Click the Custom icon to open the window that contains the variables you are adjusting. The Custom icon controls the values for the E-mail, Fax and OCR features. You must configure the variables for each function separately before the image is scanned to specified destination what you want.
- Page 12 To configure the values for the Fax function 1. Select the scanning intensity level and the document size for the scanned image, by clicking on the arrow to the right of each field. 2. Click the OK button to save the Custom push button configuration settings.
- Page 13 To configure the values for the OCR function 1. Select the text editing application to use by clicking on the arrow to the right of each field. 2. Click the OK button to save the Custom push button configuration settings. 3.
- Page 14 For iMac/iMac DV and New Power Mac G3/G4 users Configuring the Scan button Values 1. Click on the VistaAccess icon in the control strip with one mouse click. A pop -up menu as shown on the right appears. 2. Click the Push button Configuration option.
- Page 15 Note: If the application you want to scan is not shown in the Scan Destination drop-down list, click the Add button. The Add Application window opens. Enter the application name in the Application Name text box. Enter the path and the executable file name for the application you want to use in the File Location text box.
- Page 16 3. Click on the Copy icon to open the window that contains the variables you are adjusting. 4. Select the printer driver you want to use to print the copies, the type of image you are scanning, the desired resolution, a scanning intensity level, and the size of the scanned image, by clicking on the arrow to the right of each field.
- Page 17 2. Click the Push button Configuration option. The push button configuration window appears. 3. Click the Custom icon to open the window that contains the variables you are adjusting. The Custom icon controls the values for the E-mail and OCR features. You must configure the variables for each function separately before the image is scanned to specified destination what you want.
- Page 18 To configure the values for the OCR function 1. Select the text editing application to use and Brightness by clicking on the arrow to the right of each field. 2. Click the OK button to save the Custom push button configuration settings. 3.
-
Page 19: Completing Your First
Completing your first Scan Completing your first Scan Before proceeding with the steps below, please finish the hardware and software installation first. Refer to Quick Start Guide. Original Image Placement Raise the scanner’s document cover. Place the document (graphic, text or photo) with face down on the scanner. -
Page 20: Start Your Scan By Using Vistascan
Start Your Scan by using VistaScan Note It is important to realize that different applications may use different methods of acquiring an image and only the most general case is given here. Please refer to your application's user documentation for details on its usage. - Page 21 For more details about scanning the image, please refer to the on-line help of VistaScan fig.1 fig.2...
- Page 22 fig.3...
- Page 23 B. Initiating VistaScan directly i. From VistaScan program group on the desktop 1. Launch the VistaScan program group as shown to the right. 2. The VistaScan Window will appear as shown in Fig. 4. 3. From the “Scan to” panel in the main menu, choose a destination for the scanned image.
- Page 24 Fig.4 Click the PREVIEW button. A quick, low-resolution scan will be made and appear in the PREVIEW WINDOW. From this image, you can determine the area you want to scan. From the five "Scan to" destinations, click the icon that represents the desired destination for the scanned image.
- Page 25 Fig.5...
- Page 26 ii. From VistaAccess Utility 1. Click on the VistaAccess icon in the Task bar using your right mouse button. A pop -up menu appears as the diagram shown to the right. 2. Click on the VistaScan option. The VistaScan window appears. The following steps are similar to the section “From the VistaScan program group on the desktop”...
- Page 27 For iMac/iMac DV and New Power Mac G3/G4 users There are two ways to initiate VistaScan. A. Using Application programs to invoke VistaScan 1. Launch scanning software which supports plug-in drivers (e.g. Presto! PageManager. If you use other image acquisition software, please refer to its accompanying documentation for operational details).
- Page 28 Fig. 1 Fig. 2...
- Page 29 B. Initiating VistaScan directly 1. Launch the "UMAX VistaScan DA 3.x" from the " UMAX VistaScan 3.x"folder. 2. The VistaScan interface will appear as shown in Fig.3. 3. From the “Scan to” panel in the main menu, choose a destination for the scanned image.
- Page 30 Fig.3 Click the PREVIEW button. A quick, low-resolution scan will be made and appear in the PREVIEW WINDOW. From this image, you can determine the area you want to scan. From the five "Scan to" destinations, click the icon that represents the desired destination for the scanned image.
- Page 31 Fig.4...
-
Page 32: Troubleshooting
Troubleshooting Troubleshooting The scanners are designed to be reliable and easy to install. If, however, you have a problem with your scanner, these troubleshooting steps should indicate the cause of the problem. If the scanner lamp flickers, dims, or fails to come on: The scanning lamp is failing or has failed and needs to be changed. -
Page 33: If All Else Fails
If All Else Fails If the above solutions do not resolve the problem, contact your dealer or Technical Support. Be sure to have the following information ready: 1. The scanner model you are using. 2. The version number of the scanner driver. (Located on the front of the 3. -
Page 34: Maintenance
Maintenance Maintenance With the exception of periodic cleaning or lamp replacement, the scanner is virtually maintenance free. The following sections give the procedures basic maintenance of the scanner. Static Electricity Precautions Static electricity is a constant danger to computer systems. The charge that can build up in your body may be strong enough to damage electronic components on the scanner’s printed circuit board or the computer’s interface card. - Page 35 Cleaning Regularly cleaning the object glass will ensure that dirt or smudges will not reduce the quality of your scanned images. Before you clean the glass, make sure the scanner is turned off and the power cord is unplugged. Clean the object glass and document cover with a soft damp cloth and a mild detergent or alcohol.
-
Page 36: Specifications
Specifications Specifications Maximum Scannable Area..216 x 297 mm (8.5 x 11.7 Inches) Optical Resolution....600 x 1200 dpi Maximum Resolution ....9600 x 9600 dpi Scanning Density ....1 dpi to 9600 dpi, via Ultra View Technology Color Scanning Method ..Single pass with color CCD Warm Up Time ....... -
Page 37: Glossary
Glossary Glossary Application Software: Software that is used to perform a specific function, e.g., image processing, OCR (Optical Character Recognition), or DTP (Desktop Publishing). Black and White: A 1-bit image file capable of only displaying black and white image data with no intermediate gray levels. Document Cover: The plastic cover that is lowered over a document on the scanner’s object glass. - Page 38 TWAIN Compliant: Any software or image input device that conforms to the TWAIN standard. TWAIN: A standardized interfacing system that allows many different software applications to access many different image input devices. TWAIN is currently more popular on the Windows platform than it is on the Macintosh.
-
Page 39: Fcc Declaration Of Conformity
FCC Declaration of Conformity Declares that the products: Product Name: Color Scanner Model No.: Astra 3400/AstraNET e-3420 (or) HAV0/HBG0 FCC Rules: Tested to comply with FCC Part 15, Class B Operating Environment: For home or office use FCC Compliance Statement: This device complies with part 15 of the FCC Rules. - Page 40 Astra 3450 / AstraNET e-3470 Color scanner Operation Manual UMAX Data Systems, Inc.
- Page 41 Systems, Inc. Other names and trademarks appearing herein are trademarks of their respective holders. Copyright Copyright 2000 UMAX Data Systems, Inc. All Rights Reserved. No part of this publication may be reproduced, transmitted, transcribed, stored in a retrieval system, or translated into any language or computer language, in...
- Page 42 Important Safeguards Read all of the instructions. Save these instructions for later use. Follow all warnings and instructions marked on the product. When replacement parts are required, be sure that service technicians have used replacement parts that conform to at least the same safety standards with regard to fire, electric shock, or other hazards.
- Page 43 Contents A Glance at Your Scanner ..............1 Push button Configuring ..............4 Completing your first Scan..............15 Troubleshooting................. 30 Maintenance..................32 Specifications..................34 Glossary..................... 35...
-
Page 44: Scanner
The Front View Œ • Ž • Œ Document Cover The plastic cover over the object glass which can be raised and lowered over a document. • Object Glass The glass surface on which the document or image should be placed. Ž... - Page 45 The Rear View • ‘ • Power Adapter Receptacle The power adapter is plugged in here ‘ 4-Pin USB Connector...
- Page 46 Push buttons on the front panel The defining feature of the Astra 3450/AstraNET e-3470 is its push button functionality. You can scan an image to e-mail, perform OCR, or even use the scanner as a copy machine by pushing the buttons on the front panel of the scanner. The scanner has four push buttons on the front panel.
- Page 47 P u s h b u t t o n C o n f i g u r i n g Before proceeding with the steps below, please finish the hardware and software installation first. Refer to Quick Start Guide. For Windows users Configuring the Scan button Values 1.
- Page 48 If the application you want to scan is not shown in the Scan Destination drop-down list, click the Add button. The Add Application window opens. Enter the application name in the Application Name text box. Enter the path and executable file name for the application you want to use in the File Location text box.
- Page 49 configuration window appears. Click the Copy icon to open the window that contains the variables you are adjusting. Select the printer driver you want to use to print the copies, the type of image you are scanning, the desired resolution, a scanning intensity level, original, the size for scanned image, by clicking on the arrow to the right of each field.
- Page 50 Click the Custom icon to open the window that contains the variables you are adjusting. The Custom icon controls the values for the E-mail, Fax and OCR features. You must configure the variables for each function separately before the image is scanned to specified destination what you want. Note that you could configure all three features at a time, but only the last feature you configured is the destination the image will be scanned to.
- Page 51 Select a scanning intensity level the document size for the scanned image, by clicking on the arrow to the right of each field. Click the OK button to save the Custom push button configuration settings. Push the Custom button. The scanner will start scanning process and transmit the scanned image to your fax machine.
- Page 52 Click the OK button to save the Custom push button configuration settings. Push the Custom button. The scanner will start scanning process and send the scanned image to the selected text application. Note: You can also click on Check box of Intelligent Image Processing Engine to return the values in each field to default settings For more details on using the VistaAcess Utilities,...
- Page 53 For iMac/iMac DV and New Power Mac G3/G4 users Configuring the Scan button Values Click on the VistaAccess icon in the control strip with one mouse click. A pop -up menu as shown on the right appears. Click the Push button Configuration option.
- Page 54 Note: If the application you want to scan is not shown in the Scan Destination drop-down list, click the Add button. The Add Application window opens. Enter the application name in the Application Name text box. Enter the path and the executable file name for the application you want to use in the File Location text box.
- Page 55 3. Click on the Copy icon to open the window that contains the variables you are adjusting. 4. Select the printer driver you want to use to print the copies, the type of image you are scanning, the desired resolution, a scanning intensity level, and the size of the scanned image, by clicking on the arrow to the right of each field.
- Page 56 Click the Push button Configuration option. The push button configuration window appears. Click the Custom icon to open the window that contains the variables you are adjusting. The Custom icon controls the values for the E-mail and OCR features. You must configure the variables for each function separately before the image is scanned to specified destination what you want.
- Page 57 To configure the values for the OCR function Select the text editing application to use and Brightness by clicking on the arrow to the right of each field. Click the OK button to save the Custom push button configuration settings. Push the Custom button.
- Page 58 Before proceeding with the steps below, please finish the hardware and software installation first. Refer to Quick Start Guide. Original Placement If scanned item is document: 1. Raise the the transparent cover. 2. Place the document (graphic, text or photo) face down on the scanner. Center the document along the triangular mark.
- Page 59 The scanner is ready to scan transparencies. Simply, select the Scan command from the software driver to begin scanning. Be sure to select the transparency scan type from your software to scan transparencies. Start Your Scan by pressing push button Before you prepare to scan the document to image editor application or e- mail application, etc, you must configure the values of “push buttons”.
- Page 60 Start scanning with VistaScan Note It is important to realize that different applications may use different methods of acquiring an image and only the most general case is given here. Please refer to the documentation of your application for details on its usage.
- Page 61 “advanced” windsows appears. From the Scan Mode listed, Select “Negative” and then click “ Scan” button. Scanning will commence upon the selection of a button. 8. Click “Exit” to close VistaScan when the scanning is complete. The scanned image will be placed on the Presto! PageManager’s desktop, ready to be edited.
- Page 62 Fig. 2 Fig. 3...
- Page 63 Fig. 4...
- Page 64 B. Initiating VistaScan directly i. From the VistaScan program group on the desktop 1. Launch the VistaScan program group as shown on the right. 2. The VistaScan window appears as shown in Fig. 5 3. From the “Scan To” panel in the main menu, choose a destination for the scanned image.
- Page 65 Fig. 5 VistaScan offers an Auto crop feature. When the Preview button is pressed, the Auto crop feature automatically detects the exact position of the document to be scanned, scans the document at low speed and low resolution, and crops the image that appears in the Preview window (see the figure above).
- Page 66 Fig. 6 ii. From the VistaAccess Utility Click on the VistaAccess icon in the Taskbar with your right mouse button. A pop-up menu as shown on the right appears. Click on the VistaScan option. The VistaScan window appears. The following steps are similar to the section “From the VistaScan program grou p on the desktop”...
- Page 67 For iMac/iMac DV and New Power Mac G3/G4 users There are two ways to initiate VistaScan. A. Using Application programs to invoke VistaScan 1. Launch scanning software which supports plug-in drivers (e.g. Presto! PageManager. If you use other image acquisition software, please refer to its accompanying documentation for operational details).
- Page 68 Fig. 1 Fig. 2...
- Page 69 Fig. 3 Fig. 4...
- Page 70 B. Initiating VistaScan directly i. From the VistaScanFolder 1. Launch the "UMAX VistaScan DA 3.x" from the " UMAX VistaScan 3.x"folder. 2. The VistaScan interface will appear as shown in the next page. 3. From the “Scan to” panel in the main menu, choose a destination for the scanned image.
- Page 71 Fig. 5 Click the PREVIEW button. A quick, low-resolution scan will be made and appear in the PREVIEW WINDOW. From this image, you can determine the area you want to scan. From the five "Scan to" destinations, click the icon that represents the desired destination for the scanned image.
- Page 72 Fig. 6 ii. From the VistaAccess Utility 1.Click on the VistaAccess icon in the Control strip with your right mouse button. A pop-up menu as shown on the right appears. 2.Click on the VistaScan option. The VistaScan window appears. The following steps are similar to the section “From the VistaScan folder on the desktop”...
- Page 73 The scanners are designed to be reliable and easy to install. If, however, you have a problem with your scanner, these troubleshooting steps should indicate the cause of the problem. If the scanner lamp flickers, dims, or fails to come on: The scanning lamp is failing or has failed and needs to be changed.
- Page 74 If All Else Fails If the above solutions do not resolve the problem, contact your dealer or Technical Support. Be sure to have the following information ready: 1. The scanner model you are using. 2. The version number of the scanner driver. (Located on the front of the 3.
- Page 75 With the exception of periodic cleaning or lamp replacement, the scanner is virtually maintenance free. The following sections give the procedures for basic maintenance of the scanner. Static Electricity Precautions Static electricity is a constant danger to computer systems. The charge that can build up in your body may be strong enough to damage electronic components on the scanner’s printed circuit board or the computer’s interface card.
- Page 76 Cleaning Regularly cleaning the object glass will ensure that dirt or smudges will not reduce the quality of your scanned images. Before you clean the glass, make sure the scanner is turned off and the power cord is unplugged. Clean the object glass and document cover with a soft damp cloth and a mild detergent or alcohol.
- Page 77 Maximum Scannable Area..216 x 297 mm (8.5 x 11.7 Inches) Optical Resolution.......600 x 1200 dpi Maximum Resolution ....9600 x 9600 dpi Scanning Density .......1 dpi to 9600 dpi, via Ultra View Technology Color Scanning Method .....Single pass with color CCD Warm Up Time......30 Sec.
- Page 78 Application Software: Software that is used to perform a specific function, e.g., image processing, OCR (Optical Character Recognition), or DTP (Desktop Publishing). Black and White: A 1-bit image file capable of only displaying black and white image data with no intermediate gray levels. Document Cover: The plastic cover that is lowered over a document on the scanner’s object glass.
- Page 79 the TWAIN standard. TWAIN: A standardized interfacing system that allows many different software applications to access many different image input devices. TWAIN is currently more popular on the Windows platform than it is on the Macintosh. USB: Universal Serial Bus. A interface between host and peripherals.
- Page 80 Signature: The party responsible for product compliance: Corporate Name: UMAX Technologies, Inc. Address: 3561 Gateway Blvd. Fremont, CA 94538, U.S.A. Telephone No.: 510-651-4000 Person responsible for making this declaration:...
- Page 81 Astra 5400 / AstraNETe5420 Color scanner Operation Manual UMAX Data Systems, Inc.
- Page 82 Systems, Inc. Other names and trademarks appearing herein are trademarks of their respective holders. Copyright Copyright 2000 UMAX Data Systems, Inc. All Rights Reserved. No part of this publication may be reproduced, transmitted, transcribed, stored in a retrieval system, or translated into any language or computer language, in...
- Page 83 Important Safeguards Read all of the instructions. Save these instructions for later use. Follow all warnings and instructions marked on the product. When replacement parts are required, be sure that service technicians have used replacement parts that conform to at least the same safety standards with regard to fire, electric shock, or other hazards.
-
Page 84: Scan
Contents ........1 LANCE AT CANNER .......... 4 USH BUTTON ONFIGURING ........15 OMPLETING YOUR FIRST ............28 ROUBLESHOOTING ............... 30 AINTENANCE ............32 PECIFICATIONS ..............33 LOSSARY... -
Page 85: A Glance At Your Scanner
A Glance at Your Scanner The Front View Œ • • Ž Œ Document Cover The plastic cover over the object glass which can be raised and lowered over a document. • Object Glass The glass surface on which the document or image should be placed. Ž... - Page 86 The Rear View ‘ • • Power Adapter Receptacle The power adapter is plugged in here ‘ 4-Pin USB Connector.
- Page 87 Push buttons on the front panel The defining feature of the Astra 5400 / AstraNETe5420 is its push button functionality. You can scan an image to e-mail, perform OCR, or even use the scanner as a copy machine by pushing the buttons on the front panel of the scanner. The scanner has four push buttons on the front panel, from left to right: “Scan”, “Copy”, ”Custom”...
-
Page 88: Push Button Configuring
Push button Configuring Before proceeding with the steps below, please finish the hardware and software installation first. Refer to Quick Start Guide. For Windows users Configuring the Scan button Values 1. Click on the VistaAccess icon in the Taskbar with the right mouse button. A pop -up menu as shown on the right appears. - Page 89 6. Push the Scan button. The scanner will start the scanning process and scan the image to the specified image editing software. Note: If the application you want to scan is not shown in the Scan Destination drop-down list, click the Add button. The Add Application window opens.
- Page 90 3. Click on the Copy icon to open the window that contains the variables you are adjusting. 4. Select the printer driver you want to use to print the copies, the type of image you are scanning, the desired resolution, a scanning intensity level, and the size of the scanned image, by clicking on the arrow to the right of each field.
- Page 91 3. Click the Custom icon to open the window that contains the variables you are adjusting. The Custom icon controls the values for the E-mail, Fax and OCR features. You must configure the variables for each function separately before the image is scanned to specified destination what you want.
- Page 92 To configure the values for the Fax function 1. Select the scanning intensity level and the document size for the scanned image, by clicking on the arrow to the right of each field. 2. Click the OK button to save the Custom push button configuration settings. 3.
- Page 93 To configure the values for the OCR function 1. Select the text editing application to use by clicking on the arrow to the right of each field. 2. Click the OK button to save the Custom push button configuration settings. 3.
- Page 94 For iMac/iMac DV and New Power Mac G3/G4 users Configuring the Scan button Values 1. Click on the VistaAccess icon in the control strip with one mouse click. A pop -up menu as shown on the right appears. 2. Click the Push button Configuration option.
- Page 95 Note: If the application you want to scan is not shown in the Scan Destination drop-down list, click the Add button. The Add Application window opens. Enter the application name in the Application Name text box. Enter the path and the executable file name for the application you want to use in the File Location text box.
- Page 96 3. Click on the Copy icon to open the window that contains the variables you are adjusting. 4. Select the printer driver you want to use to print the copies, the type of image you are scanning, the desired resolution, a scanning intensity level, and the size of the scanned image, by clicking on the arrow to the right of each field.
- Page 97 3. Click the Custom icon to open the window that contains the variables you are adjusting. The Custom icon controls the values for the E-mail and OCR features. You must configure the variables for each function separately before the image is scanned to specified destination what you want.
- Page 98 To configure the values for the OCR function 1. Select the text editing application to use and Brightness by clicking on the arrow to the right of each field. 2. Click the OK button to save the Custom push button configuration settings. 3.
-
Page 99: Completing Your First Scan
Completing your first Scan Before proceeding with the steps below, please finish the hardware and software installation first. Refer to Quick Start Guide. Original Image Placement Raise the scanner’s document cover. Place the document (graphic, text or photo) with face down on the scanner. - Page 100 Start Your Scan by using VistaScan Note It is important to realize that different applications may use different methods of acquiring an image and only the most general case is given here. Please refer to your application's user documentation for details on its usage.
- Page 101 fig.1 fig.2 fig.3...
- Page 103 B. Initiating VistaScan directly i. From VistaScan program group on the desktop 1. Launch the VistaScan program group as shown to the right. 2. The VistaScan Window will appear as shown in Fig. 4. 3. From the “Scan to” panel in the main menu, choose a destination for the scanned image.
- Page 104 Fig.4 Click the PREVIEW button. A quick, low-resolution scan will be made and appear in the PREVIEW WINDOW. From this image, you can determine the area you want to scan. From the five "Scan to" destinations, click the icon that represents the desired destination for the scanned image.
- Page 105 Fig.5...
- Page 106 ii. From VistaAccess Utility 1. Click on the VistaAccess icon the Task bar using your right mouse button. A pop -up menu appears as the diagram shown to the right. 2. Click on the VistaScan option. The VistaScan window appears. The following steps are similar to the section “From the VistaScan program group on the desktop”...
- Page 107 For iMac/iMac DV and New Power Mac G3/G4 users There are two ways to initiate VistaScan. A. Using Application programs to invoke VistaScan 1. Launch scanning software which supports plug-in drivers (e.g. Presto! PageManager. If you use other image acquisition software, please refer to its accompanying documentation for operational details).
- Page 108 Fig. 1 Fig. 2...
- Page 109 B. Initiating VistaScan directly 1. Launch the "UMAX VistaScan DA 3.x" from the " UMAX VistaScan 3.x"folder. 2. The VistaScan interface will appear as shown in Fig.3. 3. From the “Scan to” panel in the main menu, choose a destination for the scanned image.
- Page 110 Fig.3 Click the PREVIEW button. A quick, low-resolution scan will be made and appear in the PREVIEW WINDOW. From this image, you can determine the area you want to scan. From the five "Scan to" destinations, click the icon that represents the desired destination for the scanned image.
- Page 111 Fig.4...
-
Page 112: Troubleshooting
Troubleshooting The scanners are designed to be reliable and easy to install. If, however, you have a problem with your scanner, these troubleshooting steps should indicate the cause of the problem. If the scanner lamp flickers, dims, or fails to come on: The scanning lamp is failing or has failed and needs to be changed. - Page 113 If All Else Fails If the above solutions do not resolve the problem, contact your dealer or Technical Support. Be sure to have the following information ready: 1. The scanner model you are using. 2. The version number of the scanner driver. (Located on the front of the 3.
-
Page 114: Maintenance
Maintenance With the exception of periodic cleaning or lamp replacement, the scanner is virtually maintenance free. The following sections give the procedures for basic maintenance of the scanner. Static Electricity Precautions Static electricity is a constant danger to computer systems. The charge that can build up in your body may be strong enough to damage electronic components on the scanner’s printed circuit board or the computer’s interface card. - Page 115 Cleaning Regularly cleaning the object glass will ensure that dirt or smudges will not reduce the quality of your scanned images. Before you clean the glass, make sure the scanner is turned off and the power cord is unplugged. Clean the object glass and document cover with a soft damp cloth and a mild detergent or alcohol.
-
Page 116: Specifications
Specifications Maximum Scannable Area ..216 x 297 mm (8.5 x 11.7 Inches) Optical Resolution ....1200 x 2400 dpi Maximum Resolution ....9600 x 9600 dpi Scanning Density ....1 dpi to 9600 dpi, via Ultra View Technology Color Scanning Method ... Single pass with color CCD Warm Up Time ...... -
Page 117: Glossary
Glossary Application Software: Software that is used to perform a specific function, e.g., image processing, OCR (Optical Character Recognition), or DTP (Desktop Publishing). Black and White: A 1-bit image file capable of only displaying black and white image data with no intermediate gray levels. Document Cover: The plastic cover that is lowered over a document on the scanner’s object glass. - Page 118 the TWAIN standard. TWAIN: A standardized interfacing system that allows many different software applications to access many different image input devices. TWAIN is currently more popular on the Windows platform than it is on the Macintosh. USB: Universal Serial Bus. A interface between host and peripherals.
- Page 119 Changes or modifications not expressly approved by the manufacturer responsible for compliance could void the user’s authority to operate the equipment. The party responsible for product compliance: Corporate Name: UMAX Technologies, Inc. Address: 3561 Gateway Blvd. Fremont, CA 94538, U.S.A. Telephone No.:...
-
Page 120: Canner
Astra 5450/ AstraNETe5470 Astra 5450/ AstraNETe5470 Color scanner Operation Manual UMAX Data Systems, Inc. - Page 121 Copyright Copyright 2000 UMAX Data Systems, Inc. All Rights Reserved. No part of this publication may be reproduced, transmitted, transcribed, stored in a retrieval system, or translated into any language or computer language, in any form or by any means, electronic, mechanical, magnetic, optical, chemical, manual, or otherwise, without the prior written permission of UMAX Data Systems, Inc.
- Page 122 Important Safeguards Read all of the instructions. Save these instructions for later use. Follow all warnings and instructions marked on the product. When replacement parts are required, be sure that service technicians have used replacement parts that conform to at least the same safety standards with regard to fire, electric shock, or other hazards.
- Page 123 Contents A Glance at Your Scanner ................. 1 Push button Configuring ................4 Completing your first Scan..............15 Troubleshooting ..................30 Maintenance ....................32 Specifications ................... 34 Glossary ....................35...
-
Page 124: A Glance At Your Scanner
A Glance at Your Scanner The Front View Œ • • Ž Œ Document Cover The plastic cover over the object glass which can be raised and lowered over a document. • Object Glass The glass surface on which the document or image should be placed. Ž... - Page 125 The Rear View • ’ ‘ • Power Adapter Receptacle The power adapter is plugged in here ‘ 4-Pin USB Connector ’ Transparency Adapter Socket The socket used by the Transparency Adapter...
- Page 126 Push buttons on the front panel The defining feature of the Astra 5450/ AstraNETe5470 is its push button functionality. You can scan an image to e-mail, perform OCR, or even use the scanner as a copy machine by pushing the buttons on the front panel of the scanner. The scanner has four push buttons on the front panel.
-
Page 127: Push Button Configuring
Push button Configuring Before proceeding with the steps below, please finish the hardware and software installation first. Refer to Quick Start Guide. For Windows users Configuring the Scan button Values 1. Click the VistaAccess icon the Task bar using your right mouse button. - Page 128 Note: If the application you want to scan is not shown in the Scan Destination drop-down list, click the Add button. The Add Application window opens. Enter the application name in the Application Name text box. Enter the path and executable file name for the application you want to use in the File Location text box.
- Page 129 3. Click the Copy icon to open the window that contains the variables you are adjusting. 4. Select the printer driver you want to use to print the copies, the type of image you are scanning, the desired resolution, a scanning intensity level, original, the size for scanned image, by clicking on the arrow to the right of each field.
- Page 130 3. Click the Custom icon to open the window that contains the variables you are adjusting. The Custom icon controls the values for the E-mail, Fax and OCR features. You must configure the variables for each function separately before the image is scanned to specified destination what you want.
- Page 131 2. Click the OK button to save the Custom push button configuration settings. 3. Push the Custom button. The scanner will start scanning process and transmit the scanned image to your fax machine. To configure the values for the OCR function 1.
- Page 132 2. Click the OK button to save the Custom push button configuration settings. 3. Push the Custom button. The scanner will start scanning process and send the scanned image to the selected text application. Note: You can also click on Check box of Intelligent Image Processing Engine to return the values in each field to default settings For more details on using the VistaAcess Utilities,...
- Page 133 For iMac/iMac DV and New Power Mac G3/G4 users Configuring the Scan button Values 1. Click on the VistaAccess icon in the control strip with one mouse click. A pop -up menu as shown on the right appears. 2. Click the Push button Configuration option.
- Page 134 Note: If the application you want to scan is not shown in the Scan Destination drop-down list, click the Add button. The Add Application window opens. Enter the application name in the Application Name text box. Enter the path and the executable file name for the application you want to use in the File Location text box.
- Page 135 Click on the Copy icon to open the window that contains the variables you are adjusting. Select the printer driver you want to use to print the copies, the type of image you are scanning, the desired resolution, a scanning intensity level, and the size of the scanned image, by clicking on the arrow to the right of each field.
- Page 136 3. Click the Custom icon to open the window that contains the variables you are adjusting. The Custom icon controls the values for the E-mail and OCR features. You must configure the variables for each function separately before the image is scanned to specified destination what you want.
- Page 137 To configure the values for the OCR function 1. Select the text editing application to use and Brightness by clicking on the arrow to the right of each field. 2. Click the OK button to save the Custom push button configuration settings.
-
Page 138: Completing Your First Scan
Completing your first Scan Before proceeding with the steps below, please finish the hardware and software installation first. Refer to Quick Start Guide. Original Placement If scanned item is document: 1. Raise the the transparent cover. 2. Place the document (graphic, text or photo) face down on the scanner. Center the document along the triangular mark. - Page 139 Note: 1. Make sure that the transparency is placed within the specific scan area on the object glass. 2. The size of that transparency must be smaller than the specific scanning area. 3. Keep the transparency holder well and don’t lose it. The scanner is ready to scan transparencies.
- Page 140 Start scanning with VistaScan Note It is important to realize that different applications may use different methods of acquiring an image and only the most general case is given here. Please refer to the documentation of your application for details on its usage.
- Page 141 “Negative” and then click “ Scan” button. Scanning will commence upon the selection of a button. 8. Click “Exit” to clo se VistaScan when the scanning is complete. The scanned image will be placed on the Presto! PageManager’s desktop, ready to be edited. 9.
- Page 142 Fig. 2 Fig. 3...
- Page 143 Fig. 4...
- Page 144 B. Initiating VistaScan directly i. From the VistaScan program group on the desktop 1. Launch the VistaScan program group as shown on the right. 2. The VistaScan window appears as shown in Fig. 5 3. From the “Scan To” panel in the main menu, choose a destination for the scanned image.
- Page 145 Fig. 5 VistaScan offers an Auto crop feature. When the Preview button is pressed, the Auto crop feature automatically detects the exact position of the document to be scanned, scans the document at low speed and low resolution, and crops the image that appears in the Preview window (see the figure above).
- Page 146 Fig. 6 ii. From the VistaAccess Utility Click on the VistaAccess icon in the Taskbar with your right mouse button. A pop-up menu as shown on the right appears. Click on the VistaScan option. The VistaScan window appears. The following steps are similar to the section “From the VistaScan program group on the desktop”...
- Page 147 For iMac/iMac DV and New Power Mac G3/G4 users There are two ways to initiate VistaScan. A. Using Application programs to invoke VistaScan 1. Launch scanning software which supports plug-in drivers (e.g. Presto! PageManager. If you use other image acquisition software, please refer to its accompanying documentation for operational details).
- Page 148 Fig. 1 Fig. 2...
- Page 149 Fig. 3 Fig. 4...
- Page 150 B. Initiating VistaScan directly i. From the VistaScan Folder 1. Launch the "UMAX VistaScan DA 3.x" from the " UMAX VistaScan 3.x"folder. 2. The VistaScan interface will appear as shown in the next page. 3. From the “Scan to” panel in the main menu, choose a dest ination for the scanned image.
- Page 151 Fig. 5 Click the PREVIEW button. A quick, low-resolution scan will be made and appear in the PREVIEW WINDOW. From this image, you can determine the area you want to scan. From the five "Scan to" destinations, click the icon that represents the desired destination for the scanned image.
- Page 152 Fig. 6 ii. From the VistaAccess Utility 1.Click on the VistaAccess icon in the Control strip with your right mouse button. A pop-up menu as shown on the right appears. 2.Click on the VistaScan option. The VistaScan window appears. The following steps are similar to the section “From the VistaScan folder on the desktop”...
-
Page 153: Troubleshooting
Troubleshooting The scanners are designed to be reliable and easy to install. If, however, you have a problem with your scanner, these troubleshooting steps should indicate the cause of the problem. If the scanner lamp flickers, dims, or fails to come on: The scanning lamp is failing or has failed and needs to be changed. - Page 154 If All Else Fails If the above solutions do not resolve the problem, contact your dealer or Technical Support. Be sure to have the following information ready: 1. The scanner model you are using. 2. The version number of the scanner driver. (Located on the front of the 3.
-
Page 155: Maintenance
Maintenance With the exception of periodic cleaning or lamp replacement, the scanner is virtually maintenance free. The following sections give the procedures for basic maintenance of the scanner. Static Electricity Precautions Static electricity is a constant danger to computer systems. The charge that can build up in your body may be strong enough to damage electronic components on the scanner’s printed circuit board or the computer’s interface card. - Page 156 Cleaning Regularly cleaning the object glass will ensure that dirt or smudges will not reduce the quality of your scanned images. Before you clean the glass, make sure the scanner is turned off and the power cord is unplugged. Clean the object glass and document cover with a soft damp cloth and a mild detergent or alcohol.
-
Page 157: Specifications
Specifications Maximum Scannable Area ..216 x 297 mm (8.5 x 11.7 Inches) Optical Resolution ....1200 x 2400 dpi Maximum Resolution ....9600 x 9600 dpi Scanning Density ....1 dpi to 9600 dpi, via Ultra View Technology Color Scanning Method ... Single pass with color CCD Warm Up Time ...... -
Page 158: Glossary
Glossary Application Software: Software that is used to perform a specific function, e.g., image processing, OCR (Optical Character Recognition), or DTP (Desktop Publishing). Black and White: A 1-bit image file capable of only displaying black and white image data with no intermediate gray levels. Document Cover: The plastic cover that is lowered over a document on the scanner’s object glass. - Page 159 the TWAIN standard. TWAIN: A standardized interfacing system that allows many different software applications to access many different image input devices. TWAIN is currently more popular on the Windows platform than it is on the Macintosh. USB: Universal Serial Bus. A interface between host and peripherals.
- Page 160 Changes or modifications not expressly approved by the manufacturer responsible for compliance could void the user’s authority to operate the equipment. The party responsible for product compliance: Signature: Corporate Name: UMAX Technologies, Inc. Address: 3561 Gateway Blvd. Fremont, CA 94538, U.S.A. Telephone No.: 510-651-4000...