Olympus Stylus 300 Digital Basic Manual
Hide thumbs
Also See for Stylus 300 Digital:
- Basic manual (173 pages) ,
- Manual (20 pages) ,
- Quick start manual (2 pages)

Related Manuals for Olympus Stylus 300 Digital


Summary of Contents for Olympus Stylus 300 Digital
- Page 1 basic_e_opx_6.fm Page 1 Thursday, December 12, 2002 10:44 AM DIGITAL CAMERA APPAREIL PHOTO NUMÉRIQUE DIGITALKAMERA CÁMERA DIGITAL BASIC MANUAL ENGLISH MANUEL DE BASE EINFACHE ANLEITUNG FRANÇAIS MANUAL BÁSICO DEUTSCH ESPAÑOL...
-
Page 2: Table Of Contents
“Reference Manual” on CD-ROM. This basic manual contains guidelines for using Olympus Stylus 300/400 DIGITAL (µ [mju:] 300/400 DIGITAL). Except where otherwise specified, the explanations in the manual apply to both models. - Page 3 Software Installation Guide included in the CD-ROM package. For customers in North and South America For customers in USA Declaration of Conformity Model Number : Stylus 300 DIGITAL, Stylus 400 DIGITAL RM-2 (Remote control) Trade Name : OLYMPUS Responsible Party : Olympus America Inc.
-
Page 4: Getting Started
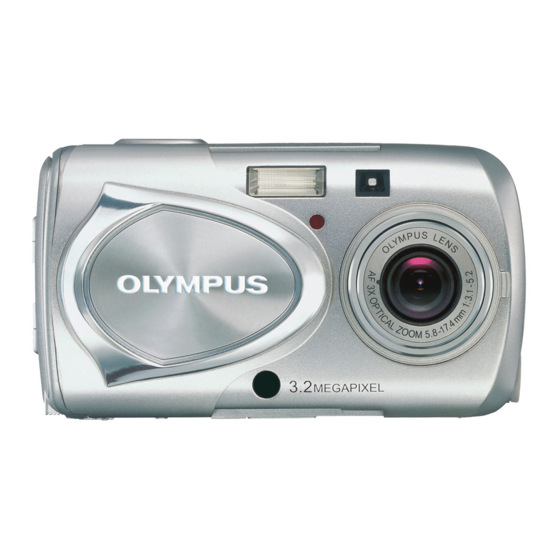
basic_e_opx_6.fm Page 4 Thursday, December 12, 2002 10:44 AM GETTING STARTED NAMES OF PARTS Lens barrier Shutter button Turns the camera on and off in the shooting mode. Flash Self-timer/ Remote control lamp Lens Remote Extends automatically control when you open the lens receiver barrier. - Page 5 basic_e_opx_6.fm Page 5 Thursday, December 12, 2002 10:44 AM Arrow pad The arrow pad is used as arrow keys, as well as function buttons. The , and marks indicate which arrow key to press. Shooting mode button Macro button Flash mode button Self-timer button Zoom button (W/T Monitor...
- Page 6 basic_e_opx_6.fm Page 6 Thursday, December 12, 2002 10:44 AM MONITOR INDICATIONS Shooting mode Still picture Movie Items Indications Shooting mode Battery check Green lamp Flash stand-by/ (Lights) Camera movement warning/ Flash (Blinks) charge Macro mode Flash mode Sequential shooting Self-timer Remote control Record mode SHQ, HQ, SQ1, SQ2...
- Page 7 basic_e_opx_6.fm Page 7 Thursday, December 12, 2002 10:44 AM Playback mode Screens with the information display set to ON are shown below. 2048 2048 1536 1536 Still picture Movie Items Indications Battery check Print reservation, Number of prints ×10 Movie Protect Record mode SHQ, HQ, SQ1, SQ2...
-
Page 8: Memory Gauge
basic_e_opx_6.fm Page 8 Thursday, December 12, 2002 10:44 AM Memory gauge The memory gauge lights up when you take a picture or record a movie. While the gauge is lit, the camera is storing the picture or the movie on the card. The memory gauge indication changes as shown below depending on the shooting status. -
Page 9: Weatherproof Feature
However, it cannot be used underwater. Observe the following precautions when using the camera. Olympus will not assume any responsibility for malfunction of the camera caused by water getting inside as a result of misuse by the user. • Do not wash the camera •... -
Page 10: Attaching The Strap
CHARGING THE BATTERY This camera uses an Olympus lithium ion battery (LI-10B). The battery is dedicated to this camera and other batteries do not work. The battery is not fully charged when the camera is purchased. Fully charge the battery on the specified charger (LI-10C) before first use. -
Page 11: Loading The Battery
basic_e_opx_6.fm Page 11 Thursday, December 12, 2002 10:44 AM LOADING THE BATTERY Important • Be sure to reset the date and time after changing the battery. Make sure that: • The monitor is off. • The lens barrier is closed. •... -
Page 12: Inserting A Card
basic_e_opx_6.fm Page 12 Thursday, December 12, 2002 10:44 AM INSERTING A CARD “Card” in this manual refers to the xD-Picture Card. The camera uses the card to record pictures. Make sure that: • The monitor is off. • The lens barrier is closed. •... -
Page 13: Removing The Card
basic_e_opx_6.fm Page 13 Thursday, December 12, 2002 10:44 AM Close the connector cover. • Press the mark in the illustration when closing the connector cover. Note Do not close the connector cover without first closing the card cover. Removing the card Open the connector cover and the card cover. - Page 14 basic_e_opx_6.fm Page 14 Thursday, December 12, 2002 10:44 AM TURNING THE POWER ON/OFF When shooting pictures Power on: Open the lens barrier. The camera turns on in the shooting mode. The lens extends and the subject is displayed on the monitor. If the lens does not extend when the lens barrier is opened, there is a possibility that the barrier is not fully...
-
Page 15: When Playing Back Pictures
basic_e_opx_6.fm Page 15 Thursday, December 12, 2002 10:44 AM When playing back pictures Power on: Press with the lens barrier closed. The camera turns on in the playback mode. The monitor turns on and the last picture taken is displayed. Power off: Press The monitor and the camera turn off. -
Page 16: Setting The Date And Time
basic_e_opx_6.fm Page 16 Thursday, December 12, 2002 10:44 AM SETTING THE DATE AND TIME Open the lens barrier fully. • The lens extends and the monitor turns on. Press • The top menu is displayed. Press on the arrow pad to select MODE MENU. Press to select the SETUP tab, then press Press... -
Page 17: Menu Functions
basic_e_opx_6.fm Page 17 Thursday, December 12, 2002 10:44 AM MENU FUNCTIONS USING THE MENUS AND TABS When you turn on the camera and press , the top menu is displayed on the monitor. The functions of this camera are set from the menus. This chapter explains how the menus work, using the shooting mode screens. -
Page 18: How To Use The Menus
basic_e_opx_6.fm Page 18 Thursday, December 12, 2002 10:44 AM How to use the menus Press to display Press to select a tab, the top menu. Press then press Top menu CAMERA tab ESP/ ESP/ DRIVE MODE MENU DIGItAL ZOOM PANORAMA 2 IN 1 Press return to the... - Page 19 basic_e_opx_6.fm Page 19 Thursday, December 12, 2002 10:44 AM Press to select an Press to select a item, then press setting. Press to complete setting. Press again to exit the menu and return to shooting. ESP/ DRIVE DEZItAL ZOOM PANORAMA 2 IN 1 ESP/ ESP/...
-
Page 20: Shooting Mode
basic_e_opx_6.fm Page 20 Thursday, December 12, 2002 10:44 AM Shortcut menus Shooting mode Adjusts the brightness of the picture. Sets the image quality and resolution. Still picture : SHQ, HQ, SQ1, SQ2 Movie : HQ, SQ Sets the appropriate white balance according to the light source. Playback mode Runs through all saved pictures one after another as slide show. -
Page 21: Mode Menus
(sequential shooting). Extends the maximum optical zoom, making possible DIGITAL ZOOM up to approx. 5x zoom. Allows panorama pictures to be taken with Olympus PANORAMA CAMEDIA-brand cards. Combines two still pictures taken in succession and 2 IN 1 stores them as a single picture. -
Page 22: Playback Mode
basic_e_opx_6.fm Page 22 Thursday, December 12, 2002 10:44 AM Selects whether to display pictures on the monitor REC VIEW while saving them to a card. Checks the CCD and image processing functions for PIXEL MAPPING errors. Adjusts the brightness of the monitor. Sets the date and time. - Page 23 basic_e_opx_6.fm Page 23 Thursday, December 12, 2002 10:44 AM SETUP tab Selects whether to keep the current camera settings ALL RESET when you turn off the power. Selects a language for on-screen display. Turns the beep sound (used for warnings, etc.) on and off.
-
Page 24: Shooting Basics
basic_e_opx_6.fm Page 24 Thursday, December 12, 2002 10:44 AM SHOOTING BASICS SHOOTING MODES This camera has 7 shooting modes to choose from depending on the shooting conditions and the effect you want to achieve. Open the lens barrier fully. • The lens extends and the monitor turns on. Press •... -
Page 25: Night Scene
basic_e_opx_6.fm Page 25 Thursday, December 12, 2002 10:44 AM LANDSCAPE Suitable for taking photos of landscapes and other outdoor scenes. The camera automatically sets the optimal shooting conditions. NIGHT SCENE Suitable for shooting pictures in the evening or at night. The camera sets a slower shutter speed than is used in normal shooting. - Page 26 basic_e_opx_6.fm Page 26 Thursday, December 12, 2002 10:44 AM Press the shutter button all the way (fully). • The camera takes the picture, and a beep sounds. • When the green lamp stops blinking, you can take the next picture. •...
-
Page 27: Recording Movies
basic_e_opx_6.fm Page 27 Thursday, December 12, 2002 10:44 AM Press the shutter button halfway until the green lamp lights. • The focus, exposure, and white balance are locked. • When the green lamp blinks, the focus is not locked. Release your finger from the shutter button, re-position your subject and press the shutter button halfway again. -
Page 28: Using The Flash
basic_e_opx_6.fm Page 28 Thursday, December 12, 2002 10:44 AM • The magnification of the optical zoom cannot be changed during movie recording. The zoom is fixed in the Wide position. To use the Note zoom, set “DIGITAL ZOOM” to “ON”. •... - Page 29 basic_e_opx_6.fm Page 29 Thursday, December 12, 2002 10:44 AM Press ) to set flash mode. • The current flash setting is displayed. • Each time you press , the flash mode changes in the following sequence: “AUTO” – “ Red-eye reduction” – “ Fill-in flash”...
-
Page 30: Macro Mode Shooting
basic_e_opx_6.fm Page 30 Thursday, December 12, 2002 10:44 AM Take the picture. • When using the remote control device, point it at the remote control receiver on the camera and then press the shutter button on the device. Self-timer : The self-timer/remote control lamp lights for about 10 seconds, then starts blinking. -
Page 31: Selecting A Record Mode
basic_e_opx_6.fm Page 31 Thursday, December 12, 2002 10:44 AM SELECTING A RECORD MODE Choose the best record mode for your purposes (printing, editing on a PC, website editing, etc.). Record Description Quality File size mode • A high quality mode. Clearer Larger •... -
Page 32: Playback
basic_e_opx_6.fm Page 32 Thursday, December 12, 2002 10:44 AM PLAYBACK PLAYING BACK STILL PICTURES Press • The monitor turns on and displays the last picture taken. (Single-frame playback) Use the arrow pad to play back other pictures. Jumps to the picture 10 frames back. ( Displays the previous Displays the next picture. -
Page 33: Index Display
basic_e_opx_6.fm Page 33 Thursday, December 12, 2002 10:44 AM Close-up playback Pictures displayed on the monitor can be enlarged in steps up to 4 times the original size. This function is useful when you want to check the details of a picture. -
Page 34: Protecting Pictures
basic_e_opx_6.fm Page 34 Thursday, December 12, 2002 10:44 AM • Press again after playback ends to display the MOVIE PLAYBACK menu. PLAYBACK : Plays back the entire movie again. FRAME BY FRAME : Plays back the movie manually one frame at a time. EXIT : Leaves the movie playback mode. -
Page 35: Erasing Pictures
FORMATTING (CARD SETUP) This function lets you format a card. Formatting prepares cards to receive data. Before using non-Olympus cards or cards which have been formatted on a PC, you must format them with this camera. • All existing data, including protected data, is erased when the card is formatted. -
Page 36: Playback On A Tv
basic_e_opx_6.fm Page 36 Thursday, December 12, 2002 10:44 AM In the top menu, select MODE MENU CARD CARD SETUP, and press • Shooting mode FORMAT screen is displayed. • Playback mode The CARD SETUP screen is displayed. If the FORMAT screen is displayed, press select YES. -
Page 37: Print Settings
basic_e_opx_6.fm Page 37 Thursday, December 12, 2002 10:44 AM PRINT SETTINGS By specifying the desired number of prints of each picture on the card and whether or not the date and time are to be printed, you can print out the desired pictures according to the print reservation data with a DPOF- compatible printer or at a DPOF photo lab. -
Page 38: Downloading Pictures To A Computer
basic_e_opx_6.fm Page 38 Thursday, December 12, 2002 10:44 AM DOWNLOADING PICTURES TO A COMPUTER By connecting the camera to a computer with the provided USB cable, images on a card can be transferred to the computer. Some OS’s (operating systems) may need a special setup before connecting to the camera for the first time. - Page 39 *Certain card readers may not • Windows XP be compatible with Mac OS X. • Mac OS 9/X Check the Olympus website for the most up-to-date compatibility information. Does your computer have a built-in PC card slot? Use the optional PC card adapter.
-
Page 40: Error Codes
basic_e_opx_6.fm Page 40 Thursday, December 12, 2002 10:44 AM ERROR CODES Monitor Possible cause Corrective action indication The card is not Insert a card or insert a different card. inserted, or it cannot Wipe the gold contacts with a NO CARD be recognized. -
Page 41: Specifications
basic_e_opx_6.fm Page 41 Thursday, December 12, 2002 10:44 AM SPECIFICATIONS Product type : Digital camera (for shooting and displaying) Recording system Still picture : Digital recording, JPEG (in accordance with Design rule for Camera File system (DCF)), Exif 2.2, Digital Print Order Format (DPOF), PRINT Image Matching II Movie : QuickTime Motion JPEG support... - Page 42 : 1/2.5'' CCD solid-state image pickup, 4,230,000 400 DIGITAL pixels (gross) Lens : Olympus lens 5.8 mm to 17.4 mm (equivalent to 35 mm to 105 mm lens on 35 mm camera), F3.1 to F5.2 Photometric system : Digital ESP metering, Spot metering Shutter speed : 1/2 to 1/1000 sec.