Table of Contents
Advertisement
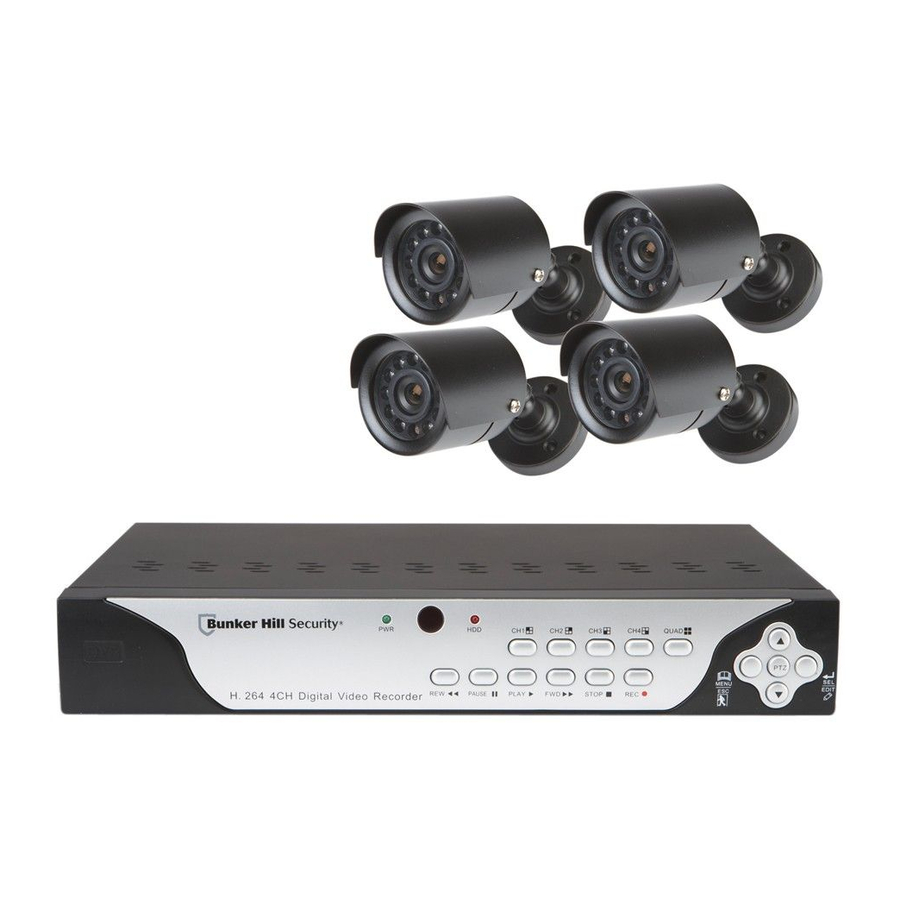
68332 DVR Security System
When unpacking, make sure that the product is intact and undamaged. If any parts are missing or broken,
Record Product's Serial Number Here:
Note: If product has no serial number, record month and year of purchase instead.
Note: Some parts are listed and shown for illustration purposes only, and are not available individually
as replacement parts.
©
Copyright
2011 by Harbor Freight Tools
or form without the express written consent of Harbor Freight Tools. Diagrams within this manual may not be drawn proportionally. Due to continuing
improvements, actual product may differ slightly from the product described herein. Tools required for assembly and service may not be included.
Smart Phone Compatible
H.264 DVR Security System
please call 1-800-444-3353 as soon as possible.
Visit our website at: http://www.harborfreight.com
®
. All rights reserved. No portion of this manual or any artwork contained herein may be reproduced in any shape
Manual Revised 11f
Advertisement
Table of Contents

Related Manuals for Bunker Hill Security BUNKER HILL SECURITY 68332


Summary of Contents for Bunker Hill Security BUNKER HILL SECURITY 68332
- Page 1 2011 by Harbor Freight Tools or form without the express written consent of Harbor Freight Tools. Diagrams within this manual may not be drawn proportionally. Due to continuing improvements, actual product may differ slightly from the product described herein. Tools required for assembly and service may not be included.
-
Page 2: Specifications
Specifications Video Standard NTSC/PAL Video 4-Input Channels / 2-Output Channels Audio 1-Input Channel/1-Output Channel Preview Resolution Resolution Recording Quality Frame Rate Effective Pixels Horizontal Resolution Field of View Cameras Minimum Illuminance Infrared Illumination Range Camera Operating Temperature Cable Hard drive 500GB hard drive Audio ADPCM2 CODEC... -
Page 3: Table Of Contents
B Specifications 1 Safety Warnings 2 – Grounding 4 Introduction 4 – Features 4 – Setup Overview 5 Components and Controls 5 – Components 6 – Remote Control 6 – Front Panel 6 – Back Panel 7 Set up 7 Cable Connections 8 Programming Your DVR 8 –... -
Page 4: Safety Warnings
Save This Manual Keep this manual for the safety warnings and precautions, assembly, operating, inspection, maintenance and cleaning procedures. Write the product’s serial number in the back of the manual near the assembly diagram (or month and year of purchase if product has no number). -
Page 5: Grounding
Grounding TO PREVENT ElECTRIC SHOCK AND DEATH FROM INCORRECT GROUNDING WIRE CONNECTION: Check with a qualified electrician if you are in doubt as to whether the outlet is properly grounded. Do not modify the power cord plug provided with the device. Never remove the grounding prong from the plug. Do not use the device if the power cord or plug is damaged. - Page 6 excessive heat, and damp or wet areas. RECOMMENDED MINIMUM WIRE GAUGE FOR EXTENSION CORDS* (120/240 VOlT) EXTENSION CORD NAMEPlATE lENGTH AMPERES (at full load) 0 – 2.0 2.1 – 3.4 3.5 – 5.0 5.1 – 7.0 7.1 – 12.0 12.1 – 16.0 16.1 –...
-
Page 7: Introduction
Introduction Features This unit is equipped with the following features: • Real time monitoring - Supports real time surveillance via Monitor • Save Recordings - DVR saves real-time recorded images to HDD • Backup Recordings - Supports DVR backup via USB flash drive and hard drive • Playback Recordings - Supports DVR single CH and multiple CH playback of recorded files • Network operation - Supports remote surveillance by multiple users simultaneously • ... -
Page 8: Components And Controls
Components and Controls Components Video Cable Camera Cables Adapter Adapter Remote Control Power Cord Cable Splitter Mouse Four Cameras Not shown: - 2 AA Batteries for the Remote Control - Hardware to install Cameras Software CD SKU 68332 For technical questions, please call 1-800-444-3353 Page: 5... -
Page 9: Remote Control
Front Panel Power LED is lit green when power is on Indicator IR Receiver Infrared receiver for the remote control LED flashes red when DVR is HDD Indicator reading the hard drive Channel Select Used to select individual channels (cameras) 1 thru 4 QUAD Used to view all the cameras at once Used for rewind when playing recordings or move to the left when navigating the menus Used to pause, and then play frame by... -
Page 10: Set Up
Set up IMPORTANT: Before mounting any of the cameras, test the unit by hooking up all the connections as shown below, and testing all the features to insure the unit is working properly. There are two 6mm cameras for longer range, and two 3.6mm cameras for wider angle, shorter range, viewing. Test the cameras for the best location before installing. -
Page 11: Programming Your Dvr
Programming Your DVR Picture 4-1 Menu List SKU 68332 System Initialization After connecting the cables and the power adapter, the system will boot-up and start initializing. Main Interface After system initialization, the system will display the main interface (shown at left before video input status has been entered). -
Page 12: Main Menu
Main Menu The Main Menu is for setting up the DVR and cameras for recording, playback network and other access. You can also set system function settings, such as the time, user password, Audio/Video settings, language, system information, and system maintenance. Note: When setting up or making changes to the program settings, you must press APPLY to have the settings take affect. -
Page 13: Camera Setup - Channel Title, Position, Live Display
PRIVACY ZONE SKU 68332 Note: To save changes, you must press APPLY. Camera Setup - Channel Title, Position, live Display In the Main Menu select CAMERA. The Display Setup menu will display (shown at left). You can edit the name of each channel (camera) and change the position where the name is displayed. -
Page 14: Record Setup - Resolution, Quality, Audio, Record Time
Sample Recording Hours Number Maximum of Days if Quality Recorded recording Resolution setting hours 24 hours a day Lowest 2688 (Normal) Lowest (Normal) Best SKU 68332 Note: To save changes, you must press APPLY. Record Setup - Resolution, Quality, Audio, Record Time In the Main Menu select RECORD to enter the Record Setup submenu (shown at left). -
Page 15: Network Setup
REV 11f SKU 68332 Note: To save changes, you must press APPLY. Network Setup In the Main Menu, select NETWORK SETUP to enter the Network Setup menu. Select network Type - such as DHCP, PPPOE, or static allocation. (See following sections for network type information.) Enter Port information and Web Port (Media port 9000 and web port 80 by default). -
Page 16: Static Addresses
SKU 68332 Note: To save changes, you must press APPLY. Static Addresses When selecting static allocation, you will need to set up the network settings on the DVR to match the settings of the router that you attach to the DVR. To find the router settings, working on a PC computer attached to the same router as the DVR, go to START (lower left of screen), click Run, type “cmd”... -
Page 17: Device Management
SKU 68332 Device Management Options in device management includes hard drive, External Alarm, PTZ control, Mobile Phone Monitoring, and Motion Detection. HDD Management In the Main Menu→Device → HDD] to enter [HDD Management] menu. When you install a HDD, the system will automatically detect whether the HDD is formatted. Menu Descriptions HHD STATUS: Indicates Hard Drive status. -
Page 18: Alarm Set
SKU 68332 Alarm Set Click [Main Menu→Device → Alarm] to enter into [Alarm setup] menu to setup Alarm warnings. HDD lOSS: Options are “ON” and “OFF”. If you select ON there will be a buzzer sound and “H” sign on screen when the HDD is not detected or not formatted. -
Page 19: Ptz Setup (Pan/Tilt/Zoom)
SKU 68332 Note: To save changes, you must press APPLY. PTZ Setup (Pan/Tilt/Zoom) (PTZ cameras not included) Click [Main Menu→Device→ PTZ Setup] to enter the PTZ Setup menu. Select the channel you want to control and set PTZ protocol (Pelco-D or Pelco-P), Baud Rate (1200, 2400, 4800, 9600), Stop bit (1, 2), Parity Check (None, Odd, Even Mark Space), and Address Code. -
Page 20: Motion Detect
Note: To save changes, you must press APPLY. Motion Detect Click [Main→Device→Motion] to enter into the MOTION DETECT menu to setup motion detection recording. STATUS: Turn ON or OFF motion detection for each channel. SENSITIVITY: Set each channel’s sensitivity level of motion detection from 1 to 4 with 4 being the most sensitive. -
Page 21: System Function
SKU 68332 Note: To save changes, you must press APPLY. System Function The [System] Menu includes sub-menus for Time Set, User Password, Audio/Video Setting, Language select, System Info and System Maintenance. After entering into the [System], you can configure the system to meet your needs. Time Setup Click [Main Menu→System→Date/Time] to enter the ... -
Page 22: Video Setup
SKU 68332 Note: To save changes, you must press APPLY. Video Setup Click [Main Menu→System→VIDEO] to setup Video, here you can set Camera system to PAL, or NTSC. In the USA use NTSC. You can also set the resolution for the VGA video out port. Your options are 800x600, or 1024x768, or 1280x1024. -
Page 23: System Maintenance
SKU 68332 Note: To save changes, you must press APPLY. System Maintenance Click [Main Menu→ System→System Maintenance] to enter the System Maintenance menu. This option allows you reset the DVR to factory default settings, update system software (firmware), and set system auto-maintenance. When opening auto-maintain function, you can setup system to restart regularly. -
Page 24: Basic Operation
Basic Operation Once you have set up your DVR, it will run based on the programmed schedule. You can view and change functions through the Menu List. Following is a description of the menu options. PIP (picture-in-picture) and DIGITAL ZOOM are only available through the menu list as described below. -
Page 25: Recorded Video Search And Playback
Recorded Video Search and Playback Once recordings have been made, you can locate them through the Video Search menu to play back and backup to another location. SKU 68332 Video Search In the Main Menu select SEARCH to enter the Video Search menu (shown at left), or from the Menu List select VIDEO SEARCH. -
Page 26: Recording File Backup
SKU 68332 Recording File Backup If you want to backup one or more selected recordings from the file list, select the recording(s) and click BACKUP. When the backup is completed you will be notified. Click OK to confirm and complete the backup process. Note: The Backup file will be in H264 format. You can convert it to AVI format using the Multimedia Player program that comes with the DVR (Playback 2.3.0.4) or through the net-viewer program, allowing you to use any player which supports AVI format. -
Page 27: Mobile Device Access Set Up
Mobile Device Access Set up The DVR is currently compatible with mobile phones running Windows Mobile, Symbian, Iphone, Blackberry and Androids operating systems. Windows Mobile 1. Copy “Aseesetup.CAB” program from CD to your mobile phone. 2. Select the program Aseesetup: 3. -
Page 28: Symbian System Mobile
Symbian System Mobile 1. Copy “ASee_AL_3rd_0723. sisx” or “ASee_AL_5th_0723. sisx” program from the CD to your mobile phone. 2. Select the program to begin installation: 3. Select phone memory or the SD card as the installation location: 4. Select CONTINUE to allow the program to access the internet: SKU 68332 5. -
Page 29: Iphone
iPhone 1. Download and install the iTunes program from the Apple website: http://www.apple.com/itunes/ 2. Run the iTunes program, then select Menu > Store > Search to enter into the sub-menu. 3. In the search mode, enter “ASee” to search for the program. 4. -
Page 30: Blackberry Mobile
Blackberry Mobile loading program 1. Download and install the Blackberry desktop manager on your PC. 2. Connect your mobile to your PC with a USB cable (sold separately). 3. Open the Desktop Manager. 4. Choose APPLICATION LOADER from the Main Menu: 5. - Page 31 1. Play/Pause 2. Full Screen Press icon to enter full screen display mode, click the trackball to quit full screen mode. 3. Snapshot Takes a still image of the current view. 4. Setup a. To set up viewing, press the Setup icon. Enter the monitor DVR information in the below setup menu: b.
-
Page 32: Android Mobile
Android Mobile Make sure you have a software support program loaded on your mobile such as Apkinstaller and that your mobile is connected to the network and can download software. 1. Enter the program aps window and select the E-Market icon: 2. -
Page 33: Playback Program
Playback Program Playback, included on the disk, is an alternate program that you can use to view recordings from the DVR. SKU 68332 Using Playback Copy the program to your PC. Copy the backup file you want to play to your PC. 1. Open the program and click [File→ Open Local File] to find/select the backup file (shown at left). Note: The file type you have selected should be *.264 format. 2. Highlight the file and Click OPEN (shown lower left). 3. -
Page 34: Playback Settings
Play Previous Recording File Pause Stop Previous Frame / Next Frame Slow Play, Normal Play, Fast Play SKU 68332 Playback Menu Controls Next Hour Capture Picture Reduce Window All Windows Add Window Start Playback Settings The default setting for video playback is a display of all four channels. -
Page 35: Net-Viewer Program
Net-Viewer Program Installing Software The Software CD includes a PC viewer program for the DVR (DxClient 2.7.1). This program is for backing up video files and remote access. You may also need to change the security settings of the web browser. To install the PC Viewer program: 1. Insert Software CD into your computer’s CD-ROM drive. -
Page 36: Main Screen Controls
Note: If you cannot use HTTP port 80 or 9000 because it is being used by another program, or it is being blocked by your service provider, you can use another port in the same range. If you do so you will need to forward the IP address of the router to the other port, change the port in the DVR NETWORK settings, and add the port number after the IP address. -
Page 37: Replay Mode
SKU 68332 Replay Mode This option allows you to playback recordings remotely. First select the day, channel and type and proceed searching and refreshing; second select any event from search result list to playback. Please note you can control playing speed by sliding the playing-control bar on the bottom of the screen. -
Page 38: Alarm
SKU 68332 Alarm PTZ Control Network For technical questions, please call 1-800-444-3353 Click ALARM to enter into its sub menu. Set the motion detection alarm, motion recording, motion trace, motion sensitivity, video loss alarm, HDD not enough space alarm, HDD not found alarm and alarm output time etc. Click Setup for each camera to enter and adjust the motion detection settings for each channel of DVR. -
Page 39: Setting
SKU 68332 Setting Click SETTING to enter the Setting Menu. Click […] button to preview net-viewer recording saving path and screen capture saving path. The menu also allows you to set a lower bandwidth for Internet video transmission, set user password, turn daylight saving time on/off, etc. -
Page 40: Troubleshooting
Troubleshooting Problem Possible Causes 1. Loose or incorrect connections. 2. Monitor needs adjustment. 3. Camera settings need adjusting. Monitor does not display image System does not Loose or incorrect connections. detect HDD 1. Loose or incorrect connections. 2. Incorrect address information. Cannot access connected modem Incompatibility with web browser. -
Page 41: Warranties
90 DAY WARRANTY Harbor Freight Tools Co. makes every effort to assure that its products meet high quality and durability standards, and warrants to the original purchaser that this product is free from defects in materials and workmanship for the period of 90 days from the date of purchase. -
Page 42: Notes
Notes SKU 68332 For technical questions, please call 1-800-444-3353 Page: 39... - Page 43 NOTICE: Camera surveillance may be prohibited by laws that vary from state to state. Check laws in your area before using for surveillance. This device complies with part 15 of the FCC Rules. Operation is subject to the following two conditions: (1) This device may not cause harmful interference, and (2) this device must accept any interference received, including interference that may cause undesired operation.