Advertisement
Quick Links
o2.co.uk
O2 (UK) Limited, 260 Bath Road, Slough, Berkshire SL1 4DX
Registered in England No. 1743099. Registered Office as above.
© O2 (UK) Limited 2003. Correct at time of going to press (April 2004)
O
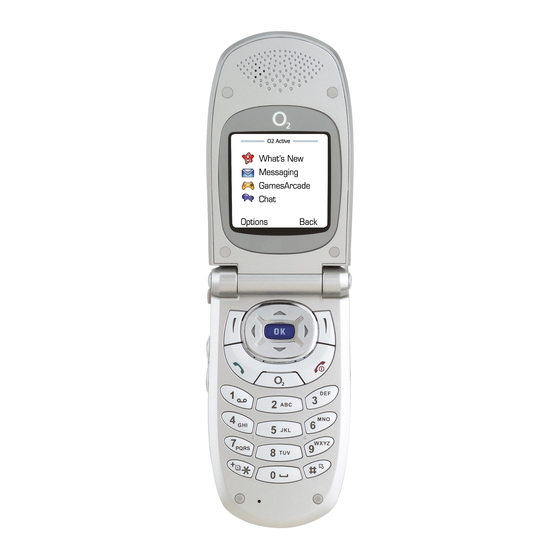
X2 user guide
2
Download pictures and
send to your friends
Find out everything there
is to know about music
Get the latest sports news
Advertisement

Related Manuals for O2 X2


Summary of Contents for O2 X2
- Page 1 Get the latest sports news o2.co.uk O2 (UK) Limited, 260 Bath Road, Slough, Berkshire SL1 4DX Registered in England No. 1743099. Registered Office as above. © O2 (UK) Limited 2003. Correct at time of going to press (April 2004)
-
Page 2: Table Of Contents
Important battery information Chapter 3 – Basic functions Turning your mobile on and off Menu navigation Basic functions Making a call Ending a call Receiving calls Making an international call Making emergency calls Voicemail O2 is a trademark of O2 Limited. - Page 3 Chapter 4 – Main menu – Inbox Contacts – Outbox Adding contacts to you phonebook – Sent items Finding contacts in your phonebook – Drafts Edit – Templates Copy – Message settings Delete Caller groups Media Messaging Privacy Manager – Create a media message Business card –...
- Page 4 Games Language Games Arcade Factory reset Input Organiser Calendar Chapter 5 – Miscellaneous Alarm clock Abbreviations and acronyms To do list Questions and answers Notes Technical data Voice memo Currency converter Chapter 6 – Safety Safety information for mobiles Tools Mobile care My services Driving safety...
-
Page 5: Welcome
* Subject to network coverage. † Terms and conditions apply. See www.o2.co.uk ©Copyright 2002 – 2004 Macrospace Ltd. O2 do not suggest in any way that the celebrities featured in this guide All rights reserved. are endorsing O2 products or services. -
Page 6: Chapter 1 - Before Using Your Mobile
Chapter 1 Before using your mobile • Package contents • Handset description • External display • Main idle screen • Icons • Function keys • Navigation key viii... -
Page 7: Package Contents
Package contents Handset description Closed view Thank you for purchasing this product. Please check the product contents to see if you have all the available items Antenna as shown below. Status indicator light Charger Mobile External display phone Hands-free External speaker Status indicator light Standard The status indicator light has the following functions:... - Page 8 Inside view Side and back views Hands-free handset/Data cable jack Earpiece Main display Volume key/Reject key OK key Mirror used to take Scroll key Neck strap self photos Left soft key socket Right soft key Dial/Answer key Power on/off key Camera lens Active key Alphanumeric keys...
-
Page 9: External Display
External display Main idle screen When the flip is closed, the external display’s status bar will Signal show icons for network signal strength, battery power, Name of network alarm (if active), the current time and the current profile in operator Time and date use. -
Page 10: Icons
Icons The icons below appear on the external display and/or the Line in use – Shows the number of the line currently main display. in use Vibrate – Appears when vibration is set as a ring Signal strength – The number of bars shows tone. -
Page 11: Function Keys
Function keys Active key • To access O Active Power on/ • Long press to turn your mobile on/off off key • Press to reject an incoming call or cancel a call being dialled Asterisk key • To insert an asterisk Send/ •... -
Page 12: Navigation Key
Navigation key When in standby mode, the navigation keys can be used to access shortcuts we have set up for you. Left – To create a text message Right – To access your profiles – To access the main menu Down –... -
Page 13: Chapter 2 - Preparing Your Mobile For Use
Chapter 2 Preparing your mobile for use • Inserting your SIM card • Using the battery • Charging the battery • Important battery information... -
Page 14: Inserting Your Sim Card
Inserting your SIM card To use your mobile, a SIM card is required at all times – • Slide the SIM card in under the metal plate in the SIM this contains important information about your mobile and card slot, with the SIM card’s metal contacts facing down network. -
Page 15: Using The Battery
Using the battery Charging the battery Installing the battery Power connection Insert the bottom of the battery into the groove at the Insert the charger’s contact point into the slot and plug the bottom of the mobile. Then push down the battery until it charger in at the socket. -
Page 16: Important Battery Information
Important battery information Charging status • Never store a battery near a fire • Don’t attempt to take the battery apart. Only use the If you charge your mobile; battery approved by the manufacturer • Never touch the battery terminals with a metallic object, •... -
Page 17: Chapter 3 - Basic Functions
Chapter 3 Basic functions • Turning your mobile on and off • Menu navigation • Basic functions • Voicemail... -
Page 18: Turning Your Mobile On And Off
Turning your mobile on and off Turning your mobile on Turning your mobile off When the SIM card is installed When the SIM card is installed • Open the mobile’s flip • Press and hold until the screen • Press and hold until the screen turns on turns off •... -
Page 19: Menu Navigation
Menu navigation Main menu map • When your mobile is in standby mode, press access the main menu Select To enter • Scroll to the menu you require by using • Press to enter the menu highlighted The main menu Each icon Messaging item to which you... - Page 20 Select To enter Select To enter Organiser Contacts When using the phonebook stored in your SIM card’s memory, the seventh item is SIM status. There is no Privacy Manager item. Tools Camera Pay & Go customers will see My Services as item number 1.
-
Page 21: Basic Functions
• Once you have entered the number, Receiving calls press . The O X2 will start dialling the number Answering a call • To answer a call, open the flip or, if the flip is already open press To reject a call •... -
Page 22: Making An International Call
Making an international call For Pay Monthly customers • Press and hold until appears on the screen • Enter the recipient’s country code, area code and phone number • Press to dial the number ™ For Pay & Go customers Please consult your O Pay &... -
Page 23: Voicemail
Voicemail Your O X2 provides you with Voicemail. This service takes messages for you when your O X2 is switched off, engaged, you don’t answer a call or you are out of signal range. When you receive a new Voicemail message the icons will be shown in the external and main display’s status bars, respectively. -
Page 24: Chapter 4 - Main Menu
Chapter 4 Main menu • Contacts • Calls • Messaging • Camera • O Active • Games • Organiser • Tools • Settings... -
Page 25: Contacts
Contacts The data fields provided by the SIM card phonebook are: From the standby menu, press then scroll to Contacts and press to select – The contact’s name Adding contacts to your phonebook – The contact’s mobile phone number You can either use the SIM card or the built-in contacts database as your Phonebook. - Page 26 To add a contact in the mobile’s memory – The contact’s home phone number • In the standby screen enter the number – The contact’s email address you wish to store then select Save • The screen will show the phonebook data –...
-
Page 27: Finding Contacts In Your Phonebook
– The contact’s company name Finding contacts in your phonebook • In the standby mode, press – The contact’s department name select Contacts and display contacts you have saved – The contact’s job title • Press to scroll through your list –... -
Page 28: Edit
Edit Delete • In the Contacts menu, scroll to Edit and press • In the Contacts menu, scroll to Delete and press select select • Using scroll to the contact you wish to edit, then • Scroll to the contact you wish to delete or to Delete All press from... -
Page 29: Privacy Manager
• Scroll to one of the groups and then; • The names of the contacts who are already on the selected list will be displayed. If the list is empty, press – Press to select Option. You can then select the ring to select Edit, then press to select tone or animation that will identify that caller group. -
Page 30: Business Card
If you choose to activate Accept List you will only be able My number to receive calls from contact in the Accept List. However, This option allows you to save your SIM card number and if you activate the Reject List, your mobile will not be name to your SIM card’s memory. -
Page 31: Calls
Calls • From the standby menu, press then scroll to Calls press to select Missed, dialled and received calls • Scroll to Missed / Received / Dialled and press select. You can then view all the latest missed, received or dialled calls. Alternatively, in the standby mode, press to view a list of all the most recent missed, dialled and received calls •... -
Page 32: Delete All
When the number for a missed, dialled, or received call is Delete All highlighted, you can perform the following tasks: To erase all recent missed, received and dialled numbers. • Press to re-dial the number • In the Calls menu, scroll to Delete All and press •... -
Page 33: Costs
Dialled Calls Time Delete Shows the total time for all dialled calls. Deletes all call cost records. Delete Call Cost Limit Deletes all call time records. Shows the current limit set for total call costs. Please note: Set Cost Limit You must enter your PIN2 code in order to clear call time Allows you to set a limit for total call costs. -
Page 34: Operations During A Call
Operations during a call When the call is on hold: • Press to select Unhold to resume the call Adjusting the earpiece volume • During a call, you can press the volume key on the • Press to end this call left side of your mobile to adjust the call volume When there is an active call and a call on hold: •... - Page 35 Call waiting If you receive an incoming call whilst you are on the phone, a tone will sound through the earpiece and the display will show that a second call is currently waiting. You can handle the waiting call and currently active call in the following ways: Answer the waiting call •...
-
Page 36: Call Menu
Call menu Send DTMF When your mobile is connected to other devices or • Press during a call to enter the Call menu services, you can send DTMF (Dual Tone Modulation • Press to scroll to the desired item, please refer to Frequency) strings. - Page 37 Messages Enables you to enter the messages menu. Calculator Allows you to use the calculator. For further information please refer to page 141.
-
Page 38: Messaging
Messaging • In the main menu, scroll to Messaging and select by pressing Then select; Text For further information on text messaging please refer to page 65. Multimedia For further information on Media Messaging please refer to page 77. Voicemail •... -
Page 39: Delete Messages
Text messaging Delete messages Text messaging is fun with O X2. You can send long messages, and personalise them with pictures and sounds • Scroll to Delete messages and press to select (EMS). You can also store pictures and sounds. - Page 40 With an attachment • Select View by pressing to view the icon • Whilst writing your text message select Option • Press to insert the icon into your message pressing to perform the following tasks: • Animation Insert You can select an EMS animation from the EMS Select Insert to enter the following objects:...
- Page 41 • vCard • Press to scroll through your contacts and press You can select a contact’s data from your phonebook to to select the desired contacts attach to your message. After receiving your message, • After you have selected the contacts press the recipient can save the attached contact data to their own phonebook Then select:...
-
Page 42: Read Messages
Read messages Save – select to save the content of the message, such as the sender’s number to your phonebook or ring tone, When you receive a new message 1 New Msg will appear animation and calendar attachments on the external display whilst an incoming message alert Save all –... -
Page 43: Sent Items
Sent Items Forward – allows you to edit and forward the message to other recipients In the Sent Items you can view all the text messages that Delete – deletes the message you have previously sent. Drafts • In the Messages menu, select Text, then scroll to Sent... -
Page 44: Templates
• You can then enter the text for the template and press to save it Message settings Your O X2 is already set up to send and receive text messages. If you are unable to send text messages, then please contact O Customer Service. -
Page 45: Media Messaging
Media Messaging Colour Media Messaging means you can do more than tell people what’s going on – you can show them exactly what’s happening with pictures, sound and text. Take a photo and send it as a media message to people showing them exactly where you are or, if you are in need of inspiration, you can grab a full colour picture or image from the O Gallery –... - Page 46 If there are multiple numbers and email addresses: To send your message as a carbon copy or a confidential carbon copy to others scroll to Bcc: and repeat the • Press to open up the symbols field along the instructions above. bottom of the screen •...
- Page 47 Animation Voice memo You can select an animation from the library to insert into • Scroll to the file name of the voice memo you would like your message. to attach and select Option by pressing • Press to scroll through the names of the •...
- Page 48 • After an audio file such as a voice memo or a ring tone is When you are editing your media message, you can inserted into a media message, the icon will appear press to select Option at any time to perform the on the top of that page following tasks: Text Template...
- Page 49 Enter a subject Priority – Determines this media message’s priority • Scroll to Subject: and select by pressing To send your media message • Enter the subject for your media message and press • After you have finished editing your media message, to confirm scroll to Send:...
-
Page 50: Read Messages
Read messages When you receive a new message 1 New Msg will appear on the external display whilst an incoming message alert will be shown on the internal display (and with a tone or vibration if selected). Please note: If the sender is a contact saved in your phonebook their name will also appear in the message alert rather than the number –... -
Page 51: Inbox
When your mobile finishes playing the entire message, you If you wish to read the message later press to return to can do the following: the standby screen. The message will be stored in the inbox and the icon will appear in the standby screen. •... -
Page 52: Outbox
Outbox • Press to read the message. After reading the If a message fails to send, a copy will save to Outbox. message you can; Sent Items Resend – allows you to edit and send the message to its In the Sent Items you can view all the media messages that original recipient you have previously sent. -
Page 53: Drafts
– allows you to edit and forward the message Delete – deletes the message Your O X2 is already set up to send and receive media Delete All – deletes all messages in the drafts folder messages. If you are unable to send media messages, then please contact O Customer Service. -
Page 54: Camera
Camera You can take photos using your mobile’s embedded camera, and then set a photo as your wallpaper for the main display’s standby screen, or send them to others in a media message. • In the standby screen, press to select Camera enter direct into the preview mode Alternatively, in the main menu, scroll to... -
Page 55: Camera Settings
Camera settings Light condition Select to amend the light conditions of your environment. Before you take your picture you can amend the Your camera will then automatically adjust its colour camera settings. balance in order for you to take the best quality pictures. •... -
Page 56: Take A Picture
Take a picture Managing your pictures • When your object is in focus, press to photograph After you have saved a photo to your mobile’s memory, the object you can manage it using the options below: Send – Enables you to send this photo to someone as a Your photo will then show up on the main display. -
Page 57: View Your Pictures
• Press to select Face Morph • Press to intensify/reduce expression effects. Intensity levels will be displayed at the top right corner of the • Then Press number key to change prompt will appear on screen ranging from 1 to 5; the default value is 2 the screen, followed by the person’s face remaining •... -
Page 58: O 2 Active
Change your world. There’s so much you can do with Active. * Terms and conditions apply to O2 Active. Please visit www.o2.co.uk for details. O2 Active is a trademark of O2 Limited. Services are handset and network dependent. - Page 59 Top 10 – and even hot pics of the male or female model of * Cost: standard rate for each message sent. From 18p for each message received. Terms and conditions apply. the day. Visit www.o2.co.uk/ringtones to see the full range. © Copyright 2002-2004 Macrospace Ltd. All rights reserved.
- Page 60 Bollywood – The top 10 chart, interviews, intrigue and Entertainment glamour with the best of Bollywood direct to your mobile. Whether you want to dance into the small hours or catch the Cartoons – Have a laugh with the latest Garfield or Dilbert latest Hollywood blockbuster, O Active will point you in the cartoon –...
- Page 61 Shazam will text you back the song title and artist. entertainment, and more – in text and with full-colour Try it! pictures. See www.o2.co.uk for terms and conditions. Music Info Services Downloads – Get into the groove and...
-
Page 62: How To Access O
– Make last minute How to access O Active holiday plans, gift purchases, dinner reservations and more using your Your O X2 is preconfigured to access mobile with lastminute.com and O Active. In addition to Active. the O Active service, shortcode... - Page 63 How to close the browser Bookmarks – to open the Bookmarks menu to view sites • Whilst online, press and hold you have previously saved or save the current web page • If you are already viewing a WAP web page, long-press you are browsing , or from the browser’s menu press , select...
-
Page 64: Wap Message
Delete all – to delete all the bookmarks and bookmarks Settings folders Your O X2 is already set up with the correct settings to enable you to get the most out of O Active. If you Hotkeys – allows you set a numerical key as a hotkey for have any problems with your settings please call a bookmark. -
Page 65: Wap Settings
WAP Settings Your O X2 is already set up to access O Active, so you won’t have to do a thing. However, if you want to change your settings, then see below: To activate another set of WAP server settings •... -
Page 66: Games
Games You can experience the latest full-colour, console-style games in full effect on your O X2. Get ready for a gripping gaming experience that takes your breath away. • In the main menu, scroll to Games and select by pressing Games Arcade Welcome to the era of fast and furious mobile gaming. - Page 67 • You’re now ready to play! from all 10 levels by solving puzzles and avoiding monsters and falling rocks. Make sure you avoid those eggs. © Copyright 2002-2004 Macrospace Ltd. All rights reserved. For terms and conditions, and charges see www.o2.co.uk...
- Page 68 You must battle your way past multiple enemies on your way to Dragon Island where you must defeat the ancient dragon and restore peace to the kingdom. © Copyright 2002-2004 Macrospace Ltd. All rights reserved. For terms and conditions, and charges see www.o2.co.uk...
-
Page 69: Organiser
Organiser • From the standby menu press , then scroll to Organiser and press to select Calendar You can use the calendar to set up memos for forthcoming events such as a meeting, an appointment, or a friend’s birthday. The calendar will also remind you about events you have previously scheduled. - Page 70 • To go to a future or past date, select Enter a name for the event associated with the memo. Option by pressing and select Go to Date, then enter the desired Enter the scheduled location for the event associated date and press with the memo.
- Page 71 Your mobile will display this date’s memo list, including the After creating all the event memos you wish, return to event name and time for the memo you just saved. If the the calendar screen. Select Option by pressing alarm clock has been set to remind you about the event then select: associated with the memo, the icon will appear beside...
-
Page 72: Alarm Clock
Alarm clock • Scroll to Alarm clock and press Then, use the following steps to set an alarm: • Select an alarm you wish to set and press • Press to select On. The configuration fields for the alarm will appear in the lower part of the screen Please note: If you activate the alarm clock feature, when the specified... -
Page 73: To Do List
To do list Time • Enter the time when you want the alarm to go off You can use this feature to create a list of work tasks or personal projects. Time duration • Scroll to To Do List and press to select Allows you to set the length of the alarm. -
Page 74: Notes
Notes Auto delete – in the list screen you can scroll to the item that has already been completed and press You can use this feature to create a list of notes. to mark it and remind yourself that the task has been done. -
Page 75: Voice Memo
Voice memo You can also perform the following: • In the Voice Memo screen press to select Option • Scroll to Voice Memo and press • Then select: • In the Voice Memo screen press to select Option, and Add – to record a new voice memo. then select •... -
Page 76: Currency Converter
Currency converter Step two • To set the exchange rate, select Option • In the main menu scroll to Convert and select and then Rate Setting • Enter the rate from converting between Below is a description of the convert screen: currency 1 and currency 2 •... - Page 77 Step three • Return to the currency converter screen and select one of the currencies • Enter an amount that you wish to convert into the other currency. The amounts can be up to six digits long Step four • Press .
-
Page 78: Tools
Tools • In the main menu scroll to Tools and select by pressing My Services • Select My Services if you are on Pay & Go to access a list of useful numbers and services Please note: My Services is only available to Pay & Go customers. If you are on a Pay Monthly calling plan your first menu option within Tools... -
Page 79: Melodies
Melodies Send – Enables you to send ring tones in a message. Only EMS format ring tones, such as Chimes High can be sent • Scroll to Melodies and press with a message. Non-EMS ring tones (including default ring tones and user created ring tones that can be set as the My Melodies alert sound for incoming calls) do not provide this option. - Page 80 Create a polyphonic ring tone Adjusting the length of a note • In the Melody screen select Composer • The default note length is a quarter note (the screen • The first time you enter the Composer menu, you will uses the number 4 to represent a quarter note) see 8 channels that you can select for editing.
- Page 81 Adding a sharp to a note • Once complete, press to return to the channel list • Press to add a sharp #, which raises the note a semitone You can now repeat the above steps to create another • To remove a sharp from a note, press channel of music.
-
Page 82: Stop Watch
Stop watch Countdown timer • Scroll to Stop Watch and press • Scroll to Countdown Timer and press • Press to start the stopwatch • Enter the amount of time to count down – this can be • While the stopwatch is running, you can press up to 23 hours, 59 minutes and 59 seconds select Split... -
Page 83: Settings
Settings The settings menu is used to set basic parameters for your mobile such as language, time and date, profiles, security, network and call settings. • In the main menu scroll to Settings and press Wallpaper Your mobile says a lot about you so ensure you choose the wallpaper for your main display’s standby screen carefully. -
Page 84: Date And Time
You can then do the following tasks: Date and time You can set the time and date, as well as the format • Select Option by pressing and select; in which the time and date will be displayed on the start up screen. -
Page 85: Profiles
Format Profiles • In the Date & Time menu select Format Change the settings that determine how your mobile alerts you to an incoming call – whether through a ring tone or a From here you can decide the format in which the time vibrating alert. - Page 86 Outdoors You can adjust the settings for each of the profiles to suit a The options in this profile have been preset to suit an particular environment. outdoor activity e.g. the highest volume ring tone or activation of both ring tone and vibrating alerts. Once •...
- Page 87 Messages Answer mode Choose a tone to alert you when you receive a message. • Send key – allows incoming calls to be answered only by pressing • Any key – allows incoming calls to be answered by Alarm pressing any key except , which is used to reject Select the ring tone for your alarm clock.
-
Page 88: Display
Display • To adjust the backlight, scroll to Time Duration press to select Edit Adjust your mobile’s display settings including the welcome • Then set the length of time and press to confirm note, outer display and more... • Scroll to Display and press Welcome message... - Page 89 Outer display • Always on – the external display will remain on, cycling Animation continuously through displays of the time and Select the animations you want to show on your mobile’s animations external display. Please note: • Press to make your selections The external display drains power from the battery when •...
-
Page 90: Audio
Audio This menu allows you to set various sounds that the mobile uses, such as Tones, Messages, Alarm, Calendar as well as the Tone Volume and Call Volume. • Scroll to Audio and press . Then select from the options available Please note: Some of the options provided in this menu and the Profiles menu are identical. - Page 91 No reply – forwards calls when you do not answer Call waiting* Not reachable – diverts calls when your mobile is turned If there is an incoming call when you are in the middle of off or outside network coverage another call, the screen will display the number of the Cancel all –...
-
Page 92: Flip Activate
Fixed dial number* Active line* After this feature is activated, your mobile will only be able You can use two different phone numbers on one mobile, to dial numbers on the fixed dial number list. If a number is designating one number for dialling calls, while accepting not on the list, calls cannot be made to this number. -
Page 93: Network
Select to activate/deactivate or change the PIN1 code. To change the PIN1 code, you must press in the Enable item to select On, so that you will be able to enter and confirm the new password. * Only available whilst abroad with your O2 X2 mobile. - Page 94 PIN2 code* Before setting the SIM lock feature, you must enter the Used to change the PIN2 code. The procedure is the same previously set SIM lock password – the default password is as for the PIN1 code. 1234. Your new password must be between 4 and 8 digits in length.
-
Page 95: Power Saving Mode
To set the screen lock feature Power saving mode • Enter the default Screen lock password which has been After you activate the power saving mode, keypad and preset as 1234 display backlighting will be turned off, as will the status •... -
Page 96: Chapter 5 - Miscellaneous
Chapter 5 Miscellaneous • Abbreviations and Acronyms • Questions and answers • Technical data... -
Page 97: Abbreviations And Acronyms
900 Mhz, 1800 Mhz and 1900 Mhz. mobile by a specific number. If a mobile is stolen, the IMEI The O X2 is a tri-band mobile. system is capable of blocking it on all network operators that support the system. - Page 98 What is WAP? What is a URL? Wireless Application Protocol or WAP is a standard Uniform Resource Locator or URL is an address system developed for mobile phones. It was designed to give used on the Internet. All WAP homepages have a unique quicker access to mobile content than existing web address, allowing browsers to distinguish one from the protocols.
-
Page 99: Questions And Answers
Questions and answers Q: Why does my mobile not turn on when I press the Q: My mobile displays ‘NO NETWORK’, what does key? this mean? A: The key press has been too short or the mobile has shut A: You are outside network range or there is no clear path down because the battery power level is too low to make to the transmitter. -
Page 100: Technical Data
Technical data Q: What type of networks are supported? Size: H 81 x W 44 x D 21(mm) Leisure A: Check the technical specifications on page 185. Get into O Active Weight: 89g Download games from Q: Can I use my mobile inside a car? Talk time: 2 - 3.5 hours Games Arcade A: Please refer to ’Driving Safety’... -
Page 101: Chapter 6 - Safety
Chapter 6 Safety • Safety information for mobiles • Mobile care • Driving safety • Electronic devices • Other safety guidelines • Cautions • R&TTE Directive 1999/05/EC... -
Page 102: Safety Information For Mobiles
Safety information for mobiles Read this information That the Test Specification Standards used are Cenelec agreed and EU Harmonised: Your radio is a low power radio transmitter and receiver. When it is on, it receives and also sends out radio EN 50360:2000 Product standard to demonstrate the frequencies (RF) signals which are absorbed by the body. -
Page 103: Mobile Care
Mobile care Your mobile is a state-of-the-art electronic device that will As with all other radio devices, touching the built-in serve you well for many years provided it gets the antenna area during telephone conversation may impair minimum of care and attention from you. the quality and lead to shorter standby time due to increased power consumption. - Page 104 • Never short-circuit the battery, as it may overheat Cleaning and storing and cause a fire. Keep away from jewellery and other • Your mobile should always be handled with care and metal objects protected from dirt, dust and damp. To avoid scratches, •...
-
Page 105: Driving Safety
Driving safety Electronic devices fully supports the new legislation announced by the Most modern electronic equipment is shielded from RF Department for Transport, banning the use of handheld energy. However, certain electronic equipment may not be mobile phones whilst driving. It is an offence whilst driving shielded against the RF signals from your mobile. -
Page 106: Other Safety Guidelines
Other safety guidelines Hearing aids Aircraft Some digital mobiles may interfere with some hearing aids. Regulations prohibit using your mobile while in the air. In the event of such interference, call Customer Service to Switch your mobile before boarding an aircraft. discuss alternatives. -
Page 107: Cautions
R&TTE Directive 1999/05/EC Your mobile is a high quality piece of equipment. Before The O X2 mobile phone conforms to all the essential operating the equipment, read all instructions and requirements of the EU Directive 1999/5/EC (R&TTE) cautionary markings on (1) AC Adaptor (2) Battery and based on compliance with the following European (3) Product Using Battery. - Page 108 Mandatory statements We hereby declare that the O X2 is in conformity to all the essential requirements of Directive 1999/5/EC. Wir möchten hiermit bekanntgeben, daß das oben genannte Produkt in Übereinstimmung mit allen erforderlichen Bedürfnissen der 1999/5/EC Direktive seht Certificamos que el aparato es conforme con lo establecido en las disposiciones de la Directiva 1999/5/CE.