Table of Contents
Advertisement
Quick Links
Advertisement
Table of Contents

Related Manuals for O2 Xda Zest


Summary of Contents for O2 Xda Zest
- Page 1 Xda Zest User Manual...
- Page 2 E2899 First edition August 2008 Copyright © O (UK) Limited. All Rights Reserved. No part of this manual, including the products and software described in it, may be reproduced, transmitted, transcribed, stored in a retrieval system, or translated into any language in any form or by any means, except documentation kept by the purchaser for backup purposes, without the express written permission of O (UK) Limited (“O...
-
Page 3: Table Of Contents
Table of Contents Safety Information ...............12 Notices ..................20 Xda Zest specifications ............21 Package contents .................23 Chapter 1: Getting started 1.1 Getting to know your Xda ...........24 Front features ..............25 Top features .................26 Back features ...............26 Bottom features ..............26 Left features ................27 Right features ..............27... - Page 4 Calibrating your Xda ............33 Locking your Xda ..............33 1.4 The Today screen ..............34 Status indicators ..............35 Main window panels ............38 Using the window panels .............38 Now Screen .................39 Professional .................39 Classic ................41 Menu ................41 Speed Dial ................42 Today Plug-In ...............44 Taskbar smart gestures ............45 Enabling the Taskbar smart gestures ........46 Screen orientation ...............47...
- Page 5 Xda pad ................50 Turning off the phone function ..........50 Adjusting the volume ............51 2.2 Making a call ...............52 Making a voice call ..............52 Calling using the Xda pad ............52 Making an emergency call ...........57 Making an international call..........58 Making a video call ..............58 Making a video call from Contacts ........59 Making a video call from Call History ........59 Video Call Setting ..............60...
- Page 6 Synchronising via mini-USB ..........67 Synchronising via Bluetooth ..........68 ® Synchronising with an Exchange Server ........69 Chapter 4: Managing your Xda 4.1 Customising your Xda ............71 Customising the Start menu ..........71 Customising the Today screen ..........71 Customising the Now screen ..........72 Customising the Today Plug-in ..........73 Customising the gestures .............74 Customising the O...
- Page 7 5.1 Using the Wireless Manager ..........82 Enabling/disabling flight mode ..........82 Enabling/disabling the wireless connections ......82 Using your Xda as an external modem .........83 Using a USB cable to connect your Xda to your PC ....83 Using Direct Push ..............84 5.2 Using Bluetooth ..............85 ®...
- Page 8 5.7 Using the Opera Mobile ............96 5.8 Using the Internet Explorer Mobile ........98 Chapter 6: Messaging 6.1 Entering text and numbers ..........101 Using the Input Panel ............101 Using the Block Recogniser ..........101 Using the on-screen keyboard ..........102 Using the Letter Recogniser ..........103 Using the Transcriber ............104 Using the XT9 input mode ..........105 6.2 Email messaging ..............106...
- Page 9 6.4 MMS messaging ..............113 Accessing MMS ..............113 Editing MMS settings ............113 Sending an MMS message ..........114 6.5 Windows Live ..............116 ® Using Hotmail ..............116 ® Using Windows Live Messenger ........118 ® Chapter 7: Organising your life 7.1 Using Contacts ..............121 Viewing Contacts ..............121 Using the SIM Manager .............123 7.2 Using Calendar ..............124...
- Page 10 Chapter 8: GPS features 8.1 GPS Catcher ..............130 Updating GPS data ............130 Setting GPS Catcher ............131 8.2 External GPS ..............131 8.3 CoPilot Live 7 ..............133 Using the trial version ............133 Using the licensed version ..........135 Navigating your first trip ............137 Quick address entry ............137 More navigation tips ............138 Change the driving view ............138...
- Page 11 Recording videos ...............144 Organising your pictures and videos ........145 Chapter 10: O Features and Applications 10.1 Newstation ................149 Using Newstation ..............149 Using Newstation menus ...........150 Channel menu ..............151 Subject menu ..............151 10.2 Microsoft Office Mobile ............152 ® Excel Mobile ..............153 ®...
-
Page 12: Safety Information
Specific Absorption Rate (SAR) Your O Xda Zest has been designed, manufactured and tested not to exceed the limits for exposure to electromagnetic fields recommended by the Council of the European Union. These limits are part of comprehensive guidelines developed by independent scientific organisations. -
Page 13: The Battery
As with all other radio devices, touching the built-in antenna area during telephone conversation may impair the quality and lead to shorter standby time due to increased power consumption. The battery Your Xda is equipped with a high-performance Li-Ion battery. Optional battery types may be available; check with your local retailer. -
Page 14: Memory Card
• N ever dispose of the battery with your regular household waste. Take it to a hazardous material collection point. • D o not touch the battery terminals. WARNING! There is a risk of explosion if the battery is replaced by an incorrect type. Dispose of used batteries according to the instructions. The charger • U se only the charger supplied with your Xda. • N ever pull the charger cord to release it from the mains – pull the charger itself. -
Page 15: Driving Safety
Cleaning and storing • Y our Xda should always be handled with care and protected from dirt, dust and dampness. To avoid scratches, never place your Xda face down. • I f cleaning is necessary, switch the Xda off and wipe carefully with a soft, slightly damp (not wet) cloth. Use a cotton swab to clean the camera lens. Allow the Xda to dry completely before switching it on. Never use solvents for cleaning. • N ever expose your Xda to moisture or liquids of any kind. -
Page 16: Electronic Devices
Electronic devices Most modern electronic equipment is shielded from RF energy. However, certain electronic equipment may not be shielded against the RF signals from your Pocket PC phone. Pacemakers To avoid potential interference, the Health Industry Manufacturers’ Association recommends that a minimum separation of six (6”) inches be maintained between a phone and a pacemaker. These recommendations are consistent with the independent research by and recommendations of Wireless Technology Research. -
Page 17: Posted Facilities
Turn your phone off in healthcare facilities when any regulations posted in these areas instruct you to do so. Hospitals or healthcare facilities may be using equipment that could be sensitive to external RF energy. Vehicles RF signals may affect improperly installed or inadequately shielded electronic systems in motor vehicles. Check with the manufacturer or its representative regarding your vehicle. -
Page 18: Blasting Areas
Blasting areas To avoid interfering with blasting operations, turn off your Xda when in a ‘blasting area’ or in areas posted: ‘Turn off two-way radio.’ Obey all signs and instructions. Potentially explosive environments Turn off your Xda when in any area with a potentially explosive environment and obey all signs and instructions. Sparks in such areas could cause an explosion or fire resulting in bodily injury or even death. Areas with a potentially explosive environment are often, but not always, clearly marked. -
Page 19: About This Guide
Xda Zest and to this system only. O Xda Zest is a trademark of the O group of companies. Mandatory statements We hereby declare that the O Xda Zest is in conformity with all essential requirements of Directive 1999/5/EC. Year of Manufacturing: 2008... -
Page 20: Notices
Notices Regulatory Notices Intended for use in the European Union. Products with CE marking comply with the R&TTE directive (99/5/EC), the EMC directive (89/366/ECC), and the Low Voltage Directive (73/23/EEC) issued by the Commission of the European Community. Compliance with these directives implies conformity to the following European Norms (in parentheses are the equivalent international standards). -
Page 21: Xda Zest Specifications
Xda Zest specifications ITEM SPECIFICATIONS Processor Marvell TavorP 624MHz Operating System Microsoft Windows Mobile 6.1 Professional ® ™ Memory 256 MB NAND Flash ROM 128 MB SDRAM Display 2.8-inch, 480 x 640 TFT Touchscreen Liquid Crystal Display (LCD) with 65,536 colour and back-lighting Frequency band HSDPA 3.6Mbps, UMTS 2100Mhz, EDGE/GPRS/GSM... - Page 22 Weight 120.5g (with battery) Dimension 102 x 60.5 x 16.5 mm Talk time* 3G: up to 3 hrs; 2G: up to 5 hrs Standby time* 3G: up to 220 hrs; 2G: up to 260 hrs * The actual performance is dependent on multiple factors, including network environment and usage behaviour.
-
Page 23: Package Contents
Package contents Check your product package for the following items: Standard items • Xda Zest device with stylus • Y-cable (audio/charging cable) • Battery (1300mAh) • Getting Started CD • AC Adapter • Quick Start Guide • Mini-USB cable • Warranty Card • Headset • CoPilot map SD card NOTE: If any of the above items is damaged or missing, contact your retailer. -
Page 24: Getting To Know Your Xda
Chapter 1 Getting started 1.1 Getting to know your Xda 1.2 Getting your Xda ready 1.3 Starting up 1.4 The Today screen 1.5 Searching for information 1.6 Getting Help... -
Page 25: Front Features
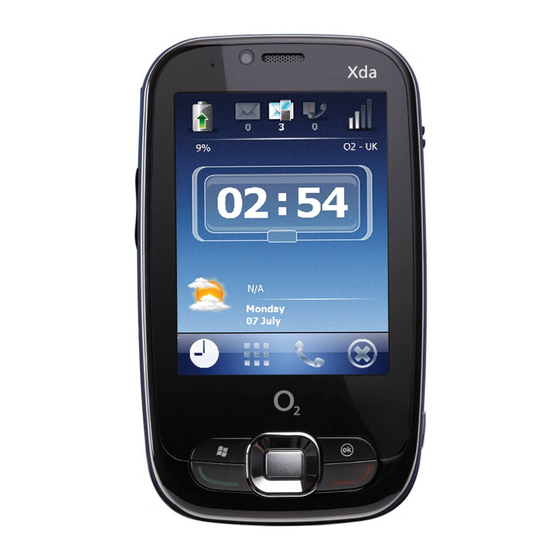
1.1 Getting to know your Xda Zest Front features FEATURE Earpiece receiver Allows you to listen to incoming/outgoing calls. LCD touch screen This 2.8-inch, 65,536-colour, 480 x 640 resolution, touchscreen TFT LCD allows you to write, draw, or make selections using the stylus. -
Page 26: Top Features
Top features Bottom features FEATURE Back features Power key Press and hold to power on/off the Xda. Press to set suspend mode or to wake Xda from sleep mode. Built-in microphone The built-in microphone allows you to make or receive phone calls, record sounds and voices, or give voice commands. -
Page 27: Left Features
Left features Right features FEATURE GPS port Allows you to install a GPS antenna for better signal reception. Volume key Allows you to adjust the volume. Stylus Use the stylus to write, draw, or select items on the screen. Hold key Allows you to disable the keys and the LCD screen. -
Page 28: Getting Your Xda Ready
1.2 Getting your Xda Zest ready Installing the SIM card and battery Before you can make a phone call using your Xda, you need to install a Subscriber Identity Module (SIM) card. The SIM card contains your phone number, subscriber details, phonebook, and additional phone memory. - Page 29 2. Insert the SIM card with its gold contacts facing down and the notched corner oriented to the upper left corner of the slot as shown. 3. Install the battery into the compartment with its copper contacts properly aligned to the copper conductor on the Xda. 4.
-
Page 30: Charging The Battery
Charging the battery The bundled battery is shipped partially charged. Charge the battery up to four hours before using for the first time. To charge battery: 1. Connect the mini-USB cable to the AC adapter. 2. Connect the other end into the mini-USB connector at the bottom of the Xda. 3. -
Page 31: Installing And Removing A Microsd Card
Installing and removing a microSD card Your Xda is equipped with a microSD card slot. A microSD card provides you with extended memory where you can store your files and data. To install/remove a microSD card: 1. Locate the microSD card slot beneath the SIM card slot inside the Xda. -
Page 32: Starting Up
1.3 Starting up Powering your Xda Ensure that your Xda is fully charged before using it for the first time. To turn on power: 1. Press and hold the Power button on top of the Xda. Power button 2. Follow the on-screen instructions to align the screen and set the local time zone. Using the stylus The stylus is a pen-like Xda found behind the upper right corner of your Xda. -
Page 33: Calibrating Your Xda
Calibrating your Xda Calibrating your Xda ensures that the item you tap on the screen is activated. This involves tapping the centre of targets that appear in various locations on the screen. To calibrate your screen: > Settings > System tab, then tap Screen icon. 1. -
Page 34: The Today Screen
The Today screen The Today screen features easy and accessible functions and tools that keep your Xda organised. It features the main window panels (Now Screen, O Menu, and Speed Dial), the quick panel (smart taskbar gestures), the Today plug-in (home, weather forecasts, world time, and photo speed dial), Contacts (smart contact search), Task Manager, colour-based themes, and improved usability for Xda locking. -
Page 35: Status Indicators
Status indicators Refer to the table below for the status indicators. ICON DESCRIPTION Call status Call in progress Call forwarded Call on hold Missed call General Packet Radio Service GPRS available (GPRS) connection status* Connecting via GPRS Connected via GPRS This icon depends on your location and mobile service provider. - Page 36 ICON DESCRIPTION Battery status Battery fully charged Battery partially charged Battery charging Battery low Signal status No cellular phone service No signal Searching for cellular phone service Indicates signal strength Xda off ActiveSync connection status ActiveSync synchronisation in progress Connecting with ActiveSync ActiveSync connection not active Synchronisation error...
- Page 37 ICON DESCRIPTION Sound status Sound ON Sound OFF Wi-Fi status Wi-Fi is not connected Wi-Fi connected Bluetooth headset connection Bluetooth stereo headset connected Hands-free on Roaming service Roaming service. This icon appears if you have international roaming feature. Mode status Vibrate or Meeting mode on Speakerphone status Speakerphone on...
-
Page 38: Main Window Panels
Main Window Panels Screen, Menu, and Speed Dial) work as a shell to your The three main window panels (Now Today screen and do not replace it. All of these panels are designed for a stylus-free navigation and support animated transitions. Using the window panels To use the window panels: • Use the left-right gesture or soft keys to switch between the main window panels. -
Page 39: Now Screen
Now Screen Now Screen gives you a quick and easy way to check your Xda status. You can see your most important information with a quick glance, for the fastest and most direct way to use your Xda. For example, you can open your Inbox to read new emails with just a tap, or with a few key clicks. Professional and Classic. - Page 40 • In the upper middle you have indicators for emails, SMS, and missed calls. For example, when you receive an email you will see the email icon highlighted with the number of new email messages you have in your Inbox. You can open your Inbox to read new email messages with just a tap, or with a few key presses.
-
Page 41: Classic
Classic The Now Screen classic layout provides you with almost the same information you can find in the professional layout. However, some features are different, these are: • The ability to choose between a digital or analogue clock views. • The ability to disable or enable the display of current and upcoming appointments. • The calendar is not available in the classic layout. Menu Menu allows you to quickly and conveniently access an application or feature on your Xda. - Page 42 The nine sub-menu items in O Menu contain these useful features and tools: • Contacts: Under the Phone Book category you can find the O Contacts tool. When you start entering a phone number or contact name, O Contacts will automatically search and sort the contact entries that match the sequence you have entered.
-
Page 43: Speed Dial
Speed Dial Speed Dial allows you to add up to 16 photo contacts of your choice. You can also add a shortcut to the O Contacts on the panel. • From the main window slide your finger in a left-right gesture to go to the Speed Dial panel. You can also have quick access to Speed Dial panel from any application using the taskbar gesture. -
Page 44: Today Plug-In
Today Plug-In The Today Plug-In consists of these four dynamic tab icons: Home, Time, Weather Forecast, Photo Speed Dial. Tap any of these icons to quickly and conveniently access the applications or features on the Xda. Weather Forecast Time Tap to display the weather forecast for a Tap to display the local time of three specific city or area. -
Page 45: Taskbar Smart Gestures
Taskbar Smart Gestures The taskbar smart gestures allow you, if enabled, to select and launch the Screen, Menu, or Speed Dial screen from any application you are in. The gesture panel thumbnails show you a real-time preview of the current panel status. Taskbar Gesture: Now Screen Taskbar Gesture: O Menu... -
Page 46: Enabling The Taskbar Smart Gestures
Enabling the taskbar smart gestures To enable the taskbar smart gestures: Menu. To do this, do any of the following: 1. Launch the • From the Today screen, tap Menu. • Tap > Programs > O Menu. Settings > O Menu. 2. From the O Menu main screen, tap Animation Enable taskbar smart gestures... -
Page 47: Screen Orientation
Screen orientation You can set the screen to three different orientations: 1. Portrait 2. Landscape (right-handed) 3. Landscape (left-handed) Set to Portrait mode to get a better view or better operation of certain applications on your Xda. Set to Landscape when viewing pictures, video or viewing longer text files. To change the screen orientation, tap >... -
Page 48: Searching For Information
1.5 Searching for information The Search tool enables you to search for files and other items stored in your Xda or in the external MicroSD card. You can search by file name or by words located in various applications including the Calendar, Contacts, Excel Mobile, Word Mobile, Help, Messages, Notes, and Tasks. You can also filter your search to files larger than 64 KB. - Page 49 Xda Zest Chapter 2 a call Xda Zest features g a call during a call 2.1 Using the Xda Zest 2.2 Making a call 2.3 Receiving a call 2.4 Options during a call...
-
Page 50: Using The Xda
2.1 Using the Xda Like a standard mobile phone, you can use your Xda Zest to make and receive voice and video calls. You can also keep a history of calls made, missed, and received, send SMS or MMS messages, take notes while talking, call from Contacts, and copy data from an installed SIM card to your Xda. -
Page 51: Adjusting The Volume
Adjusting the volume To adjust the volume: 1. Tap from the status bar. 2. From the volume menu, you can: • Move the slider to adjust the volume. • Tap On, Vibrate, or to change the mode and ringer volume settings. NOTE: You can also press the volume button at the left side of the Xda to adjust the volume. -
Page 52: Making A Call
2.2 Making a call You can make a phone call using the phone pad. You can also make calls directly from the Contacts, Call History, Speed Dial, or Voice Commander. Making a voice call Calling using the Xda pad To make calls using the Xda pad: >... - Page 53 Xda pad features Back arrow Contacts Tap to show/hide the keypad Tap to launch Menu Displays the current call status Tap to mute/unmute a call Tap to launch the Contacts list Tap to turn the speaker on/off Tap to put a call on hold Tap to take notes Tap to launch Call History Tap to switch between keypad and call...
-
Page 54: Calling From Call History
Calling from Contacts To make a call from Contacts: 1. Tap Start > Contacts or from the Today screen, tap Contacts. 2. You can do any of the following to make a call: • Tap name of contact, then tap Call. • Tap name of contact, then press • You can also tap and hold the contact, and from the shortcut menu tap Call Work, Call Home, or Call... -
Page 55: Calling Using The Speed Dial
• : Displays all the calls you received. Call 2. Scroll to the desired contact or phone number, then tap or press Tap Menu to do other tasks such as saving a caller’s contact information to your Contacts list, or send a text message to a caller. 3. Press to end the call. Calling using Smart dialler The Smart dialler feature in your Xda enables you to find a contact more quickly. -
Page 56: Using Voice Commander
2. Tap from the Today screen. 3. Tap Menu > Speed Dial to enter the Speed Dial menu. Tap Menu > New to add a contact. 4. Edit the name and number and select a numeric key for this contact. 5. -
Page 57: Making An Emergency Call
Voice Commander menu. 5. Say “Goodbye” or tap to exit Voice Commander. NOTES: To use Voice Commander while using a headset, press the answer button* on the headset then follow given instructions. (* Answer button may not be available in some headset models.) Some languages may not support the Voice Commander function. -
Page 58: Making An International Call
Making an international call To place an international call: 1. Tap and hold “0“ on the keypad to enter a (+) plus sign. 2. Enter the full phone number with the country code, area code, and phone number, and then press Making a video call IMPORTANT: Before using the video call function, apply for a 3G SIM card from your... -
Page 59: Making A Video Call From Contacts
Making a video call from Contacts To make a video call from Contacts: 1. From the Today screen, tap Contacts. 2. Select a contact and tap Menu > Video Call. 3. When finished, press to end the call. Making a video call from Call History To make a call from the Call History list: Call History. -
Page 60: Video Call Setting
Video Call Setting The Video Call Setting function enables you to set up the video call related features. General settings To set the General settings: 1. Tap > Settings > Personal tab > Video Call Setting > General tab. 2. Select your preferred items. Accept without camera Select the box if you do not want to show your video profile in... -
Page 61: Receiving A Call
NOTE: The service options vary with different service providers. 3. Set the preferences that you want for your selected service option. 4. Tap when finished. 2.3 Receiving a call When you receive a call, a message prompts and allows you to answer or reject the incoming call. To answer or reject an incoming call: •... -
Page 62: Options During A Call
2.4 Options during a call Listed in the table below are the possible menu options for when a call is in progress. Some of these options are available only when multiple calls are in progress or during a conference call. IN-CALL MENU OPTION DESCRIPTION Hold... -
Page 63: Managing Multiple Calls
Managing multiple calls To answer another call: Hold 1. Tap to place the first call on hold and answer the second call. 2. To end the second call and return to the first call, press To hold a call to make a second call: Hold to place the first call on hold and call a second number. - Page 64 Chapter 3 Xda Zest Synchronisation 3.1 Synchronising your Xda Zest 3.2 Microsoft ActiveSync ®...
-
Page 65: Synchronising Your Xda
3.1 Synchronising your Xda Your Xda enables you to synchronise data in your Xda with the data on your computer. You can synchronise contents and transfer data between your Xda and your computer using Microsoft ® ActiveSync on Windows XP platform, or Microsoft Windows Mobile Device Center on ™... - Page 66 • Notes • Favourites • Files • Media You can also exchange data between your computer and Xda without synchronising. ActiveSync is already installed in your Xda, but before you can synchronise data with your computer, you must first install ActiveSync in your computer. You can download the latest ActiveSync program from www.microsoft.com.
-
Page 67: Synchronising Via Mini-Usb
5. Select the information type that you want to synchronise. 6. After you finish the wizard, ActiveSync/Microsoft automatically synchronises your Xda. You ® can disconnect the Xda after the synchronization is complete. NOTES: When connected, your Xda is automatically synchronised with your computer. ActiveSync synchronises every time you make a change on either the Xda or computer. -
Page 68: Synchronising Via Bluetooth
Synchronising via Bluetooth ® NOTE: Ensure that Bluetooth is turned on both on your Xda and your computer. To synchronise your Xda via Bluetooth: 1. Configure the settings of ActiveSync and Bluetooth on your computer. NOTE: Refer to the Microsoft ActiveSync Help on your computer for details. -
Page 69: Synchronising With An Exchange Server
Synchronising with an Exchange Server To synchronise your Xda with Exchange Server: 1. From the ActiveSync screen, tap Menu > Add Server Source... 2. Key in your email address, then tap Next. If you prefer the Xda to detect the Exchange Server Settings automatically, select the check box. - Page 70 Chapter 4 Managing your Xda Zest 4.1 Customising your Xda Zest 4.2 Managing and backing up files...
-
Page 71: Customising Your Xda
4.1 Customising your Xda Zest Customising the Start menu You can choose up to seven programs to appear in the Start menu. To customise the Start menu: > Settings > Menus. 1. Tap 2. Select up to seven programs that you want to be on the Start menu. -
Page 72: Customising The Now Screen
To change the background image: 1. Tap > Settings > Personal tab > Today. Appearance Use this picture as the background 2. From tab, select the box of and tap Browse. Then tap an image to use as the background image. 3. -
Page 73: Customising The Today Plug-In
Customising the Today Plug-In To customise the Today Plug-In: Menu. To do this, do any of the following: 1. Launch the • From the Today screen, tap Menu. > Programs > O Menu. • Tap Settings > O Menu. 2. From the O Menu main screen, tap 3. -
Page 74: Customising The Gestures
3. From the Tabs tab, set up the necessary settings. You can move up, move down, add and replace the item. 4. Tap when finished. Customising the gestures To customise the gestures: Menu. To do this, do any of the following: 1. -
Page 75: Customising The O Menu
Customising the O Menu To customise the O Menu: Menu. To do this, do any of the following: 1. Launch the • From the Today screen, tap Menu. • Tap > Programs > O Menu. Settings > O Menu. 2. From the O Menu main screen, tap Advance tab, tap Menu. -
Page 76: Setting Sounds And Notifications
Setting Sounds and Notifications This function enables you to customise the sounds for ring tones, notifications, reminders, alert, warnings, email, text message, and key tones. The Xda comes with some polyphonic ring tones from which you can choose. To change the sound: >... -
Page 77: Setting The Ring Tone
To set the alarm: 1. Tap > Settings > System tab > Clock and Alarms. Alarm 2. On the tab, enter the necessary alarm settings. 3. Tap Setting the ring tone With your Xda you can add and configure your favourite music as your ring tone. You can easily configure your favourite song or sound as your ring tone with the following compatible audio formats: aac, amr, .mp3, .wav, .wma, and .mid. -
Page 78: Wake-Up Settings
Changing the ring tone To change the ring tone: 1. Tap > Settings > Personal tab > Phone. 2. On the Phone tab, select a ring tone from the Ring tone list box. The songs or sounds that you added as ring tone appears on this list along with the default ring tones that came with the Xda. -
Page 79: Managing And Backing Up Files
4.2 Managing and backing up files To manage your files, you can use the File Explorer or a storage card (microSD card) on your Xda or the ActiveSync on your PC. You can back up files to your PC using ActiveSync or copy files to a storage card on your Xda. You can also efficiently manage your files and folders using the File Explorer program on your Xda. -
Page 80: Using The File Explorer
Using File Explorer File Explorer allows you to manage the files and folders on your Xda just like you do on your PC. To start File Explorer 2.1 Using th • Tap > Program > File Explorer. Once in the File Explorer application, you can do the following: 2.2 Making a DO THIS 2.3 Receiving... -
Page 81: Chapter 5: Getting Connected
Xda Zest Chapter 5 a call Getting connected g a call during a call 5.1 Using the Wireless Manager 5.2 Using Bluetooth ® 5.3 Using Wi-Fi 5.4 Setting the GPRS connection 5.5 Setting the network 5.6 GSM/3G networks 5.7 Using the Opera Mobile... -
Page 82: Using The Wireless Manager
5.1 Using the Wireless Manager The Wireless Manager allows you to enable/disable the flight mode function; enable/disable Wi-Fi, Wireless, Bluetooth and phone connections; use your Xda as an external modem; and disable/enable Direct Push. Enabling/disabling flight mode Your Xda allows you to enable flight mode before taking an onboard flight. -
Page 83: Using Your Xda As An External Modem
2. Tap the Wi-Fi, Bluetooth, or GPRS icons to turn on any of these wireless connections. The selected icon turns blue when enabled. To disable a wireless connection, tap the icon of the wireless connection that you want to turn off. The icon turns gray when disabled. Using your Xda as an external modem With Internet Sharing, you can use your Xda to connect your PC to the Internet. -
Page 84: Using Direct Push
4. From the Network Connection list, select the network that your Xda will use to connect to the Internet. 5. Tap Connect. Allow a few seconds for your Xda to establish the Internet connection. Using Direct Push Direct Push is a technology that allows you to continuously retrieve email messages even without synchronising your Xda with your PC. -
Page 85: Using Bluetooth
5.2 Using Bluetooth ® Bluetooth is a short-range wireless communication technology that allows devices with ® Bluetooth capabilities to exchange data within a radius of about 10 meters (30 feet) without requiring a physical connection. With Bluetooth enabled in your Xda, you can: • Connect and communicate, such as beam files, tasks, or contacts, with other Bluetooth- enabled devices. -
Page 86: Adding Bluetooth Devices
Adding Bluetooth devices To add Bluetooth devices: 1. Ensure that Bluetooth is enabled on the device you want to add and the device is set as visible. 2. Tap > Settings > Connections tab > Bluetooth. Add new device... 3. Tap to search for available Bluetooth devices. -
Page 87: Using Wi-Fi
5.3 Using Wi-Fi NOTE: Bluetooth and Wi-Fi share the same frequency band depending on the environment and wireless equipment being connected. Hence, performance may vary if both the device’s Bluetooth and Wi-Fi features are used simultaneously. Turning on Wi-Fi To turn on Wi-Fi: > Settings > Connections tab > Wi-Fi Manager > Menu > Turn On Wi-Fi. -
Page 88: Configuring Wireless Networks
Configuring wireless networks To configure a wireless network: 1. To launch the Wi-Fi settings page, you can either: • Tap > Settings > Connections tab > Wi-Fi. Settings > Wi-Fi. • Tap from the status bar and then tap 2. On the Configure Wireless Networks screen, tap an available wireless network, then make the necessary changes. -
Page 89: Using Wi-Fi Manager
3. Set authentication, data encryption, and network key. Ask your network administrator for this information. Then tap Next. NOTE: Obtain the authentication, data encryption, and network key from your network administrator. 4. If you need to change the EAP type, check the check box and then change the EAP type. 5. - Page 90 • IP Info This page shows the network information and provides a way to get the new IP address from the DHCP server. Renew button enables you to request the DHCP server for a new IP address. This function would take several seconds to get the new IP address. The Ping button serves as the network’s diagnostic tool. It enables you to detect if your Xda is connected to the network.
-
Page 91: Setting The Gprs Connection
5.4 Setting the GPRS connection Your Xda allows you to connect via General Packet Radio Service (GPRS). GPRS is a wireless communication standard. It supports a wide range of bandwidth that allows sending and receiving small bursts of data, such as email and web browsing. To set a GPRS connection in your Xda: 1. -
Page 92: Connecting Gprs
Connecting GPRS To connect GPRS: > Settings > Connections tab > Connections. 1. Tap 2. From the Connections screen, tap Manage existing connections. 3. Tap and hold on an existing connection then from the pop-up menu tap Connect. Delete if you want to delete the selected connection. 4. -
Page 93: Disconnecting Gprs
Disconnecting GPRS To disconnect GPRS: > Settings > Connections tab > Wireless Manager. 1. Tap 2. Tap the GPRS icon. The icon turns grey when disabled. NOTES: You can only disconnect but you cannot enable the GPRS connection in the Wireless Manager application. -
Page 94: Setting The Network
5.5 Setting the network Your Xda enables you to configure your Xda’s network connection as well as set multiple networks in the order that you want to access them. Configuring the network To configure the network settings: > Programs > O Connection Settings. 1. Tap 2. Select the Country Profile from the drop-down lists. 3. -
Page 95: Gsm/3G Networks
5.6 GSM/3G Networks GSM/3G Networks allows you to conveniently switch network type. Network options include Automatic, 3G, and GSM. The default setting is Automatic, which allows the Xda to search for the proper service automatically. To choose network type: 1. Tap >... -
Page 96: Using The Opera Mobile
5.7 Using the Opera Mobile Opera Mobile enables you to browse the Internet on your Xda. It allows you to import your favourite links from Internet Explorer; send links as email/SMS/MMS messages; and download images and copy texts from web pages. To launch the Opera Mobile, tap >... - Page 97 DO THIS Action > Save This Page. Save a web page Manage saved web pages Menu > Tools > Settings > Manage Saved Pages. Tap Menu to add or delete saved web pages. Bookmark a favourite web page Action > Bookmark This Page.
-
Page 98: Using The Internet Explorer Mobile
5.8 Using the Internet Explorer Mobile Use the Internet Explorer Mobile to browse the Internet on your Xda. With the Internet ® Explorer Mobile, you can add a website to your favorites list; send a web link via SMS/MMS/ ® email messaging;... - Page 99 DO THIS Menu > Tools > History, and select a web page. Viewing a web page from your History list Clear history, or temporary files Menu > Tools > Options... > Memory tab. Send a web link via email/SMS/ Select the web page that you want send. Tap Menu >...
- Page 100 Chapter 6 Messaging 6.1 Entering text and numbers 6.2 Email messaging 6.3 Threaded SMS 6.4 MMS messaging 6.5 Windows Live ®...
-
Page 101: Entering Text And Numbers
6.1 Entering text and numbers Using the Input Panel When you start an application or select a field that requires text, symbols, or numbers, the Input Panel icon appears on the menu bar. The Input Panel allows you to select various input methods Block Recogniser, Keyboard, Letter... -
Page 102: Using The On-Screen Keyboard
Using the on-screen keyboard With the on-screen keyboard, you can enter texts, symbols, numbers, or other special characters. To input text using the on-screen keyboard: 1. In an application that accepts user input, tap the Input Panel arrow, then tap Keyboard. 2. -
Page 103: Using The Letter Recogniser
Using the Letter Recogniser With the Letter Recogniser you can write individual letters, numbers, or special characters, which are converted into typed text. To use the Letter Recogniser: 1. In an application that accepts user input, tap the Input Panel arrow, then tap Letter Recogniser. -
Page 104: Using The Transcriber
Using the Transcriber Transcriber is a handwriting recognition program that allows you to write in cursive, print, or mixed styles. It recognises not only written text but also numbers and symbols. Make sure to write legibly. See Help for more information on the Transcriber. To use the Transcriber: 1. -
Page 105: Using The Xt9 Input Mode
Using the XT9 input mode The XT9 input mode enhances your text input as it provides you with possible word matches as you key in your text in a text entry, such as SMS messaging. To use the XT9 input mode: 1. -
Page 106: Email Messaging
6.2 Email messaging Setting up an email account Before you can send and receive email messages, you need to set up an email account that you have with an Internet Service Provider (ISP) or an account that you access using a VPN server connection (typically a work account). -
Page 107: Managing Email Accounts
5. From the drop-down list, select the time interval that you want to automatically send/receive email messages. If you want to view more download settings, tap Review all download settings, and select your preferred download settings. 6. When done, tap Finish. Managing email accounts DO THIS View a list of accounts... -
Page 108: Sending An Email Message
Sending an email message To send an email message: Messaging. 1. Tap > 2. Tap an email account. Menu > New. 3. Tap 4. In To: field, enter email address of the person to whom you want to send the message or tap Menu >... -
Page 109: Downloading Email Messages
DO THIS Insert a picture/voice note/file into an While composing your message, tap Menu > Insert > Picture/ email message Voice Note/File. Set the priority, security, permission, While composing your message, tap Menu > Message Options. and language of an email message Cancel a message While composing your message, tap Menu >... -
Page 110: Synchronising Email Messages
Synchronising email messages You can include email messages as part of the general synchronisation process. On Windows ® XP platform, you need to enable mail synchronisation in Microsoft ActiveSync. For more ® information on enabling mail synchronisation, see the ActiveSync online help on your computer. On Windows Vista platform, you can synchronise your email messages via the Windows Mobile... -
Page 111: Managing Folders
Managing folders Each Messaging account has a set of five folders: Deleted Items, Drafts, Inbox, Outbox, and Sent Items. These folders store messages that you send and receive through the account. You can move a message to a different folder within the same account. DO THIS View message folder contents >... -
Page 112: Threaded Sms
6.3 Threaded SMS Your Xda organises your SMS messages from a single contact or number into a single thread of conversation, making it easier for you to follow the messaging flow and send the appropriate responses. Sending a threaded SMS To send a threaded SMS message: >... -
Page 113: Mms Messaging
6.4 MMS messaging Multimedia Messaging System (MMS) allows you to send text messages with multiple slides. Each slide may include a picture, video or audio, or text. MMS messages are sent by GPRS (General Packet Radio Service) to email accounts or other MMS-enabled mobile devices. NOTES: You need to subscribe to the GPRS and MMS services with your service provider before you can send and receive MMS messages. -
Page 114: Sending An Mms Message
MMSC Settings Edit 3. On the tab, select your Internet Service Provider from the list. Tap to access Multimedia Messaging Service Centre (MMSC) settings. NOTE: Contact your mobile service provider for the detailed settings. Sending an MMS message To send an MMS message: >... - Page 115 The following assumes that you are on the MMS message screen. DO THIS Copy the message to other recipients Using the stylus, move the scroll bar to display the field. Key in the recipient‘s phone number or email address or tap Menu >...
-
Page 116: Windows Live
6.5 Windows Live ® Windows Live provides a set of services including email, messaging, and search that brings ® all your online necessities together. With Windows Live, you can conveniently do the following ® on your Xda: • Access your Hotmail, Messenger, or Microsoft Exchange account and send or receive email messages. • Start a chat with your friends who are online. - Page 117 5. Tap the check boxes to show or hide Windows Live items on the Today screen, then ® tap Next. 6. Select the items you want to synchronise on your Xda, then tap Next. Wait for a few minutes for the synchronisation process to finish. The next time you sign in to Windows Live, your username and password is displayed.
-
Page 118: Using Windows ® Live Messenger
Using Windows Live Messenger ® To sign in and out of Windows Live Messenger: ® 1. Set email address and password in Windows Live. ® 2. When the setting is finished, tap > Programs > Messenger. Signing 3. On the Windows Live Messenger main screen, tap ®... - Page 119 DO THIS Switch to another chat session In the list of ongoing chats displayed at the bottom of screen, tap the name of a contact with whom you want to chat. Return to the contacts list at the bottom of the screen. End a chat session From a chat session, tap Menu >...
-
Page 120: Chapter 7: Organising Your Life
Chapter 7 Organising your life 7.1 Using Contacts 7.2 Using Calendar 7.3 Using Tasks 7.4 Microsoft Mobile Device Manager 2008 ®... -
Page 121: Using Contacts
7.1 Using Contacts Contacts contains your list of contact information such as mobile or work numbers and email addresses. Using Bluetooth on the Xda, you can quickly share Contacts information with other ® Xda users. If you use Outlook on your computer, you can synchronise Contacts between your Xda and computer. - Page 122 DO THIS On the Today screen, tap Contacts. Tap the contact you want to call and use the Call a contact from the contact list stylus to scroll to the number you want to call, and tap Call. On the Today screen, tap Contacts. Tap the contact to which you want to send Send a text message to a contact a text message and scroll to the number.
-
Page 123: Using The Sim Manager
Using the SIM Manager SIM Manager enables you to manage your contacts stored in the SIM card, as well as to copy contacts from your Xda to the SIM card and vice versa. > Programs > SIM Manager. To launch the SIM Manager, tap DO THIS Create a new contact and then key in the contact name and phone number. -
Page 124: Using Calendar
7.2 Using the Calendar Use Calendar to schedule appointments, including meetings and other events. You can also set the Calendar to remind you of your appointments. If you use Outlook on your computer, you can synchronise appointments between your Xda and computer. To open the Calendar program, tap Calendar. -
Page 125: Viewing An Appointment
Viewing an appointment To view an appointment: Calendar. 1. Tap > 2. Tap the appointment to view. Viewing your schedule DO THIS To view your schedule: Menu View today’s From any Calendar view, tap > Go to Today. appointment Calendar. 1. Tap >... -
Page 126: Using Tasks
7.3 Using Tasks Use Tasks to keep track of what you have to do. The Tasks list The task list is your “things to do” list. When you create or edit tasks with Outlook on your computer and then synchronise it with your Xda, additional information, such as due date, priority, and category, may show. - Page 127 DO THIS Change a completed task to > Programs > Tasks. Select a completed task, then press incomplete Activate to change status to incomplete. Find a task > Programs > Tasks. Tap Menu > Sort by and select a Menu > Filter sort option or and select a category.
-
Page 128: Microsoft Mobile Device Manager 2008
7.4 Microsoft Mobile Device Manager 2008 ® Microsoft® System Centre Mobile Device Manager 2008 provides organisations with enhanced security and control over mobile devices within their organisations, and gives mobile employees access to corporate resources such as confidential information on corporate networks with firewalls. 2.1 Using th Using Mobile Device Manager 2008 2.2 Making a... -
Page 129: Chapter 8: Gps Features
Xda Zest Chapter 8 a call GPS features g a call during a call 8.1 GPS Catcher 8.2 External GPS 8.3 CoPilot Live 7... -
Page 130: Gps Catcher
8.1 GPS Catcher The GPS Catcher allows you to update the Global Positioning System (GPS) data in your Xda. The GPS data contains important information about the status of satellite, and the current date and time for determining the satellite position. Updating GPS data To update GPS data: 1. -
Page 131: Setting Gps Catcher
Setting GPS Catcher To set GPS Catcher: Menu > Setting. 1. From the GPS Catcher screen, tap 2. Set the options according to your preference. Tap Done when finished. 8.2 External GPS Your Xda allows you to use an external GPS device to receive GPS data. NOTES: Your Pocket PC support only Bluetooth-enabled external GPS devices. - Page 132 Hardware 3. From the tab, specify a hardware port and baud rate for your external GPS device to use. NOTE: By default, the hardware port is set to COM2, and the baud rate is set to 57600. Refer to the Full User Manual of your external GPS device for details.
-
Page 133: Copilot Live 7
CoPilot Live 7 is a satellite navigation software that is pre-loaded on your Xda to guide you wherever you go – simply, safely, and reliably. You have 14 days to explore a full featured version of CoPilot Live 7 on your Xda. To continue enjoying its features, buy the full licence at www.copilotlive.co.uk/o2 before the end of the 14-day trial period. NOTES: Ensure that you set the correct location, date, and time on your Xda to enjoy the best GPS functionality. - Page 134 Subscription Alert 3. In the screen, the remaining days on your free trial version is displayed. Cancel to use the free trial version. NOTE: The CoPilot Live 7 trial version on your Xda expires in 14 days. After it expires, you need to buy the full licence at www.copilotlive.co.uk/o Refer to Using the licensed version for more details.
-
Page 135: Using The Licensed Version
Welcome 4. After setting up the initial settings, the screen appears. The Welcome screen includes a quick menu which allows you to easily enter a Destination, select your Favourites, access your Settings, or Drive to set off. To close the quick menu tap NOTE: Tips and tricks are displayed at start-up to let you learn more about the various features of CoPilot. - Page 136 Activating using the Internet connection on your Xda • Tap Internet and then tap Next. • Enter your email address when requested and tap Next. Activating using the Internet connection on your PC • Connect your Xda to a PC with an Internet connection using the synchronisation software and cable supplied with your device. Internet and then tap Next. • Tap • Enter your email address when requested and tap Next.
-
Page 137: Navigating Your First Trip
Navigating your first trip CoPilot Live uses GPS satellites to calculate your exact position so you do not have to enter your starting point. Simply enter your destination and CoPilot Live will take you there, providing detailed instructions all the way. To navigate your first trip: Menu >... -
Page 138: More Navigation Tips
More navigation tips There is more you can do when inputting your destination and setting off. > Plan or Edit Trip. • To plan a trip with multiple destinations, tap Menu > • To set and save your Home address for quick and easy route planning, tap Menu > Destination > Home. • To create and manage your favourite destinations, tap Menu > Destination > Favourites. Change the driving view CoPilot Live has a selection of different driving views. -
Page 139: Safety Camera Alerts
Safety camera alerts Safety alerts let you know where safety cameras are located. To enable this feature or to adjust Menu > > Safety Alerts. the warning distance select >Settings > Taking a detour You can programme CoPilot Live to make a detour from your current route. You can choose an alternate route, or just detour around a section of the route. -
Page 140: Chapter 9 Multimedia Features
Chapter 9 Multimedia features 9.1 Working with photos and videos... -
Page 141: Working With Pictures And Videos
9.1 Working with pictures and videos The built-in 3.0 megapixel camera allows you to take photos and record audio/video clips. After you have taken the photos and video clips, you can organise, edit, beam or send them using a messaging application. Using the camera To start using the camera, do either of the following: • Tap... -
Page 142: Camera Features
Camera features Scene mode Macro mode Timer Burst Picture size Tap to close Tap to preview Pictures the camera and Videos Tap to set to Tap to set to video mode Frame mode Tap to set to camera mode Tap to set to GPS mode Tap to switch mode Tap to set to... -
Page 143: Taking Photos
Taking photos After launching the camera, your Xda is set to Camera mode by default. You can switch between camera and video mode by tapping the camera/video mode icon on the screen. To take photos: 1. Aim Xda to your subject then half-press the camera button to auto-focus on the subject. While the camera button is half-pressed, the auto-focus frame appears on the centre of the screen. -
Page 144: Recording Videos
Recording videos To record videos, set the Xda to video capture mode. To set video mode: • Tap the video mode icon on the screen. To record video: 1. Aim Xda to your subject then half-press the camera button to auto-focus on the subject. While the camera button is half-pressed, the auto-focus frame appears on the centre of the screen. -
Page 145: Organising Your Pictures And Videos
Organising your photos and videos Use the Pictures and Videos application to preview stored images and playback video clips. > Programs > Pictures and Videos. To launch the application, tap DO THIS Set the photo scene Set to Camera Mode. Select Menu >... - Page 146 DO THIS View a picture or a video clip Select the picture or video clip you want to view and tap View Menu > Delete a picture or a video clip Select the picture or video clip you want to delete and tap Delete.
- Page 147 DO THIS Menu > Email a picture or video clip Select the picture or video clip you want to send and tap Send. Select Outlook Email and tap Select. A new email message is created with the file attached. Enter the recipient’s email address, the subject, and your message; and tap Send. Send a picture or video clip Select the picture or video clip you want to send and tap Menu >...
-
Page 148: Chapter 10: O Features And Applications
2.1 Using th Chapter 10 2.2 Making a Features and Applications 2.3 Receiving 2.4 Options 10.1 Newstation 10.2 Microsoft Office Mobile ® 10.3 Adobe Reader LE... -
Page 149: Newstation
10.1 Newstation With the Newstation in your Xda, you can conveniently browse news and blogs anywhere and anytime. he Xda Zest NOTE: Ensure that your Xda is connected to Internet when using Newstation. a call g a call Using Newstation... -
Page 150: Using Newstation Menus
To add a channel: 1. Tap > Programs > Newstation, then tap a category folder to open. Menu > New Channel. You can add a channel from either Internet or an existing file. 2. Tap • Input from URL Input from URL and enter the URL address. -
Page 151: Channel Menu
Channel Menu To use the channel menu: > Programs > Newstation. 1. Tap 2. Tap a category folder, then select a channel and tap Menu. 3. Tap an option that you need. Subject Menu To use the subject menu: > Programs > Newstation. -
Page 152: Microsoft ® Office Mobile
10.2 Microsoft Office Mobile ® Your Xda comes with pre-installed Microsoft Office Mobile applications which enable you to ® create, view, and edit spreadsheets, presentations, note, and word files on your Xda. Use these applications like you would normally use the Office applications on your computer. >... -
Page 153: Excel ® Mobile
Excel Mobile ® Excel Mobile enables you to view, and edit spreadsheets on your Xda. Any editing or formatting ® done on a spreadsheet file is kept intact even when you open the spreadsheet file on your computer. Excel Mobile is compatible with Microsoft Office Excel 2007. -
Page 154: Adobe Reader Le
> Programs > Adobe Reader Service and Support For more information about your O Xda Zest, answers to Frequently Asked Questions, documentation and software upgrades, please visit www.seeO2.com. You can also register online to receive information on updates and promotions.