Table of Contents
Advertisement
Before use, please read these instructions completely.
Model number suffix "EB" denotes UK model.
EB
Basic Operating Instructions
More detailed instructions on the
operation of this camera are
contained in "Operating
Instructions for Advanced Features (PDF
format)" in the supplied CD-ROM. Install it on
your PC to read it.
Web Site: http://www.panasonic-europe.com
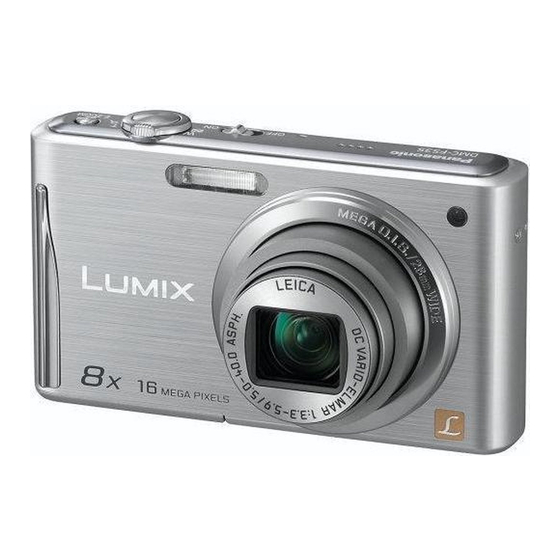
Digital Camera
DMC-FS35
Model No.
DMC-FS18
DMC-FS16
DMC-FS14
VQT3D41
Advertisement
Table of Contents

Related Manuals for Panasonic Lumix DMC-FS35


Summary of Contents for Panasonic Lumix DMC-FS35
-
Page 1: Basic Operating Instructions
More detailed instructions on the operation of this camera are contained in “Operating Instructions for Advanced Features (PDF format)” in the supplied CD-ROM. Install it on your PC to read it. Web Site: http://www.panasonic-europe.com Model number suffix “EB” denotes UK model. VQT3D41... -
Page 2: Information For Your Safety
Dear Customer, We would like to take this opportunity to thank you for purchasing this Panasonic Digital Camera. Please read these Operating Instructions carefully and keep them handy for future reference. Please note that the actual controls and components, menu items, etc. of your Digital Camera may look somewhat different from those shown in the illustrations in these Operating Instructions. -
Page 3: Caution For Ac Mains Lead
IMPORTANT Caution for AC mains lead The wires in this mains lead are coloured For your safety, please read the following in accordance with the following code: text carefully. Blue: Neutral, Brown: Live. This appliance is supplied with a moulded As these colours may not correspond with the coloured markings identifying the three pin mains plug for your safety and... - Page 4 ∫ About the battery pack CAUTION Danger of explosion if battery is incorrectly replaced. Replace only with the same or equivalent type recommended by the manufacturer. Dispose of used batteries according to the manufacturer’s instructions. • Do not heat or expose to flame. •...
-
Page 5: Cautions For Use
∫ About the battery charger CAUTION! • DO NOT INSTALL OR PLACE THIS UNIT IN A BOOKCASE, BUILT-IN CABINET OR IN ANOTHER CONFINED SPACE. ENSURE THE UNIT IS WELL VENTILATED. TO PREVENT RISK OF ELECTRIC SHOCK OR FIRE HAZARD DUE TO OVERHEATING, ENSURE THAT CURTAINS AND ANY OTHER MATERIALS DO NOT OBSTRUCT THE VENTILATION VENTS. - Page 6 Information for Users on Collection and Disposal of Old Equipment and used Batteries These symbols on the products, packaging, and/or accompanying documents mean that used electrical and electronic products and batteries should not be mixed with general household waste. For proper treatment, recovery and recycling of old products and used batteries, please take them to applicable collection points, in accordance with your national legislation and the Directives 2002/96/EC and 2006/66/EC.
-
Page 7: Table Of Contents
Contents Information for Your Safety ................2 Accessories....................8 Names of the Components ................. 10 Charging the Battery ................... 13 • Charging ....................13 • Approximate operating time and number of recordable pictures ..15 About the Built-in Memory/the Card ............16 Inserting and Removing the Card (optional)/the Battery ...... -
Page 8: Accessories
Accessories Check that all the accessories are supplied before using the camera. Product numbers correct as of January 2011. These may be subject to change. ¢ Battery Pack (Indicated as battery pack or battery in the text) Charge the battery before use. Battery Charger (Indicated as battery charger or charger in the text) -
Page 9: Optional Accessories
SD Memory Card 2 GB: RP-SDN02GE1A ¢ The AC Adaptor (optional) can only be used with the designated Panasonic DC Coupler (optional). The AC adaptor (optional) cannot be used by itself. Some optional accessories may not be available in some countries. -
Page 10: Names Of The Components
Names of the Components Flash (DMC-FS35) Lens Self-timer indicator AF Assist Lamp (DMC-FS18) (DMC-FS16) (DMC-FS14) LCD monitor [MENU/SET] button [DISP.] button [Q.MENU]/Delete/Cancel button [MODE] button [Rec]/[Playback] selector switch VQT3D41 (ENG) - Page 11 10 Cursor buttons A: 3/Exposure compensation B: 4/Macro Mode AF Tracking C: 2/Self-timer D: 1/Flash setting In these operating instructions, the cursor buttons are described as shown in the figure below or described with 3/4/2/1. e.g.: When you press the 4 (down) button Press 4 Strap eyelet •...
- Page 12 19 (DMC-FS35) [E.ZOOM] button 20 Tripod receptacle 21 Card/Battery door 22 DC coupler cover • When using an AC adaptor, ensure that the Panasonic DC coupler (DMW-DCC10; optional) (DMC-FS18) (DMC-FS16) (DMC-FS14) and AC adaptor (DMW-AC5E; optional) are used. 14 15 •...
-
Page 13: Charging The Battery
Please be advised that we are not liable for any accident or failure occurring as a result of use of a counterfeit battery pack. To ensure that safe products are used we would recommend that a genuine Panasonic battery pack is used. • Use the dedicated charger and battery. -
Page 14: Charging Time
∫ About the [CHARGE] indicator The [CHARGE] indicator turns on: The [CHARGE] indicator A is turned on during charging. The [CHARGE] indicator turns off: The [CHARGE] indicator A will turn off once the charging has completed without any problem. • When the [CHARGE] indicator flashes –... -
Page 15: Approximate Operating Time And Number Of Recordable Pictures
• Temperature: 23 oC (73.4 oF)/Humidity: 50%RH when LCD monitor is on. • Using a Panasonic SD Memory Card (32 MB). • Starting recording 30 seconds after the camera is turned on. (When the Optical Image Stabilizer function is set to [ON].) •... -
Page 16: About The Built-In Memory/The Card
Memory Card compatible equipment. • Check that the PC and other equipment are compatible when using the SDXC Memory Cards. SDXC Memory Card http://panasonic.net/avc/sdcard/information/ (48 GB, 64 GB) SDXC.html • Only the cards with capacity listed left can be used. -
Page 17: Inserting And Removing The Card (Optional)/The Battery
Inserting and Removing the Card (optional)/the Battery • Check that this unit is turned off. • We recommend using a Panasonic card. (DMC-FS35) Slide the card/battery door to open it. • Always use genuine Panasonic batteries (NCA-YN101H; supplied or DMW-BCK7E; optional). - Page 18 (DMC-FS18) (DMC-FS16) (DMC-FS14) Slide the release lever in the direction of the arrow and open the card/battery door. • Always use genuine Panasonic batteries (NCA-YN101H; supplied or DMW-BCK7E; optional). • If you use other batteries, we cannot guarantee the quality of this product.
-
Page 19: Setting Date/Time (Clock Set)
Setting Date/Time (Clock Set) • The clock is not set when the camera is shipped. Slide the [Rec]/[Playback] selector switch to [ ] and then turn the camera on. Press [MENU/SET]. Press 2/1 to select the items (year, month, day, hour, minute, display sequence or time display format), and press 3/4 to set. -
Page 20: Selecting The [Rec] Mode
Selecting the [Rec] Mode Slide the [Rec]/[Playback] selector switch to [!]. Press [MODE]. Press 3/4/2/1 to select the mode. Press [MENU/SET]. ∫ List of [Rec] Modes Intelligent Auto Mode ¦ The subjects are recorded using settings automatically selected by the camera. Normal Picture Mode The subjects are recorded using your own settings. -
Page 21: Taking Pictures Using The Automatic Function ( Ñ : Intelligent Auto Mode)
ñ [Rec] Mode: Taking pictures using the automatic function : Intelligent Auto Mode) ñ The camera will set the most appropriate settings to match the subject and the recording conditions so we recommend this mode for beginners or those who want to leave the settings to the camera and take pictures easily. -
Page 22: Scene Detection
Scene Detection When the camera identifies the optimum scene, the icon of the scene concerned is displayed in blue for 2 seconds, after which its colour changes to the usual red. > [i-Portrait] ¦ [i-Scenery] [i-Macro] • [i-Night Portrait] Only when [ ] is selected [i-Night Scenery] [i-Sunset]... -
Page 23: Motion Picture Mode
[Rec] Mode: Motion Picture Mode Slide the [Rec]/[Playback] selector switch to [!], and then press [MODE]. Press 3/4/2/1 to select [Motion Picture], and then press [MENU/SET]. Press the shutter button halfway to focus and then press it fully to start recording. -
Page 24: Playing Back Pictures ([Normal Play])
¸ [Playback] Mode: Playing Back Pictures ([Normal Play]) Slide the [Rec]/[Playback] selector switch to [(]. Press 2 or 1. • After selecting the motion picture, press 3 to start playback. ¸ [Playback] Mode: Deleting Pictures Once deleted, pictures cannot be recovered. •... -
Page 25: Setting The Menu
Setting the Menu Press [MENU/SET]. Press 2/1 to select menu and then press [MENU/SET]. Press 3/4 to select the menu item and then press [MENU/SET]. • Screen at right is an example of selecting [AF Mode] in [Rec] mode Menu. Press 3/4 to select the setting and then press [MENU/SET]. -
Page 26: Reading The Operating Instructions (Pdf Format)
Reading the Operating Instructions (PDF format) More detailed instructions on the operation of this camera are contained in “Operating Instructions for Advanced Features (PDF format)” in the supplied CD-ROM. Install it on your PC to read it. ∫ For Windows Turn the PC on and insert the CD-ROM containing the Operating Instructions (supplied). - Page 27 OS from the following Web Site. http://get.adobe.com/reader/otherversions ∫ To uninstall the Operating Instructions (PDF format) Delete the PDF file from the “Program Files\Panasonic\Lumix\” folder. • When the contents in the Program Files folder cannot be displayed, click the [Show the contents of this folder] to display them.
-
Page 28: Specifications
Specifications Digital Camera: Information for your safety Power Source: DC 5.1 V Power Consumption: 1.1 W (When recording) 0.7 W (When playing back) Camera effective (DMC-FS35) (DMC-FS18) pixels 16,100,000 pixels (DMC-FS16) (DMC-FS14) 14,100,000 pixels Image sensor (DMC-FS35) (DMC-FS18) 1/2.33q CCD, total pixel number 16,600,000 pixels, Primary colour filter (DMC-FS16) (DMC-FS14) 1/2.33q CCD, total pixel number 14,500,000 pixels,... - Page 29 Focus range Normal (DMC-FS35) 50 cm (1.64 feet) (Wide)/2 m (6.56 feet) (Tele) to ¶ (DMC-FS18) (DMC-FS16) (DMC-FS14) 50 cm (1.64 feet) (Wide)/1 m (3.28 feet) (Tele) to ¶ Macro/ 5 cm (0.17 feet) (Wide)/1 m (3.28 feet) Intelligent auto/ (Tele) to ¶...
- Page 30 LCD monitor 2.7q TFT LCD (4:3) (Approx. 230,000 dots) (field of view ratio about 100%) Flash range (DMC-FS35) Approx. 60 cm (1.97 feet) to 5.8 m (19.0 feet) (Wide, [ ] is set) (DMC-FS18) (DMC-FS16) (DMC-FS14) Approx. 40 cm (1.32 feet) to 3.3 m (10.8 feet) (Wide, [ ] is set) Microphone...
- Page 31 10%RH to 80%RH Battery Charger (Panasonic DE-A92A): Information for your safety Input: 110 V to 240 V, 50/60 Hz, 0.2 A Output: 4.2 V, 0.43 A Battery Pack (lithium-ion) (Panasonic NCA-YN101H): Information for your safety Voltage/capacity: 3.6 V/660 mAh (ENG) VQT3D41...
- Page 32 Other names, company names, and product names printed in these instructions are trademarks or registered trademarks of the companies concerned. Pursuant to at the directive 2004/108/EC, article 9(2) Panasonic Testing Centre Panasonic Marketing Europe GmbH Winsbergring 15, 22525 Hamburg, Germany Panasonic Corporation Web Site: http://panasonic.net VQT3D41 ...