Polaroid HD-READY DIGITAL LCD User Manual
32”/37” 16:9 hd-ready digital lcd
Hide thumbs
Also See for HD-READY DIGITAL LCD:
- User manual (45 pages) ,
- User manual (42 pages) ,
- User manual (40 pages)
Table of Contents
Advertisement
Advertisement
Table of Contents

Related Manuals for Polaroid HD-READY DIGITAL LCD


Summary of Contents for Polaroid HD-READY DIGITAL LCD
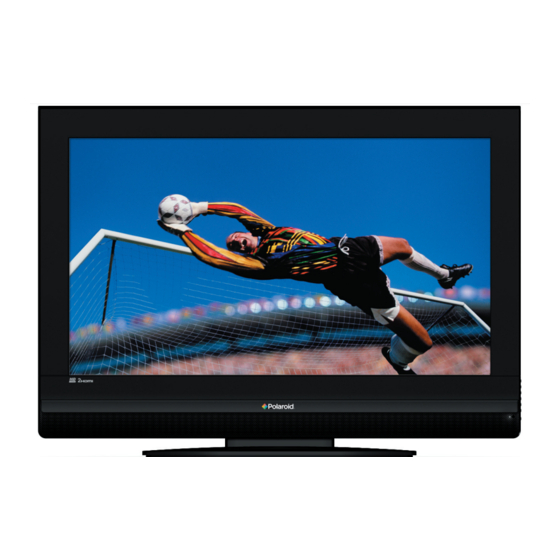
- Page 1 32”/37” 16:9 HD-READY DIGITAL LCD Your TV may look different from the one pictured above. Questions? If you still have questions, call Need some help? Or visit our help line found on the www.polaroid.com/support. insert with this icon: This manual should help you...
-
Page 2: Table Of Contents
TABLE OF CONTENTS Important Information ..............1 1.1-Cleaning the screen and cabinet............1 1.2-Disposing of your TV at the end of service life........1 1.3-Superior features of your integrated digital television ......1 1.4-Receiving digital broadcasting channels ..........1 Features of your new television ..........2 2.1-Special Features ..................2 Important Safety Instructions ............3 Start ....................6... -
Page 3: Important Information
©2008 Polaroid All rights reserved. “Polaroid” and “Polaroid and Pixel” are trademarks of Polaroid Corporation. Changes are periodically made to this document. Changes, technical inaccuracies, and typographic errors will be corrected in subsequent editions. For service, support and warranty information, visit... -
Page 4: Features Of Your New Television
Features of your new television We would like this product, which has been manufactured in modern facilities in accordance with total quality principles, to offer you the best performance. Therefore, we would like you to read this entire manual carefully before you use your product and keep it for future reference. 2.1-Special Features •... -
Page 5: Important Safety Instructions
Important Safety Instructions This symbol is used to warn the user about the “dangerous voltage” contained inside the housing of the product that may create a risk of electrical shock. This symbol is used to remind the user important usage and service instructions supplied with the device. - Page 6 10) Never operate Note: If your device has an adaptor, then electrical devices close use the adaptor and AC power cable to water. Operating supplied with your product. Do not use such devices, for defective sockets. Make sure that the example, near a plug is firmly inserted into the socket.
- Page 7 As a consumer, you are responsible for ensuring that this product is disposed of properly. To find out how to properly dispose of this product, please go to www.polaroid.com and click on “Company“ or call the customer service number for your country listed in the instruction manual.
-
Page 8: Start
Start Remove your television carefully from its Note: Your TV is equipped to operate with box. You can keep the packaging of your TV buttons in case your R/C is broken or the television to use in future. batteries are exhausted. 3. -
Page 9: Your New Television
Your new television 5.1-TV Control Panel Program Down/Up button & Volume Level Down/Up button & & & Stand by indicator Menu button / Source selection button Bright light: TV is in Stand-by & & Dimmed light: TV is On On-Off / Standby button No light: Power Cable is not connected. -
Page 10: Remote Control
5.3-Remote Control Stand-by mode On/Off button Temporary sound mute (Mute) button AV modes selection menu button Picture Format selection button PAT (Picture and Teletext) Mode ZOOM mode selection button Subtitle selection button (D) Sound selection button (D) Numeric buttons Favorite channel selection button (D) Page Stop button in Txt mode (Hold) EPG selection button (D) Question/Answer button in Txt mode (Reveal) -
Page 11: Performing The Initial Power-On Settings
Performing the initial power-on settings 6.1-TV controls 6.1.4-Performing the Volume setting You can adjust the volume of your 6.1.1-Temporary on/off (STAND-BY) television by using the VOL+/VOL- buttons on your remote control. When you press the red STAND- BY button located on the upper left hand side of your remote control 6.1.5-Temporary sound mute (MUTE) while your television is switched... -
Page 12: Turning On The Tv And Setting The Channels
6.2-Turning on the TV and SETUP Setting the Channels AUTO TUNING MANUAL TUNING FIRST TIME INSTALLATION When you turn on your television for the first time, FIRST TIME INSTALLATION CHECK AERIAL CABLE IS CONNECTED. PRESS OK KEY TO CONTINUE message is displayed. -
Page 13: Program Table
6.3.2-Manual tuning of channels and Add Channels : With this option, the new storing in the memory channels in the frequency which is desired to be manually searched will be scanned and In digital mode. Press MENU added to the existing channel list. button, MAIN MENU will be Replace Channels : With this option, you displayed. - Page 14 6.3.3.1-Displaying Television and Program Radio channel lists and selecting 13:15 15:10 Reality Show the channels All TV Monday 18/8/2007 13:45 When the Program Table menu is 1 BBC ONE 13:15 Program opened, all TV and Radio channels 2 BBC TWO 15:10 News 3 ITV1...
-
Page 15: Language Settings
6.3.5-Digital Features Access Control To enter digital features menu, select Lock/Unlock Channels Change PIN FEATURES tab from the main menu by using Up/Down movement buttons. Select DIGITAL FEATURES tab from FEATURES menu by using Up/Down movement buttons and press OK button to confirm. -
Page 16: Performing Analog Tunings
6.3.5.5-Favourite Lists Select PROGRAM NO tab by pressing the Up/Down movement buttons in Setup Please see 6.3.3.2-Creating favorite channel menu, enter the channel number to be list for detailed explanation of this feature. searched and stored automatically, then 6.3.5.6-Common Interface Module select AUTOPROGRAM tab by using the Up/Down movement buttons and press In this menu, you can make the CI Module... - Page 17 6.4.2-Manual tuning of channels and Press the MENU button. Move to the storing in the memory SETUP menu by pressing the Down 6.4.2.1-If you already know the movement button in the Main Menu channel number and confirm your selection with the OK button.
- Page 18 PROGRAM TABLE tab by pressing the 6.4.4.3-Skipping a stored channel Down movement button in Main Menu and confirm your selection with the OK button. In the event that you do not wish to see Program Table menu will be displayed. certain programs while navigating through the channels using the PR+/PR- buttons, 6.4.4.1-Switching the locations of the...
-
Page 19: Settings Of Your New Television
Settings of Your New Television 7.1- Sound Menu Settings 7.1.3-Sound Mode If you want to give depth to the sound of the You may perform volume settings program you are watching, select SPATIAL by using the VOL+ or VOL- item by using Left/Right movement buttons on your television or the buttons. -
Page 20: Picture Menu Settings
effect depending on the feature of the 7.2.2-DNR (Noise reduction) program you are watching or the USER (Optional) option which you can adjust as you desire. You may reduce interference and noise To adjust the User option, select USER formed in the picture by using this feature. and press the Right movement button. -
Page 21: Features Menu Settings
7.2.4.2-Auto Some movie channels may broadcast in the 16:9 format. If you would like to see this format automatically, then select AUTO. In that case, AUTO 16:9 appears on your 7.2.4.7-Subtitle (Optional) screen. If the subtitles are transmitted in the “16:9 formatted”... -
Page 22: Other Picture Features
You can select the titles for which you would 7.3.3-Auto Scart like to perform an operation in Features When this feature is set to On and when you menu by using the Up/Down movement operate an external device that is connected buttons. -
Page 23: Teletext
Teletext 8.3-Teletext image in the TV picture Being one of the most prominent services (MIX) of broadcasting today, Teletext renders the TV more fruitful. Teletext means in With this feature, you can watch short the transmission of various updated the teletext information and the TV information along with the TV broadcast broadcast together. - Page 24 8.7-Temporary TV Picture (UPDATE) Note: The fastext feature is not available for all teletext broadcasts. It is determined by the broadcasting agency whether it is to be This button allows you to switch broadcast or not. to the television picture while the page you want is being searched 8.11-Toptext (optional) in the teletext broadcast eliminating...
-
Page 25: External Equipment Connection
External equipment connection YPBPBR (Component Input) (Optional): You can connect various compatible audio To be able to watch the image when a and video devices to your television. connection is made via this socket, this AV inputs: Press the AV button on your option must be selected. -
Page 26: Connection Types For External Devices
9.1-Connection types for external devices SCART SOCKET VCR/VCD Your TV is equipped with 8 inputs including antenna input, which allows for the external device connection. These inputs are: DVD/PVR 1-Antenna input 2-VGA input 3-HDMI input 4-YUV Component input 5-S-VHS input DECODER 6-SCART input 1 7-SCART input 2... -
Page 27: Connecting A Video Recorder Device And A Digital Satellite Receiver
9.2.3-PC Setting Note 1: 4:3, 16:9 and 14:9 picture formats are supported in 16:9 panels. Only 4:3 Enter into the SETUP menu from the Main picture format is supported in 4:3 panels. Menu by pressing the MENU button in the Note 2: In the Monitor mode, you can make PC mode. -
Page 28: Help And Tips
Help and tips Failure Possible cause Solution Is the power cord connected to the Check the power cord. mains supply? The television does not function Is the main power On/Off button on? Check if the On/Off button is on. Is the antenna cable attached? Check the antenna cable. -
Page 29: Technical Specifications Chart
Design and specifications are subject to change without notice. Questions? Need some help? This manual should help you understand your new product. If you have questions, call our customer service number found on the insert with this icon: 20080428 Or visit www.polaroid.com. 27 I... - Page 30 FRX.801...