Table of Contents
Advertisement
Advertisement
Table of Contents
Troubleshooting

Related Manuals for Mio 269+


Summary of Contents for Mio 269+
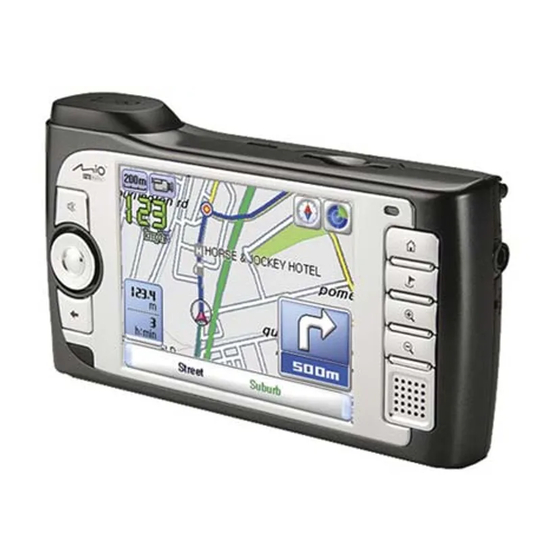
- Page 1 www.mio-tech.be...
- Page 2 Revision: R00 August 2005 Trademarks All brand and product names are trademarks or registered trademarks of their respective companies. Note The information in this manual is subject to change without notice.
-
Page 3: Table Of Contents
Table of Contents Preface ....................v Precautions and Notices ................v About this Manual ..................vi Getting Started ................1 1.1 Performing the Initial Start Up ............1 1.2 Connecting to AC Power and Charging the Battery......4 1.3 Using Your Device in a Vehicle............5 Using the Car Holder................5 Connecting the Car Charger ..............6 1.4 Understanding Hardware Features ............7... - Page 4 3.8 Back....................27 Mio Transfer ................29 4.1 Installing Mio Transfer ..............29 4.2 Starting and Exiting Mio Transfer ............ 31 4.3 Copying MP3 or Pictures to Your Device ........32 Using Mio Transfer ................32 Managing Your MP3 and Picture Files..........34 4.4 Synchronizing Contacts of Your Device and PC......
- Page 5 6.7 Transferring Images .................54 Contacts: Tracking Friends and Colleagues ......57 7.1 Starting and Exiting Contacts............57 7.2 Creating a Contact ................58 7.3 Displaying the Contacts Summary Screen ........59 7.4 Navigating to Your Contact Address ..........59 7.5 Editing or Deleting a Contact ............60 Calculator..................
-
Page 7: Preface
Preface Precautions and Notices For your o wn safety, do not operate the controls of the product while driving. Use this product prudently. The product is intended to be used only as a navigation aid. It is not f or precise measurement of direction, distance, location or topography. -
Page 8: About This Manual
Using Tools (Chapter 4 to 8) − Mio Transfer tells you how to use Mio Transfer, a tool for data transfer and data recover. − MP3 Player tells you how to play MP3 files on your device. - Page 9 For instructions on using Navigator, refer to the Mio Map user’s manual included on your Map CD.
-
Page 11: Getting Started
Getting Started This chapter tells you step by step how to perform the initial startup and introduces the components of your device. 1.1 Performing the Initial Start Up Pull out the stylus and use it to slide the ON/OFF switch to the ON (right) osition. - Page 12 NOTE: If multiple languages are available, you can change the language later on by tapping Settings Switch Language. (See Section 3.7 for more information.) 4. The Date&Time screen appears. Tap the arrow button to select the time zone, date and time for your system. Then tap to continue.
-
Page 14: Connecting To Ac Power And Charging The Battery
1.2 Connecting to AC Power and Charging the Battery Fully charge the battery before starting to use your device for the first time. NOTE: Depending on your region of purchase, the converter may not look exactly the same as the picture shown. 1. -
Page 15: Using Your Device In A Vehicle
1.3 Using Your Device in a Vehicle A car holder and a car charger are supplied with your device. Using the Car Holder CAUTION: Select an appropriate location for the car holder. Never place the holder where the driver’s field of vision is blocked. If the car’s windshield has window tint, it is recommended that you use a car antenna (optional) to route the antenna to the top of the car through the window. -
Page 16: Connecting The Car Charger
Connecting the Car Charger The car charger supplies power to your device when you are using the device in a car. CAUTION: To protect your device against sudden current, connect the car charger only after the car engine has been started. 1. -
Page 17: Understanding Hardware Features
1.4 Understanding Hardware Features NOTE: Depending on the model you purchased, the color of the device might not be exactly the same as the pictures shown in this manual. Front Components Component Description See Also Displays the output of your device. Tap Touch Screen the screen with the stylus to select menu commands or enter information. -
Page 18: Back Components
Back Components Component Description See Also ON/OFF Switch Controls the main power switch. Section 1.1 Car Antenna Inside the rubber cover is a connector for Connector connecting a GPS car antenna (optional) so that the antenna can be positioned on top of the car for better signal reception. -
Page 19: Left-Side Components
Left-Side Components Ref Component Description See Also Adjusts the volume level of your device. Section 2.2 Volume Control Turns on and off the device. Section 2.1 Power Button Right-Side Components Component Description See Also Stylus Tap on the touch screen to make selections Section 2.2 and enter information. -
Page 20: Top Components
Top Components Component Description See Also GPS Receiver Receives signals from the GPS satellites overhead. Make sure that it has a clear view of the sky. Accepts a SD (Secure Digital) or MMC Section 2.4 SD/MMC Slot (MultiMediaCard) card for accessing data such as MP3 music. -
Page 21: Basic Skills
Basic Skills This chapter familiarizes you with the basic operations of your device such as using the Home screen and the hardware components. 2.1 Turning On and Off Your Device Use the powe r butt on on the side of your device to turn on an d of your device. -
Page 22: Operating Your Device
Ref Button Name Description See Also Starts the navigation program. Mio Map Navigator User’s Manual Multimedia Enables you to play the MP3 music and view Chapter 5~7 the pictures. Tools Allows you to view and manage your contacts Chapter 8 ~9 information and use the calculator. -
Page 23: Using The Navigation Pad
Using the Navigation Pad With the navigation pad, you can move up, down, left and right within a menu. Left Right To move in a direction, simply press the corresponding area on the button. To activate the selected item, press the center of the button. -
Page 24: Using The Stylus
To increase the volume Rotate the volume control upward and then release. Each rotating and releasing increases one volume level. To decrease the volume Rotate the volume control downward and then release. Each rotating and releasing decreases one volume level. Down Using the Stylus The stylus is your input device. -
Page 25: Managing The Battery Power
Drag Hold the stylus on the screen and drag up/down/left/right or across the screen. Tap and hold Tap and hold the stylus on an item to see a list of actions available for that item. On the pop-up menu that appears, tap the action you want to perform. 2.3 Managing the Battery Power A fully charged battery can provide power for up to 4~5 hours. - Page 26 If you do not take any action to charge the battery, the remaining operating time depends on how you are using the device. Approximately, you will have 50 minutes~1 hour left for the normal operation. When the battery has only 5% power left, another warning screen will appear preventing you from using the device until you recharge the battery.
-
Page 27: Using A Sd/Mmc Card
2.4 Using a SD/MMC Card Your device has a SD/MMC slot where you can insert an optional Secure Digital or MultiMediaCard storage card. NOTE: Make sure that no foreign objects enter the slot. Keep a SD or MMC card in a well-protected box to avoid dust and humidity when you are not using it. -
Page 29: System Settings
System Settings Your device initially has its default settings. You can customize the settings to suit your personal needs. Once you change the settings, the settings will remain till the next changes. 3.1 Using System Settings To open the Se ttings screen, tap the button on th e Home screen. -
Page 30: Backlight
3.2 Backlight 1. Tap the button on the Home screen to open the Settings screen. Settings 2. Tap the Backlight button on the Settings screen. 3. Move the slider along the track bar for the adjustment. To darken the screen, move the slider to the left. To lighten the screen, move the slider to the right. -
Page 31: Volume
4. Tap the button to save the changes and go back to the Settings screen. 3.3 Volume 1. Tap the button on the Home screen. Settings 2. Tap the button on the Settings screen. Volume 3. Move the slider along the track bar for the adjustment. To turn down the volume, move the slider to the left. -
Page 32: Screen
4. Tap the button to save the changes and go back to the Settings screen. 3.4 Screen You can adjust the touch screen if it is not responding accurately to your stylus taps. 1. Tap the button on the Home screen. Settings 2. -
Page 33: Power
4. Tap and hold the center of the target. 5. When the target moves to another position, tap and hold again. Repeat the same step to complete the adjustment. 6. Once the calibration is complete, the message “Calibration succeeded!” will appear. Tap button to return to the Settings screen. - Page 34 3. The Power screen will appear showing the remaining power of your battery. You can also set up a timer for your device to automatically turn off the device when being idle for a set period of time. The options are Never, 30 minutes, 20 minutes, and 10 minutes.
-
Page 35: Date&Time
3.6 Date&Time To set the date and time: 1. Tap the button on the Home screen. Settings 2. Tap the button. Date&Time 3. To change the time zone, tap the left or right arrow in the Time Zone. 4. To change the date, tap the down arrow next to the Date box. A calendar will pop up showing day, month and year. -
Page 36: Switch Language
5. To set the time, first tap the hour, minute, or second in the Time item and then tap the up arrow to increase the value or down arrow to decrease the value. 6. Tap the button to save changes and go back to the Settings screen. 3.7 Switch Language NOTE: If your device supports only one language, you cannot use this switch language feature. -
Page 37: Back
3. If your device supports multi-languages, tap the left or right arrow to select the system language. NOTE: The available language options depend on your region of purchase. 4. Tap the button to save changes and go back to the Settings screen. 3.8 Back button brings you back to the Home screen. -
Page 39: Mio Transfer
Mio Transfer This chapter tells you how to use Mio Transfer to transfer data such as MP3 files, images or Contacts information from your computer to your device and recover the map data and n avigation software to your device. - Page 40 Setup.exe file in the folder “\Install\Mio Transfer\” of the CD.) 4. Follow the onscreen instructions to complete the installation. NOTE: If Mio Transfer has already been installed on your PC, clicking Installl Mio Transfer will remove the application from your system.
-
Page 41: Starting And Exiting Mio Transfer
4.2 Starting and Exiting Mio Transfer Click icon on the Windows Desktop to start the program. The Mio Mio Transfer Transfer screen appears. Mio Transfer contains five tabs, including: Music, Picture, Contacts, Recover and Mio Online. Music allows you to transfer the MP3 files between your device and your computer. -
Page 42: Copying Mp3 Or Pictures To Your Device
4.3 Copying MP3 or Pictures to Your Device Before playing MP3 music, or viewing pictures, you need to have the MP3 or picture files ready on your device. You can use Mio Transfer to transfer these files. Using Mio Transfer... - Page 43 NOTE: When connecting your computer and your device, the status icon on the lower right corner of the Windows Desktop will change from indicating that the connection is successfully established. If you uplug the USB cable from your device, the icon will change back to 5.
-
Page 44: Managing Your Mp3 And Picture Files
NOTE: You can also copy the files from your device to your computer. First select the file you want to copy from the right column and and select a folder on the left column to place these files. Then click to start the file transfer. - Page 45 3. Start Mio Transfer by clicking icon on the Windows Desktop. Mio Transfer The Mio Transfer screen appears. NOTE: When connecting your computer and your device, the status icon on the lower right corner of the Windows Desktop will change from indicating that the connection is successfully established.
-
Page 46: Recovering Maps And Navigation Software
4.5 Recovering Maps and Navigation Software Mio Recover allows you to recover map, navigation software and the applications on the device if any on your device hard drive is lost or damaged. NOTE: As all the existing data will be erased from the storage card during the recovering process, back up the files on your storage card to your computer before starting the recovering. - Page 47 4. Click on the top menu bar. Recover 5. Insert the Mio Map CD into the CD-ROM drive of your computer. 6. Click to start the recovering process. The status bar will show the Start progress of file recovery.
- Page 48 7. When the recovering process is complete, reset your device. (Refer to Section 9.1 for more information.)
-
Page 49: Mp3 Player
MP3 Player This chapter tells yo u how to play MP3 files on your de vice. 5.1 Starting and Exiting MP3 Player The MP3 Play er program turns your device into an MP3 pla yer. It features: Playback of MP3 and wav files Basic playback controls such as pla y, pause, stop, next and previous Equalizer settings with 17 presets... -
Page 50: Preparing The Mp3 Files For You Device
To exit the program, tap on the lower right of the screen. You will return to the Multimedia screen. To go back to the Home screen, press Back button or press Home button on your device. 5.2 Preparing the MP3 Files for You Device Before you can play MP3 files, you need to have the files ready on either your device hard drive or a storage card. -
Page 51: Mp3 Playback Control
5. To exit the program, tap on the lower right of the screen. You will return to the Multimedia screen. MP3 Playback Control You can control the MP3 Player via control buttons. See the table below for details: Control Button Name Description Play/Pause... -
Page 52: Using The Play Lists
Sequence* Normal sequence (Default) Random sequence Opens play list. (See Section 5.4 for more Open Play List information.) Equalizer Opens or closes the equalizer panel. (See Section 5.5 for more information.) Help Introduces the function and operation of each icon. Tap an icon and a line of function description for that icon appears at the bottom of the screen. -
Page 53: Opening A Play List
2. To add a song in the play list, tap the Add Song button at the bottom of the screen. A screen appears displaying all the MP3 files. Tap the song you wish to add and then tap Add Song 3. -
Page 54: Managing Your Play Lists
3. Tap the play list you want to open and tap Load Managing Your Play Lists When you have opened a play list, you can edit or remove the list. To remove a song from the list: Tap the song and then tap the Delete Song button at the bottom of the screen. -
Page 55: Equalizer
5.5 Equalizer The MP3 Player provides 17 presets for various music effects. Tap to open the equalizer panel and tap left button and right button to access the option list. Available options are Default, blues, classical, club, dance, full bass, full bass & treble, full treble, dance hall, live, party, pop, reggae, rock, ska, soft, classic rock and techno. -
Page 57: Picture Viewer
6.2 Preparing the Pictures on Your Device Before viewing the pictures, you need to have the picture files ready on the device hard drive or on a storage card. You can use “Picture Assistant” of Mio Transfer to easily copy the pictures from your computer to the correct directory (See Section 4.3 for more instructions.) -
Page 58: Viewing Pictures In Thumbnail View
6.3 Viewing Pictures in Thumbnail View The thumbnail view is the default view of the Picture Viewer. It allows 12 photos to be displayed at one time. 1. Tap to start the Picture Viewer program. Multimedia Picture 2. The Photo Viewer will automatically search all the photos under the folder \Storage Card\My Picture\ on your device hard drive or under the folder \SD Card\ My Picture\ on a storage card and display all the photos in thumbnail view (4x3). -
Page 59: Go To Next Or Previous Picture
Go to Next or Previous Picture The full screen view allows you to view the pictures one by one. You can press the navigation pad left or right on the device to go to the previous or next picture. Zooming In a Picture By default, the picture is displayed in its original size (1.0 zoom level). -
Page 60: On-Screen Control Buttons
On-Screen Control Buttons Tap anywhere on a picture screen. The on-screen control panel will appear providing you with five buttons for various tasks. See the table below for the details. Control Button Name Description Transfer Transfers images between the device hard disk and the storage card. -
Page 61: Viewing A Slideshow
6.5 Viewing a Slideshow You can view a slideshow of all your pictures on your device hard drive or on a storage card. You can use the following ways to start the slideshow. When in thumbnail view, tap the button at the bottom to start the slideshow. -
Page 62: Setting The Interval Time For The Slideshow
To stop the slideshow, simply tap anywhere on the picture screen. When the slideshow indicator disappears, you will enter the full screen view. To go back to the thumbnail screen, press the Back button on the device. Setting the Interval Time for the Slideshow The interval setting allows you to set the length of time each slide is displayed before it moves on to the next slide. -
Page 63: Managing Your Pictures
6.6 Managing Your Pictures Displaying Picture Information Picture Viewer allows you to display file name and modified date of a picture while viewing picture full screen or viewing slideshow. To display the picture information: 1. Tap anywhere on the picture screen until the on-screen control buttons appear. -
Page 64: Deleting Pictures
4. Tap the Information button again and the information will disappear. Deleting Pictures To delete a picture, tap Delete button on the on-screen control panel and a screen will pop up aksing you if you really want to delete this picture. Tap to delete the picture or tap to undo the deleting action. - Page 65 A green color frame indicates the images selected Page up Selected file/ Total number of files Page down Transfer button Select all images 5. After selecting the images, tap button to start the file transfer. Transfer 6. A status bar will show to indicate the progress of the transfer. 7.
-
Page 67: Contacts: Tracking Friends And Colleagues
Contacts: Tracking Friends and Colleagues ontacts: Tracking Friends and Colleagues This chapter tells you how to use Contacts for viewing and m anaging your contacts information. Starting and Exiting Contacts NOTE: If you have created Microsoft Contacts information on your computer, you copy the information to your device. -
Page 68: Creating A Contact
Tap one of the alphabet Tap to navigate to a sets to quickly find your contact address. contacts. Tap to create a new Tap twice to display a contact. summary screen of a contact. Tap to edit a contact. Tap to remove a conta Tap to return to the Tools screen. -
Page 69: Displaying The Contacts Summary Screen
7.3 Displaying the Contacts Summary Screen Double tap a contact in the contact list to display the summary screen of a contact. To exit the contacts summary screen, tap the arrow button on the upper right corner of the screen or simply press the Back button on the device. -
Page 70: Editing Or Deleting A Contact
3. The navigation program is automatically launched and you can start the navigation. 7.5 Editing or Deleting a Contact To modify your contact details, select the contact and then tap on the right toolbar of the contact list screen. To delete a contact, tap on the right toolbar of the contact list screen. -
Page 71: Calculator
Calculator This chapter tells you how to use Calculator to perform b asic arithmetic and convert currency an d measure. 8.1 Starting and Exiting Calculator Calculator provides three modes: Calculator, Currency, and Metrology. Yo can use th ese modes to perform basic arithmetic and convert currency and measure. -
Page 72: Using Calculator Mode
Clear the current data Tap to switch to Display field Calculator mode. Tap to switch to Currency mode. Tap to switch to Metrology mode. Numeric keypad Tap to return to the Tools screen. To exit Calculator, tap at the bottom right corner of the screen. 8.2 Using Calculator Mode Calculator mode allows you to perform any of the standard operations for which you would normally use a handheld calculator. -
Page 73: Using Calculator Memory
4. Then tap the equal sign button to generate the result. Using Calculator Memory Calculator mode allows you to store a number value in the calculator memory for later use. Display field Memory indicator Memory buttons You can use the memory buttons to store, display or change the value that you add to the memory. -
Page 74: Using Currency Mode
Memory Minus If the memory is empty, you can tap Memory Minus button to add the currently displayed number as negative (-) to the memory. When a number is stored in the memory, you can calculate a number and tap Memory Minus button to subtract this number from the number already stored. - Page 75 abbreviation of the currency will be displayed on the upper left corner of the output field. Output field Currency indicator Currency scroll list 5. Enter the currency value in the input field by tapping the number buttons on the numeric keypad. You can also perform basic arithmetic in the input field.
-
Page 76: Editing Exchange Rate
Editing Exchange Rate Before performing the currency conversion, you can edit the exchange rate to the most up-to-date one. 1. Tap to start Calculator. Tools Calculator 2. Tap the button on the calculator screen. 3. Select the source and target currency. 4. -
Page 77: Using Metrology Mode
8.4 Using Metrology Mode Metrology mode allows you to convert measures from one unit to another. 1. Tap to start Calculator. Tools Calculator 2. Tap the button on the calculator screen to switch to Metrology mode. 3. Tap the measure button on the metrology screen to display a scroll list of measures and select the desired measure from the list. - Page 78 5. Tap the down arrow next to the output field to display a list of units and select the unit to convert to. When a unit is selected, the abbreviation of the unit will be displayed on the upper left corner of the output field. Output field Unit indicator Unit scroll list...
-
Page 79: Troubleshooting And Maintenance
Troubleshooting and Maintenance roubleshooting and Mainte nance This chapter gives solutions to common problems you m ay encounter. It also p vides guidelines on taking care of your device. NOTE: If you encounter a problem you cannot solve, contact your dealer for assistance. 9.1 Resetting Your System Resetting your system is similar to restarting your computer. -
Page 80: Clearing The Memory
9.2 Clearing the Memory If your device still does not respond after being reset, you can use the following steps to clear the memory. 1. Disconnect all cables, including the AC adapter, from your device. 2. Use the stylus to slide the ON/OFF switch to the OFF (left) position. 3. -
Page 81: Warning Screen
Warning Screen A temperature warning screen appears and your device stops operating When the device temperature goes down to around -5°C (23 °F), a warning screen automatically appears and your device stops operating. This is a protection mechanism against the malfunction of the hard drive in your device. -
Page 82: Connection Problems
Inaccurate response to stylus taps Calibrate the touch screen. (See “Screen” in section 3.4 for more information.) Connection Problems Cable Connection Problems Make sure that your device and your computer are both turned on before establishing the connection. Make sure that the cable is securely plugged into the USB port on your computer. - Page 83 Avoid exposing your device to direct sunlight or strong ultraviolet light for extended periods of time. Do not place anything on top of your device or drop objects on top of your device. Do not drop your device or subject it to severe shock. Do not subject your device to sudden and severe temperature changes.
-
Page 84: Support Information
9.5 Support Information In case of problems with your device, you can: Write us e-mail from the website: http://www.mio-tech.be/support/support_form.asp?product=269plus Call a local number in your country: Austria 01 36027 72066 Norway 02350 0063 Belgium 02620 0097 Portugal 021 316 4190... -
Page 85: A Regulatory Information
Regulatory Information NOTE: Marking labels located on the exterior of your device indicate the regulations that your model complies with. Please check the marking labels on your device and refer to the corresponding statements in this chapter. Some notices apply to specific models only. A.1 Regulations Statements Class B Regulations Federal C... -
Page 86: European Notice
Connect the equipment into an outlet on a circuit different from that to which the receiver is connected. Consult the dealer or an experienced radio/TV technician for help. Any changes or modifications not expressly approved by the manufacturer could void the user’s authority to operate the equipment. Please note: The use of a non-shielded interface cable with this equipment is prohibited. -
Page 87: Safety Precautions
About Charging Use only the AC adapter (PHIHONG, PSC05R-050) supplied with your Mio269+/Mio 279. Use of another type of AC adapter will result in malfunction and/or danger. This product is intended to be supplied by a LISTED Power Unit marked with “LPS”, “Limited Power Source”... - Page 88 CAUTION: This unit contains a non-replaceable internal Lithium Ion battery. The battery can burst or explode, releasing hazardous chemicals. To reduce the risk of fire or burns, do not disassemble, crush, puncture, or dispose of in fire or water. Important instructions (for service personnel only) Caution: Risk of explosion if battery is replaced by an incorrect type.