Table of Contents
Advertisement
Advertisement
Table of Contents

Related Manuals for Miele KWFN 8706 SE ED-1


Summary of Contents for Miele KWFN 8706 SE ED-1
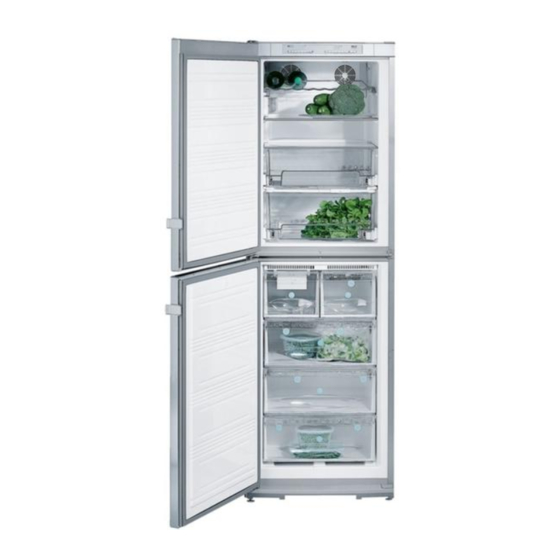
- Page 1 Operating and installation instructions Frost free freezer with wine cooler and ice cube maker KWFN 8706 SE ed-1 To avoid the risk of accidents or damage to the appliance, it is essential to read these instructions before it is installed and used for the first time.
-
Page 2: Table Of Contents
Contents Description of the appliance ......... 5 Caring for the environment . - Page 3 Contents Freezing and storing food ......... . . 25 Maximum freezing capacity .
- Page 4 Contents Installing in a side-by-side combination ......45 Installation ............45 Joining the two appliances together .
-
Page 5: Description Of The Appliance
Description of the appliance a Wine cooler On/Off button f Freezer section On/Off button b Wine cooler g Freezer section temperature display temperature display h Freezer section c Wine cooler temperature selector buttons temperature selector buttons left hand button: warmer left hand button: warmer right hand button: colder right hand button: colder... - Page 6 Description of the appliance a Wooden shelf front with descriptive labels b Active charcoal filter c Condensate channel and drain hole d Ice cube drawer with automatic ice cube maker e Freezer drawers with freezer calendar f Marker system for frozen food...
-
Page 7: Caring For The Environment
Caring for the environment Disposal of the packing Disposal of your old appliance material Please ensure that the appliance presents no danger to children while The transport and protective packing being stored for disposal. has been selected from materials which are environmentally friendly for It should be unplugged or disposal, and can normally be... -
Page 8: Warning And Safety Instructions
Warning and Safety instructions Technical safety This appliance complies with all This appliance contains the coolant relevant legal safety requirements. Isobutane (R600a), a natural gas Improper use of the appliance can, which is environmentally friendly. however, present a risk of both Although it is flammable, it does not personal injury and material damage the ozone layer and does not... - Page 9 Warning and Safety instructions Before connecting the appliance to The manufacturer cannot be held the mains supply make sure that liable for damage due to a faulty the rating on the data plate connection to the mains water supply. corresponds to the voltage and Connection to the mains water frequency of the household supply.
- Page 10 Warning and Safety instructions When cooling drinks quickly in the freezer make sure bottles are not Never handle frozen food with wet left in for more than one hour, otherwise hands. Your hands may freeze to they could burst. Danger of injury and the frozen food.
-
Page 11: Disposal Of Your Old Appliance
Warning and Safety instructions Disposal of your old appliance Do not block the ventilation grilles in the appliance as this would Before disposing of an old impair the efficiency of the appliance, appliance first make the door latch increase the electricity consumption or lock unusable. -
Page 12: How To Save Energy
How to save energy Normal energy consumption Increased energy consumption Installation site In a ventilated room. In an enclosed, unventilated room. Protected from direct sunlight. In direct sunlight. Not situated near to a heat source Situated near to a heat source (radiator, oven). - Page 13 How to save energy Normal energy Increased energy consumption consumption Defrosting Defrost the freezer when a layer of A layer of ice hinders the cold ice one centimetre thick has built from reaching the frozen food, and causes an increase in energy consumption.
-
Page 14: Switching On And Off
Switching on and off Before using for the first time Freezer section The stainless steel surface has a layer of protective foil to prevent scratching during transportation. ^ Do not remove this foil until the ^ Press the freezer section On/Off appliance has been installed or built button on the right hand side of the in. -
Page 15: Safety Lock
Switching on and off Safety lock The safety lock can be activated to prevent the appliance being switched off inadvertently. ^ Press the freezer section On/Off button to come out of the setting Activating or de-activating the safety mode. lock The electronics will then switch over to normal operation after a couple of minutes. -
Page 16: Temperature Displays
Temperature displays During normal operation the – if the ambient temperature temperature displays show the average surrounding the appliance is too temperature in the wine cooler and the high. temperature in the warmest part of the The appliance is designed for use in freezer section. - Page 17 Temperature displays ^ You can now adjust the level of brightness by pressing the temperature selector buttons. You can choose from settings 1 to 5: 1: lowest setting, 5: brightest setting. ^ Press the Super freeze button to save the setting. ^ Press the freezer section On/Off button to come out of the setting mode.
-
Page 18: Alarm
Alarm Door alarm Your appliance has been fitted with a warning system to protect your stored If one of the doors has been left open wine and frozen food from a change in for more than approx. 60 seconds the temperature and also to save energy. -
Page 19: Using The Wine Cooler
Using the wine cooler Setting the temperature in the Wine keeps on maturing depending on the surrounding conditions. The length wine cooler of time for which wine can be kept in Use the two buttons underneath wine good condition will depend on the cooler temperature display to set the temperature but also the air humidity. -
Page 20: Dynamic Cooling M
Using the wine cooler Dynamic cooling m Humidity It is very important to store wine in an With Dynamic cooling the relative atmosphere with a high humidity level humidity inside the wine cooler and the (60 - 70 %) so that the corks remain temperature are distributed evenly moist on the outside. - Page 21 Using the wine cooler Air filtering with the active charcoal filter The active charcoal filter maintains the air quality in the wine cooler by filtering the incoming air to ensure that all air entering the appliance is fresh and free from dust and smells.
-
Page 22: Storing Wine Bottles
Storing wine bottles Wooden shelf fronts Any vibration or movement of the bottle can affect the wine by interrupting the natural respiration process and so impair the taste. As far as possible, store bottles of the same type of wine beside each other on the same shelf. -
Page 23: Using The Freezer Section
Using the freezer section The correct temperature – Each subsequent press of the button adjusts the temperature shown in To freeze fresh food and to store frozen 1 °C steps. food for a long time, a temperature colder than -18 °C is required. At this –... -
Page 24: Freezing Fresh Food
Using the freezer section Freezing fresh food Super freeze Fresh food should be frozen as quickly Switch the Super freeze function on as possible. This way the nutritional before putting fresh food into the value of the food, its vitamin content, freezer section. -
Page 25: Switching Off Super Freeze
Using the freezer section Freezing and storing food Switching off Super freeze Depending on the amount of food Maximum freezing capacity placed in the freezer section, the Super freeze function will switch off To ensure that fresh food placed in the automatically after approx. -
Page 26: Home Freezing
Using the freezer section Home freezing lightly before freezing, but care should be taken as the taste of some Only freeze fresh food which is in a spices alters when frozen. good condition. – Do not place hot foods or drinks in Hints on home freezing the freezer. -
Page 27: Before Placing Food In The Freezer Compartment
Using the freezer section Before placing food in the freezer When freezing, make sure that food compartment already frozen does not come into ^ When freezing more than 2 kg of contact with fresh food being frozen fresh food, switch on the Super as this could cause the frozen food freeze function for some time before to begin to defrost. -
Page 28: Defrosting
Using the freezer section Use the markers to indicate the type of Never re-freeze partially or fully food being frozen, and turn the dials to defrosted food. Consume defrosted the appropriate number to indicate the month the food was first placed in the food as soon as possible as it will freezer. -
Page 29: Cool Pack
Using the freezer section Cool pack The cool pack prevents the temperature in the freezer rising too quickly in the event of a power cut. Place the cool pack in the upper drawer directly on top of food or to save space on the freezer tray. -
Page 30: Ice Cube Maker
Ice cube maker For the automatic ice cube maker to To ensure that the water pipes are operate it must be connected to the thoroughly flushed through before mains water supply. use, ice cubes from the first three ice cube making processes must not be consumed. - Page 31 Ice cube maker Switching off the ice cube maker The ice cube maker can be switched off independently of the freezer section if you do not want the appliance to make any ice cubes. ^ Press the On/Off button on the ice cube maker until the indicator light goes out.
-
Page 32: Defrosting
Defrosting Wine cooler Freezer section Condensate and frost can build up on This freezer is equipped with a "Frost the back wall of the wine cooler whilst it free" system. The freezer section is in use. These are automatically defrosts automatically. removed and defrosted by the The moisture generated by defrosting appliance. -
Page 33: Cleaning And Care
The data plate located inside the ^ A microfibre "E-Cloth" is available appliance must not be removed. It from the Miele UK Spare Parts contains information which is Department which is suitable for required in the event of a service cleaning surfaces such as stainless call. -
Page 34: Ventilation Gaps
Cleaning and care ^ Connect the appliance to the ^ Press the On/Off button on the ice electricity supply. cube maker. ^ Press the On/Off button on the ice The ice cube tray will return to its cube maker. The indicator light will original position. -
Page 35: Metal Grille At The Back Of The Appliance
Miele Spare Parts Dept. the freezer drawers and place them back in the freezer section. ^ Switch off Super freeze by pressing... -
Page 36: Problem Solving Guide
^ Check that the fuse is not defective and that the mains fuse has not . . . food has frozen together. blown. If it has, contact the Miele Ser- Use a blunt instrument, e.g. a spoon vice Department. handle or plastic scraper, to prise it apart carefully. - Page 37 Problem solving guide . . . the alarm sounds and the wine The temperature display will show the warmest temperature recorded in the cooler or freezer section temperature freezer section during the power cut. display flashes. The wine cooler is too warm or too cold Depending on the temperature in relation to the set temperature or the displayed, you should check the...
- Page 38 ^ Clean the condensate channel and drain hole. If you still cannot remedy the fault having followed these suggestions, please contact the Miele Service Department. To prevent unnecessary loss of temperature it is advisable not to open the door while waiting for the...
-
Page 39: Noises
Noises Normal noises What causes them Humming noise made by the motor (compressor). This noise can Brrrrr... get louder for brief periods when the motor is switching on. Blubb, blubb..A gurgling noise can be heard when coolant is circulating through the pipes. -
Page 40: After Sales Service
In the event of a fault which you cannot correct yourself, or if the appliance is under guarantee, please contact: – Your Miele Dealer – The Miele Service Department (see back cover for address). When contacting your Dealer or the Service Department, please quote the model and serial number of your appliance. -
Page 41: Mains Water Connection
^ Ensure that it is screwed into position long. This may only be lengthened correctly. by means of a Miele extension hose. Before using the appliance for the first This extension hose is available from time the water inlet pipe should be... - Page 42 Mains water connection ^ The stainless steel hose should be attached to the solenoid valve at the base of the appliance at the back. ^ Ensure that the hose is fitted correctly and that it is water tight. ^ Turn on the stopcock slowly and check the whole water system for leaks.
-
Page 43: Electrical Connection
Electrical connection Electrical connection U.K. Non-rewireable plugs (BS 1363) All electrical work should be carried out The fuse cover must be re-fitted when by a suitably qualified and competent changing the fuse, and if the fuse cover person in strict accordance with current is lost, the plug must not be used until a local and national safety regulations suitable replacement is obtained. -
Page 44: Installation
Installation with the risk of food deteriorating and Do not place any appliance which going off. gives off heat, such as a toaster or microwave oven, on top of this Ventilation appliance, as this would increase Air at the back of the appliance gets the appliance’s energy consumption. -
Page 45: Installing In A Side-By-Side Combination
However, this appliance has side wall a torque screwdriver and a socket heating, and can be installed wrench. side-by-side with certain other Miele ^ Before starting, peel off any appliances. protective foil from appliance. Your dealer will be able to advise ^ Place the appliances next to one you on which models are suitable. - Page 46 Installing in a side-by-side combination ^ Align both appliances using a spirit ^ Remove top screws h from bearing blocks g. level. – Align front feet c using a spanner ^ Loosely attach lower bracket i with screws h. ^ Push the two appliances together, –...
- Page 47 Installing in a side-by-side combination ^ Plug the two appliances into the mains electricity supply points. Appliances with integrated ice-maker (depending on model): Plumb the appliance into the mains water supply. ^ Carefully push the two appliances back into their final position. It is easier if you raise the appliances at ^ Remove covers j from both the front, and roll them back on their...
- Page 48 Installing in a side-by-side combination ^ Break off thin tags r from plinth ^ Push short trim p into the gap at the facings a. Important: Make sure you top. Make sure that the gap in the remove these from the correct side - trim faces the front.
-
Page 49: Changing The Door Hinging
Changing the door hinging ^ Remove the cover caps from the The appliance is supplied left hand hinged. If right hand door hinging is opposite side, and fit them into the required, follow the instructions below. empty holes. Removing the door handles: Changing over the doors: ^ Open the lower door. - Page 50 Changing the door hinging ^ Remove spacer p with a screwdriver and refit it on the opposite side. ^ Remove plugs q from the door bearing bushes in the doors and refit on the opposite side. ^ Hang the upper door on hinge pin j and then close the appliance door.
- Page 51 Changing the door hinging Refitting the handles: In the following illustration the lower door is not shown in the closed Please make sure you follow the position to make it easier to see instructions below carefully when what happens next. you refit the handle.
- Page 52 Changing the door hinging It is important to check that the side section of the handle d does not come into contact with the door seal when opening the door, as this would damage the door seal permanently. If, after you have refitted the handle, you find that the side section does touch the door seal when the door is opened:...
-
Page 53: Building In The Appliance
Building in the appliance The air inlet and outlet must not be covered or blocked in any way. They should be dusted on a regular basis. When built into a kitchen run (max. depth 580 mm) the appliance can be installed directly next to a kitchen furniture housing unit. - Page 56 Alteration rights reserved / 4905 M.-Nr. 06 785 780 / 00 en - GB KWFN 8706 SE ed-1...