Table of Contents
Advertisement
OWNER'S MANUAL
OWNER'S MANUAL
CAR CD/MP3/WMA Receiver
CAR CD/MP3/WMA Receiver
Please read this manual carefully before operating
Please read this manual carefully before operating
your set and retain for future reference.
your set and rt for future reference.
MODEL
MODEL
LCF600UN/ LCF600UR
LCS300AN/ LCS300AR
LCS500UN/ LCS500UR
LCF800IN/ LCF800IR
P/NO : MFL63287302
P/NO : MFL63287305
Advertisement
Table of Contents

Related Manuals for LG LCS300AN


Summary of Contents for LG LCS300AN
- Page 1 Please read this manual carefully before operating Please read this manual carefully before operating your set and retain for future reference. your set and rt for future reference. MODEL MODEL LCF600UN/ LCF600UR LCS300AN/ LCS300AR LCS500UN/ LCS500UR LCF800IN/ LCF800IR P/NO : MFL63287302 P/NO : MFL63287305...
-
Page 2: Table Of Contents
3.2.9), 72/245/EEC, and 2006/95/EC. Pausing or restarting CD playback European representative : Searching for a section within a track /file LG Electronics Service Europe B.V. Veluwezoom 15, 1327 Skipping to another track/ file AE Almere, The Netherlands Checking information about your music... -
Page 3: Safety Note
Safety Note CAUTION : This product uses a Laser System. To ensure proper use of this product, please read this owner’s manual carefully and retain it for future reference. Should the unit require maintenance, contact an authorized service center. Performing controls, adjustments, or carrying out procedures other than those specified herein CAUTION may result in hazardous radiation exposure. -
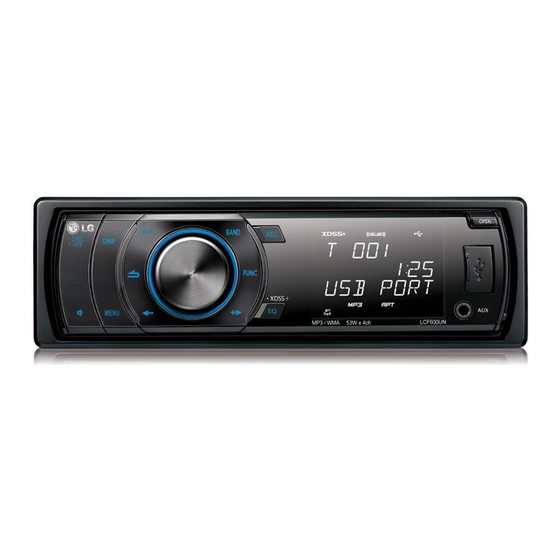
Page 4: Front Panel
Front Panel a [SRC] Selects function sources. f [REC] Recording to USB g Display window [• OFF] Power on/off. b [DISP] h Remote Sensor i [OPEN] Opens the front panel. • Press it, you can check the clock time. • Press and hold it, you can turn off the dis- ] Returns to the previous step. -
Page 5: Remote Control
Remote Control Battery Installation Pull out the battery holder with a sharp product like a ball point pen. g Adjusts volume level. h [m M] Put the battery with cor- rectly on the battery holder. Skip / Search / Seek / Tune Push the battery holder back into its original position. -
Page 6: About Detachable Control Panel
About detachable control panel Attaching the control panel Detaching the control panel Attach part A of the control panel to Press the [OPEN] to open the con- part B of the unit. trol panel. Push the control panel to right. Attach part C of the control panel to part D of the unit while pushing the control panel to left. -
Page 7: Installation
Installation ISO-DIN Installation Basic Installation Slide the unit into the ISO-DIN Before installing, make sure that the Bend the claws frame. according to ignition-switch is set to OFF and the thickness Fit screws removed from the old remove the terminal of the car battery of the unit. -
Page 8: Connection
Connection Before connecting, make sure that the ignition switch is set to OFF, and remove the battery # terminal to avoid short circuits. Wired remote input(Black): Hard-wired control adapter can be connected. (Optional/Not supplied) To Audio in (OPTIONAL) To Audio out (OPTIONAL) Rear Left (Sub-woofer Left) Front Left Rear Right (Sub-woofer Right) -
Page 9: Basic Operation
Turning off the display light Basic Operation 1. Press and hold DISP. 2. Press and hold it again to turn it on. ON PLAYER ON REMOTE Note 1. Turn the unit on. Any key Under the light-off condition, press any keys, the light is turned on and then off 2. -
Page 10: Listening To A Cd
For Light setting Listening to a CD You can adjust the light effects by adjusting LED, DIM, or DIM L. LED LED COL1/ COL2/ AUTO: You can change the LED window color. ON PLAYER ON REMOTE DIM(Dimmer) OFF / ON / AUTO : You can change the brightness of the dis- OPEN 1. -
Page 11: Playing Back Tracks/Files In A Way You Want
You have to set the disc format option to [Mastered] in order to make the discs compatible with the LG players when formatting rewritable discs. When setting On the Unit the option to Live File System, you cannot use it on LG players. 1. Press FUNC (Mastered/Live File System : Disc format system for Windows Vista) 2. -
Page 12: Listening To The Radio
Adjusting TUNER settings Listening to the radio On the Unit 1. Press FUNC. ON PLAYER ON REMOTE 2. Rotate the volume knob to select an item and press it. 1. Select a source to tuner. 3. Rotate the volume knob to set the option and press it. 4. - Page 13 (OPTIONAL) REG (Region) ON/ OFF REG ON : The unit switches to another station, within the same network, broadcasting the same program when the receiving signals from the current station become weak. REG OFF : The unit switches to another station, within the same network when the receiving signals from the current station become weak.
-
Page 14: Using An Usb Device
Recording to USB from CD or FM tuner Using an USB device 1. Open the USB cover and connect it to the unit. ON PLAYER ON REMOTE 2. Select CD or FM tuner. 3. Start playback. 1. Open the USB cover. 4. -
Page 15: Listening To Music By Connecting Ipod
Playing back files in a way you want Listening to music by connecting iPod On the Unit (Only in LCF800IN/ LCF800IR) 1. Press FUNC. 2. Rotate the volume knob to select an item and press it. 3. Rotate the volume knob to set the option. You can enjoy iPod-stored music on the unit by connecting it to the USB 4. -
Page 16: Troubleshooting
Troubleshooting Symptom Cause Correction General Power doesn’t turn on / Leads and connectors are not properly. Confirm once more that all connections are The unit doesn’t operate. correct. The fuse is blown. Rectify the problem that caused the fuse to blow, and then replace it. -
Page 17: Specifications
Specifications Compatible iPod models General iPod touch • Output Power 53 W x 4 CH (Max.) • iPod classic Power Source DC 12 V Speaker impedance 4Ω • iPod with video (5th generation) Ground System Negative • iPod nano (1st generation) Dimensions (W x H x D) 178 x 50 x 169 mm (Without Control Panel) •...