Table of Contents
Advertisement
Advertisement
Table of Contents

Related Manuals for AT&T TL7812


Summary of Contents for AT&T TL7812
- Page 1 User’s manual TL7812 DECT 6.0 cordless headset and handset lifter...
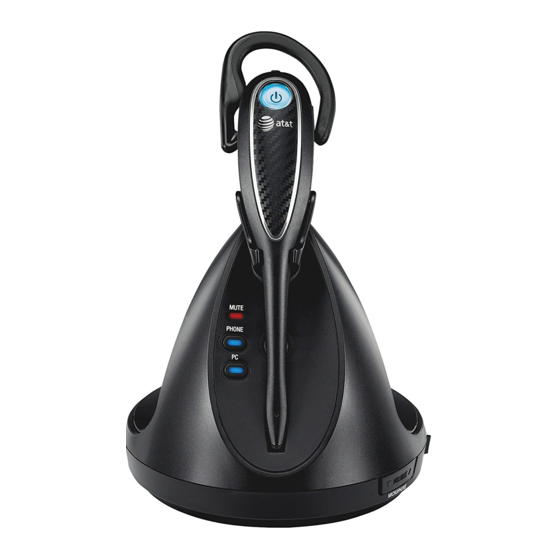
- Page 2 TL7812 DECT 6.0 Cordless Headset and Handset Lifter. Whether you want to connect directly to your corded telephone, telephone line or computer, you can with the TL7812 headset. Control costs and support your mobile workforce with connectivity to Voice over IP (VoIP) services like Skype Microsoft Lync .
- Page 3 Check to make sure the headset package includes the following items. Save your sales receipt and original packaging in the event warranty service is necessary. Quick start guide User’s manual TL7812 TL7812 DECT 6.0 cordless headset DECT 6.0 cordless headset and handset lifter...
- Page 4 Parts checklist Five earbuds Two over the ear hooks Over the head band Behind the neck band USB cable Handset lifter lifter Large lifter pad lifter pad Anti-slip pad Auxiliary ring detector...
- Page 5 Optional accessory This headset system can be expanded by registering a TL7800 accessory headset (sold separately) to it. The TL7800 includes an expansion headset and a headset charger (up to two headsets can be used with the same headset base). For more information about the product, visit our website at www.telephones.att.com/smb TL7800...
-
Page 6: Table Of Contents
User’s manual TL7812 DECT 6.0 cordless headset and handset lifter Table of contents Getting started Option 3: Connect the headset to a telephone Introduction ........1 wall jack ........20 Quick reference guide - Adjust the corded handset headset ........... 2 audio ..........21... - Page 7 Operation Precautions for users of implanted cardiac Headset operation ......37 pacemakers ........61 Power on/off the Pacemaker patients ....61 headset .........37 FCC Part 68 and ACTA....62 PHONE mode and FCC Part 15 ........64 PC mode ........37 Limited warranty ......65 PHONE mode.........38 Technical specifications ...68 Make a call........38 DECT 6.0 digital...
-
Page 8: Getting Started
Getting started Introduction The TL7812 is a cordless headset and base that allows you to have handsfree phone conversations. The package also comes with the TL7100 handset lifter, making it convenient to answer and end calls right from the headset. It can be used in different ways depending on your needs. -
Page 9: Quick Reference Guide
Getting started Getting started Quick reference guide - headset (On/off button and light) Press to make, answer or end a call (pages 38-39). Headset lights light status • On when the headset is charging in the headset base. • Flashes every 10 seconds to indicate the battery is low when the headset is not in the headset base. - Page 10 Getting started Quick reference guide - headset VOL+/VOL- Slide the volume switch to the right or left to adjust the headset ringer volume while in idle mode (page 39), or the listening volume while on a call Earpiece (page 41). FLASH Battery with cover attached...
-
Page 11: Headset Alert Tones
Getting started Quick reference guide - headset Headset alert tones • One short beep every The microphone is muted. 30 seconds • Two beeps Error alert tone. • The ringer volume has reached its lowest setting. • The listening volume has reached its highest or lowest setting. -
Page 12: Quick Reference Guide - Headset Base
Getting started Quick reference guide - headset base Magnetic charging mount PAIR Place the headset here Use to initiate headset for charging. registration or deregistration. MUTE (light) PC (mode button and light) PHONE (mode button and light) Headset base lights •... - Page 13 Getting started Quick reference guide - headset base VOLUME /MICROPHONE Press the volume keys on the side of the headset base to adjust the speaking volume when on a call (page 41). (USB port) Open the port cover to plug in the USB cable for use with PC mode (pages 17-18).
- Page 14 Getting started Quick reference guide - headset base CORDED PHONE CONNECTION jack (blue dot) This jack is only used to connect the corded phone connection cable (page 15 or 17). TEL WALL JACK (red dot) POWER jack (green dot) Corded handset audio adjust switch Use this switch to adjust the corded handset audio when you have connected the headset base to a corded telephone...
-
Page 15: Quick Reference Guide - Handset Lifter
Getting started Quick reference guide - handset lifter SENSOR ADJ knob Adjusts the sensitivity of the ring detector (page 27). ADJUST LIFTER knob Adjusts the height of the lifter arm (page 23). Lifter arm Holds the corded telephone handset. Switch hook presser When the CORDED HANDSET CONNECTED switch is set to YES, pressing on the... - Page 16 Getting started Quick reference guide - handset lifter RING ON/OFF Press to turn the ring detector on or off. When the ring detector is off, the cordless headset does not ring (page 27). Switch hook presser adjustment knob Adjusts the position of the switch hook presser (page 23).
-
Page 17: Status Light
Getting started Quick reference guide - handset lifter STATUS light • On when the headset is not in use and the ring detector is turned off. • Flashes slowly when the headset is in use and the ring detector is turned off. Blue •... -
Page 18: Installation
Getting started Installation You must install and STOP See pages 12-13 charge the battery before for easy instructions. using the headset. Colored labels The cords have colored labels that guide you to plug them into the correct headset base jacks. The back of the headset base has color-coded dots and the names of the jacks above them that correspond to the colored labels on the cords. -
Page 19: Battery Installation
Getting started Battery installation The battery is permanently attached to the battery compartment cover. Do not try to separate them from each other. After installing the battery pack, charge it for at least 15 minutes. You may be able to make and receive short calls. For optimal performance, charge the headset battery for at least three hours before use. -
Page 20: Headset Base Installation And Battery Charging
Getting started Headset base installation and battery charging After installing the battery, charge the headset by placing it in the magnetic charging mount as shown below. The light turns on when the headset is charging. Plug the small end of the headset base power adapter into the POWER jack (green dot) at the back of the headset base. -
Page 21: Headset Base And Handset Lifter Installation
Getting started Headset base and handset lifter installation Installation options There are three installation options as described below. For Options 1 and 2, the handset lifter works with the cordless headset to provide a complete communication solution for most corded telephones. The lifter raises and lowers its switch hook presser to answer, make and end phone calls. -
Page 22: Option 1: Connect The Headset To A Corded Phone
Getting started Headset base and handset lifter installation Option 1: Connect the headset to a corded phone Plug one end of the corded phone connection cable into the CORDED PHONE CONNECTION jack (blue dot) at the back of the headset base. Plug the other end of the corded phone connection cable into the handset jack on the corded phone. - Page 23 Getting started Headset base and handset lifter installation Option 1: Connect the headset to a corded phone (cont.) Plug the large end of the headset base power adapter into a power outlet not controlled by a wall switch. Plug the end of the lifter control cable into the LIFTER jack at the back of the headset base.
-
Page 24: Option 2: Connect The Headset To A Corded Phone And Computer
Getting started Headset base and handset lifter installation Option 2: Connect the headset to a corded phone and computer Plug one end of the corded phone connection cable into the CORDED PHONE CONNECTION jack (blue dot) at the back of the headset base. - Page 25 Getting started Headset base and handset lifter installation Option 2: Connect the headset to a corded phone and computer (cont.) Plug the small end of the headset base power adapter to the POWER jack (green dot) on the headset base. Plug the large end of the headset base power adapter into a power outlet not controlled by a wall switch.
- Page 26 Getting started Headset base and handset lifter installation Option 2: Connect the headset to a corded phone and computer (cont.) After you have installed the AT&T Softphone Call Manager, check to make sure the audio setting is properly configured in your Windows system. If you have installed Skype and/or Microsoft Lync and want to use them with your headset, make sure the audio settings are configured correctly in the programs as well.
-
Page 27: Option 3: Connect The Headset To A Telephone Wall Jack
Getting started Headset base and handset lifter installation Option 3: Connect the headset to a telephone wall jack Make sure the CORDED HANDSET CONNECTED switch on the right side of the headset base is set to NO. Connect the line cords as shown below. Use the included line splitter to connect the headset base and your telephone to the same telephone wall jack. -
Page 28: Adjust The Corded Handset Audio
Getting started Headset base and handset lifter installation Adjust the corded handset audio After you have connected the headset base to your corded phone, you may need to adjust the corded handset audio switch at the bottom of the headset base for optimal sound quality. -
Page 29: Attach The Lifter
Getting started Headset base and handset lifter installation Attach the lifter 1. To choose where to install the lifter on your telephone, look at the space underneath the corded handset. If there is a speaker, the lifter should be centered over the speaker. -
Page 30: Adjust The Switch Hook Presser Position
Getting started Headset base and handset lifter installation Adjust the switch hook presser position Turn the knob to move the switch hook presser until it is lined up with your telephone switch hook. Adjust the height of the lifter arm Turn the ADJUST LIFTER knob to change the height of the lifter arm. -
Page 31: Lifter Adjustments And Testing
Getting started Headset base and handset lifter installation Lifter adjustments and testing 1. Make sure that the CORDED HANDSET CONNECTED switch on the headset base is set to YES. 2. Turn the switch hook presser adjustment knob until the switch hook presser is just above the switch hook (see page 23). -
Page 32: Installation Of Large Lifter Pad (Optional)
Getting started Headset base and handset lifter installation Installation of large lifter pad (optional) If the small lifter pad cannot hold the corded handset steadily, you can attach a large lifter pad (provided) to enlarge the contact area. 1. Hold the large lifter pad in front of the small lifter pad as shown below. -
Page 33: About Internal And Auxiliary Ring Detectors
Getting started About internal and auxiliary ring detectors The internal or auxiliary ring detector detects the telephone ringer and sends a ring tone to the headset earpiece. If you installed the lifter over the top of the corded phone speaker, the internal ring detector will recognize when the phone rings. -
Page 34: Ring Detector On/Off
Getting started About internal and auxiliary ring detectors Ring detector on/off When the ring detector detects an incoming call, it sends a ring tone to the headset earpiece. • Press the RING ON/OFF button on the lifter to turn the ring detector on or off. -
Page 35: Headset Attachments
Getting started Headset attachments Earbud There are a total of six earbuds provided. One of them has been attached to the headset. They come in three sizes of which there are two types: one normal and one providing a deeper fit. Follow the steps below to change the earbud. -
Page 36: Over The Ear Hook
Getting started Headset attachments Over the ear hook There are two ear hooks provided. Choose the size that best fits your need to attach to the headset. Follow the steps below to attach an ear hook to the headset. To position the headset to wear on the left or right ear: •... - Page 37 Getting started Headset attachments To attach the ear hook to the headset: Make sure there are no headset attachment, except the earbud, connected to the headset. Insert the earpiece into the ear hook loop as shown in Figure 3. Press the edge of the ear hook loop towards the earpiece until it clicks into place as shown in Figure 4.
- Page 38 Getting started Headset attachments To remove the ear hook from the headset: Hold the headset with one hand. Twist and pull the ear hook with the other hand until it separates from the earpiece.
-
Page 39: Over The Head Band
Getting started Headset attachments Over the head band To attach the head band to the headset: Make sure there are no headset attachment, except the earbud, connected to the headset. Insert the earpiece into the loop of the ear pad as shown in Figure 6. - Page 40 Getting started Headset attachments To remove the head band from the headset: Hold the headset with one hand and the ear pad with the other hand. Twist and pull the headset until it separates from the ear pad.
-
Page 41: Behind The Neck Band
Getting started Headset attachments Behind the neck band By default, the ear pad on the neck band is positioned to be worn on the right ear. To attach the headset to the neck band: Make sure there are no headset attachment, except the earbud, connected to the headset. - Page 42 Getting started Headset attachments To wear the headset on your left ear: Remove the ear pad and supporting pad from the neck band by carefully pulling them up through the stems at the end of the neck band as shown in Figure 12. Ear pad Supporting pad Figure 12...
- Page 43 Getting started Headset attachments To remove the neck band from the headset: Hold the headset with one hand and the ear pad with the other hand. Twist and pull the headset until it separates from the ear pad.
-
Page 44: Headset Operation
Operation Headset operation Power on/off the headset Power on the headset before use. To power on the headset: • Place the headset in the headset base. -OR- • Press and hold for two seconds. light flashes blue three times and you hear three beeps when it is being powered on. -
Page 45: Phone Mode
Operation PHONE mode Make a call To make calls on your home or office telephone line, press PHONE on the headset base for PHONE mode. When the headset base is connected to the corded handset of your telephone with the handset lifter installed: 1. -
Page 46: End A Call
Operation PHONE mode End a call When the headset base is connected to the corded handset of your telephone with the handset lifter installed: • Press on the headset to end a call. The switch hook presser pushes down the switch hook and ends the call. When the headset base is connected to a telephone wall jack: •... -
Page 47: Temporary Ringer Silencing
Operation PHONE mode Temporary ringer silencing Press MUTE to temporarily silence the ringer in the headset earpiece. This silences the ringer without disconnecting the call. The next incoming call rings normally at the preset volume. NOTE: If you have more than one headset registered to the headset base, both headset earpieces ring when there is an incoming call. -
Page 48: Options While On Calls
Operation Options while on calls Volume control To adjust the listening volume: • While on a call, slide the volume switch at the top of the headset towards VOL+ or VOL- to adjust the listening volume. To adjust the speaking volume: VOLUME /MICROPHONE on the •... -
Page 49: Mute
Operation Options while on calls Mute The mute function turns off the headset microphone. You can hear the caller, but the caller cannot hear you. To mute a call: • Press MUTE on the headset to turn off the headset microphone. The voice prompt "Mute on"... -
Page 50: Switching Between Phone Mode And Pc Mode
Operation Options while on calls Switching between PHONE mode and PC mode You can switch back and forth between PHONE mode and PC mode while on a call by pressing the corresponding mode button on the headset base. Once selected, the PHONE mode light or the PC mode light flashes twice every three seconds to indicate that line is on hold. -
Page 51: Adding And Registering Headsets
Adding and registering headsets The TL7812 supports up to two cordless headsets. The headset provided with your TL7812 is already registered. You can add a new headset (TL7800, purchased separately) to the headset base. You must register a new headset with the headset base before use (see page 45). -
Page 52: Register A Headset To The Headset Base
Getting started Adding and registering headsets Register a headset to the headset base Make sure the battery is properly installed in the headset (see page 12). The light flashes slowly in red and blue to indicate the headset is not registered. -
Page 53: Deregistering Headsets
Getting started Deregistering headsets You may need to deregister your headsets if: You wish to register your headset to a different headset base. -OR- You have two registered headsets and need to replace one of them. You must first deregister both headsets, and then register each headset you wish to use again, one at a time. -
Page 54: Appendix
Appendix Troubleshooting If you have difficulty with your telephone, please try the suggestions below. For customer service, visit our website at www.telephones.att.com/smb or call 1 (800) 222–3111 1 (866) 288-4268 . In Canada, dial My headset doesn’t work at all. •... - Page 55 Appendix Troubleshooting There is no dial tone. • Try all the suggestions above. • Move the cordless headset closer to the headset base. You might have moved out of range. • Make sure that the CORDED HANDSET CONNECTED switch is set properly (page 16, 18 or 20).
- Page 56 Appendix Troubleshooting I cannot dial out. • Try all the suggestions above. • You must use a telephone on the same line to dial out. Once you have dialed the number, you can press to join the call (page 38). •...
- Page 57 Appendix Troubleshooting I get noise, static, or a weak signal even when I’m near the headset base. • If you subscribe to high-speed Internet service (DSL - digital subscriber line) through your telephone line, you must install a DSL filter between the telephone line cord and the telephone wall jack.
- Page 58 Appendix Troubleshooting I cannot hear a ring tone from the headset when there is an incoming call. • The headset does not have an external ringer. You can only hear the ring tone when you are wearing the earpiece. • If you have pressed MUTE on the headset when it is ringing, it mutes the ring tone of the headset.
- Page 59 Appendix Troubleshooting I hear other calls while using my headset. • Plug a different telephone into the telephone jack that you are currently using. If you still hear other calls, the problem is probably in your building's wiring or local service. Call your telephone service provider.
- Page 60 Appendix Troubleshooting I want to use my headset with a different headset base. • You need to deregister the headset from the current headset base (page 46), and then register it to the new headset base (page 45). I cannot answer an incoming call in PC mode. •...
- Page 61 Appendix Troubleshooting light on the headset is off while charging. • Make sure the power and line cords are plugged in correctly and securely. • Make sure that the battery is securely installed in the cordless headset. • Make sure the headset is sitting properly in the base to charge. •...
- Page 62 Appendix Troubleshooting When I press on the headset, the handset lifter rises, but the call is not connected or I do not hear a dial tone. • Try all the suggestions above. • When using the handset lifter, make sure the CORDED HANDSET CONNECTED switch on the headset base is set to YES and the telephone line cord is connected to the telephone line jack on the back of the corded phone.
- Page 63 Appendix Troubleshooting My corded phone is ringing, but my headset is not ringing. • Make sure the CORDED HANDSET CONNECTED switch on the headset base is set to YES. • Make sure that the RING ON/OFF button on the lifter is turned on.
- Page 64 Appendix Troubleshooting Nothing happens when I move the corded handset audio adjust switch. • When the handset lifter is used, make sure the CORDED HANDSET CONNECTED switch on the headset base is set to YES. Slide the corded handset audio adjust switch at the bottom of the headset base from A to F until you obtain good sound quality.
-
Page 65: Maintenance
Appendix Maintenance Taking care of your headset • Your cordless headset contains sophisticated electronic parts, so it must be treated with care. • Avoid rough treatment. • Place the headset down gently. Save the original packing materials to protect your headset if you ever need to ship it. Avoid water •... -
Page 66: Important Safety Information
Appendix Important safety information This symbol is to alert you to important operating or servicing instructions that may appear in this user’s manual. Always follow basic safety precautions when using this product to reduce the risk of injury, fire, or electric shock. -
Page 67: Especially About Cordless Headsets
Appendix Important safety information Caution: Use only the power adapter provided with this product. To obtain a replacement, visit our website at www.telephones.att.com/smb or call 1 (800) 222-3111 1 (866) 288-4268 In Canada, dial Especially about cordless headsets • Privacy: The same features that make a cordless headset convenient create some limitations. -
Page 68: Precautions For Users Of Implanted Cardiac Pacemakers
Appendix Important safety information CAUTION • There may be a risk of explosion if you use a wrong type of battery. Use only the supplied rechargeable battery or replacement battery (model BT191665). • Change this product's batteries only in accordance with the instructions and limitations specified in this manual. -
Page 69: Fcc Part 68 And Acta
Appendix FCC Part 68 and ACTA This equipment complies with Part 68 of the FCC rules and with technical requirements adopted by the Administrative Council for Terminal Attachments (ACTA). The label on the back or bottom of this equipment contains, among other things, a product identifier in the format US: AAAEQ##TXXXX. - Page 70 Appendix FCC Part 68 and ACTA If this product is equipped with a corded or cordless handset, it is hearing aid compatible. If this product has memory dialing locations, you may choose to store emergency telephone numbers (e.g. police, fire, medical) in these locations. If you do store or test emergency numbers, please: Remain on the line and briefly explain the reason for the call before hanging up.
-
Page 71: Fcc Part 15
Appendix FCC Part 15 This equipment has been tested and found to comply with the requirements for a Class B digital device under Part 15 of the Federal Communications Commission (FCC) rules. These requirements are intended to provide reasonable protection against harmful interference in a residential installation. -
Page 72: Limited Warranty
Appendix Limited warranty The AT&T brand is used under license - any repair, replacement or warranty service, and all questions about this product should be directed to: In the United www.telephones.att.com/smb States of America, visit or call 1 (800) 222-3111 1 (866) 288-4268 . - Page 73 Appendix Limited warranty 4. What is not covered by this limited warranty? This limited warranty does not cover: • PRODUCT that has been subjected to misuse, accident, shipping or other physical damage, improper installation, abnormal operation or handling, neglect, inundation, fire, water, or other liquid intrusion; or •...
- Page 74 Appendix Limited warranty 6. What must you return with the PRODUCT to get warranty service? You must: Return the entire original package and contents including the PRODUCT to the service location along with a description of the malfunction or difficulty; Include a “valid proof of purchase”...
-
Page 75: Technical Specifications
Sound level protection technology conforms to the current regulations and is used to filter out the loud and high-pitched noises. Encrypted for added security The 64 bit encryption adds an extra layer of security between your TL7812 headset and TL7812 base to keep your conversations private. -
Page 76: Index
Index Index Index AC adapter 13, 16, 18, 68 Deregistration 46 Adjust Dial tone 23, 24, 38 corded handset audio 21 DSL 11, 15, 17, 20 height of the lifter arm 23 sensitivity level 27 switch hook presser Earbud 28 position 23 Ear hook 29–31 Alert tones 4... - Page 77 Index Index Limited warranty 65–67 Listening volume 41 Sensitivity level 27 Small lifter pad 25 Speaking volume 41 Magnetic charging Status light 10 mount 5, 13 Switch hook presser 23 Maintenance 58 Multiple headsets use 42 Mute 42 Technical specifications 68 Temporary ringer silencing 40 Troubleshooting 47–57 Neck band 34–36...
- Page 78 www.telephones.att.com/smb © 2012 Advanced American Telephones. All Rights Reserved. AT&T and the AT&T logo are trademarks of AT&T Intellectual Property licensed to Advanced American Telephones, San Antonio, TX 78219. The Skype name is a trademark of Skype. Microsoft Lync is a registered trademark of Microsoft Corporation. Printed in China.