Brother PT-9700PC User Manual
P-touch
Hide thumbs
Also See for PT-9700PC:
- User manual (118 pages) ,
- Manual (8 pages) ,
- Technical specifications (4 pages)

Related Manuals for Brother PT-9700PC


Summary of Contents for Brother PT-9700PC
- Page 1 97OOPC / 98OOPCN User’s Guide ST AT U S ST AT U S If you encounter any problems with your product, visit our Web site: http://solutions.brother.com/...
- Page 2 Introduction Thank you for purchasing the PT-9700PC/PT-9800PCN. The PT-9700PC/PT-9800PCN (hereafter, referred to as “printer”) is a label printer that enables you to easily print custom labels after it is connected to a computer. Also, with a bar code reader connected to the printer, labels and bar codes can easily be printed by scanning bar codes.
-
Page 3: Compilation And Publication Notice
The contents of this manual and the specifications of this product are subject to change without notice. If new versions of the PT-9700PC/9800PCN software become available, this manual may not reflect the updated features. Therefore, you may find that the software and the contents in this manual are different. -
Page 4: Safety Precautions
Do not use a damaged adapter cord or power Failure to observe this may result in an supply cord. accident or damage. Brother shall not assume any responsibility for any accident or damage Do not overload the power outlet. resulting from not using the specified AC adapter (AD9100ES), adapter cord, power supply cord and USB cable. - Page 5 WARNING Printer Follow these guidelines to avoid fire, damage, electric shock, and/or the risk of injury. Do not allow the printer to get wet in any way. Do not touch the blade of the cutter unit. Do not touch any metal parts near the print head.
-
Page 6: General Precautions
● Depending on the environmental conditions and the applied settings, some characters or symbols may be difficult to read. ● Use only Brother TZ tapes or Brother HG tapes with this printer. Do not use tapes that do not have the mark. -
Page 7: Table Of Contents
Connecting to the power source ....................12 Connecting to a computer ......................13 Using the interface cables ......................14 Installing the tape cassette ..................15 Authorised tape ..........................15 Installing the tape cassette ......................15 Installing the software for PT-9700PC ................16 ® ® When using Microsoft Windows ....................16 ®... -
Page 8: Unpacking The Printer
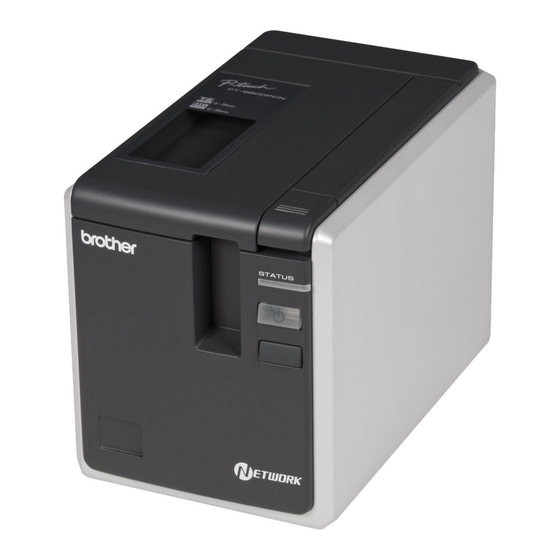
Unpacking the printer Open the box and confirm that the following items are included. If any item is missing or damaged, please contact your Brother dealer or Brother Customer Service. ■ PT-9700PC/PT-9800PCN ■ USB cable Printer (PT-9700PC) ST AT US ■... -
Page 9: General Description
General description ■ PT-9700PC ST AT US DC IN 24V Front view Rear view ■ PT-9800PCN ST AT US DC IN 24V Front view Rear view 1. Tape compartment cover 9. Serial (RS-232C) port 2. Label outlet 10. USB port 3. -
Page 10: Led Lamps
LED lamps The condition of the printer shown by LED lamps on printer or USB Direct Interface (PT-9800PCN only). ■ LED lamps on printer Lamp condition Condition Remedy Power lamp STATUS (green) lamp (red) Printer standby condition — Flashing Receiving data —... - Page 11 If the STATUS lamp Roller holder error continues to flash, contact your Flashing fast Brother dealer or Brother Customer Service. Turn the printer off and on with the Print head overheat error power button.
-
Page 12: Getting Ready To Use Your Printer
You will also need to install P-touch Editor label design software. For details on installing this software, refer to “Installing the software for PT-9700PC” (→ P. 16) or “Installing the software for PT-9800PCN” (→ P. 20). Creating labels After setting up your printer you can start creating labels. -
Page 13: Connecting The Printer
Connecting the printer Connect the printer to the power source and a computer. Plug the power supply cord into an Connecting to the power source electrical outlet (AC 220 to 240 V). Connect the included power supply cord to the AC adapter. DC IN Turning on the printer Turn on the main power switch on the... -
Page 14: Connecting To A Computer
Connecting to a computer Connect the printer to a computer using the interface cables. The interface cables used to connect to a USB port, serial (RS-232C) port and LAN (10/100BASE-TX Wired Ethernet) port are different. Basic Setup Serial port (ESC/P and Operation Systems P-touch USB port... -
Page 15: Using The Interface Cables
For serial and network interfaces, a shielded interface cable should be used to ensure ● compliance with the limits for EMC. Changes or modifications not expressly approved by Brother Industries, Ltd. may affect the ● performance and print quality, and damage may not be covered under the limited warranty. -
Page 16: Installing The Tape Cassette
Installing the tape cassette This section lists the types of tape that may be used with the printer and explains the procedures to install the tape cassettes. Install the tape cassette. Authorised tape Make sure that the end of the tape feeds under the tape guide. -
Page 17: Installing The Software For Pt-9700Pc
“When using Mac OS ” (→ P. 18). Note If you will be using the models “PT-9700PC”, it is necessary to install the following versions of ● P-touch Editor or b-PAC SDK to avoid printing difficulties: [P-touch Editor] version 5.0.101 and later (included on CD). - Page 18 Restart your computer if you are instructed to do so. Start the software. Click “Start” - “All Programs (Programs)” - “Brother P-touch” - “P-touch Editor 5.0” to start P-touch Editor 5.0. When instructed, connect your printer to the computer by using the USB cable, and then turn on the printer.
-
Page 19: When Using Mac Os
Double-click the “PT_Series” (CD-ROM) Follow the on-screen instructions. icon. When the installation is completed Double-click “Brother PT-9700PC and the message “Click Restart to Driver.pkg” in the “Mac OS X” folder. finish installing the software.” is The Driver Installer starts up. Follow the displayed, click [Restart]. - Page 20 ® For Mac OS X 10.3.9 - 10.4.x Click [Add] and choose USB at the top of the screen. Choose “PT-9700PC” from the list and click [Add] again to add the printer to the “Printer List”. ® For Mac OS X 10.5.x - 10.6...
-
Page 21: Installing The Software For Pt-9800Pcn
For details of the Network, see the “Network User's Guide” (PDF). ● You can find the Software User's Guide or Network User´s Guide (PDF) by clicking “Start” - ● “All Programs (Programs)” - “Brother P-touch” - “Manuals” - “PT-9800PCN” - “Software User's Guide” or “Network User's Guide”. Custom Installation ®... - Page 22 When instructed to download the optional tools, select your choice and click [Next]. • If you choose “Yes, display the page”, you will go to the Brother Solutions Center web site before finishing the installation (recommended). Choose your region (eg. Europe), your country, your model and Downloads for your model.
- Page 23 When instructed to download the • If you choose “Yes, display the page”, optional tools, select your choice and you will go to the Brother Solutions click [Next]. Center web site before finishing the • If you choose “Yes, display the page”, installation (recommended).
- Page 24 The BRAdmin Light is a utility for initial setup of exceptions?” appears. Check your of Brother network connected devices. It can computer environment and choose also search for Brother products on your [Yes] or [No].
-
Page 25: When Using Mac Os
® Start up the Macintosh , and insert the CD-ROM into the CD-ROM drive. Double-click the “PT_Series” (CD-ROM) icon. Double-click “Brother PT-9800PCN Driver.pkg” in the “Mac OS X” folder. The Driver Installer starts up. Follow the on-screen instructions. - Page 26 After the installation is completed and After restarting the computer, the screen shown below is displayed, connect your printer to the computer click [Close]. by using the USB/LAN cable, and then The installation of the printer driver is turn on the printer. completed.
- Page 27 Set the appropriate printer name. When the screen returns to the “Printer List” / “Print & Fax” screen, check that the “PT-9800PCN/Brother PT-9800PCN” is added, and close the “Printer List” / “Print & Fax” screen. Now you can use the printer.
- Page 28 Mac OS X 10.5.x-10.6 When the screen returns to the “Printer List” / “Print & Fax” screen, check that the “Brother PT-9800PCN” is added, and close the “Printer List” / “Print & Fax” screen. Now you can use the printer.
- Page 29 X 10.3.9 setup of Brother network connected Click [Add] and choose IP Printing at the devices. It can also search for Brother top of the screen. products on your network, view the status Enter the IP address of the printer into and configure basic network settings, such the Printer Address box.
- Page 30 Method”. Enter the IP Address, and Gateway using BRAdmin Light Subnet Mask and Gateway, and then click [OK]. Click “Library” - “Printers” - “Brother” - “P-touch Utilities” - “BRAdmin Light.jar”. BRAdmin Light will search for new devices automatically. Note If you have a DHCP/BOOTP/RARP ●...
-
Page 31: Uninstalling The Software
The “Uninstall or change a program” Note window appears. ® For details, see Windows Help. ● ® For Windows Choose “Brother P-touch Editor 5.0”, and ® For Windows click [Remove]. Choose “Brother PT-XXXX”, and click ® ® For Windows Vista /Windows “File”... -
Page 32: When Using Mac Os
In case the “Terminal” window does not ● appear by double-clicking the ® For Windows “UninstallPtEditor.command”, right click Click the “Drivers” tab and choose “Brother (or press control key + click) the PT-XXXX”. Then, click [Remove]. “UninstallPtEditor.command”. The Go to step context menu appears. Open the ®... -
Page 33: Advanced Function
Advanced function After the printer has been connected to the computer, labels can be created and printed. This section describes various useful print settings and how to use a bar code reader to print labels without a computer. ■ Printing labels at high speed or a high resolution See “Printing at a higher speed or at a higher resolution”... -
Page 34: Distributed Printing
Select the “Advanced” tab, select the Distributed printing “Distributed printing” check box, and then click [Settings]. When printing a large number of labels, printing can be distributed among multiple printers. Since printing is performed at the same time, the total printing time can be reduced. Note Printing can be distributed to printers ●... - Page 35 Specify the tape width to be used for Click [OK] to close the “Distributed printing. Printing Settings” window. A. If only one printer has been selected. Setup is completed. In the dialog box from step , select the printer whose setting is to be specified, Click [OK] to start distributed printing.
-
Page 36: Btp (Bar Code Template Print) Function
● transferred to the printer, identical labels code reader models whose operation has can be printed simply by scanning the been confirmed, visit the Brother Solutions print settings and commands with a bar Center (http://solutions.brother.com/). code reader. Before this function can be used, the ●... - Page 37 “P-touch Template manual” (English only) from the P-touch Editor 5.0 to the from the following web site: printer by using the Transfer Manager. http://solutions.brother.com/ (See Software User´s Guide.) Choose your region (eg. Europe), your country, your model and Downloads for Note your model.
- Page 38 Choose your region (eg. Europe), your to create and print the bar code.
- Page 39 Scan the bar code whose data is to be Connect the database file to the label used. layout to be printed. For details on specifying the settings, refer to the “P-touch Editor Help”. (CODE128/9-digit) Scan the “Begin printing” bar code. Data to be The bar code is printed with the replaced by...
- Page 40 P-touch Template Settings, download ABC Company “P-touch Template manual” (English only) Planning from the following web site: Walter Freeman http://solutions.brother.com/ 8766 Choose your region (eg. Europe), your country, your model and Downloads for your model. To specify the number of copies to be ●...
-
Page 41: Using P-Touch Editor Lite Lan (Pt-9800Pcn And Windows ® Only)
DHCP, the IP address is automatically For example, click on the layout area assigned when the printer is connected and then type “Brother”. to the network, therefore the printer can be used immediately. However, since the IP address may change dynamically,... -
Page 42: Printing The Printer Settings
Note Printing the printer settings P-touch Editor Lite LAN is ideal for ● creating simple labels. To create labels The printer settings page shows a report listing with more complex designs, use the printer settings and the network settings P-touch Editor 5.0. (PT-9800PCN only). -
Page 43: Serial Interface Settings (Windows ® Only)
“Printer” (Windows Vista ® Click [Apply]. Windows The baud rate will be changed. Right-click the “Brother PT-XXXX” Click [Exit]. icon, and then select “Properties”. Click the “Ports” tab and then select Click [OK]. the port you use from the list. -
Page 44: Maintenance
Maintenance Your printer should be cleaned on a regular basis to maintain its performance. Note Always disconnect the AC adapter prior to cleaning the printer. ● ■ Cleaning the exterior of the printer Cleaning the head roller manually Wipe any dust and marks from the main unit using a soft, dry cloth. -
Page 45: Troubleshooting
Troubleshooting For printer troubleshooting, refer to the following list of possible problems. Q & A Problem Solution Check that the interface cable is connected correctly, the tape The printer does not print. cassette is installed correctly, and the tape compartment A printing error is received. - Page 46 COM2 may have been mistakenly selected in the Change Baud Rate Wizard or the Change Baud Rate Wizard.) Brother printer utilities. • Error 1 or Error 5: The serial port of the computer cannot be used. When another serial connection device is using the same COM port, labels cannot be printed.
- Page 47 Problem Solution • With a USB connection. When the printer is connected to the computer using a USB cable, the driver for the second printer is automatically installed through Plug and Play. • With a Peer-to-Peer connection (PT-9800PCN only). - If one PT-9800PCN is already installed: After the second printer is connected to the LAN, the installer starts up and the printer driver is installed.
-
Page 48: Product Specifications
Product specifications ■ Printer specifications Item Specification Power lamp (green), STATUS lamp (red), Display USB Direct Interface lamp (green/red) (PT-9800PCN only) Printing method Heat transfer laminated printing/thermal printing Print head 360 dpi/384 dot For TZ tape cassettes: 360 × 360 dpi Print resolution For HG tape cassettes: 360 ×... -
Page 49: Appendix
Appendix General procedure for the BTP (Bar code Template Print) function The general procedure for using the BTP (Bar code Template Print) function is described below. For details on specifying the various settings, refer to “BTP (Bar code Template Print) function” (→... -
Page 50: List Of Bar Codes For Specifying Settings
List of bar codes for specifying settings These are the bar codes for specifying settings used with the “BTP (Bar code Template Print) function” (→ P. 35). Note When using the bar codes in this list, set “Trigger for P-touch Template Printing” and ●... - Page 51 ■ For entering numbers* • 1 • 2 • 3 • 4 • 5 • 6 • 7 • 8 • 9 • 0 • 00 ■ Preset template number • Preset template 1 • Preset template 2 • Preset template 3 •...
- Page 52 • Preset template 5 • Preset template 6 • Preset template 7 • Preset template 8 • Preset template 9 • Preset template 10 ■ Select template ■ Delimiter ■ Begin printing *1 This is the default setting. *2 These are used when specifying the number of copies printed and when selecting a template number.
-
Page 53: Accessories
Obtain tape cassettes from your nearest authorised dealer. Use only Brother TZ tapes or HG tapes with this printer. Brother cannot be held responsible for trouble caused by the use of unauthorised supplies. Do not use tapes that do not have the mark. - Page 54 Size Description Stock No. Black characters on white tape TZ-251 Black characters on clear tape TZ-151 Black characters on red tape TZ-451 Black characters on blue tape TZ-551 Black characters on yellow tape TZ-651 Black characters on green tape TZ-751 Black characters on matt clear tape TZ-M51 Black characters on fluorescent orange tape...
- Page 55 Size Description Stock No. Black characters on white tape TZ-231 Black characters on clear tape TZ-131 Black characters on red tape TZ-431 Black characters on blue tape TZ-531 Black characters on yellow tape TZ-631 Black characters on green tape TZ-731 Black characters on matt clear tape TZ-M31 Black characters on fluorescent orange tape...
- Page 56 Size Description Stock No. 24 mm Black characters on white tape TZ-N251 Black characters on white tape TZ-N241 Black characters on heart tape TZ-PH41 18 mm Black characters on fruit tape TZ-PF41 Non-Laminated type Black characters on marine tape TZ-PM41 12 mm Black characters on white tape TZ-N231...
- Page 57 Size Description Stock No. Black characters on white tape TZ-FX261 36 mm Black characters on yellow tape TZ-FX661 Black characters on white tape TZ-FX251 24 mm Black characters on yellow tape TZ-FX651 Black characters on white tape TZ-FX241 18 mm Black characters on yellow tape TZ-FX641 Flexible ID type...
-
Page 58: Index
Index AC adapter ..........7, 12 Label outlet ........... 8 AC adapter socket......... 8 LAN port............8 LED lamp ............9 Bar code printing ......... 37 Bar code Template Print ......35 Main power switch ........8, 12 Bar codes for specifying settings ....49 Maintenance .......... - Page 59 Uninstalling the software ......30 USB cable ..........7, 14 USB Direct Interface ........8 USB port............8 User’s Guide ..........7...
- Page 60 Printed in China LW5581001...