Table of Contents
Advertisement
Quick Links
Advertisement
Table of Contents

Related Manuals for Haier L15D2-A0


Summary of Contents for Haier L15D2-A0
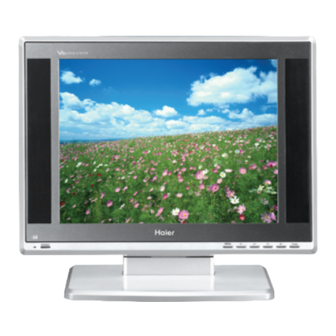
- Page 1 15"17"20"LCD TV USER'S MANUAL MODEL: L15SV6-A0, L17LV6-A1,L20AV6-A0 Please read this manual carefully before L17L6A-G1,L20L6A,L15G1-A0, using your television and keep this manual L17G1-A0,L20G1-A0,L15D2-A0, In a good place for future reference. L17D2-A0...
-
Page 2: Table Of Contents
To users: Thank you for using our LCD-TV. After unpacking, please check that you have the following items: Operating instructions, Remote control, AC- DC adapter, AC wire, and Batteries. Before connecting the LCD-TV and turning the power on, please read this book carefully. Please keep this book for later use. When it was loss of function by electrostatic shock, please switch the on/off button for restoring the function. -
Page 3: Safety Notice Items
Safety Notice Items Incorrect usage will cause fire or electric shock. To prevent this, please do as required when you are installing, using and cleaning this machine. To insure your safety and extend the life-span of LCD-TV, please read the following items carefully before using: l Please read and understand all the instructions before operation;... -
Page 4: Front Panel Controls
Front Panel Controls G1 series TV/AV MENU VOL- VOL+ Note: These buttons are on the top of the sets on these two series. Control Panel Function 1. MENU Press to select the main menu VOL (V-/VOL-) Volume down / Left orientation to adjust the item in the OSD (V+/VOL+) Volume up / Right orientation to adjust the item/Press to enter the submenu. -
Page 5: Connection Options
Connection Options The figure is just for referrence, please see the real.) D-SUB Input Connect to the D-SUB 15PIN analog output connector of the PC display card for PC display purpose Earphone port DC IN D-SUB IN HEADPHONE PC Audio Input Connect the PC output connector from a PC to the audio input port... -
Page 6: Remote Control Key Functions
Remote Control Key Functions When using the remote control, aim it towards the remote sensor on the TV Illustration of the keys on the remote control: POWER Power supply switch MUTE 2. MUTE Display current input signal information 3. DISPLAY TV channel number select 4. -
Page 7: Installing Batteries
Remote Control Key Functions PC-RGB system select 13. PC Select sound mode:VOICE/MUSIC/THEATRE/PERSONAL 14. SS Auto adjust (PC mode) 28. AUTO AD 15. RED Correspond to the differently colored subjects 16. CYAN 17. GREEN 18.YELLOW Switch to the Teletext with text mode/turn off Teletext and 19. -
Page 8: Connection Instructions
Connection Instructions Grounding Ensure that you connect the grounding / earth wire to prevent possible electric shock. If grounding methods are not possible, have a qualified electrician install a separate circuit breaker. Do not try to ground the unit by connecting it to telephone wires, lightening rods, or gas pipes. External Equipment Connections Antenna Connection - Antenna or Cable Service with a Cable Box Connections... -
Page 9: Pc Setup
Connection Instructions PC Setup You can use your LCD-TV as a monitor for your personal computer using a VGA cable (not supplied). Connection and use steps: 1.Read the user guide supplied with your computer and ensure that it has a VGA connector; 2.Make sure that the power of the LCD -TV and the PC are off;... -
Page 10: Vcr Setup
Connection Instructions VCR Setup - To avoid picture noise (interference), leave an adequate distance between the VCR and TV Connection and use steps: 1.Read the user guide supplied with your AV devices and ensure that it has Composite or S-Video connectors; 2.Make sure that the power of the LCD-TV and the AV device are off;... -
Page 11: Cable Tv Setup
Connection Instructions Cable TV Setup - After subscribing to a cable TV service from a local provider you can watch cable TV programming. The TV cannot display TV programming unless a TV tuner device or cable TV converter box is connected to the TV. - For further information regarding cable TV service, contact your local cable TV service provider(s). -
Page 12: Basic Operating Instructions
Basic Operating Instructions Turn on the LCD-TV When the POWER button is pressed and the LCD-TV is SLEEP DISPLAY MUTE POWER turned on, the indicator light on the front of the LCD-TV NICAM AUTO AD TV/AV changes from red to green. When the LCD-TV is turned on, the input mode is displayed on the screen. -
Page 13: Select The Tv Channel You Want
Basic Operating Instructions Select the TV Channel You Want You can use the number keys on the remote control to directly select TV channels. The LCD-TV can store up to 100 channels , and you can press the keys on the remote control or on the panel to make a selection. -
Page 14: Teletext
TELETEXT Some menu related function are not available in TELETEXT mode. MENU and AUTO AD control functions are not available in TELETEXT mode. If the TV is switched on by POWER after off in TELETEXT mode, or press TV/AV or PC button, the TELETEXT mode will disappear automatically. - Page 15 TELETEXT SUBCODE Button When Teletext information exceeds more than one page , it may take some time for the automatic changing of the sub pages to reach the sub page you require . It is possible to enter your required sub page and continue watching the normal programme until the correct sub page is found .
-
Page 16: Menu Operations
Menu Operations * In this manual, the OSD (On Screen Display) may be different from your TV s because it is just an example to help you with the TV operation. 1. Press MENU button to either display the VIDEO MENU source inputs. -
Page 17: Picture Menu Options Continued
Menu Operations Picture Menu Options Continued TV MENU 2. Press P+/P- button to enter the picture menu and to go up and down to select the desired option . 3.Press V+/V- button to increase and decrease the level to adjust the selected option to your preference . -
Page 18: Picture Menu Options Continued
Menu Operations Picture Menu Options Continued PHASE : Removes any horizontal distortion and clears or sharpness the displayed characters . CLOCK : Adjust the TFT-LCD to match the PC-RGB input source COLOR : Press V+/V- to adjust the color HUE : Adjust the tone of the picture . Appear and be adjusted only under NTSC mode SHARPNESS : Adjust the amount of the detail enhancement , the image sharpness rises as the number increases (By increasing the level, it will show... -
Page 19: Sound Menu Options Continued
Menu Operations Sound Menu Options Continued Function : VOLUME : Adjust the volume of your TV BALANCE : Adjust the balance of the audio output from left to right . When indication value of balance increases toward 100 , sound of the left speaker becomes weaker . -
Page 20: General Menu Options Continued
Menu Operations General Menu Options Continued 1. Press MENU button until the following menu appears on the screen You can adjust sound options BLUE SCREEN , NOISE REDUCE, INPUT SOURCE and RESET to the levels you prefer. 2. Press P+/P- button to enter the general menu and to go up and down to select the desired option . -
Page 21: Tv Menu Options
Menu Operations TV Menu Options 1. Press MENU button until the following menu appears on the screen Note: This menu is only appears in TV mode . 2. Press P+/P- button to enter the TV menu and to go up and down to select the desired option . -
Page 22: Tv Menu Options Continued
Menu Operations TV Menu Options Continued 6. SWAP : Press V+ to display the menu as follows: Press P+/- to select the item and then V+/- to adjust the channel and V+ to confirm.( For example: press P+/- to select FROM item, and then press V+/- to adjust the channel number to 1;... -
Page 23: Specifications
Specifications Specifications of the television that you have just purchased may vary from the information in this table due to technical innovations. Picture, sound system Antenna input impedance Audio output External input port AC-DC adapter Temperature NOTE:Sound system L' certainly does not demonstrate in the TV's OSD, in menu L includes sound system L and sound system L'. - Page 24 V0.2 0090506259...