Table of Contents
Advertisement
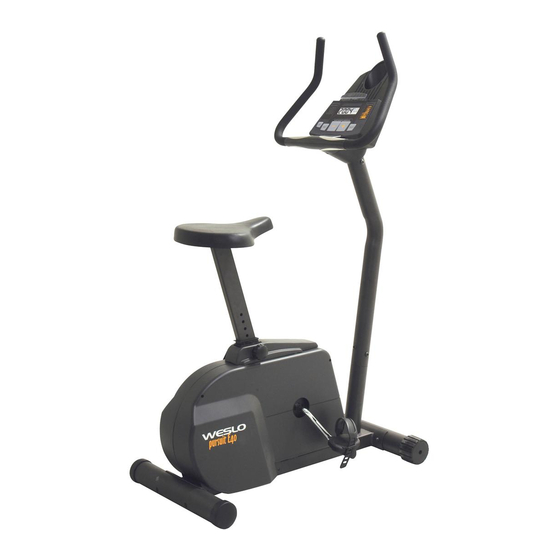
Model No. WLEX19840
Serial No.
Write the serial number in the
space above for future reference.
QUESTIONS?
As a manufacturer, we are com-
mitted to providing complete
customer satisfaction. If you
have questions, or if there are
missing parts, we will guarantee
complete satisfaction through
direct assistance from our factory.
TO AVOID DELAYS, PLEASE
CALL DIRECT TO OUR TOLL-
FREE CUSTOMER HOT LINE. The
trained technicians on our cus-
tomer hot line will provide imme-
diate assistance, free of charge to
you.
CUSTOMER HOT LINE:
1-866-699-3756
Mon.–Fri., 6 a.m.–6 p.m. MST
CAUTION
Read all precautions and instruc-
tions in this manual before using
this equipment. Keep this manual
for future reference.
Serial
Number
Decal
USER'S MANUAL
Visit our website at
www.weslo.com
new products, prizes,
fitness tips, and much more!
Advertisement
Table of Contents

Related Manuals for Weslo Pursuit E40 Bike


Summary of Contents for Weslo Pursuit E40 Bike
- Page 1 CUSTOMER HOT LINE: 1-866-699-3756 Mon.–Fri., 6 a.m.–6 p.m. MST CAUTION Visit our website at Read all precautions and instruc- tions in this manual before using www.weslo.com this equipment. Keep this manual new products, prizes, for future reference. fitness tips, and much more!
-
Page 2: Table Of Contents
TABLE OF CONTENTS IMPORTANT PRECAUTIONS ..............3 BEFORE YOU BEGIN . -
Page 3: Before You Begin
BEFORE YOU BEGIN Thank you for selecting the new WESLO ® PURSUIT (excluding holidays). To help us assist you, please E40 exercise cycle. The PURSUIT E40 exercise cycle mention the product model number and serial number blends advanced engineering with contemporary when calling. -
Page 4: Part Identification Chart
PART IDENTIFICATION CHART As you assemble the exercise cycle, use the drawings tity needed for assembly. Note: Some small parts may have been pre-assembled. If a part is not in below to identify the small parts needed for assembly. the parts bag, check to see if it has been pre- The number in parenthesis below each drawing is the key number of the part, from the PART LIST on page assembled. -
Page 5: Assembly
ASSEMBLY Place all parts of the exercise cycle in a cleared area and remove the packing materials. Do not dispose of the packing materials until assembly is completed. Assembly requires the included allen wrench , a phillips screwdriver , and two adjustable wrenches 1. - Page 6 4. Connect the wire harness on the Handlebar (5) to the indicated wire harness on the Console (7). Insert both wire harnesses into the opening in the bottom of the Console. Then, insert the metal tube on the Bookrack Handlebar into the opening in the bottom of the Console.
-
Page 7: How To Use The Exercise Cycle
7. Identify the Left Pedal (28); there is an “L” on the Left Pedal for identification. Using an adjustable wrench, firmly tighten the Left Pedal counter- clockwise into the left arm of the Crank (33). Tighten the Right Pedal (not shown) clockwise into the right arm of the Crank (33) in the same manner. - Page 8 FEATURES OF THE CONSOLE surement is selected. When the batteries are replaced, it may be necessary to reselect the The easy-to-use console offers a selection of features desired unit of measurement. designed to help you get the most from your workouts. When the manual mode of the console is selected, the B.
- Page 9 If desired, you HOW TO USE THE MANUAL MODE can select a sin- gle mode for continuous dis- Turn on the console. play. Press the Display Mode Note: The console requires four “D” batteries (not button repeatedly until only the MPH (or Km/H), included).
- Page 10 During the program, the resistance of the pedals HOW TO USE A PERSONAL TRAINER will automatically change as shown by the applic- PROGRAM able profile on the console. If the current resis- tance level is too high or too low, you can change the resistance level by pressing the + and –...
-
Page 11: Maintenance And Troubleshooting
MAINTENANCE AND TROUBLESHOOTING Inspect and tighten all parts of the exercise cycle regularly. Replace any worn parts immediately. The exercise cycle can be cleaned with a soft, damp cloth. To prevent damage to the console, avoid spilling liquid on the console, keep the console out of direct sunlight, and remove the batteries when storing the exercise cycle. - Page 12 HOW TO ADJUST THE BELT If the Belt (16) is properly adjusted, reattach the side shields and pedals. If the Belt needs to be adjusted, The exercise cycle features a precision belt that must loosen the M8 Washer Nut (37) on each side of the be kept properly adjusted.
-
Page 13: Conditioning Guidelines
CONDITIONING GUIDELINES Fat Burning WARNING: To burn fat effectively, you must exercise at a relative- ly low intensity level for a sustained period of time. • Before beginning this or any exercise pro- During the first few minutes of exercise, your body gram, consult your physician. -
Page 14: Part List
PART LIST—Model No. WLEX19840 R0604A Key No. Qty. Description Key No. Qty. Description Left Side Shield M10 Flat Washer Right Side Shield Flywheel Double Tree Fastener Crank/Pulley Handlebar Endcap M4 x 38mm Self-tapping Screw Handlebar Flywheel Spacer Foam Grip Flywheel Axle Console M8 x 27mm Button Screw M10 x 27mm Button Screw... -
Page 15: Exploded Drawing
EXPLODED DRAWING—Model No. WLEX19840 R0604A... -
Page 16: How To Order Replacement Parts
• The SERIAL NUMBER of the product (see the front cover of this manual) • The KEY NUMBER and DESCRIPTION of the part(s) (see the PART LIST on page 14) WESLO is a registered trademark of ICON IP, Inc. LIMITED WARRANTY ICON Health &...