Table of Contents
Advertisement
Swarm™ User Manual
USER MANUAL
th
3000 N 29
Ct, Hollywood, FL 33020 U.S.A.
(800) 762-1084 – (954) 929-1115
FAX (954) 929-5560
www.chauvetlighting.com
1
Snapshot
OK on Dimmer
Outdoor OK
Sound Activated
DMX512
Master/Slave
Autoswitching
Transformer
Replaceable Fuse
User Serviceable
Duty Cycle
4/23/2009 11:59 AM
Advertisement
Table of Contents

Related Manuals for Chauvet SWARM


Summary of Contents for Chauvet SWARM
-
Page 1: User Manual
OK on Dimmer Outdoor OK Sound Activated DMX512 Master/Slave Autoswitching Transformer Replaceable Fuse User Serviceable Duty Cycle USER MANUAL 3000 N 29 Ct, Hollywood, FL 33020 U.S.A. (800) 762-1084 – (954) 929-1115 FAX (954) 929-5560 Swarm™ User Manual www.chauvetlighting.com 4/23/2009 11:59 AM... -
Page 2: Table Of Contents
General Troubleshooting ......................... 14 Technical Support ........................... 14 Contact Us .............................. 15 5. Appendix ............................15 DMX Primer ............................15 General Maintenance ..........................16 Returns Procedure ..........................16 Claims ..............................16 Technical Specifications .......................... 17 Swarm™ User Manual 4/23/2009 11:59 AM... -
Page 3: Before You Begin
1. B EFORE EGIN What is included 1 x Swarm™ 1 x Power Cord 1 x Warranty Card 1 x User Manual Unpacking Instructions Immediately upon receiving a fixture, carefully unpack the carton, check the contents to ensure that all parts are present, and have been received in good condition. -
Page 4: Safety Instructions
Caution! There are no user serviceable parts inside the unit. Do not open the housing or attempt any repairs yourself. In the unlikely event your unit may require service, please contact CHAUVET at: 954-929-1115. Swarm™ User Manual 4/23/2009 11:59 AM... -
Page 5: Introduction
Built-in automated programs via master/slave or DMX Built-in sound activated programs via master/slave or DMX ADDITIONAL FEATURES High-power, 3W (1,200mA) LEDs Additional power output: max 12 units @ 120V DMX Channel Summary HANNEL UNCTION Function Run speed Strobe Rotation Swarm™ User Manual 4/23/2009 11:59 AM... -
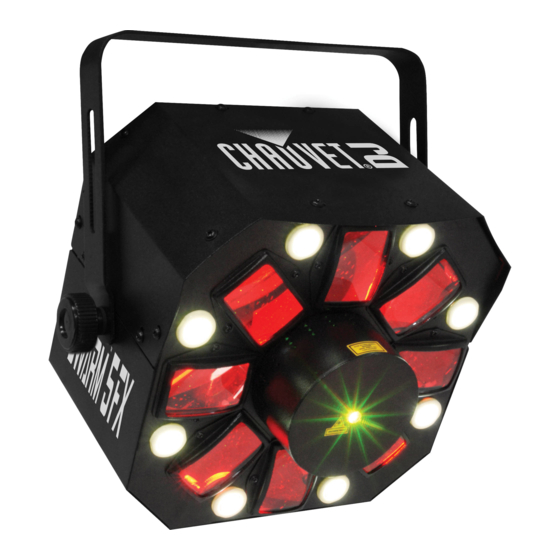
Page 6: Product Overview
Sound Sound sensitivity adjustment DMX indicator (flashing segment on display) Microphone Mode DMX out button DMX in Down button Power link button Fuse holder Safety cable Power in eyebolt Bracket Bracket adjustment knob Swarm™ User Manual 4/23/2009 11:59 AM... -
Page 7: Setup
32 fixtures on one serial data link without the use of a DMX optically-isolated splitter may result in deterioration of the digital DMX signal. Maximum recommended serial data link distance: 500 meters (1640 ft.) Maximum recommended number of fixtures on a serial data link: 32 fixtures Swarm™ User Manual 4/23/2009 11:59 AM... -
Page 8: Data Cabling
Data Cabling To link fixtures together you must obtain data cables. You can purchase CHAUVET-certified DMX cables directly from a dealer/distributor or construct your own cable. If you choose to create your own cable please use data-grade cables that can carry a high quality signal and are less prone to electromagnetic interference. -
Page 9: Setting Up A Dmx Serial Data Link
3. Then, proceed to connect from the output DMX Input/Output panel of a lighting fixture. as stated above to the input of the following fixture and so on. CHAUVET Certified DMX Data Cables Order Code Description DMX1.5 DMX Cable 1.5m/4.9ft DMX4.5... -
Page 10: Mounting
Safety cables must always be used. Never mount in places where the fixture will be exposed to rain, high Note! humidity, extreme temperature changes or restricted ventilation. Clamp is sold separately. Swarm™ User Manual 4/23/2009 11:59 AM... -
Page 11: Operating Instructions
Use the <UP> and <DOWN> buttons to navigate the menu map and menu options. Press the <ENTER> button to access the menu function currently displayed or to enable a menu option. To return to the previous option or menu without changing the value, press the <MODE> button. Swarm™ User Manual 4/23/2009 11:59 AM... -
Page 12: Menu Functions
The unit must be the first unit in line. Then simply chain the units together using DMX cable. Then, set the slave units to DMX mode at starting address (see section on DMX Mode). Swarm™ User Manual 4/23/2009 11:59 AM... -
Page 13: Dmx Mode
Strobe: slow fast 255 255 Strobe to sound Rotation 000 004 No function 005 127 Clockwise rotation: slow fast 128 133 Stop 134 255 Counterclockwise rotation: slow fast Swarm™ User Manual 4/23/2009 11:59 AM... -
Page 14: Setting The Starting Address
Note: Keep DMX cables separated from power cables or black lights. No light output Call service technician If you still have a problem after trying the above solutions, please contact CHAUVET Technical Support at the location below. Technical Support Address: Service Dept. -
Page 15: Contact Us
XLR male to female connectors. The shield connection is pin 1, while pin 2 is Data Negative (S-) and pin 3 is Data positive (S+). CHAUVET carries 3-pin XLR DMX compliant cables, DMX-10 (33’), DMX-4.5 (15’) and DMX-1.5 (5’) Swarm™... -
Page 16: General Maintenance
Package must be clearly labeled with a Return Merchandise Authorization Number (RMA #). Products returned without an RMA # will be refused. Call CHAUVET and request RMA # prior to shipping the fixture. Be prepared to provide the model number, serial number and a brief description of the cause for the return. -
Page 17: Technical Specifications
Data output ..................... locking 3-pin XLR female socket Data pin configuration................. pin 1 shield, pin 2 (-), pin 3 (+) Protocols ........................... DMX-512 USITT DMX Channels ............................4 ORDERING INFORMATION Swarm™ ............................SWARM WARRANTY INFORMATION Warranty........................2-year limited warranty Swarm™ User Manual 4/23/2009 11:59 AM...