Table of Contents
Advertisement
Advertisement
Table of Contents

Related Manuals for AEG Electrolux LAVAMAT 16850 A


Summary of Contents for AEG Electrolux LAVAMAT 16850 A
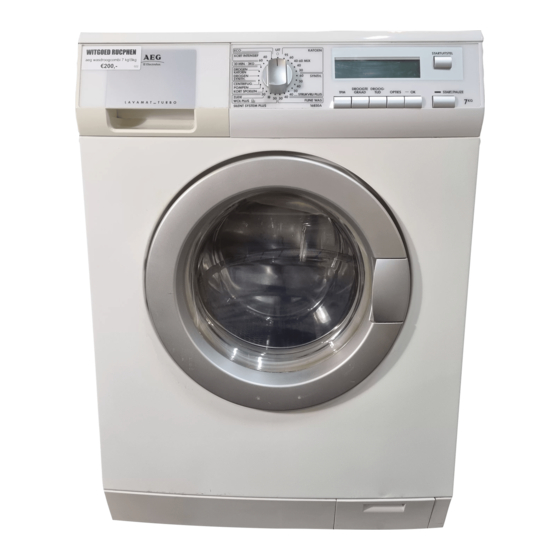
- Page 1 LAVAMAT 16850 A User Manual Washer-dryer...
- Page 2 Dear Customer Thank you for choosing one of our high-quality products. With this appliance you will experience the perfect combination of functional design and cutting edge technology. Convince yourself that our appliances are engineered to deliver the best performance and control - indeed we are setting the highest standards of excellence.
-
Page 3: Table Of Contents
Contents Contents Instruction booklet Safety information Product Description Detergent dispenser drawer Control panel Display First use Personalization Acoustic signal Child safety lock Daily use - Washing Load the laundry Measure out the detergent and the fabric softener Select the required programme by means of programme selector dial Select the Spin speed, RINSE HOLD or NIGHT CYCLE option Selected the desired option PREWASH option... - Page 4 Contents Cancelling a programme Opening the door after the programme has started At the end of the programme Drying only Automatic washing and drying Washing programmes Drying programmes Helpful hints and tips Sorting the laundry Temperatures Before loading the laundry Maximum loads Laundry weights Removing stains...
- Page 5 Contents Door seal Drain pump Water inlet filter Frost precautions Emergency emptying out What to do if... Technical Data Consumption value Installation Unpacking Positioning and levelling Water inlet Water-stop device Water drainage Electrical connection Enviroment concerns Packaging materials Old machine Ecological hints...
-
Page 6: Instruction Booklet
Safety information Instruction booklet Safety information Prior to using for the first time • The safety of AEG/ELECTROLUX appliances complies with the industry standards and with legal requirements on the safety of appliances. However, as manufacturers, we feel it is our duty to provide the following safety notes. You MUST read them carefully before installing or using the appliance. - Page 7 Safety information • Do not use your washer-dryer to wash and dry articles with whalebones, material without hems or torn material. • Always unplug the appliance and turn off the water supply after use, clean and maintenance. • Under no circumstances should you attempt to repair the machine yourself. Repairs carried out by inexperienced persons may cause injury or serious malfunctioning.
-
Page 8: Child Safety
Safety information • Before washing, ensure that all pockets are empty and buttons and zips are fastened. Avoid washing frayed or torn articles and treat stains such as paint, ink, rust, and grass before washing. Underwired bras must NOT be machine washed. -
Page 9: Product Description
Safety information/Product description • Make sure that children or pets do not climb into the drum. To avoid this the machine incorporates special feature. To activate this device, rotate the button (without pressing it) inside the door clockwise until the groove is horizontal. If necessary use a coin. -
Page 10: Detergent Dispenser Drawer
Detergent dispenser drawer Detergent dispenser drawer Compartment for detergent (used for prewash) or stain remover. The prewash detergent is added at the beginning of the wash programme. The stain remover is added during the main wash in programmes with STAIN- option. -
Page 11: Control Panel
Control panel Control panel Below is a picture of the control panel. It shows the programme selector dial as well as the buttons and the display. These are presented by relevant numbers on the following pages. Programme selector dial OK button SPIN REDUCTION button START/PAUSE button AUTODRYING button... - Page 12 Display Drying degree indicator allowed by the set programme, IRON DRY CUPBOARD DRY and EXTRA DRY - symbols, selectable by means of button 3 and indicator «AUTO», connected to the drying programme and the button 4. Programme progress indicator: PREWASH , MAIN WASH , RINSE , SPIN...
- Page 13 Display previously selected programme is displayed. The DELAY START symbol will appear on the display. The delay time value decreases by one unit every hour and then, when remains 1 hour, the time decreases every minute. Selected drying time After selecting a drying programme, the drying time is displayed in minutes 2.10 and/or hours (max 130 mins= After the programme has started the time remaining is updated every minute.
-
Page 14: First Use
First Use First Use Ensure that the electrical and water connections comply with the installation instructions. Remove the polystyrene block and any material from the drum. Run a cotton cycle at 90°C or 95°C, without any laundry in the machine, to remove any manufacturing residue from the drum and tub. -
Page 15: Daily Use - Washing
Daily Use - Washing Daily Use Load the laundry 1. Open the door by carefully pulling the door handle outwards. Place the laundry in the drum, one item at a time, shaking them out as much as possible. 2. Close firmly the door. You must hear a click during closing. -
Page 16: Select The Required Programme By Means Of Programme Selector Dial
Use - Washing WASHING Select the required programme by means of programme selector dial (1) You can choose the right programme for any type of laundry following the descriptions on the washing programme tables (see «Washing Programmes»). Turn the programme selector dial to the required programme. The programme selector determines the type of washing cycle (e.g. -
Page 17: Selected The Desired Option
Use - Washing NIGHT CYCLE: by selecting this option, the machine will not drain the water of the last rinse, so as not to wrinkle the laundry. As all spinning phases are suppressed, this washing cycle is very noiseless and it can be selected at night or in times with a more economical power rate In some programmes the rinses will be performed with more water. -
Page 18: Stain Option
The Prewash ends with a short spin in programmes for COTTON and SYNTHETIC fabrics, whereas in the programmes for DELICATE fabrics the water is only drained. The relevant symbol will appear on the display. STAIN option Select this option to treat heavily soiled or stained laundry with stain remover (extended main wash with time optimised stain action phase). -
Page 19: Select The Start/Pause
Use - Washing Press the START/PAUSE (button 7) To start the selected programme, press the button ; the corresponding red pilot light stops blinking. The DOOR symbol appears on the display to indicate that the appliance has started operating and the door is locked. To interrupt a programme which is running, press the button corresponding red pilot light starts blinking. -
Page 20: Altering An Option Or A Running Programme
Use - Washing Cancelling the delayed start: set the washer-dryer to PAUSE by pressing the button ● press the button until the symbol 0’ is displayed; ● press the button again to start the programme. ● The button cannot be selected with DRAIN programme Altering an option or a running programme It is possible to change any option before the programme carries it out. -
Page 21: At The End Of The Programme
Use - Washing At the end of the programme The machine stops automatically, the pilot light of button and the DOOR symbol go off, a blinking « » appears on the display and the acoustic signal sounds for some minutes. If you have choosen a programme or an option that ends with water in the tub, follow the below instruction to empty the water out: : turn the programme selector dial to O... -
Page 22: Drying Only
Use - Drying DRYING only The recommended load size is 3,5 kg for cottons and linen, and 2 kg for synthetic items. By pressing Drying Time button it is also possible to dry up to 5 kg of cotton items (see the «Drying Programme » table). The water tap must be open and the drain hose must be positioned in the sink or connected to the drain pipe. -
Page 23: Automatic Washing And Drying
Use - Drying 5. - Press button 7 to start the programme After the programme has started, the time remaining is updated every minute. Note! The different type of cottons (towelling, sheets, shirts, and so on) or any laundry items rolling up during the spinning phase may result in partial dryness. In the exceptional case that at the end of the cycle the laundry remains slightly wet, we suggest that you unfold the rolled up items, redistribute them evenly in the drum and select an additional drying cycle of 20-30 minutes. - Page 24 Use - Drying If possible, do not select a spin speed lower than that proposed by the appliance to avoid too long a drying time therefore saving energy. In any case the reduction of the spin speed is only possible after selecting drying. The lowest values you can select are the following: - 900 r.p.m.
-
Page 25: Washing Programmes
Washing programmes Washing programmes Programme Maximum and Minimum Temperature Available Detergent Cycle Description Options Compartment Maximum Fabrics Load Type of Laundry COTTONS 95° - 30° SPIN reduction, Main wash - Rinses - Long spin at the NIGHT CYCLE, RINSE HOLD, maximum spin speed PREWASH*, STAIN**, Max. - Page 26 Washing programmes Programme Maximum and Minimum Temperature Detergent Available Cycle Description Options Compartment Maximum Fabrics Load Type of Laundry DELICATES SPIN reduction, 40° - 30° NIGHT CYCLE, RINSE HOLD, Main wash - Rinses - Short spin at 1200 rpm PREWASH*, STAIN**, Max.
- Page 27 Washing programmes Programme Maximum and Minimum Temperature Detergent Available Cycle Description Options Compartment Maximum Fabrics Load Type of Laundry DRAIN Draining of water Max. load 7 kg For emptying out the water of the last rinse in programmes with the option selected, which ends with water left in the tub.
-
Page 28: Drying Programmes
Washing programmes Programme Maximum and Minimum Temperature Available Detergent Cycle Description Options Compartment Maximum Fabrics Load Type of Laundry 60° Main wash - Rinses - Long spin at the maximum spin speed SPIN reduction, Max. load 7 kg NIGHT CYCLE, RINSE HOLD, TWhite and fast coloured cotton. - Page 29 Drying programmes Automatic Programmes Drying time Degree of drying Type of fabric Spin Speed Max load in mins 5 kg 175 - 195 Extra dry Cotton and linen Ideal for towelling (bathrobes, bath towels, 3,5 kg 1600 95 - 105 materials 2 kg 40 - 50...
-
Page 30: Helpful Hints And Tips
Helpful hints and tips Helpful hints and tips Sorting out the laundry Follow the wash code symbols on each garment label and the manufacturer’s washing instructions. Sort the laundry as follows: whites, coloureds, synthetics, delicates, woollens. Temperatures for normally soiled white cottons and linen (e.g. tea cloths, 95°... -
Page 31: Laundry Weights
Helpful hints and tips Washing a maximum load makes the most efficient use of water and energy. For heavily soiled laundry, reduce the load size. Laundry weights The following weights are indicative: bathrobe 1200 g napkin 100 g quilt cover 700 g sheet 500 g... -
Page 32: Detergents And Additives
Helpful hints and tips Red wine: soak in water and detergent, rinse and treat with acetic or citric acid, then rinse. Treat any residual marks with bleach. Ink: depending on the type of ink, moisten the fabric first with acetone (*), then with acetic acid;... -
Page 33: Degrees Of Water Hardness
Helpful hints and tips Use less detergent if: • you are washing a small load, • the laundry is lightly soiled, • large amounts of foam form during washing. For the stain treatment before the washing cycl, follow the product manufacturers’ instructions on detergent quantities. -
Page 34: Garment's Labels
Drying Hints can attract the fluff. • Remove the laundry when the appliance has finished drying. • To avoid a static charge when drying is completed, use either a fabric softener when you are washing the laundry or a fabric conditioner specifically for tum- ble dryers. -
Page 35: Care And Cleaning
Care and cleaning Care and cleaning You must DISCONNECT the appliance from the electricity supply, before you can carry out any cleaning or maintenance work. Descaling The water we use normally contains lime. It is a good idea to periodically use a water softening powder in the machine. -
Page 36: Washing Drum
Care and cleaning 2. Remove the conditioner insert from the middle compartment. 3. Clean all parts with water. 4. Put the conditioner insert in as far as it will go, so that it is firmly in place. 5. Clean all parts of the washing ma- chine, especially the nozzles in the top of the washing-in chamber, with a brush. - Page 37 Care and cleaning 4. Place a container close to the pump to collect any spillage. 5. Release the emergency emptying hose, place it in the container and remove its cap. 6. When no more water comes out, unscrew the pump and remove it. Always keep a rag nearby to dry up spillage of water when removing the pump.
-
Page 38: Water Inlet Filter
Care and cleaning 7. Remove any objects from the pump impeller by rotating it. 8. Put the cap back on the emergency emptying hose and place the latter back in its seat. 9. Screw the pump fully in. 10. Close the pump door. Warning! When the appliance is in use and depending on the programme selected there can be hot water in the pump. -
Page 39: Frost Precautions
Care and cleaning Frost precautions If the machine is installed in a place where the temperature could drop below 0°C, proceed as follows: 1. Close the water tap and unscrew the water inlet hose from the tap. 2. Place the end of the emergency emptying hose and that of the inlet hose in a bowl placed on the floor and let water drain out. -
Page 40: What To Do If
What to do if... What to do if... Certain problems are due to lack of simple maintenance or oversights, which can be solved easily without calling out an engineer. Before contacting your local Service Centre, please carry out the checks listed below. yellow During machine operation it is possible that the pilot light of button... - Page 41 What to do if... Problem Possible cause/Solution The end of the drain hose is too low. The machine fills then empties • Refer to relevant paragraph in «water drainage» immediately: section. The drain hose is squashed or kinked. • Check the drain hose connection. The drain filter is clogged.
- Page 42 What to do if... Problem Cause possible/Solution The programme is still running. • Wait the end of washing cycle. The door lock has not been released. The door will not open: • Wait until the DOOR symbol disappears. There is water in the drum. •...
-
Page 43: Technical Data
What to do if... Problem Cause possible/Solution Machines based on modern technology operate very No water is visible in the drum: economically using very little water without affecting performance. Anti-flooding system has activated. The display shows the alarm code • Disconnect the appliance and contact the Service Force Centre If you are unable to identify or solve the problem, contact our service centre. -
Page 44: Consumption Value
Consumption value Consumption value Water consumption Energy consumption Programme duration Programme (lltres) (KWh) (Minutes) White Cottons 95° Cottons 60° 1.35 (*) Cotton ECOMONY 60° 1,05 Cottons 40° Synthetics 60° Delicates 40° 0.55 Wool (Handwash) 30° 0.25 The consumption data shown on this chart is to be considered purely indicative, as it may vary depending on the quantity and type of laundry, on the inlet water temperature and on the ambient temperature. -
Page 45: Installation
Installation Installation Unpacking All transit bolts and packing must be removed before using the appliance. You are advised to keep all transit devices so that they can be refitted if the machine ever has to be transported again. 1. After removing all the packaging, carefully lay machine on it’s back to remove the polystyrene base from the bottom. - Page 46 Installation 4. Slide out the relevant plastic spacers. 5. Open the porthole, take out the inlet hose from the drum and remove the polystyrene block fitted on the door seal. 6. Fill the smaller upper hole and the two large ones with the corresponding plastic plug caps supplied in the bag containing the instruction booklet.
-
Page 47: Positioning And Levelling
Installation Positioning and levelling Install the machine on a flat hard floor. Make sure that air circulation around the machine is not impeded by carpets, rugs etc. Before placing it on small tiles, apply a rubber coating. Never try to correct any unevenness in the floor by putting pieces of wood, cardboard or similar materials under the machine. -
Page 48: Water-Stop Device
Installation 4. Connect the hose to a tap with a 3/4” thread. Always use the hose supplied with the appliance. The inlet hose must not be lengthened. If it is too short and you do not wish to move the tap, you will have to purchase a new, longer hose specially designed for this type of use. -
Page 49: Electrical Connection
Installation Electrical connection Information on the electrical connection is given on the rating plate on the inner edge of the appliance door and in the chapter «Technical Data». Check that your domestic electrical installation can take the maximum load required, also taking into account any other appliances in use. Connect the machine to an earthed socket. -
Page 50: Enviroment Concerns
Environment concerns Enviroment concerns Packaging materials The materials marked with the symbol are recyclable. >PE<=polyethylene >PS<=polystyrene >PP<=polypropylene This means that they can be recycled by disposing of them properly in appropriate collection containers. Old machine Use authorised disposal sites for your old appliance. Help to keep your country tidy! The symbol on the product or on its packaging indicates that this product may not be treated as household waste. - Page 52 www.electrolux.com...