
Related Manuals for ASCOM Eurit 25


Summary of Contents for ASCOM Eurit 25
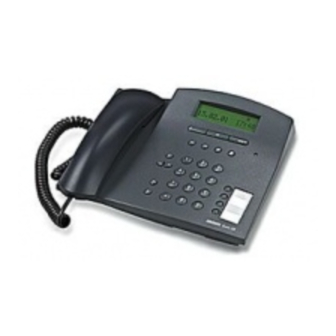
- Page 1 The world in your hands Ascom Eurit 25 ISDN Telephone User manual (( Bild (folgt) ))
- Page 2 You will find the following features particularly useful: – Up to 3 users on the same set, with individual settings Because the Ascom Eurit 25 can handle up to 3 numbers, it is an ideal phone for households with several members.
-
Page 3: Overview And Operating Elements
Overview and operating elements 1 1 1 1 1 3 3 3 3 3 4 4 4 4 4 5 5 5 5 5 6 6 6 6 6 7 7 7 7 7 8 8 8 8 8 9 9 9 9 9 2 2 2 2 2 1 1 1 1 1 7 7 7 7 7 1 1 1 1 1 6 6 6 6 6... -
Page 4: Led Status Display
Overview and operating elements 1 1 1 1 1 Handset hook Handset hook Handset hook Handset hook Handset hook 2 2 2 2 2 Loudspeaker key Loudspeaker key Loudspeaker key Loudspeaker key Loudspeaker key 3 3 3 3 3 Scroll left (back) in text Scroll left (back) in text Scroll left (back) in text Scroll left (back) in text... -
Page 5: Table Of Contents
Congratulations and thank you for your confidence in us. The Ascom Eurit 25 is designed for connection to the public ISDN network. If you plan to use the Ascom Eurit 25 in conjunction with a PBX, please refer to the section on »PBX access«. - Page 6 Contents Telephoning ......................... 16 User concept ........................16 Manual dialling ........................17 Call back on busy / no reply / autodial ................18 Redialling ........................... 19 Dialling from the phonebook ....................20 Dialling numbers in the caller list ..................22 Dialling numbers in the call log...................
- Page 7 Contents Short Message Service (SMS) .................... 65 Options ..........................65 Incoming SMS signalling ....................65 Handling incoming SMS messages..................66 Composing, sending, saving SMS messages ..............68 Retrieving, sending or deleting stored SMS messages ............69 PBX access ..........................70 PBX access on/off .......................
- Page 8 4 4 4 4 4...
-
Page 9: Introduction
Introduction The phone Connection type Connection type Connection type Connection type Connection type Your phone is designed for use with an ISDN basic access (DSS1 protocol, Euro-ISDN) and can be operated on your subscriber connection (NT+2ab), an ISDN bus (S-Bus) or connected to a PBX. -
Page 10: User Manual
Introduction User manual This user manual will help you get to know all the functions of your ISDN phone. Keep the instructions near your phone. The contents list and comprehensive list of key words will help you to find what your are looking for quickly. -
Page 11: How To Proceed
Introduction How to proceed Read the section on »Startup« first. If you plan to use the phone in conjunction with a PBX, please refer to the Section on »PBX access«. Look up the procedure/function in the contents or key words list. Go to the relevant page and follow the instructions. -
Page 12: Startup
Startup Your feature-rich Ascom Eurit 25 phone will only function to your satisfaction if you meet all the requirements for startup. Unpacking the phone Unpacking the phone Unpacking the phone Unpacking the phone Unpacking the phone Contents of the package... -
Page 13: Positioning
Positioning Positioning Place the Ascom Eurit 25 on an even, dry surface within range of the connection socket (NT+2ab or wall socket). If the selected position is too far from the connection socket, use an approved extension cable which you can buy from a specialist dealer. -
Page 14: Write-On Label
Startup Connecting the phone Connecting the phone Connecting the phone Connecting the phone Connecting the phone Plug the smaller of the two connectors on the telephone connection cord into the socket on the phone base (1) marked with the phone symbol. Press the cable into the cable duct (2). -
Page 15: The Display
The display The display Your Ascom Eurit 25 is equipped with a display which shows various pictograms indicating the menu function/status as well as a text line with explanatory text. The display is always active to indicate the status of your phone. -
Page 16: Display Symbols
RINGING TONE OFF – The loudspeaker is switched off (i.e. ringing volume = 0). MWI – Your phone can evaluate special signalling (MWI). CALLER LIST – List of unanswered calls to your Ascom Eurit 25. SHORT MESSAGE SERVICE (SMS) - You have SMS messages waiting on your Ascom Eurit 25. -
Page 17: Using The Function Menu
Using the function menu Using the function menu Using the function menu Using the function menu Operation of your Ascom Eurit 25 is menu-guided. To call up menus and scroll through sub-menus, you have two options: Menu key Menu key... -
Page 18: Setting Up Multiple Subscriber Numbers (Msn)
To get the best out of your Ascom Eurit 25, you must set at least one user. This is done automatically by giving the phone an MSN. See the section on »Additional settings« for how to assign other users. - Page 19 Startup You can enter the name of user A. Press the key containing the letter or character you wish until the letter appears, e.g. for K, press key 5 twice. Press the # key to switch between upper and lower case lettering. In the case of double letters or if the following letter is on the same key, wait briefly before pressing the key again.
-
Page 20: Telephoning
This describes the different settings which can be made for different users. Your Ascom Eurit 25 can also be operated in conjunction with a PBX with the same options as listed below. The range of additional features available to you and how you use them is dependent on the PBX type. -
Page 21: Manual Dialling
Manual dialling Manual dialling Manual dialling If only one user is assigned to your Ascom Eurit 25 or if your code is already displayed, there is no need to press the user key before making a call. Direct dialling (off-hook dialling) -
Page 22: Call Back On Busy / No Reply / Autodial
Press the OK key to confirm. »Delete call back« is displayed. Press the OK key to confirm. The redial list and call back list are combined in your Ascom Eurit 25 . -
Page 23: Redialling
Redialling Redialling Redialling Redialling Your Ascom Eurit 25 contains a redial memory which registers the last ten numbers dialled. This memory is user-independent. Once more than ten numbers have been dialled, the oldest is deleted from memory. Selecting the user. -
Page 24: Dialling From The Phonebook
Dialling from the phonebook Dialling from the phonebook Dialling from the phonebook Your Ascom Eurit 25 has an electronic phonebook for storing 40 names and numbers. The phonebook is available to all users. To set up the phonebook, see the section on »Phonebook«. - Page 25 Telephoning Scrolling through the phonebook Scrolling through the phonebook Scrolling through the phonebook Scrolling through the phonebook Scrolling through the phonebook Select the user. Press the menu key. »Phonebook« appears in the display. Press the OK key. The first phonebook entry is displayed. Press the right arrow key (>) to scroll down the phonebook, and the left arrow key (<) to scroll up.
-
Page 26: Dialling Numbers In The Caller List
Dialling numbers in the caller list Dialling numbers in the caller list This allows your Ascom Eurit 25 to register all calls not answered by you. The caller list can contain up to 20 numbers. For numbers registered in the caller list, the display shows two numbers separated by brackets. - Page 27 Telephoning Saving numbers in the caller list Saving numbers in the caller list Saving numbers in the caller list Saving numbers in the caller list Saving numbers in the caller list You can transfer the numbers in the caller list directly to your phonebook. The caller list is open and the number is displayed.
-
Page 28: Dialling Numbers In The Call Log
Dialling numbers in the call log The last 10 calls answered on the Ascom Eurit 25 are stored in the call log. This list is available to all users. After ten calls, the oldest number is deleted from the list. - Page 29 Telephoning Saving numbers in the call log Saving numbers in the call log Saving numbers in the call log Saving numbers in the call log Saving numbers in the call log You can transfer the numbers in the call log directly to your phonebook. The call log is open and the number is displayed.
-
Page 30: Speed Dialling
Replace the handset to terminate the call. Your Ascom Eurit 25 is delivered with the first speed dial key programmed for »Send SMS« You have the option of deleting this function and reprogramming the speed dial key. -
Page 31: Provider Selection
Telephoning Provider selection Provider selection Provider selection Provider selection Provider selection You can also telephone via another provider if you subscribe to their service. You have the option of assigning a provider to phonebook entries (see »Phonebook«): Outgoing calls to these telephone numbers are always carried by the defined provider. -
Page 32: Listening By Loudspeaker
Telephoning Listening by loudspeaker Listening by loudspeaker Listening by loudspeaker Listening by loudspeaker Listening by loudspeaker If you press the loudspeaker key during a call, anyone present in the room can listen in to your call. You are talking on the handset and want others in the room to listen in. Press the loudspeaker key to activate the loudspeaker. -
Page 33: Parking A Call
Telephoning Parking a call Parking a call Parking a call Parking a call Parking a call You can park a call for up to 3 minutes and retrieve it on another phone during this time. It is also possible to unplug the phone, reconnect it at another phone socket on the same ISDN connection, and continue your call. - Page 34 Telephoning Manual call parking Manual call parking Manual call parking Manual call parking Manual call parking (if no park code is programmed.) Press the OK key and the arrow keys (<) or (>) until »Park/Unpark« is displayed. Press the OK key. Enter a (temporary) park code.
-
Page 35: Incoming Calls
Telephoning Incoming calls Incoming calls Incoming calls Incoming calls Incoming calls If you have not entered a Multiple Subscriber Number (MSN) i.e. no user is programmed, your phone will ring for every incoming call to any of your MSNs. If several users have been defined and each assigned an MSN, you can program an individual ringing tone for each user. -
Page 36: Etv Online (Only For Switzerland)
Online (only for Switzerland) Online (only for Switzerland) Online (only for Switzerland) ® Online is a new service provided by your Ascom Eurit 25 which gives you direct access to Swisscom’s electronic telephone phonebook (ETV ® = Elektronisches Teilnehmerverzeichnis der Swisscom Directories AG). - Page 37 Telephoning ® ® ® ® ® Online query for incoming calls Online query for incoming calls Online query for incoming calls Online query for incoming calls Online query for incoming calls The phone is ringing and a number is displayed. Press the OK key.
- Page 38 Online queries under a speed dial key Online queries under a speed dial key Your Ascom Eurit 25 is delivered with the second speed dial key programmed for »ETV Query« You can delete this function and reprogram the speed dial key.
-
Page 39: Conducting Two Calls/Switching Between Calls
ISDN allows you to conduct two calls on your phone simultaneously. The following instructions govern calls made over the ISDN basic access. For information on operating your Ascom Eurit 25 when connected to a PBX, refer to your PBX documentation and the section on »PBX Access« in this manual. - Page 40 Telephoning Switching between calls Switching between calls Switching between calls Switching between calls Switching between calls Your phone has two active calls, one of which is on hold as described in the previous section. Press the R key. The existing call is put on hold. The previously held call is retrieved and you can resume talking.
-
Page 41: Transferring Calls
Telephoning Transferring calls Transferring calls Transferring calls Transferring calls Transferring calls You can transfer a call from your phone to another. Transferring an existing call Transferring an existing call Transferring an existing call Transferring an existing call Transferring an existing call Your phone has two active calls between which you have been switching. -
Page 42: Three-Party Conference
The following instructions govern calls made over the ISDN basic access. For information on operating your Ascom Eurit 25 when connected to a PBX, refer to your PBX documentation and the section on »PBX Access« in this manual. - Page 43 Telephoning Terminating a three-party conference Terminating a three-party conference Terminating a three-party conference Terminating a three-party conference Terminating a three-party conference You wish to terminate a three-party conference call and, for example, only switch between your call partners. Press the OK key. The display shows »Conference activated«. Press the arrow keys (<) and (>) to switch to »End 3-party conference«.
-
Page 44: Call Forwarding
Telephoning Call forwarding Call forwarding Call forwarding Call forwarding Call forwarding Call forwarding can only be activated if at least one user is programmed for this function! Every user can program the three call forwarding options under any speed dial key (several call forwarding types can be active simultaneously): Unconditional forwarding Incoming calls are forwarded immediately. -
Page 45: Direct Call
Direct call Direct call Direct call You can program a direct call (hotline function) on your Ascom Eurit 25 Once this function is set and the handset is lifted, any key can be pressed to automatically dial the programmed number. -
Page 46: Phonebook
Subaddress You can enter a subaddress after the number. This is used for remote control of devices which support subaddresses. The Ascom Eurit 25 does not evaluate incoming subaddresses (displayed as Option »Z«). Keypad You can enter keypad information to control PBX functions (displayed as Option »K«). -
Page 47: Entering Number And Name Only
Phonebook Entering number and name only Entering number and name only Entering number and name only Entering number and name only Entering number and name only Entries in the phonebook are user-independent. Even if you enter them under your MSN code, all users can use these entries. - Page 48 Phonebook If you wish to delete an existing entry, press the OK key and use the arrow keys to switch to »Delete«. Press the OK key again and continue as described under »Deleting entries«. Press the arrow keys (<) or (>) to scroll through this menu. The »Change«...
-
Page 49: Assigning Options To Numbers
Phonebook Assigning options to numbers Assigning options to numbers Assigning options to numbers Assigning options to numbers Assigning options to numbers This section follows on from the previous section »Entering number and name only«. As described in the previous section, enter a name and confirm until »No._« and the cursor position is shown. - Page 50 Phonebook CLIP/CLIR (show/suppress number) CLIP/CLIR (show/suppress number) CLIP/CLIR (show/suppress number) CLIP/CLIR (show/suppress number) CLIP/CLIR (show/suppress number) The first line of the display shows »No. _« and the cursor position. You have not yet entered a number. Press the OK key. »Save« is displayed. Press the right arrow key (>) repeatedly until »Suppress No.
- Page 51 Phonebook Press the OK key again. A »P« is shown after »No._« . Enter the provider’s code and number with prefix. Press the OK key to access »Save« again. Or… If you do not wish to make another entry, hold down the ESCAPE key. Or…...
-
Page 52: Changing Entries
Phonebook Changing entries Changing entries Changing entries Changing entries Changing entries Press the menu key »Phonebook« is displayed. Press the OK key to show the first entry in the phonebook. Press the key containing the first letter of the name you are looking for until the first entry beginning with this letter is displayed. - Page 53 Phonebook Press the right arrow key (>) to scroll through the available options if the option you wish has not yet been shown. Press the OK key. The option symbol is added to the number. If necessary, use the left arrow key (<) to go to an error and correct it by overwriting it.
-
Page 54: Deleting Entries
Phonebook Deleting entries Deleting entries Deleting entries Deleting entries Deleting entries Press the menu key. »Phonebook« is displayed. Press the OK key to show the first entry in the phonebook. Keep press the key containing the first letter of the name you are looking for until the first entry beginning with this letter is displayed. -
Page 55: Additional Settings
Additional settings This section lists additional settings which can be made on your Ascom Eurit 25: – Enter additional users (MSN) – Program speed dial keys – Set date and time – Interception circuit (malicious call registration) – CLIR Calling Line Identification Restriction –... - Page 56 Additional settings Assigning additional users (MSN) Assigning additional users (MSN) Assigning additional users (MSN) Assigning additional users (MSN) Assigning additional users (MSN) Press the menu key repeatedly until »Installation« is displayed. Press the OK key to confirm. Press the menu key repeatedly until »Set MSN« is displayed. Press the OK key to confirm.
- Page 57 Additional settings Deleting an MSN (user) Deleting an MSN (user) Deleting an MSN (user) Deleting an MSN (user) Deleting an MSN (user) You can delete any of the set users. Press the menu key repeatedly until »Installation« is displayed. Press the OK key to confirm. »Set MSN«...
-
Page 58: Programming Speed Dial Keys
The numbers or functions/services stored under speed dial keys are available to all users. Your Ascom Eurit 25 is delivered with the first speed dial key programmed for »Send SMS« and the second for »ETV Query« Press the menu key repeatedly until »Installation« is displayed. - Page 59 Additional settings ... Programming a speed dial key with a function ... Programming a speed dial key with a function ... Programming a speed dial key with a function ... Programming a speed dial key with a function ... Programming a speed dial key with a function Press the OK key to display »Save«.
- Page 60 Additional settings Changing speed dial key settings Changing speed dial key settings Changing speed dial key settings Changing speed dial key settings Changing speed dial key settings Press the menu key repeatedly until »Installation« is displayed. Press the OK key to confirm. Press the menu key repeatedly until »Speed dial«...
-
Page 61: Setting The Date And Time
Press the arrow keys (<) or (>) to scroll through this menu. The date and time are displayed unless there are unanswered calls. As soon as your Ascom Eurit 25 registers unanswered calls, the call count and time of call are displayed. Interception circuit (malicious call identification) -
Page 62: Clir Calling Line Identification Restriction
Additional settings CLIR Calling Line Identification Restriction CLIR Calling Line Identification Restriction CLIR Calling Line Identification Restriction CLIR Calling Line Identification Restriction CLIR Calling Line Identification Restriction If you call someone your number (i.e. your MSN) is displayed at the called person’s end. When you are called, your number is displayed at the caller’s end immediately on lifting the handset. -
Page 63: Reject Anonymous Calls
Reject all anonymous calls You can universally reject anonymous incoming calls (where the user has suppressed the number). Once this service is activated, no anonymous calls are forwarded to your Ascom Eurit 25. To activate this function: Select the relevant user. -
Page 64: Setting The Ringing Tone Melody And Volume
Additional settings Setting the ringing tone melody and volume Setting the ringing tone melody and volume Setting the ringing tone melody and volume Setting the ringing tone melody and volume Setting the ringing tone melody and volume Every user has a choice of 12 different ringing melodies und 7 volumes (0-7). Select the relevant user. -
Page 65: Ascending Ringing Volume
Additional settings Ascending ringing volume Ascending ringing volume Ascending ringing volume Ascending ringing volume Ascending ringing volume Every user can choose whether to have the ringing tone volume constant (default) or ascending – i.e. from soft to loud. To set an ascending ringing volume: Select the user. -
Page 66: Setting The Charge Factor And Currency
Additional settings Setting the charge factor and currency Setting the charge factor and currency Setting the charge factor and currency Setting the charge factor and currency Setting the charge factor and currency Some network operators provide defined currencies and charge factors. In this case you cannot set the charge factor and currency on your telephone. -
Page 67: Individual User Charges, Call Charge Total
Additional settings Individual user charges, call charge total Individual user charges, call charge total Individual user charges, call charge total Individual user charges, call charge total Individual user charges, call charge total Advice of charge Advice of charge Advice of charge Advice of charge Advice of charge You can display the charges per user as well as the charge total for all calls made from the... -
Page 68: Setting The Contrast
Additional settings Setting the contrast Setting the contrast Setting the contrast Setting the contrast Setting the contrast To enhance the legibility of the display to changing light conditions in your room or office, you can set the display contrast. Press the menu key. Press the right arrow key (>) until »Installation« appears. Press the OK key to confirm. -
Page 69: Short Message Service (Sms)
Short Message Service (SMS) Options Options Options Options Options You can use your phone to receive, edit and send short text messages. This is better known in mobile communications as SMS (Short Message Service). The term is also used here. Contact your network operator to find out whether this service is available. -
Page 70: Handling Incoming Sms Messages
Short Message Service (SMS) Handling incoming SMS messages Handling incoming SMS messages Handling incoming SMS messages Handling incoming SMS messages Handling incoming SMS messages Read SMS Read SMS Read SMS Read SMS Read SMS Select the user. Only calls/SMS outside brackets are intended for you. Press the menu key repeatedly to display »Caller list«. - Page 71 Short Message Service (SMS) Or… You have read the SMS and want to forward it: Press the OK key. »Delete« ppears in the display. Press the right arrow key (>) until »Forward« appears. Press the OK key. The display shows the sender’s SMS. Press the OK key.
-
Page 72: Composing, Sending, Saving Sms Messages
Short Message Service (SMS) Write, send, save SMS messages Write, send, save SMS messages Write, send, save SMS messages Write, send, save SMS messages Write, send, save SMS messages Select the user. Press the menu key repeatedly. »Messages (SMS)«.appears in the display. Press the OK key. -
Page 73: Retrieving, Sending Or Deleting Stored Sms Messages
Short Message Service (SMS) Retrieve, send, delete saved SMS messages Retrieve, send, delete saved SMS messages Retrieve, send, delete saved SMS messages Retrieve, send, delete saved SMS messages Retrieve, send, delete saved SMS messages To retrieve saved SMS messages: Press the menu key repeatedly. »Messages (SMS)«.appears in the display. Press the OK key. -
Page 74: Pbx Access
PBX access You can also connect your Ascom Eurit 25 to a PBX. Since the functionality is dependent on your PBX type, please refer to your PBX instruction manual before connecting the telephone. You can also program several users when connected to a PBX and assign them different extension numbers. -
Page 75: Entering The Exchange Access Code (Eac) For Outgoing Calls
PBX access Entering the Exchange Access Code (EAC) for outgoing calls Entering the Exchange Access Code (EAC) for outgoing calls Entering the Exchange Access Code (EAC) for outgoing calls Entering the Exchange Access Code (EAC) for outgoing calls Entering the Exchange Access Code (EAC) for outgoing calls The access code is required by some systems to allow the PBX to assign you a public exchange line for external calls. -
Page 76: Entering Eac For Incoming Calls
PBX access Entering EAC for incoming calls Entering EAC for incoming calls Entering EAC for incoming calls Entering EAC for incoming calls Entering EAC for incoming calls External calls directed to your phone through your PBX are also stored in the caller list. To enable these numbers to be called back, the EAC must be set. -
Page 77: Setting The Transfer Type
PBX access Enter the new internal number length. Press the OK key to confirm. To exit the menu, hold down the ESCAPE key. For further information on internal number lengths, refer to your PBX documentation. Setting the transfer type Setting the transfer type Setting the transfer type Setting the transfer type Setting the transfer type... - Page 78 PBX access Call transfer on-hook Call transfer on-hook Call transfer on-hook Call transfer on-hook Call transfer on-hook You can transfer a call within the PBX network or externally by replacing the handset. To do this, you need to set the phone: Press the menu key repeatedly until »Installation«...
-
Page 79: Keypad Information
PBX access Keypad information Keypad information Keypad information Keypad information Keypad information Keypad information are data in which the keypad characters are converted to specific functions in the PBX. Normally the asterisk or hash key are used to switch the function. Your PBX documentation will advise you on which keypad functions your PBX supports. -
Page 80: Send Automatic Keypad On/Off
PBX access Send automatic keypad on/off Send automatic keypad on/off Send automatic keypad on/off Send automatic keypad on/off Send automatic keypad on/off If the asterisk or hash key is pressed before dialling, the phone automatically switches to »Keypad signalling«(default setting: on). In some PBXs e.g. those in which automatic EAC selection is activated, you need to deactivate automatic keypad sending in order to initiate an internal call by pressing the asterisk key. -
Page 81: Attachment
Attachment Renumbering Renumbering Renumbering Renumbering Renumbering If a country introduces renumbering (national access code changed), you can pre-program the national prefix for Switzerland and the international traffic selection digit (TSD) for calls abroad: Setting the national traffic selection digit (TSD) Setting the national traffic selection digit (TSD) Setting the national traffic selection digit (TSD) Setting the national traffic selection digit (TSD) - Page 82 Attachment Setting the international TSD Setting the international TSD Setting the international TSD Setting the international TSD Setting the international TSD The international traffic selection digit is the digit you need to dial before the national prefix. This pre-programmed number must only be changed or deleted if you are unable to make domestic calls from the caller list or call log.
-
Page 83: Emergency Operation
Attachment Emergency operation Emergency operation Emergency operation Emergency operation Emergency operation Your phone remains operational even during a power failure (emergency operation). How you activate emergency operation is dependent on your phone connection. Emergency operation on network termination unit (NT+2ab) Emergency operation on network termination unit (NT+2ab) Emergency operation on network termination unit (NT+2ab) Emergency operation on network termination unit (NT+2ab) -
Page 84: Resetting The Phone
Headset connection Headset connection You can connect a headset (earpiece and external microphone) to your Ascom Eurit 25. The headset is available from any specialist dealer. When purchasing a headset from a specialist dealer, make sure it is compatible with your Ascom Eurit 25. -
Page 85: Show Software Version And Checksums
The software delivered with the Office Manager contains a TAPI driver and a program for configuring and operating the Ascom Eurit 25 on your PC. Calls are then automatically displayed on the screen. If the caller is stored in your database, all important data on the caller is displayed on screen. So you know all the facts even before answering the call. -
Page 86: Remote Download
Remote download Remote download The Ascom Eurit 25 software is continually adapted to the latest state of the art. You can download the current software over the telephone line in a few minutes (subject to charge). If your phone already has the most recent software installed, the connection is cleared within a few seconds. -
Page 87: Troubleshooting
Attachment Troubleshooting Troubleshooting Troubleshooting Troubleshooting Troubleshooting If your phone is not functioning as it should, try first to find the fault in the following table. The following tips should help you correct the fault: Problem Possible cause Remedy No dialling tone. The connection cord of the Unplug it and phone is not plugged in correctly plug it in again... -
Page 88: Summary Of Default Settings
Attachment Summary of default settings Summary of default settings Summary of default settings Summary of default settings Summary of default settings To allow you to use your phone immediately after setup, it is set for general-purpose use. You can change these settings to your own requirements and connection conditions. To do this, refer to the relevant function description. -
Page 89: Technical Data
• Connect only authorised accessories. • Clean the phone with a soft, damp cloth. Do not use abrasive cleaning agents or solvents. • The phone may only be repaired by authorised service personnel. Ascom accepts no liability for damage resulting from inappropriate use. -
Page 90: Warranty Conditions
Warranty Conditions Warranty Conditions During the warranty period Ascom agrees to correct all faults arising from material or manufacturing defects. Ascom may choose whether to repair the defective product or replace it. The warranty does not cover damage arising from inappropriate use or normal wear and tear. -
Page 91: Declaration Of Conformity
Attachment Declaration of conformity Declaration of conformity Declaration of conformity Declaration of conformity Declaration of conformity... -
Page 92: Menu Structure
Attachment Menu structure Menu structure Menu structure Menu structure Menu structure Save + Phonebook Roger Sch. Change Name:Roger Sch_ Nr:00855_ Optionenmenüs (analog "Neuer Eintrag") < > Delete < > < > Save + New entry Optionenmenüs < > Dial zzMuster Hans <... - Page 93 Attachment Forward No:0055666_ sofort <OFF> sofort <OFF> sofort <ON> > < > bei nicht melden Analog der < > Aktivierung der "Anrufumleitung sofort" Busy < > < > Execute Gebühren Request DM 10.50 Total DM 50.25 < > Delete Are you sure <NEIN> Are you sure <JA>...
- Page 94 Attachment Installation Set MSN No:21_ Name: Intern 21_ MSN A < > A, B, C C (Longclick) Delete user… <NO> > Delete user… <YES> MSN C < > Date/Time Date: 08.08.00 Time: 15.32 < > Contrast Contrast <¤¤¤¤¤_> < > Speichern + Speed dial Press a speed dial key...
-
Page 95: Write-On Labels
Attachment Write-on labels Write-on labels Write-on labels Write-on labels Write-on labels... -
Page 97: Warranty Certificate
Warranty Certificate ascom Warranty Certificate Garantieschein, Bon de garantie, Certificato di garanzia, Garantiebewijs, Takuutodistus, Garantibevis, Garantisedel, Garantibevis, Certificado de Garantía, Talão de garantia device type: (Gerätetyp, type d’appareil, tipo di apparecchio, toesteltype, laitetyyppi, maskintype, apparattyp, apparat- type, modelo del aparato, modelo do aparelho): serial number: (Seriennummer, numéro de série, numero di serie, serienummer, sarjanumero, serienummer, serienummer,... -
Page 99: Key Words
Key words A A A A A G G G G G AKZ ............71 Garantiebestimmungen ......86 Amtskennziffer (AKZ) ......71 Garantiekarte ......... 93 Anklopfen ..........59 Gebührenfaktor und Währung einstellen 62 Ankommende Anrufe ......31 Gebühren pro Benutzer ......63 Anonyme Anrufe generell abweisen .. - Page 100 Key words O O O O O U U U U U Office Manager ........81 Über das Telefonbuch wählen ....20 OK-Taste ..........13 Über Zielwahltaste wählen ...... 26 Uhrzeit ........... 57 P P P P P Umleitung ..........40 Parkcode eingeben .........
-
Page 101: Notes
Notes... - Page 102 Notes...
- Page 103 Notes...
- Page 104 Notes...
- Page 105 Hergestellt in der Schweiz durch: Ascom Business Systems AG Eichtal Postfach 500 CH-8634 Hombrechtikon http://www.ascom.ch Vertrieben in Österreich durch: Vertrieben in Deutschland durch: Ascom Austria Ascom Deutschland GmbH Fachbereich Endgeräte Gesellschaft m.b.H. Victor-Slotosch-Str. 11 Hohenbergstrasse 20-22 A-1120 Wien 60388 Frankfurt http://www.ascom.at...