Friendly Robotics RL500 Owner's Operating Manual
Robotic lawnmower
Hide thumbs
Also See for RL500:
- Operating & safety manual (41 pages) ,
- Operating & safety manual (40 pages) ,
- Operating & safety manual (42 pages)

Related Manuals for Friendly Robotics RL500


Summary of Contents for Friendly Robotics RL500
- Page 1 SMARTHOME.COM™ 1-800-SMART-HOME 949-221-9200 http://www.smarthome.com Order #3256 Owner Operating Manual...
-
Page 2: How It Works
This document is subject to change without notice. Friendly Robotics makes no warranty of any kind with regard to this material, including, but not limited to, the implied warranties of merchantability and fitness for a particular purpose. Friendly Robotics shall not be liable for errors contained herein or for incidental or consequential damages in connection with the furnishing, performance, or use of this material. -
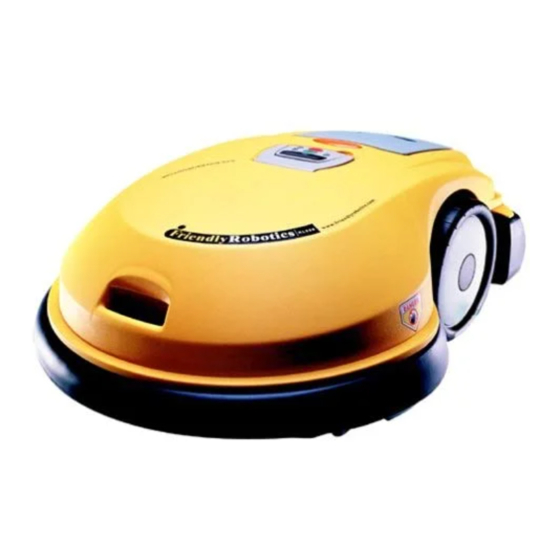
Page 3: Unit Description
Review the safety precautions (Chapter 9). Please read and make sure you understand the safety precautions and warnings in this manual; they are for your protection. Do not allow people and/or pets on the lawn when RL500 is in operation. -
Page 4: Table Of Contents
8 Safety Measurements ..................8.1 Safety measurements built into your RL500 unit. 9 Troubleshooting ....................9.1 What to do if your RL500 is not functioning properly. 10 Warnings and Operating Suggestions ............10.1 Common sense operating procedures and safety precautions. 11 Technical Specifications & Accessories ............11.1... - Page 5 Think of it as a virtual wall for your RL500. 5. Perimeter Switch: Activates the perimeter wire, which defines the area in which RL500 will operate. (3 “C” batteries included) 6. Perimeter Switch Mounting Stake For separate plot designation 7.
-
Page 6: Perimeter Switch Installation
Chapter 1 - Perimeter Switch Installation 1.1 Perimeter Switch Location Choose a location for the perimeter switch that is away from children’s reach and sheltered from rain, sun, and sprinkler systems. Tip: The garage inner wall is an ideal place to mount the perimeter switch. 1.2 Power Requirements Open the perimeter switch box and insert 3 “C”... -
Page 7: Perimeter Wire Installation
Chapter 2 - Perimeter Wire Installation 2.1 Perimeter Wire Starting Point Tear out perforated center piece on wire box. Find end of wire and pull out. Do not remove wire spool from the box. Starting at the perimeter switch location, uncoil the wire and lay it out on the lawn. - Page 8 Note: For illustration purposes, the lengths of wire leading to the perimeter island appear to have space between them. This is not the case-- these wires must be parallel and touching for the RL500 to function properly. Secure them to the ground using the same pegs.
- Page 9 Chapter 2 - Perimeter Wire Installation (cont’d) Perimeter Island Two wires parallel and touching Distance from Mounted perimeter wire Perimeter to island wire Switch must be greater than 5 feet. Flower Bed Lawn Fig. 2-6 Distance between obstacle and lawn edge is Flower Bed less than 7 ft.
- Page 10 Note: For illustration purposes, the lengths of wire leading to the perimeter island and between plots appear to have space between them. This is not the case-- these wires must be parallel and touching for the RL500 to function properly. Plot...
- Page 11 Make sure it is at least 3 feet (1m.) from the perimeter wire, so it will not be touched by RL500. The wires leading to the perimeter switch should be touching and taut. The ends of the plot wires should be inserted into a fast connector (one wire per hole).
-
Page 12: Activating Rl500
Chapter 3 - Activating RL500 3.1 Setting the Cutting Height Raise RL500 to the height of cut needed for your grass condition. If your grass is high, raise RL500 to its highest position. The front wheel has six levels of adjustment and the rear wheel has three levels of adjustment. - Page 13 Chapter 3 - Activating RL500 (cont’d) 3.4 RL500 Battery Pack Using the battery pack handle, insert the battery pack into its opening in RL500. RL500 will immediately switch ON audio will sound). (fig. 3-4) Fig. 3-4 3.5 Set Geo/’Calibration’ On first operation only: Press the green button. The display will change to read 'Set GEO Location.' The bottom display line will read 'Location.' Leaving the manual...
- Page 14 RL500 will begin to move forward, towards the perimeter wire. After positioning itself on the wire, RL500 will mow the border one to two times. When the border is completely mowed, RL500 will turn left into the lawn and begin to mow inside the perimeter wire until the end of its designated work time (fig.
- Page 15 RL500 to the charging location. A ‘None’ setting will cause the RL500 to have zero operating time. Note: If you choose not to set the work time, RL500 will use the Work Time default setting of 2 hours (fig.
-
Page 16: Manual Controller And Menu Options
6. Green Button/’Smart Key’ Used for operating RL500 in main modes, serves as an “enter” key for settings and menu choices 7. Stop Stops RL500 at any stage of its operation 8. Scroll Arrows Used for scrolling through menu Fig. 4-1 4.2 Menu Options... - Page 17 'Mowing On'--'Set,' scroll to 'off,' OK the choice. The display will change to 'Mowing off.' RL500 will move, but will not cut. This mode may be used on the first operation with a newly set perimeter wire, in order to check its distance from the lawn edge, etc.
- Page 18 Note: Operating RL500 prior to having a ‘Fully Charged’ message will reduce your battery life… trust us! Note: RL500 should be charging at all times when not in use. Continuous charging does not harm the batteries. Charging...
-
Page 19: Care And Maintenance
Remove the battery pack and blades prior to cleaning the mowing deck area. To clean RL500, lift to an upright position by using the carrying handle. Use a wet cloth or soft brush to clean the mowing deck area and the wheels from accumulated grass clippings. -
Page 20: Manual Mowing
(e.g. when the RL500 has struck an obstacle with the bumper or mow button is released). Note: Always wear appropriate footwear and walk behind RL500 and keep a distance of at least 1 foot (30 cm.) from RL500’s rear bumper. -
Page 21: Safety Measurements
If the bumpers fail to respond, stop RL500 and contact Technical Support for assistance (1-877-MOWBOTS). 8.4 Perimeter Wire If the perimeter wire is not active or is cut, the RL500 will not operate in automatic mode. Caution: Do not lift RL500 while operating! 8.5 Crossing the Perimeter Wire... -
Page 22: Troubleshooting
(fig.9-5) 9.8 RL500 Will Not Move (“Wire Too Close” Display) RL500 is positioned on the perimeter wire or too close to it. Move the unit a few feet away from the wire and press the green button (fig.9-6) 9.9 RL500 Will Not Move (“Path Blocked”... - Page 23 Chapter 9 - T roubleshooting No Wire Signal Recharge Battery Fig. 9-1 Fig. 9-2 Mowing Problem User Help Needed Fig. 9-3 Fig. 9-4 Charging Problem Wire Too Close Fig. 9-5 Fig. 9-6 Path Blocked Charging Failure - Tech Support Fig. 9-7 Fig.
- Page 24 Never let anyone ride or sit on the RL500. 10.12 Manual Mowing Always walk behind your RL500, at a safe distance of at least 1 ft. (30 cm.), while moving your unit or mowing. It is recommended that shoes be worn at all times when operating the RL500;...
- Page 25 Chapter 10 - Warnings and Safety Precautions 10.16 Servicing Your RL500 Allow only authorized RL500 technicians to service your unit. Do not attempt to open RL500, as it will void your warranty. Altering RL500 parts will void your warranty. 10.17 Cleaning Your RL500 Use only a damp cloth or soft brush to clean your unit.
- Page 26 SMARTHOME.COM™ 1-800-SMART-HOME 949-221-9200 http://www.smarthome.com Order #3256 Chapter 11 - T echnical Specifications Dimensions 35”l. x 26”w. x 12.5”h. (89 x 66.5 x 31.5 cm) Weight 50lb. (22.6Kg) Unit + 28lb. (12.6Kg) Battery Pack Charging Time 24 hours Mowing Width 3 Blades equaling 21” (56cm) Cuts .6”...