Table of Contents
Advertisement
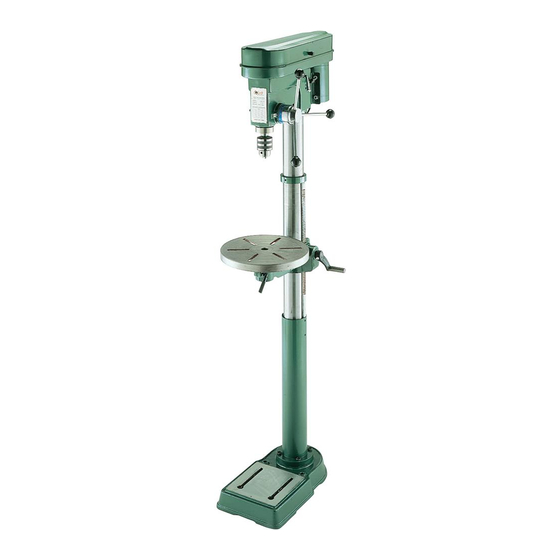
DRILL PRESS
MODEL G4008/G4009
INSTRUCTION MANUAL
COPYRIGHT © 1996 BY GRIZZLY IMPORTS, INC.
WARNING: NO PORTION OF THIS MANUAL MAY BE REPRODUCED IN ANY SHAPE
OR FORM WITHOUT THE WRITTEN APPROVAL OF GRIZZLY IMPORTS, INC.
APRIL, 1997 PRINTED IN USA
DISCONTINUED MACHINE MANUAL DISCLAIMER
T T H H E E I I N N F F O O R R M M A A T T I I O O N N I I N N T T H H I I S S M M A A N N U U A A L L R R E E P P R R E E S S E E N N T T S S T T H H E E L L A A S S T T C C O O N N F F I I G G U U R R A A T T I I O O N N O O F F T T H H E E M M A A C C H H I I N N E E B B E E F F O O R R E E I I T T W W A A S S D D I I S S C C O O N N T T I I N N U U E E D D . . M M A A C C H H I I N N E E C C O O N N - -
F F I I G G U U R R A A T T I I O O N N S S M M A A Y Y H H A A V V E E C C H H A A N N G G E E D D A A S S P P R R O O D D U U C C T T I I M M P P R R O O V V E E M M E E N N T T S S W W E E R R E E I I N N C C O O R R P P O O R R A A T T E E D D . . I I F F Y Y O O U U O O W W N N A A N N E E A A R R L L I I E E R R V V E E R R S S I I O O N N O O F F T T H H E E M M A A C C H H I I N N E E , ,
T T H H I I S S M M A A N N U U A A L L M M A A Y Y N N O O T T E E X X A A C C T T L L Y Y D D E E P P I I C C T T Y Y O O U U R R M M A A C C H H I I N N E E . . C C O O N N T T A A C C T T C C U U S S T T O O M M E E R R S S E E R R V V I I C C E E I I F F Y Y O O U U H H A A V V E E A A N N Y Y Q Q U U E E S S T T I I O O N N S S A A B B O O U U T T D D I I F F F F E E R R E E N N C C E E S S . .
P P R R E E V V I I O O U U S S V V E E R R S S I I O O N N S S A A R R E E N N O O T T A A V V A A I I L L A A B B L L E E O O N N L L I I N N E E . .
Advertisement
Table of Contents

Related Manuals for Grizzly G4008


Summary of Contents for Grizzly G4008
- Page 1 INSTRUCTION MANUAL COPYRIGHT © 1996 BY GRIZZLY IMPORTS, INC. WARNING: NO PORTION OF THIS MANUAL MAY BE REPRODUCED IN ANY SHAPE OR FORM WITHOUT THE WRITTEN APPROVAL OF GRIZZLY IMPORTS, INC. APRIL, 1997 PRINTED IN USA DISCONTINUED MACHINE MANUAL DISCLAIMER T T H H E E I I N N F F O O R R M M A A T T I I O O N N I I N N T T H H I I S S M M A A N N U U A A L L R R E E P P R R E E S S E E N N T T S S T T H H E E L L A A S S T T C C O O N N F F I I G G U U R R A A T T I I O O N N O O F F T T H H E E M M A A C C H H I I N N E E B B E E F F O O R R E E I I T T W W A A S S D D I I S S C C O O N N T T I I N N U U E E D D .
- Page 2 WARNING Some dust created by power sanding, sawing, grind- ing, drilling, and other construction activities contains chemicals known to the State of California to cause cancer, birth defects or other reproductive harm. Some examples of these chemicals are: • Lead from lead-based paints. •...
-
Page 3: Table Of Contents
DRILL CHANGES ...16 DRILL SPEED ...17 DRILLING METAL ...17 DRILLING WOOD ...18 MORTISE ATTACHMENT...18 MAINTENANCE...19 GENERAL ...19 BELT TENSION...19 LUBRICATION ...19 CLOSURE...20 GENERAL MACHINE DATA ...21 PART BREAKDOWN ...22 PART LIST ...23 WARRANTY AND RETURNS...24 G4008/G4009 Drill Press Table Of Contents PAGE... -
Page 4: Safety
11. ALWAYS USE SAFETY GLASSES. Also use face or dust mask if cutting operation is dusty. Everyday eyeglasses only have impact resistant lenses, they are NOT safety glasses. 16 A.W.G. 50ft 16 A.W.G. 100ft 14 A.W.G. 200ft 12 A.W.G. 300ft G4008/G4009 Drill Press... -
Page 5: Additional Safety Instructions For Drill Presses
Back the bit out of deep cuts to cool and clean the bit. Never attempt to clean wood or metal cut- tings from drill bits while the drill press is run- ning. Work should be secured in such a way so as... -
Page 6: Circuit Requirements
SECTION 2: CIRCUIT REQUIREMENTS 110V Operation The G4008/G4009 Drill Press is supplied with a U.S made 110V/220V motor. Under normal use, the motor draws approximately 9 amps @ 110V. We recommend using a 15 amp circuit breaker or a 15 amp slow blow fuse for 110V operation. This... -
Page 7: General Information
SECTION 3: GENERAL INFORMATION Grizzly Imports, Inc. is proud to offer the Model G4008/G4009 Drill Press. This drill press is a part of Grizzly’s growing family of fine woodworking and metalworking machinery. When used accord- ing to the guidelines stated in this manual, you can expect years of trouble-free, enjoyable oper- ation. -
Page 8: Unpacking
Unpacking The Model G4008/G4009 Drill press is shipped from the manufacturer in a carefully packed car- ton. If you discover the machine is damaged after you’ve signed for delivery, please call Customer Service immediately for advice. Save the containers and all packing materials for possible inspection by the carrier or its agent. -
Page 9: Clean Up
Clean up The column and other unpainted parts of the Model G4008/G4009 are coated with a waxy oil that protects them from corrosion during ship- ment. Remove the protective coating with miner- al spirits and paper towels. Do not use gasoline or other petroleum based solvents because of their extremely low flash points. -
Page 10: Assembly
Most of the Drill Press has been pre-assembled at the factory. The few remaining pieces should go together quickly and easily. This manual is written for both the G4008 and G4009. The only difference between the two regarding assembly is the length of the column. -
Page 11: Headstock/Column
3. Secure the headstock to the column by tight- ening the setscrews located on the side. Figure 4. Figure 4. G4008/G4009 Drill Press 4. Screw the three handle bars into the tapped holes in the handle body. Figure 9. Figure 5. -
Page 12: Working Table
4. Place the table into the hole in the table brack- et and secure with the table lock handle. Figure 8. Figure 8. 5. Thread the column lock handle into the col- umn bracket. Leave the lock handle loose for now. Figure 9. Figure 9. G4008/G4009 Drill Press... -
Page 13: Motor
Install the V-Belt and adjust the motor as necessary so the pulleys line up correctly. Figure 10. Figure 10. G4008/G4009 Drill Press Motor Wiring Remove the wire box cover located at the end of the motor. Wire the motor per the diagram in Figure 11. -
Page 14: Drill Chuck
2. The short taper on the end of the drill chuck arbor is called a ‘Jacobs Taper’. In this case, a ‘Jacobs Taper #3’. Slide the short taper into the drill chuck and tap lightly with a soft ham- mer or block of wood. -
Page 15: Adjustments
Figure 13. G4008/G4009 Drill Press Depth Stop To stop the vertical travel of the drill bit at a desired depth, loosen the scale set knob located on the feed shaft assembly, rotate the collar to the desired depth and tighten the scale set knob. -
Page 16: Table Adjustments
Figure 16. 4. To tilt the table, loosen the pivot bolt with the 12mm Allen wrench supplied. Figure 17. Tilt the table to the desired angle (up to 45°). Tighten the pivot bolt. Pivot Bolt Figure 17. G4008/G4009 Drill Press... -
Page 17: Chuck Removal
2. Rotate the spindle manually and line up the internal spindle slot with the slot on the side of the quill. The end of the drill chuck (the tang) should be visible through the slot at this point. 3. Insert the wedge shifter through the slot in the spindle with the tapered edge facing down. -
Page 18: Operations
3. Install the bit so the chuck jaws will grab the major portion of the bit shank. Do not allow the chuck to grab the fluted body of the drill bit. 4. Tighten the chuck with the chuck key using all three key locations. -
Page 19: Drill Speed
Drill Speed The best speed to use in any drill press operation is determined by; material, size of drill bit, type of drill bit or cutter and quality of cut desired. The smaller the drill bit, the greater the speed. In soft materials, the speed should be higher than for hard materials. -
Page 20: Drilling Wood
Do not attempt to open the chuck wider by forcing it. -18- Mortise Attachment The optional Grizzly G1083 Mortise Attachment was specifically designed to fit the G4008/G4009 Drill Press. Refer to our current catalog for order- ing information. Figure 19. ⁄... -
Page 21: Maintenance
SECTION 7: MAINTENANCE General Make a habit of inspecting your drill press each time you use it. Check for the following conditions and repair or replace when necessary. Loose mounting bolts. Worn switch. Worn or damaged cords and plugs. Damaged V-belt. -
Page 22: Closure
Like all power tools, there is danger associated with the Model G4008/G4009 Drill press. Use the tool with respect and caution to lessen the possi- bility of mechanical damage or operator injury. If... -
Page 23: General Machine Data
Features: Table Tilt ...0°-45° Left and Right Table Swing ...360° Drive ...Four Step Pulley Table Locks...Positive Table Height Adjustment ...Worm Gear Specifications, while deemed accurate, are not guaranteed. G4008/G4009 Drill Press GENERAL MACHINE DATA ⁄ ⁄ ⁄ " ⁄ "/38 ⁄... -
Page 24: Part Breakdown
-22- 78 77 G4008/G4009 Drill Press... -
Page 25: Part List
47 P4008047 SCALE 48 P4008048 RIVET 49 P4008049 SPRING & HOUSING 51 P4008051 SPRING SEAT 52 P4008052 SPECIAL SET SCREW 53 P4008053 HEX NUT 54 P4008054 SPECIAL SET SCREW G4008/G4009 Drill Press PART # DESCRIPTION P4008055 HEX NUT P4008056 QUILL... -
Page 26: Warranty And Returns
WARRANTY AND RETURNS Grizzly Imports, Inc. warrants every product it sells for a period of 1 year to the original purchaser from the date of purchase. This warranty does not apply to defects due directly or indirectly to misuse, abuse, neg- ligence, accidents, repairs or alterations or lack of maintenance.