
Related Manuals for LENCO DF-1020


Summary of Contents for LENCO DF-1020
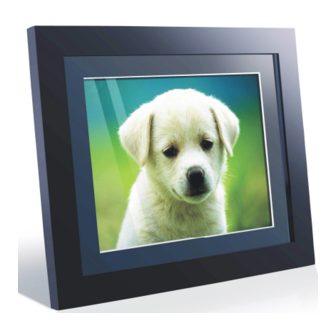
- Page 1 10.4 inch Digital Photo Frame DF-1020 USER’S MANUAL For information and support, www.lenco.eu...
-
Page 2: Table Of Contents
Table of Contents Introduction ...............………… ..3 Installing your Unit ..............3 Connecting to a Computer............4 Controls…………………………………………………………… 5 Interfaces..................6 Using your remote control………………………………………….7 Using Your Digital Picture Frame ..........8 Browsing photos……………………………………………………….9 photo Settings ................9 Watching Video ................9 Listening to Music ..............11 Copy/ Delete Files .............. -
Page 3: Introduction
Introduction Congratulations on your purchase of Digital Picture Frame, model DF 1020 . Before operating the unit, please read this manual thoroughly, and retain it for future reference. This manual will help you use many of the exciting and useful features that will make your Digital Picture Frame viewing more enjoyable. -
Page 4: Connecting To A Computer
Connecting to a computer ◆Turn on your digital picture frame. ◆Use the USB cable provided, and then plug the mini USB into the digital picture frame ◆Plug the other end of the cable into your computer Upon connecting the unit to your computer, the picture frame interface will show as “the DPF set is connected to PC”.Then please find “My Computer”... -
Page 5: Controls
Controls 1. UP 5. right 2. Down 6. Exit 3. enter 4. Left... -
Page 6: Interfaces
Interfaces 7. USB host 10.. CF card Slot 8. USB device 11. Power switch 9. SD/MMC/MS/xD Card 12. Power socket Slot... -
Page 7: Using Your Remote Control
Using Your Remote Control Button Description and Function Switch on/off the frame Switch between Image/Music/Video Start a slideshow Used to call setup menu Used to call function menu Back / Home Increase Volume Decrease volume Confirm or rotate picture Zoom in the picture or video Zoom out the picture or video Play / Pause Navigate Up on screen... -
Page 8: Using Your Digital Picture Frame
Using Your Digital Picture Frame Make sure you have at least one image, video or music file on your memory cards or USB flash drive or the frame’s internal memory. ⒈Switch on the frame and insert memory cards into the unit, it will automatically start slideshow. -
Page 9: Photo Settings
◆Using the directional arrows highlight the desired flash device (USB, CF, SD, MMC, MS, XD or internal memory), press “Enter” button or wait for 3 seconds, cursor position will move to the corresponding interface. Using the directional arrows highlight ‘’Image’’, press “Enter” button or wait for 2-3 seconds, cursor position will move to the image in thumbnail format. - Page 10 ◆Press “Back’’ button repeatedly to have the cursor position moving to File – Image - Flash device orderly. ◆Using the directional arrows highlight ‘’Video’’, press “Enter” button or wait for 3 seconds, cursor position will move to the list of video. ◆...
-
Page 11: Listening To Music
Random repeat all files Repeat single file Repeat folder Listening to Music Make sure you have at least one music file on your memory cards or USB flash drive or the frame’s internal memory. ◆Press “Back’’ button repeatedly to have the cursor position moving to File – Image - Flash device orderly. -
Page 12: Copy/ Delete Files
Repeat single file Repeat folder 3.Using the directional arrow selecting EQ effect : Ballad / Club / R&B / Dance / Normal / Rock / Classic / jazz / Pop / Studio Copy/ Delete Files ◆Copy / Delete images: Under Photo thumbnail format, using the directional arrows highlight the desired images, press “Func”... -
Page 13: Frequently Asked Questions
Auto Power: Press “Enter” and using the directional arrows setting auto power on/off: ◆ Repeat: Select auto power on/off Disable / One Day / Every Day / Weekday / Weekend ◆ Power on time: Set power on time ◆ Power off time: Set power off time Calendar Display: Select calendar display mode with slide / With single / With clock Contrast: adjust display contrast... -
Page 14: Troubleshooting
A: The Digital Picture Frame is designed to show images following the same camera industry standards format as digital cameras. This format is a JPEG/ BMP/GIF/TIFF/PNG format images, such as web images, scanned images, or images in RAW format, are not stored according to camera industry standards and therefore cannot be displayed correctly on the Digital Picture Frame. -
Page 15: Specification
Specifications Type 10.4 inch Digital Picture Frame Resolution 640 x 480 Output 12 V ,1.5A Input AC100-240V ~50/60Hz Internal Memory 128MB Display Mode JPEG,BMP,GIF,TIFF,PNG File Format MP3,WMA,OGG / MPEG 1/2/4 DivX (except V3.11) Cards SD/MMC/MS/ xD/CF/USB USB ports USB Host, USB Slave Start-up Photo with music Digital Photo Frame...