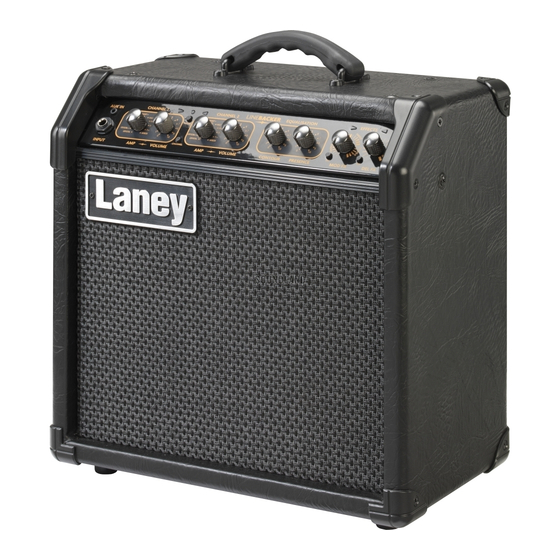
Summary of Contents for Laney linebacker LR20
- Page 2 WARNING: When using electrical products, basic cautions should always be followed, including the following: 1. Read these instructions. 2. Keep these instructions safe. 3. Heed all warnings. 4. Follow all instructions. 5. Do not use this apparatus near water. 6. Clean only with a dry cloth. 7.
- Page 3 ATTENTION: L’utilisation de tout appareil électrique doit être soumise aux precautions d’usage incluant: 1. Lire ces instructions 2. Gardez ce manuel pour de futures références. 3. Prétez attention aux messages de précautions de ce manuel. 4. Suivez ces instructions. 5. N’utilisez pas cette unité proche de plans d’eau. 6.
- Page 4 ACHTUNG: Beim Einsatz von Elektrogeräten müssen u.a. grundlegende Vorsichtsmaßnahmen befolgt werden: 1. Lesen Sie sich diese Anweisungen durch. 2. Bewahren Sie diese Anweisungen auf. 3. Beachten Sie alle Warnungen. 4. Befolgen Sie alle Anweisungen. 5. Setzen Sie dieses Gerät nicht in der Nähe von Wasser ein. 6.
- Page 5 CUIDADO: Cuando use productos electrónicos, debe tomar precauciones básicas, incluyendo las siguientes: 1. Lea estas instrucciones. 2. Guarde estas instrucciones. 3. Haga caso de todos los consejos. 4. Siga todas las instrucciones. 5. No usar este aparato cerca del agua. 6.
- Page 6 PRECAUCION: Para disminuir el risego de carrientazo, no abra la cubierta. No hay piezas adentro que el pueda reparar. Your Laney amplifier has undergone a thorough two stage, pre- Deje todo mantenimiento a los tecnicos calificadod. delivery inspection, involving actual play testing.
- Page 7 It must be taken to an approved recycling centre according to the recommendations of the WEEE (Waste Electrical and Electronic Equipment) directive applicable in your country. In the interest of continued development, Laney reserves the right to amend product specification without prior notification.
- Page 9 The 15W LR20 model features an 8" custom driver, 2 channels, 2 x 11 built in amp models and range of "must have" effects like; chorus, phase, flange, tremolo, reverb and delay, provides everything from clean tones to full-out overdrive.
- Page 10 HEART+ HEART+ HEART VOLT HEART VOLT VOLT+ VOLT+ CRYSTAL+ CRYSTAL CRYSTAL CRYSTAL WRECK WRECK...
- Page 11 N15039 MODEL: LR20 ~100V T500mA L 250V ~120V T500mA L 250V ~220V/~230V T250mA L 250V ~240V T250mA L 250V Power To The Music L Z B 1 2 3 4 WWW.LANEY.CO.UK SUPPLY VOLTAGE & FUSE RATING: DESIGNED AND ENGINEERED IN THE UK Spare power fuse included in the pull out tray.
- Page 12 POWER INLET SOCKET: Connect to your power source. POWER: This is the main power on off switch. INPUT JACK: Connect your guitar here. Use only good quality cables to avoid poor sound quality. CHANNEL 1 & 2 AMP MODEL SELECTION: Choose 2 14 from the various pre programmed amp models VOLUME CONTROLS FOR EACH CHANNEL: Each...
- Page 13 HEADPHONE/RECORD OUT: A rear panel 6.35” stereo jack is provided for headphone use. FOOTSWITCHES: The rear panel has jack connectors for two footswitches. CHANNEL: Use to switch between channels. EFFECTS: Use to switch: (1) MOD FX ON/OFF & (2) DEL FX ON/OFF...
- Page 14 TUNER OPERATION: By pressing the Tuner Button the amplifier will Mute and the tuner function will be activated. The round LED above the tuner button will flash to indicate Tuner operation. The AMP selector on channel 2 should then be used to select each string in turn to be tuned. These are E,B,G,D,A,E and numbered 1-6 with 1 being the High “E”...
- Page 15 POWER: This is the main power ON/OFF switch. After switch on all of the LED’s on the fascia light up momentarily, after a couple of seconds the LED’s indicate the previous settings used: i.e. If the amp was last used on Channel 1 with Reverb, the Channel 1 & DEL FX LED’s will be lit. All other control settings associated with Channel 1 will also be recalled.
- Page 16 CHANNEL 1 & 2 SETTINGS: The control levels set on CH1 and CH2 are not lost when 2 14 switching between Channels. For example, CH1 may be set up as a clean sound with Chorus & Reverb applied & both EQ settings at 5.
- Page 17 The cool sounds you discover can be noted in the user settings section. (Page 21/22) FOOTSWITCHES: The rear panel has jack connectors for two footswitches. CHANNEL: Use a single switch (Mono Jack) footswitch (Laney FS1 Recommended) to switch between channels. EFFECTS: Use a double switch (Stereo Jack) footswitch (Laney FS2 Recommended) to switch: (1) MOD FX ON/OFF &...
-
Page 18: Factory Reset
SERIAL NO: Displays the model and serial number of the unit. POWER INLET SOCKET: Connect to your power source. Make sure the specified voltage is correct for your country! POWER FUSE: This drawer contains the main safety fuse for the unit and also a spare in the pull out tray. - Page 19 Amp Model Definitions Linebacker Tone Description Amp modelled Sounds Crystal Pure & Clean Clean channel of an LC amp - bright and full Crystal + Clean with Compression Clean channel of an LC amp - bright and full + a clean boost pedal to give more low end Clean &...
- Page 20 CONNECTIONS N15039 Mixer Desk MODEL: LR20 ~100V T500mA L 250V ~120V T500mA L 250V ~220V/~230V T250mA L 250V FOOTSWITCH ~240V T250mA L 250V Power To The Music L Z B 1 2 3 4 CHANNEL SUPPLY VOLTAGE & FUSE RATING: WWW.LANEY.CO.UK...
- Page 21 USER SETTINGS - Store your own cool sounds NOTES NOTES NOTES NOTES...
- Page 22 USER SETTINGS - Store your own cool sounds NOTES NOTES NOTES NOTES...
- Page 23 NOTES...


