JVC KD-DV4506 Instructions Manual
Dvd/cd receiver
Hide thumbs
Also See for KD-DV4506:
- Installation & connection manual (4 pages) ,
- Installation & connection manual (4 pages)

Related Manuals for JVC KD-DV4506


Summary of Contents for JVC KD-DV4506
- Page 1 KD-DV4506/ DVD/CD RECEIVER KD-DV4505/KD-DV4504 For canceling the display demonstration, see page 9. For installation and connections, refer to the separate manual. INSTRUCTIONS GET0588-001A [U/UN/UT/A/UI]...
- Page 2 Thank you for purchasing a JVC product. Please read all instructions carefully before operation, to ensure your complete understanding and to obtain the best possible performance from the unit. IMPORTANT FOR LASER PRODUCTS 1. CLASS 1 LASER PRODUCT 2. CAUTION: Do not open the top cover. There are no user serviceable parts inside the unit; leave all servicing to qualified service personnel.
-
Page 3: Table Of Contents
CONTENTS Detaching the control panel Detaching the control panel ......3 Attaching the control panel ......3 How to reset your unit ......... 3 How to forcibly eject a disc ......3 INTRODUCTIONS Playable disc type ........4 Attaching the control panel OPERATIONS Basic operations ........... -
Page 4: Introductions
Playable disc type Disc type Recording format, file type, etc Playable DVD-Video * Region Code: South East Asia, Hong Kong region: 3 Australia: 4 India: 5 Ex.: DVD-Audio/DVD-ROM DVD Recordable/Rewritable DVD-Video (DVD-R/-RW * , +R/+RW * DVD-VR • DVD Video: UDF bridge DivX/MPEG1/MPEG2 •... -
Page 5: Operations
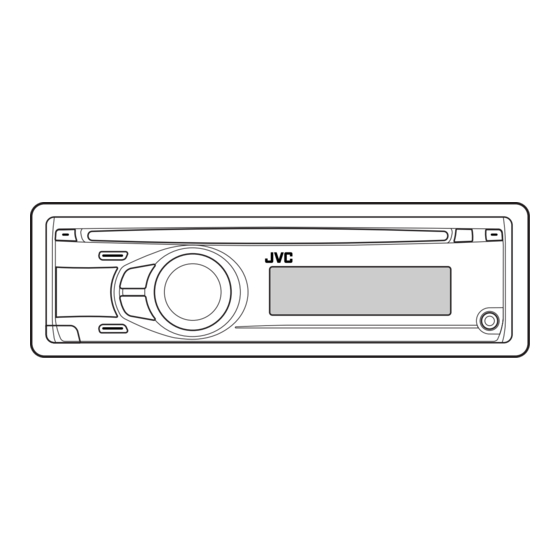
Basic operations Using the control panel • FM/AM: Select preset station. • FM/AM: Search for station. • DISC: Select title/program/playlist/folder. • DISC: Select chapter/track. • CD-CH: Select folder. • CD-CH/IPOD: Select track. • IPOD: Enter the main menu/Pause playback/ Return to the previous menu. Confirm selection. -
Page 6: Using The Remote Controller (Rm-Rk255)
Display window Tr (track) indicator EQ (equalizer) indicator Source display / Track number / Folder number / LOUD (loudness) indicator Disc number / Title number / PBC indicator / Time Disc information indicators— countdown indicator TAG (Tag information), (track/file), (folder) Playback source indicators—CH (CD changer), DISC Main display (Time, menu, playback information) Sound mode indicators —CLASSIC, HIP HOP, JAZZ,... - Page 7 • IPOD: ∞ – : Enters the main menu (then ¢ work as menu selecting buttons.) : Returns to the previous menu. ∞ : Confirms the selection. ∞ – : Pauses or resumes playback. ¢ buttons • FM/AM: – Searches for stations automatically if pressed briefly.
- Page 8 fi * TOP MENU button buttons • DVD-Video: Shows the disc menu. • DVD-Video: Makes selection/settings. • DVD-VR: Shows the Original Program screen. • CD-CH: Changes discs in the magazine. • VCD: Resumes PBC playback. buttons * OSD (on-screen display) button •...
-
Page 9: Preparation
Preparation Canceling the display demonstration and setting the clock • See also page 25. Turn on the power. Cancel the display demonstrations Select “DEMO,” then “DEMO OFF.” Press and hold until the Set the clock main menu is called up. “CLOCK SET.”... -
Page 10: Storing Stations In Memory
Improving the FM reception When an FM stereo broadcast is hard to receive, activate monaural mode for better reception. • See also page 26. Local FM stations with the strongest signals are searched and stored automatically. ¢ • To stop searching, press To preset other 6 stations, repeat from step 1 again. -
Page 11: Disc Operations
Disc operations Before performing any operations... Turn on the monitor to watch the playback picture. If you turn on the monitor, you can also control playback of other discs by referring to the monitor screen. (See pages 16 – 19.) The disc type is automatically detected, and playback starts automatically (for DVD: automatic start depends on its internal program). -
Page 12: Operations Using The Control Panel
Changing the display information Current chapter number and Elapsed playing time Current chapter number and Clock Current title and chapter number (back to the beginning) Current chapter number and Elapsed playing time Current chapter number and Clock Current program (or playlist) number and chapter number (back to the beginning) Elapsed playing time Folder number and Clock... -
Page 13: Selecting The Playback Modes
Disc type [Press] Select track [Press] Pause/resume [Hold] Reverse/fast-forward — playback track * [Press] Select track Select folder [Press] Pause/resume [Hold] Reverse/fast-forward playback track * [Press] Select track [Press] Pause/resume [Hold] Reverse/fast-forward — playback track * Search speed: Search speed: Selecting the playback modes You can use only one of the following playback modes at a time. -
Page 14: Operations Using The Remote Controller
Disc type REPEAT RANDOM TRACK RPT:Repeat current track FOLDER RND: Randomly play all tracks of FOLDER RPT: Repeat current folder current folder, then tracks of next folders ALL RND: Randomly play all tracks TRACK RPT: Repeat current track ALL RND: Randomly play all tracks •... - Page 15 Button Stop play Stop play Stop play Start play/Pause (if pressed Start play/Pause (if pressed Start play/Pause (if pressed during play) during play) during play) Reverse/forward track search * Reverse/forward track search * Reverse/forward track search * • Forward slow motion * during pause (No sound can be heard.) –...
- Page 16 • For DivX/MPEG Video/MP3/WMA/WAV, track is Operations using the searched within the same folder. on-screen bar • For DVD-VR, program/playlist search is possible (DVD/DVD-VR/DivX/MPEG Video/VCD) during Original program playback (PG)/Playlist playback (PL). These operations are possible on the monitor using the •...
- Page 17 On-screen bar Ex.: DVD-Video Information Operation Disc type Playback status • DVD-Video: Audio signal format type and Play Forward/reverse search channel Forward/reverse slow-motion • VCD: PBC Playback mode * Pause Stop DVD-Video: T. RPT: Title repeat C. RPT: Chapter repeat Operation icons DVD-VR: C.
- Page 18 Current track number/total number of tracks in the Operations using the control current folder (total number of tracks on the disc) screen Track information (DivX/MPEG Video/MP3/WMA/WAV/CD) Track list with the current track selected These operations are possible on the monitor using the Selecting a playback mode remote controller.
- Page 19 Current page/total number of the pages included Operations using the list in the list screen Current folder/track (highlighted bar) (DVD-VR/DivX/MPEG Video/MP3/WMA/WAV) List screen (DVD-VR) These operations are possible on the monitor using the remote controller. You can use ORIGINAL PROGRAM or PLAY LIST screen Before playing, you can display the folder list/track list anytime while playing DVD-VR with its data recorded.
-
Page 20: Listening To The Cd Changer
Listening to the CD changer It is recommended to use a JVC MP3-compatible CD changer (not supplied) with your unit. You can connect a CD changer to the CD changer jack on the rear of the unit. • You can only play conventional CDs (including CD Text) and MP3 discs. -
Page 21: Listening To The Ipod
Listening to the iPod Before operating, connect the Interface adapter for iPod, KS-PD100 (not supplied) to the CD changer jack on the rear of the unit. Preparation: Make sure “CH/IPOD” is selected in the “SRC SELECT” “EXT IN” setting, see page 27. Select “IPOD.”... -
Page 22: Listening To The Other External Components
* Functions only if you select “ALL ALBUMS” in “ALBUMS” ONE RPT : Functions the same as “Repeat of the main menu. One” of the iPod. ALL RPT : Functions the same as “Repeat • To cancel repeat play or random play, select All”... -
Page 23: Settings
Selecting a preset sound mode You can select a preset sound mode suitable to the music genre. • See also page 25. Selecting from Menu. [Turn] [Press] • See page 24 for “USER” settings. Preset value setting for each sound mode Preset value Sound BASS... - Page 24 Storing your own sound mode Range/selectable item Sound You can store your own adjustments in memory. element BASS MIDDLE TREBLE Select “USER.” Frequency 60 Hz 0.5 kHz 7.5 kHz 80 Hz 1.0 kHz 10.0 kHz 100 Hz 1.5 kHz 12.5 kHz 120 Hz 2.5 kHz 15.0 kHz...
-
Page 25: Menu Operations
Menu operations Call up the menu. Select the desired item. Repeat step 2 if necessary. • To return to the previous menu, press BACK. [Turn] [Press] • To exit from the menu, press DISP or MENU. Initial: Underlined Category Menu item Selectable setting, [reference page] DEMO •... - Page 26 Category Menu item Selectable setting, [reference page] MONO * • MONO ON : Activate monaural mode to improve FM reception, but Monaural mode stereo effect will be lost, [10]. • MONO OFF : Restore the stereo effect. IF BAND • AUTO : Increases the tuner selectivity to reduce interference noises Intermediate between adjacent stations.
-
Page 27: Title Assignment
: Enable “AM” in source selection, [5]. EXT IN * • CH/IPOD : To connect a JVC CD changer, [20], or an iPod, [21]. External input • EXT INPUT : To connect a portable audio player to the CD changer jack, [22]. -
Page 28: Disc Setup Menu
Disc setup menu These operations are possible on the monitor using the remote controller. Enter the disc setup menu while stop. Select a menu. Select an item you want to set up. • To cancel pop-up menu, press RETURN. Select an option. To return to normal screen Menu Item... - Page 29 Menu Item Setting MONITOR TYPE Select the monitor type to watch a wide screen picture on your monitor. OSD POSITION Select the on-screen bar position on the monitor. • 1 : Higher position • 2 : Lower position (Guidance below the disc setup menu will disappear.) DIGITAL AUDIO Select the signal format to be emitted through the DIGITAL OUT (Optical) terminal.
-
Page 30: More About This Unit
More about this unit • When storing a station manually, the previously General preset station is erased when a new station is stored Turning on the power in the same preset number. • By pressing SRC button on the unit, you can also turn on the power. -
Page 31: Ipod Operations
When operating an iPod, some operations may not be performed correctly or as intended. In this case, • This unit can play back MPEG Video files with the visit the following JVC web site: <http://www.jvc. extension code <.mpg>, <.mpeg>, or <.mod>*. co.jp/english/car/> (English website only) * <.mod>... - Page 32 Menu operations Disc setup menu • If you change the “AMP GAIN” setting from • When the language you have selected is not recorded “HIGH POWER” to “LOW POWER” while on a disc, the original language is automatically used the volume level is set higher than “VOLUME 30,” as the initial language.
- Page 33 About sounds reproduced through the On-screen guide icons During playback, the following guide icons may rear terminals appear for a while on the monitor. • Through the analog terminals (Speaker : Playback out/LINE OUT): : Pause 2-channel signal is emitted. When playing a : DVD-Video/VCD: Forward slow multi-channel encoded disc, multi-channel signals motion...
-
Page 34: Maintenance
Maintenance How to clean the connectors To keep discs clean Frequent detachment will deteriorate the connectors. A dirty disc may not play correctly. To minimize this possibility, periodically wipe the If a disc does become dirty, wipe it with connectors with a cotton swab or cloth moistened with a soft cloth in a straight line from center alcohol, being careful not to damage the connectors. -
Page 35: Troubleshooting
Troubleshooting What appears to be trouble is not always serious. Check the following points before calling a service center. Symptom Remedy/Cause • Sound cannot be heard from the speakers. • Adjust the volume to the optimum level. • Check the cords and connections. •... - Page 36 Symptom Remedy/Cause • Disc cannot be played back. • Change the disc. • Record the tracks using a compliant application in the appropriate discs (see page 4). • Add the extension code <.divx>, <.div>, <.avi>, <.mpg>, <.mpeg>, <.mp3>, <.wma>, or <.wav>...
- Page 37 Reset the iPod. disconnecting from this unit. JVC bears no responsibility for any loss of data in an iPod while using this System. • Manufactured under license from Dolby Laboratories. Dolby and the double-D symbol are trademarks of Dolby Laboratories.
-
Page 38: Specifications
Specifications Maximum Power Output: Front/Rear: 50 W per channel Continuous Power Output Front/Rear: 19 W per channel into 4 Ω, 40 Hz to (RMS): 20 000 Hz at no more than 0.8% total harmonic distortion Load Impedance: 4 Ω (4 Ω to 8 Ω allowance) Tone Control Range: Bass: ±12 dB (60 Hz, 80 Hz, 100 Hz, 120 Hz) - Page 39 Signal Detection System: Non-contact optical pickup (semiconductor laser) Number of Channels: 2 channels (stereo) Frequency Response: DVD, fs=48 kHz/96 kHz: 16 Hz to 22 000 Hz CD, fs=44.1 kHz: 16 Hz to 20 000 Hz Dynamic Range: 96 dB Signal-to-Noise Ratio: 98 dB Wow and Flutter: Less than measurable limit...
- Page 40 Thank you for purchasing a JVC product. Please read all instructions carefully before operation, to ensure your complete understanding and to obtain the best possible performance from the unit. IMPORTANT FOR LASER PRODUCTS 1. CLASS 1 LASER PRODUCT 2. CAUTION: Do not open the top cover. There are no user serviceable parts inside the unit; leave all servicing to qualified service personnel.
-
Page 41: Detaching The Control Panel
CONTENTS Detaching the control panel Detaching the control panel ......3 Attaching the control panel ......3 How to reset your unit ......... 3 How to forcibly eject a disc ......3 INTRODUCTIONS Playable disc type ........4 Attaching the control panel OPERATIONS Basic operations ........... -
Page 42: Introductions
Playable disc type Disc type Recording format, file type, etc Playable DVD-Video * Region Code: South East Asia, Hong Kong region: 3 Australia: 4 India: 5 Ex.: DVD-Audio/DVD-ROM DVD Recordable/Rewritable DVD-Video (DVD-R/-RW * , +R/+RW * DVD-VR • DVD Video: UDF bridge DivX/MPEG1/MPEG2 •... -
Page 43: Operations
Basic operations Using the control panel • FM/AM: Select preset station. • FM/AM: Search for station. • DISC: Select title/program/playlist/folder. • DISC: Select chapter/track. • CD-CH: Select folder. • CD-CH/IPOD: Select track. • IPOD: Enter the main menu/Pause playback/ Return to the previous menu. Confirm selection. -
Page 44: Using The Remote Controller (Rm-Rk255)
Display window Tr (track) indicator EQ (equalizer) indicator Source display / Track number / Folder number / LOUD (loudness) indicator Disc number / Title number / PBC indicator / Time Disc information indicators— countdown indicator TAG (Tag information), (track/file), (folder) Playback source indicators—CH (CD changer), DISC Main display (Time, menu, playback information) Sound mode indicators —CLASSIC, HIP HOP, JAZZ,... - Page 45 • IPOD: ∞ – : Enters the main menu (then ¢ work as menu selecting buttons.) : Returns to the previous menu. ∞ : Confirms the selection. ∞ – : Pauses or resumes playback. ¢ buttons • FM/AM: – Searches for stations automatically if pressed briefly.
- Page 46 fi * TOP MENU button buttons • DVD-Video: Shows the disc menu. • DVD-Video: Makes selection/settings. • DVD-VR: Shows the Original Program screen. • CD-CH: Changes discs in the magazine. • VCD: Resumes PBC playback. buttons * OSD (on-screen display) button •...
-
Page 47: Preparation
Preparation Canceling the display demonstration and setting the clock • See also page 25. Turn on the power. Cancel the display demonstrations Select “DEMO,” then “DEMO OFF.” Press and hold until the Set the clock main menu is called up. “CLOCK SET.”... - Page 48 Improving the FM reception When an FM stereo broadcast is hard to receive, activate monaural mode for better reception. • See also page 26. Local FM stations with the strongest signals are searched and stored automatically. ¢ • To stop searching, press To preset other 6 stations, repeat from step 1 again.
-
Page 49: Disc Operations
Disc operations Before performing any operations... Turn on the monitor to watch the playback picture. If you turn on the monitor, you can also control playback of other discs by referring to the monitor screen. (See pages 16 – 19.) The disc type is automatically detected, and playback starts automatically (for DVD: automatic start depends on its internal program). -
Page 50: Operations Using The Control Panel
Changing the display information Current chapter number and Elapsed playing time Current chapter number and Clock Current title and chapter number (back to the beginning) Current chapter number and Elapsed playing time Current chapter number and Clock Current program (or playlist) number and chapter number (back to the beginning) Elapsed playing time Folder number and Clock... - Page 51 Disc type [Press] Select track [Press] Pause/resume [Hold] Reverse/fast-forward — playback track * [Press] Select track Select folder [Press] Pause/resume [Hold] Reverse/fast-forward playback track * [Press] Select track [Press] Pause/resume [Hold] Reverse/fast-forward — playback track * Search speed: Search speed: Selecting the playback modes You can use only one of the following playback modes at a time.
-
Page 52: Operations Using The Remote Controller
Disc type REPEAT RANDOM TRACK RPT:Repeat current track FOLDER RND: Randomly play all tracks of FOLDER RPT: Repeat current folder current folder, then tracks of next folders ALL RND: Randomly play all tracks TRACK RPT: Repeat current track ALL RND: Randomly play all tracks •... - Page 53 Button Stop play Stop play Stop play Start play/Pause (if pressed Start play/Pause (if pressed Start play/Pause (if pressed during play) during play) during play) Reverse/forward track search * Reverse/forward track search * Reverse/forward track search * • Forward slow motion * during pause (No sound can be heard.) –...
- Page 54 • For DivX/MPEG Video/MP3/WMA/WAV, track is Operations using the searched within the same folder. on-screen bar • For DVD-VR, program/playlist search is possible (DVD/DVD-VR/DivX/MPEG Video/VCD) during Original program playback (PG)/Playlist playback (PL). These operations are possible on the monitor using the •...
- Page 55 On-screen bar Ex.: DVD-Video Information Operation Disc type Playback status • DVD-Video: Audio signal format type and Play Forward/reverse search channel Forward/reverse slow-motion • VCD: PBC Playback mode * Pause Stop DVD-Video: T. RPT: Title repeat C. RPT: Chapter repeat Operation icons DVD-VR: C.
- Page 56 Current track number/total number of tracks in the Operations using the control current folder (total number of tracks on the disc) screen Track information (DivX/MPEG Video/MP3/WMA/WAV/CD) Track list with the current track selected These operations are possible on the monitor using the Selecting a playback mode remote controller.
- Page 57 Current page/total number of the pages included Operations using the list in the list screen Current folder/track (highlighted bar) (DVD-VR/DivX/MPEG Video/MP3/WMA/WAV) List screen (DVD-VR) These operations are possible on the monitor using the remote controller. You can use ORIGINAL PROGRAM or PLAY LIST screen Before playing, you can display the folder list/track list anytime while playing DVD-VR with its data recorded.
-
Page 58: Listening To The Cd Changer
Listening to the CD changer It is recommended to use a JVC MP3-compatible CD changer (not supplied) with your unit. You can connect a CD changer to the CD changer jack on the rear of the unit. • You can only play conventional CDs (including CD Text) and MP3 discs. -
Page 59: Listening To The Ipod
Listening to the iPod Before operating, connect the Interface adapter for iPod, KS-PD100 (not supplied) to the CD changer jack on the rear of the unit. Preparation: Make sure “CH/IPOD” is selected in the “SRC SELECT” “EXT IN” setting, see page 27. Select “IPOD.”... -
Page 60: Listening To The Other External Components
* Functions only if you select “ALL ALBUMS” in “ALBUMS” ONE RPT : Functions the same as “Repeat of the main menu. One” of the iPod. ALL RPT : Functions the same as “Repeat • To cancel repeat play or random play, select All”... -
Page 61: Settings
Selecting a preset sound mode You can select a preset sound mode suitable to the music genre. • See also page 25. Selecting from Menu. [Turn] [Press] • See page 24 for “USER” settings. Preset value setting for each sound mode Preset value Sound BASS... - Page 62 Storing your own sound mode Range/selectable item Sound You can store your own adjustments in memory. element BASS MIDDLE TREBLE Select “USER.” Frequency 60 Hz 0.5 kHz 7.5 kHz 80 Hz 1.0 kHz 10.0 kHz 100 Hz 1.5 kHz 12.5 kHz 120 Hz 2.5 kHz 15.0 kHz...
-
Page 63: Menu Operations
Menu operations Call up the menu. Select the desired item. Repeat step 2 if necessary. • To return to the previous menu, press BACK. [Turn] [Press] • To exit from the menu, press DISP or MENU. Initial: Underlined Category Menu item Selectable setting, [reference page] DEMO •... - Page 64 Category Menu item Selectable setting, [reference page] MONO * • MONO ON : Activate monaural mode to improve FM reception, but Monaural mode stereo effect will be lost, [10]. • MONO OFF : Restore the stereo effect. IF BAND • AUTO : Increases the tuner selectivity to reduce interference noises Intermediate between adjacent stations.
-
Page 65: Title Assignment
: Enable “AM” in source selection, [5]. EXT IN * • CH/IPOD : To connect a JVC CD changer, [20], or an iPod, [21]. External input • EXT INPUT : To connect a portable audio player to the CD changer jack, [22]. -
Page 66: Disc Setup Menu
Disc setup menu These operations are possible on the monitor using the remote controller. Enter the disc setup menu while stop. Select a menu. Select an item you want to set up. • To cancel pop-up menu, press RETURN. Select an option. To return to normal screen Menu Item... - Page 67 Menu Item Setting MONITOR TYPE Select the monitor type to watch a wide screen picture on your monitor. OSD POSITION Select the on-screen bar position on the monitor. • 1 : Higher position • 2 : Lower position (Guidance below the disc setup menu will disappear.) DIGITAL AUDIO Select the signal format to be emitted through the DIGITAL OUT (Optical) terminal.
-
Page 68: More About This Unit
More about this unit • When storing a station manually, the previously General preset station is erased when a new station is stored Turning on the power in the same preset number. • By pressing SRC button on the unit, you can also turn on the power. - Page 69 When operating an iPod, some operations may not be performed correctly or as intended. In this case, • This unit can play back MPEG Video files with the visit the following JVC web site: <http://www.jvc. extension code <.mpg>, <.mpeg>, or <.mod>*. co.jp/english/car/> (English website only) * <.mod>...
- Page 70 Menu operations Disc setup menu • If you change the “AMP GAIN” setting from • When the language you have selected is not recorded “HIGH POWER” to “LOW POWER” while on a disc, the original language is automatically used the volume level is set higher than “VOLUME 30,” as the initial language.
- Page 71 About sounds reproduced through the On-screen guide icons During playback, the following guide icons may rear terminals appear for a while on the monitor. • Through the analog terminals (Speaker : Playback out/LINE OUT): : Pause 2-channel signal is emitted. When playing a : DVD-Video/VCD: Forward slow multi-channel encoded disc, multi-channel signals motion...
-
Page 72: Maintenance
Maintenance How to clean the connectors To keep discs clean Frequent detachment will deteriorate the connectors. A dirty disc may not play correctly. To minimize this possibility, periodically wipe the If a disc does become dirty, wipe it with connectors with a cotton swab or cloth moistened with a soft cloth in a straight line from center alcohol, being careful not to damage the connectors. -
Page 73: Troubleshooting
Troubleshooting What appears to be trouble is not always serious. Check the following points before calling a service center. Symptom Remedy/Cause • Sound cannot be heard from the speakers. • Adjust the volume to the optimum level. • Check the cords and connections. •... - Page 74 Symptom Remedy/Cause • Disc cannot be played back. • Change the disc. • Record the tracks using a compliant application in the appropriate discs (see page 4). • Add the extension code <.divx>, <.div>, <.avi>, <.mpg>, <.mpeg>, <.mp3>, <.wma>, or <.wav>...
- Page 75 Reset the iPod. disconnecting from this unit. JVC bears no responsibility for any loss of data in an iPod while using this System. • Manufactured under license from Dolby Laboratories. Dolby and the double-D symbol are trademarks of Dolby Laboratories.
-
Page 76: Specifications
Specifications Maximum Power Output: Front/Rear: 50 W per channel Continuous Power Output Front/Rear: 19 W per channel into 4 Ω, 40 Hz to (RMS): 20 000 Hz at no more than 0.8% total harmonic distortion Load Impedance: 4 Ω (4 Ω to 8 Ω allowance) Tone Control Range: Bass: ±12 dB (60 Hz, 80 Hz, 100 Hz, 120 Hz) - Page 77 Signal Detection System: Non-contact optical pickup (semiconductor laser) Number of Channels: 2 channels (stereo) Frequency Response: DVD, fs=48 kHz/96 kHz: 16 Hz to 22 000 Hz CD, fs=44.1 kHz: 16 Hz to 20 000 Hz Dynamic Range: 96 dB Signal-to-Noise Ratio: 98 dB Wow and Flutter: Less than measurable limit...
- Page 78 Having TROUBLE with operation? Please reset your unit Refer to page of How to reset your unit © 2008 Victor Company of Japan, Limited 1208DTSMDTJEIN...
- Page 79 • • Be sure to ground this unit to the car’s chassis again after installation. Notes: • Replace the fuse with one of the specified rating. If the fuse blows frequently, consult your JVC car audio • dealer. •...
-
Page 80: Removing The Unit
The following illustration shows a typical installation. If you have any questions or require information regarding installation kits, consult your JVC car audio dealer or a company supplying kits. • If you are not sure how to install this unit correctly, have it installed by a qualified technician. -
Page 81: Typical Connections
ENGLISH ELECTRICAL CONNECTIONS Typical connections / Before connecting: Check the wiring in the vehicle carefully. Incorrect connection may cause serious damage to this unit. The leads of the power cord and those of the connector from the car body may be different in color. Connect the colored leads of the power cord in the order specified in the illustration below. - Page 82 When connecting the external components, refer also to the manuals supplied for the components and adapter. CAUTION: Before connecting the external components, make sure that the unit is turned off. You can connect the following JVC components to the CD changer jack. JVC component Model name CD changer (CD-CH) CH-X1500, etc.
- Page 83 • Pastikan untuk mentanahkan unit ini ke casis mobil kembali setelah pemasangan. Notes: Catatan: • Replace the fuse with one of the specified rating. If the fuse blows frequently, consult your JVC car audio • Ganti sekring dengan voltase yang sudah ditetapkan. Jika sekring sering meledak, konsultasikan pada dealer.
-
Page 84: Installation
The following illustration shows a typical installation. If you have any questions or require information Ilustrasi berikut menunjukkan sebuah tipe pemasangan. Jika anda mempunyai suatu pertanyaan atau regarding installation kits, consult your JVC car audio dealer or a company supplying kits. informasi yang diperlukan mengenai alat-alat pemasangan, konsultasikan pada penyalur audio mobil JVC •... -
Page 85: Electrical Connections
ENGLISH INDONESIA ELECTRICAL CONNECTIONS SAMBUNGAN-SAMBUNGAN LISTRIK Typical connections / Ciri khas sambungan-sambungan Before connecting: Check the wiring in the vehicle carefully. Incorrect connection may cause serious Sebelum penyambungan: Cek perkabelan dalam mobil dengan hati-hati. Penyambungan yang damage to this unit. tidak benar mungkin menyebabkan kerusakan serius pada unit. - Page 86 Before connecting the external components, make sure that the unit is turned off. Sebelum menyambungkan komponen eksternal, pastikan bahwa unit sudah dimatikan. You can connect the following JVC components to the CD changer jack. Anda dapat menghubungkan komponen JVC berikut ini ke jack CD changer.
- Page 87 © 2008 Victor Company of Japan, Limited This unit is designed to operate on 12 V DC, NEGATIVE ground electrical systems. If your vehicle does not have this system, a voltage inverter is required, which can be purchased at JVC car audio dealers.
- Page 88 INSTALLATION (IN-DASH MOUNTING) The following illustration shows a typical installation. If you have any questions or require information regarding installation kits, consult your JVC car audio dealer or a company supplying kits. • If you are not sure how to install this unit correctly, have it installed by a qualified technician.
- Page 89 ELECTRICAL CONNECTIONS Typical connections Before connecting: Check the wiring in the vehicle carefully. Incorrect connection may cause serious damage to this unit. The leads of the power cord and those of the connector from the car body may be different in color. Connect the colored leads of the power cord in the order specified in the illustration below.
- Page 90 When connecting an external component adapters. CAUTION: Before connecting the external components, make sure that the unit is turned off. You can connect the following JVC components to the CD changer jack. JVC component Model name CD-CH / KS-PD100 /...