Advertisement
Available languages
Available languages
Quick Links
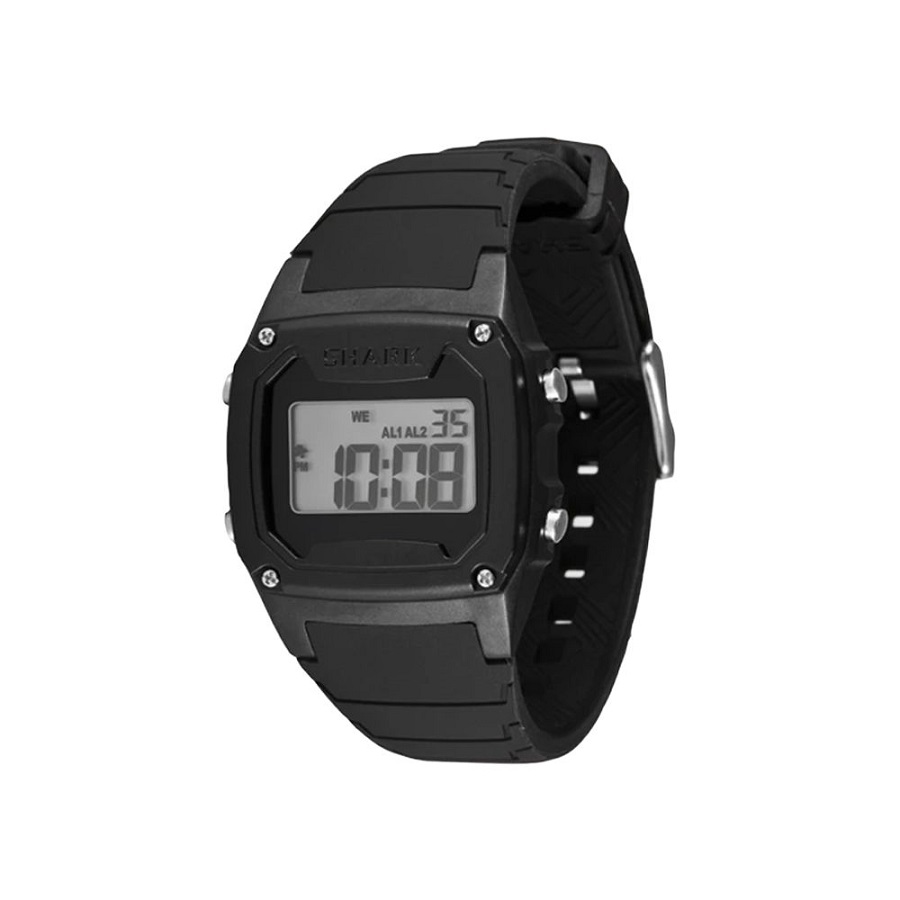
SHARK CLASSIC
S4
S3
S1. Start/stop Button
S2. Lap/reset Button
S3. Mode Button
S4. Light Button
SPECIAL FEATURE
This SHARK product features unique Hydro
Pushers®: these pushers can be pressed
under water to a dynamic water pressure
(not water depth) of 3 ATM.
DISPLAY MODES
The watch has four display modes:
HOME TIME (TIME) / FOREIGN TIME (TM-2),
HOME TIME ALARM (ALM1) / FOREIGN
TIME ALARM (ALM2), STOPWATCH (STW)
and COUNTDOWN TIMER (TMR).
To change from one display mode to an-
other, press the S3 button once. The mode
description will appear for 2 seconds before
the selected mode is activated.
HOME AND FOREIGN DISPLAY
To display FOREIGN TIME, press S2 button
when HOME TIME is displayed. The mode
description (TM-2) will appear shortly before
FOREIGN TIME is displayed. To change back
to HOME TIME, press S2 button.
To display FOREIGN TIME ALARM, press
S2 button when HOME TIME ALARM is
displayed. The mode description (ALM 2)
will appear shortly before the FOREIGN
TIME ALARM is displayed. To change back to
HOME TIME ALARM, press S2 button.
TO SET THE TIME AND CALENDAR
1. Press S3 button to select time mode.
2. Press S2 button to toggle between HOME
TIME and FOREIGN TIME mode to set.
3. Press and hold S2 button for 2 seconds
until the "SET" message appears and the
second digits will blink.
4. Press S1 button to reset the second digits
to 00.
5. Press S3 button, the minute digits will
blink.
6. Press S1 button to set the minute digits.
Holding down the button speed up the
process.
7. Press S3 button, the hour digits will blink.
8. Press S1 button to set the hour digits.
9. Follow the same pattern to set date,
month, day (of the week), hour format
and calendar format.
10.To set the hour format, press S1 button
to toggle between 12-hour and 24-hour
format. The P.M. indicator may be
displayed to indicate the time period
12:00 A.M. – 11:59 P.M. in 12-hour
format.
11.To set the calendar format, press S1
button to toggle between M-D (month-
date) and D-M (date-month) format.
12.After finished making all the settings,
press S2 button to confirm.
NOTE: The chosen hour and calendar
formats will apply to both HOME TIME mode
and FOREIGN TIME mode.
NOTE: In FOREIGN TIME settings, only
minutes, hours, date, month and day are
open to setting.
TO DISPLAY THE CALENDAR
1. Press S3 button to select time mode.
2. Press S1 button to toggle between time
display and calendar display.
Note: Calendar will be displayed for around
6 seconds before the watch switches back
to time display.
TO SET THE ALARM TIME
S1
1. Press S3 button to select alarm mode.
2. Press S2 button to toggle between HOME
TIME ALARM and FOREIGN TIME ALARM
mode to set.
3. Press and hold S2 button for 2 seconds
S2
until the "SET" message appears and the
minute digits will blink.
4. Press S1 button to set the minute digits.
Holding down the button will speed up
the process.
5. Press S3 button, the hour digits will blink.
6. Press S1 button to set the hour digits.
7. After finished making all the settings,
press S2 button to confirm.
TO TURN ON/OFF THE ALARM AND
HOURLY CHIME
In alarm mode,
1. Press S2 button to toggle between HOME
TIME ALARM and FOREIGN TIME ALARM
mode to set.
2. Press S1 button once to activate the
alarm. Alarm indicator
appear.
3. Press again to activate the hourly chime.
Chime indicator
4. Press the third time to activate both
functions. Both of the indicators will
appear.
5. Press the fourth time to deactivate both
functions. Both of the indicators will
disappear.
WHEN AN ALARM OR HOURLY CHIME
GOES OFF
A tune will go off by the hour if the hourly
chime function is activated.
An alarm tune will be emitted for around 20
seconds at the designated time when the
alarm is activated. To stop the tune, press
any button.
TO USE THE STOPWATCH
1. Press S3 button to select STOPWATCH
mode.
2. The stopwatch will then be displayed in
its current state – reset, running, or
stopped.
3. To resume a counting, press S1 button to
resume from where it left off.
4. To start a new counting, reset the stop
watch to zero first.
Press S1 button to stop counting, then
press S2 button to reset counter to zero.
For the measurement of elapsed time:
In STOPWATCH mode,
1. Press S1 button to start counting.
2. To stop counting, press S1 button once.
Press S1 button again to resume from
where it left off.
3. To reset to zero, press S1 button to stop
counting, then press S2 button to reset
the counter to zero.
For the measurement of split time:
In STOPWATCH mode,
1. Press S1 button to start counting.
2. While the stopwatch is running, press S2
button once to register a lap. The stop
watch is still running in the background.
To display the currently accumulated
time, press S2 button again.
3. Repeat the last step until all the laps have
been registered.
4. To stop counting, press S1 button once.
Press S1 button again to resume from
where it left off.
5. To reset to zero, press S1 button to stop
counting, then press S2 button to reset
the counter to zero.
NOTE: You can leave the stopwatch running
while switching over to other operating
modes.
TO SET THE TIMER
1. Press S3 button to select TIMER mode.
2. Press S2 button to alter the timer setting
TO USE THE TIMER
In TIMER mode,
1. Press S1 button to start counting.
2. To stop counting, press S1 button once.
3. To reload the TIMER, press S1 button to
4. After reaching zero in a countdown, a
NOTE: You can leave the timer running while
switching over to other operating modes.
TO USE THE BACKLIGHT
Press S4 button to turn on the backlight for
around 3 seconds.
will
will appear.
ENGLISH
among 1, 3, 5, 10, 15, 20, 25, 30, 45 and 60
minutes.
Press S1 button again to resume from
where it left off.
stop counting and then press S2 button.
tune will be emitted. To stop the tune,
press any button, the TIMER will reload
automatically.
To reduce carbon foot print, these
SHARK instructions are printed with
soy inks on recycled paper.
Advertisement

Related Manuals for Shark SHARK CLASSIC

Summary of Contents for Shark SHARK CLASSIC
- Page 1 S2 button to confirm. SPECIAL FEATURE TO USE THE BACKLIGHT TO TURN ON/OFF THE ALARM AND This SHARK product features unique Hydro Press S4 button to turn on the backlight for HOURLY CHIME Pushers®: these pushers can be pressed around 3 seconds.
- Page 2 CARACTERÍSTICA ESPECIAL NOTA: Puede dejar la CUENTA ATRÁS en Este producto de SHARK tiene una CÓMO CONFIGURAR LA HORA DE LA marcha y cambiar a otros modos operativos. característica única, Hydro Pushers ®: ALARMA Los pushers se pueden pulsar bajo agua 1.
- Page 3 Messung BESONDERE EIGENSCHAFTEN: weiter zu messen. Diese SHARK Uhr hat die einzigartigen WECKZEIT EINSTELLEN 5. Um die Stoppuhr zurückzusetzen, Eigenschaften des Hydro Pushers®: diese 1. Drücken Sie Taste S3 um den Weckmodus drücken Sie Taste S1 um die Zeitmessung...
- Page 4 S2 pour enregistrer FONCTION SPECIALE un temps intermédiaire. Le compteur du Ce produit SHARK offre la fonction unique Remarque: Le calendrier s’affichera durant chronomètre continue à tourner dans d’Hydro Pushers®: ces boutons peuvent environ 6 secondes avant que la montre ne le fond.
- Page 5 5. Per resettare a zero, premere il tasto FUNZIONE SPECIALE COME IMPOSTARE L’ORARIO DI ALLARME S1 per interrompere il conteggio e poi Questo prodotto SHARK garantisce la 1. Premere il tasto S3 per selezionare la premere il tasto S2. caratteristica unica Hydro Pushers®: questi modalità...
- Page 6 2. Prima o botão S2 para alternar entre os de funcionamento. CARACTERÍSTICAS ESPECIAIS modos HOME TIME ALARM e FOREIGN Este produto SHARK apresenta os únicos TIME ALARM ACERTAR O TEMPORIZADOR Hydro Pushers®: estes botões de acciona- 3. Carregue e mantenha o botão S2 durante 1.
- Page 7 日本語 SHARK CLASSIC 設定を終了します。 ストップした時点から再び測定が始 まります。 注: 選択した日付フォーマッ トと時間フォ 3. ゼロにリセッ トするには、 S1を押して ーマッ トはホームタイム、 海外タイムの設 測定をストップしてからS2を押しま 定両方に適用されます。 す。 注: 海外タイム (FOREIGN TIME) は、 月 ・ スプリッ トタイムの測定は以下のように 日 ・ 時間 ・ 分 ・ 曜日のみの設定が可能です。 行います。 カレンダーを表示する STOPWATCHモードでは、 1. S3ボタンを押してタイムモードを選択...
- Page 8 REGION LOCATION Región Ubicación Region Standort Région Emplacement Regione Posizione Região Localização 地域 ロケーション WEST CST USA HUNTINGT Huntinton Beach, California TRESTLES Trestles, San Clemente, California OCEANSIDE Oceanside, California LA JOLLA La Jolla, San Diego, California HUMBOLDT Humboldt Bay California OCEAN BCH Ocean Beach, Outer Coast, California MAVERICKS Mavericks, California ST. CRUZ Santa Cruz, California MORRO BAY Morro Bay, California PISMO BCH Pismo Beach, California GAVIOTA Gaviota, Santa Barbara, California RINCON Rincon, California VENTURA Ventura, California...
- Page 9 TORAMI B Torami Beach, Japan SENDAI Sendai, Japan HABUSHI B Habushi Beach, Japan KAMAKURA Kamakura, Japan TSUJIDO Tsujido, Japan OCEANDOME Ocean Dome, Japan CAPE ZAMP Cape Zampa, Japan UCHIUMI Uchiumi, Japan SOUTH AFRICA DURBAN Durban, South Africa THE HOEK The Hoek, South Africa To reduce carbon foot print, these JEFFREY B Jeffrey’s Beach, South Africa SHARK instructions are printed with soy inks on recycled paper.