Opel Corsa Infotainment System User Manual
Opel corsa infotainment system
Hide thumbs
Also See for Corsa Infotainment System:
- Owner's manual (177 pages) ,
- Infotainment manual (105 pages)
Table of Contents
Advertisement
Advertisement
Table of Contents

Related Manuals for Opel Corsa Infotainment System


Summary of Contents for Opel Corsa Infotainment System
- Page 1 OPEL CORSA Infotainment System...
- Page 3 Contents Touch & Connect ......5 CD 30 / CD 30 MP3 Type 1 ..91 CD 30 / CD 30 MP3 Type 2 ..117 Mobile phone portal ....143...
-
Page 5: Table Of Contents
Touch & Connect Introduction ........6 Radio ........... 20 CD Player ........25 AUX input ........30 USB port ........31 Bluetooth music ......34 Navigation ........36 Phone .......... 75 Index ..........88... -
Page 6: General Information
Introduction Introduction General information Optionally, the Infotainment system can be operated using controls on the The Infotainment system provides steering wheel. you with state-of-the-art in-car The well-thought-out design of the infotainment. General information ....... 6 control elements, the touch screen The radio has six station memories and the clear displays enable you to Theft-deterrent feature .... - Page 7 Introduction Radio reception Unlocking the Infotainment traffic. The related traffic system Radio reception may be disrupted by regulations must always be static, noise, distortion or loss of followed. If the power supply to the reception due to Infotainment system is interrupted, Only make entries (e.g.
- Page 8 Introduction Note selecting the Delete screen Detailed description of menu button. operation via touch screen or 3. After all numbers are entered multifunction knob 3 11. select the OK screen button to confirm your input. 1. Select the OK screen button. A message with important A keypad for PIN code input is information regarding the safe...
- Page 9 Introduction Control elements overview Instrument panel...
-
Page 10: Table Of Contents
Introduction l ......... 21 R .......... 26 13 I .......... 79 Radio: scroll down in CD ejection ......26 Phone menu ......79 station memory ..... 21 NAV ........37 14 m knob ........11 CD/MP3: short press: skip Navigation menu ....37 Press: switch on/off track backwards;... -
Page 11: Turn: Adjust Volume
Introduction Operation Steering wheel audio controls p button ......79 Phone connected, no call Control elements active: 1st press: open The Infotainment system is operated phone menu; 2nd press: via function buttons, multifunctional redial (if redial number knobs, a touch screen and menus available) ....... -
Page 12: Media
Introduction When the Infotainment system is Adjusting the volume of voice The adjusted setting is stored by the switched on, the last selected volume commands (navigation) Infotainment system and will be is set. automatically used for all future The volume of voice commands can phone calls until the setting is be adjusted while a command is If the volume is muted (set to zero),... - Page 13 Introduction ■ USB port functions 3 31 You can, for example, activate an on- / (back) button screen button by tapping on it with a Press the / button to return from a ■ Bluetooth music functions 3 34 finger or change the position of an on- submenu to the next higher menu screen slider element by moving it Navigation...
- Page 14 Introduction The corresponding system function is Messages activated, or a message is displayed, or a submenu with further options is displayed. With multifunction knob: 1. Turn the multifunction knob clockwise or anti-clockwise to select a screen button or menu item. The currently selected screen button or menu item is highlighted.
- Page 15 Introduction Scrolling through a long list of menu With multifunction knob: With multifunction knob: items Turn the multifunction knob clockwise 1. Turn the multifunction knob or anti-clockwise to scroll through the clockwise or anti-clockwise to list of menu items. select a menu item. 2.
- Page 16 Introduction Example: Avoid road settings Example: Display settings Note In subsequent chapters the operating steps for switching to another setting option via touch screen or multifunction knob will simply be described as "...set...to...'option name'...". Example: System settings With touch screen: With touch screen: Tap on the - or + screen button beside Tap on a menu item to switch to...
-
Page 17: Volume Settings
Introduction With multifunction knob: To open the AUDIO SETUP menu: Fader 1. Turn the multifunction knob Use this setting to adjust the volume ■ Press the SETUP button and then clockwise or anti-clockwise to distribution between the front and select the Audio screen button, select a menu item. -
Page 18: System Settings
Introduction Adjusting the volume of voice System settings commands (navigation) ■ if an audio main menu is currently active, e.g. the FM1 or CD menu, press the multifunction knob. Note The Audio screen button in the SETUP menu is not selectable, when the volume is set to zero. - Page 19 Introduction Scroll direction Activating or deactivating touch clicks To adjust the scroll direction for menu If the menu item Touch Click in the item selection via the multifunction SYSTEM SETUP menu is set to On, knob: set Scroll Direction to [ or ]. each tap on a screen button or menu item is indicated by a clicking sound.
-
Page 20: Radio
Radio Radio Usage If the currently played station is an RDS station 3 22, the station name Note and programme related information Within the radio menus you can only are displayed. use the touch screen to select/ Usage .......... 20 activate the screen buttons at the Selecting the waveband Station search ...... - Page 21 Radio Enabling or disabling traffic Manual station tuning announcements (TA) Using the multifunction knob (TA function not available for AM While a radio main menu is active: waveband) turn the multifunction knob clockwise Select the TA screen button to enable or anti-clockwise to change the or disable the reception of traffic receiving frequency.
- Page 22 Radio This ensures that, e.g., the station Note list always contains the FM stations If no beep can be heard when storing that can be received in the local area a station, system sounds are during a long motorway journey. deactivated.
- Page 23 Radio The Infotainment system always During the verbal announcement the tunes into the best receivable volume can be changed by turning frequency of the currently played the m knob. RDS station. The traffic announcement can be If RDS Regional mode is activated, cancelled by selecting the Cancel only frequencies of the currently screen button.
- Page 24 Radio Enabling or disabling traffic announcements Select the TA screen button to enable or disable the reception of traffic announcements. When the reception of traffic announcements is enabled, TA is displayed in the top line of all main menus. If traffic announcements can not be received, TA is crossed out.
-
Page 25: Cd Player
CD Player CD Player General information MP3 and WMA files written in any format other than listed above may The Infotainment system’s CD player not play correctly, and their file can replay audio CDs and MP3/WMA names and folder names may not CDs. - Page 26 CD Player ■ Dirt and liquids on CDs can smear Playlist entries must be in the form the lens of the audio player inside of relative paths. the device and cause faults. ■ This chapter deals only with playing ■ Protect CDs from heat and direct MP3 files since the operation for sunlight.
- Page 27 CD Player If the normal CD replay mode is active (no mix or repeat mode activated, see below): replay starts with the first track on the CD again, after all tracks on the CD have been played. Note Folders and playlists stored on an MP3 CD are treated equally by the CD player.
- Page 28 CD Player Fast forward or rewind Select the Mix screen button to Repeat mode activate or deactivate the mix mode. Press the l or m button and hold it down to fast forward or rewind the If the mix mode is activated, Mix is current track.
- Page 29 CD Player During MP3 CD replay If the CD is not removed after ejection, it will be drawn back in again If an MP3 CD is inserted, the current automatically after a few seconds. track or all tracks in the currently selected folder can be repeatedly played until the repeat mode is deactivated again.
-
Page 30: Aux Input
AUX input AUX input General information Usage General information ..... 30 Usage .......... 30 In the centre console in front of the Press the MEDIA button once or gearshift lever there is an AUX socket several times to activate the AUX for the connection of external audio mode. -
Page 31: Usb Port
USB port USB port General information When connected to the USB port, various functions of the above devices can be operated via the controls and menus of the Infotainment system. General information ..... 31 Note Playing saved audio files ..... 32 Not all MP3 player, USB drive, SD card or iPod models are supported by the Infotainment system. - Page 32 USB port ISO9660 Level 1, Level 2, (Romeo, Playlist entries must be in the form The operation of audio data sources Joliet). of relative paths. connected via USB is the same as described for an audio MP3/WMA CD MP3 and WMA files written in any The system attribute for folders/ 3 26.
- Page 33 USB port Below only the aspects of operation The following operating steps are that are different/additional are mainly the same as described for described. track selection in folders on an MP3/ WMA CD 3 26. Music browser Depending on the model/version of the connected iPod and the data stored, there are various options for the selection and playing of tracks.
-
Page 34: Bluetooth Music
Bluetooth music Bluetooth music General information Operation Bluetooth enabled audio sources Prerequisites (e.g. music mobile phones, MP3 The following prerequisites must be players featuring Bluetooth, etc.), General information ..... 34 met in order to use the Bluetooth which support Bluetooth music music mode of the Infotainment Operation ........ - Page 35 Bluetooth music Activating the Bluetooth music Skipping to next or previous track Briefly press the t or v button (on mode the instrument panel). Pause/Stop replay Select the z screen button. To restart replay: press the l screen button again. Press the MEDIA button once or several times to activate the Bluetooth music mode.
-
Page 36: Navigation
Navigation Navigation General information followed. If a navigation instruction contradicts traffic regulations, the The navigation system will reliably traffic regulations always apply. guide you to your destination without the need to read maps, even if you General information ..... 36 Functioning of the navigation have no local knowledge whatsoever. -
Page 37: Navigation Menu
Navigation The route guidance is provided by Dynamic route guidance only works if voice commands and an direction traffic information is received via the arrow, as well as with the aid of a TMC traffic information system. multi-colour map display. The dynamic route guidance function can be deactivated, see chapter TMC traffic information system... - Page 38 Navigation The NAVIGATION menu provides The TRAFFIC MESSAGES menu The NAVIGATION SETUP menu access to all system functions for shows all traffic events on the current provides various settings for destination input 3 48 and route route (if route guidance is active), adjustment of the navigation system.
- Page 39 Navigation Route guidance not active ■ Current position indicated by a red Route guidance active triangle. ■ Street name of current position. ■ Points of interest (POI), e.g. petrol stations, parking areas or restaurants, indicated by corresponding symbols. The display of POIs can be switched on/off, see "Setting up the navigation system"...
- Page 40 Navigation Note The display of POIs can be ■ Remaining distance to the final The activation/deactivation of voice switched on/off, see "Setting up the destination. guidance is indicated by a beep, if map display" below. Changing the distance unit, see system sounds are activated 3 11.
- Page 41 Navigation Moving the visible map section Note When the move mode is activated, The visible map section on the map you can set the GPS coordinates for display can be moved freely in all new destinations by tapping on the directions.
- Page 42 Navigation ■ Show Position Information: book: select the Save screen displays the address/GPS button. coordinates of the current position. ■ Map Setup: displays the MAP To store the displayed address/ SETUP menu, see below. GPS coordinates in the address Setting up the map display book: select the Save screen To open the MAP SETUP menu: button.
- Page 43 Navigation In the 2D map view, you can toggle ■ Show POIs In Map: if set to On, The following settings/options are between the "north orientation", points of interest, e.g. fuel stations, available: and the "driving direction parking areas, or restaurants, are ■...
- Page 44 Navigation If this option is set to On: when the vehicle approaches a user defined POI, the related warning message is displayed. ■ POI Warning Distance: only applicable, if user defined points of interest (POI) and corresponding warning messages were downloaded to the Infotainment system, see "User defined points of interest"...
- Page 45 Navigation system, see "User defined points of accomplish a short execution time interest" below. for a simulated trip. Select the menu item to remove all To return to normal route guidance: user defined POI data from the set the menu option to Off. Infotainment system.
- Page 46 Navigation Note 3 48. You can select the regarding Creating user defined POIs Functionality of the Dynamic menu item as destination for route For each POI type you need to create navigation settings when route guidance. a separate text file, e.g. by using a guidance is active, see "Settings for simple text editor software.
- Page 47 Navigation Example: 9.9800000, 6. Enter further POI data, using a The only difference is: instead of 52.0150000, "Michaels House separate line for each POI, into creating a name (e.g. "Michaels [ Fleet Street ]" the text file, as described above. house") you need to create a warning message (e.g.
-
Page 48: Destination Input
Navigation To start the download: press the The NAVIGATION menu provides SETUP button, select the Navigation three options that you can use for screen button, select the Download destination input: my POIs now menu item, and then ■ Destination: opens the ENTER confirm the displayed message. - Page 49 Navigation as new destination, see "Entering and selecting the home address" below. The menu options Options, Route, and Cancel Route are described in the "Guidance" chapter 3 65. Using menus with keypads for address input When using the various options for address input, you often need to enter address data using menus with keypads.
- Page 50 Navigation In case the displayed city name is the Entering an address directly one you are searching for, you can Press the NAV button, and then select the OK screen button to directly select the Destination menu item to add that city name to your destination open the ENTER DESTINATION address.
- Page 51 Navigation Performing the address data input Select the City menu item to enter the name or postal code of your 1. Entering the country name: destination city. If the destination country needs to A menu with keypad for city name be entered or changed: select the or postal code input is displayed.
- Page 52 Navigation A menu with keypad for street with keypad for house number If you select the No num. screen name input is displayed. input, see image below. button, the destination is set to the centre of the destination street, Note and the CONFIRM In case the system does not require DESTINATION menu is...
- Page 53 Navigation A message is displayed that provides the options (1) Move and (2) Store described above. Select the desired option (screen button). Moving the destination to a new location: If you select the Move screen button in the message, the SCROLL MAP menu is displayed.
- Page 54 Navigation Tap on the map to move the The route will be calculated by the destination to a new location. navigation system, and then route guidance started. The destination flag is now displayed at the new location. Description on route guidance, see chapter "Guidance"...
- Page 55 Navigation The previously entered address is Using the address book, you can The following options are available: indicated by a chequered flag. conveniently store the addresses of ■ New Address: displays the menu To change the previously entered your favourite destinations, and later for direct address input.
- Page 56 Navigation The CONFIRM DESTINATION menu is displayed again. To store the new address in the address book: Select the Save screen button. A menu with keypad for name input is displayed. If required, you can move the Select a previous destination that visible map section in an arbitrary you want to store in the address direction by moving your finger on...
- Page 57 Navigation To store the address data: see Enter a new name for the address descriptions above. book entry, and select the OK screen button to confirm the new ■ Current Position: stores the current name. destination in the address book. ■...
- Page 58 Navigation The data stored on the map SD card The POINTS OF INTEREST menu is contain a great number of predefined displayed. POIs, which are indicated by corresponding symbols on the map display. You can select such POIs as destinations for route guidance. To select a point of interest: Press the NAV button, and then select the Destination menu item to...
- Page 59 Navigation ■ Petrol stations nearby: shows a list In such cases, select the desired of petrol stations nearby the current subcategory. location. Finally, a list of category specific Operating steps to start route POIs will be displayed. guidance to a particular petrol Operating steps to start route station, see instructions on guidance to a particular POI, see...
- Page 60 Navigation POIs which names contain the specific POI, see instructions on To select a user defined point of entered letter combination. Search near here above. interest: ■ Search in another city: provides Press the NAV button, and then Note access to all POIs within a selected select the Destination menu item to If you do not enter any letter, and city.
- Page 61 Navigation To return to the user POI list: select the List screen button. To start route guidance to the selected user POI: select the Start screen button. Description on route guidance, see chapter "Guidance" 3 65. Selecting a destination from the This method of destination input allows you to search for a new Select the Destination from map...
- Page 62 Navigation After selecting the Save screen Selecting an intersection as button in the message, a menu with destination keypad for name input is displayed. This method of destination input functions almost the same as described for "Entering an address directly", see above. Instead of specifying a location in a street by a house number, you need to specify the location by an...
- Page 63 Navigation If there are 5 or less crossing streets, Select the desired crossing street, a list of all crossing streets is and continue with operating step 5 of displayed. Select the desired "Entering an address directly", see crossing street, and continue with above.
- Page 64 Navigation exceeds 50, the oldest one will be ■ Del. all: deletes the entire list of removed from the list, and the new previous destinations. one will be added. ■ Delete: deletes the displayed After selecting a previous destination destination from the list of previous in the list, a menu is displayed with destinations.
-
Page 65: Traffic Info Menu
Navigation The old home address (if available) Detailed descriptions on the map will be deleted. display and the visual route guidance information, see chapter "Usage" ■ Start: sets the displayed home 3 37. address or GPS coordinates as new destination, and starts route Voice commands guidance to that destination. - Page 66 Navigation Controlling route guidance via ■ Route: opens the ROUTE LIST Press the NAV button, and then menu that shows all streets on the select the Options menu item to open the NAVIGATION menu current route, see "Displaying the the ROUTE OPTIONS menu. Press the NAV button to open the route list"...
- Page 67 Navigation Automatic: all TMC messages are and ferries should be minimized, ■ Direction arrow or motorway automatically taken into account for when calculating the route to the symbol. route calculation/recalculation. destination. Note Prompt: in the event of a traffic jam An additional small red triangle in a Displaying the route list or other traffic incidents, for which...
- Page 68 Navigation To show all available information on a The following menu options are traffic events in the vicinity of the particular route list item: select that available: current vehicle position. list item. ■ Block: using this menu item you can TMC (traffic) symbols (see chapter exclude streets from route "Symbols overview"...
- Page 69 Navigation Using that menu you can exclude the first upcoming streets from the current route by defining the length of the exclusion section, starting from the current vehicle position. To exclude upcoming streets from the route: set the desired value of Avoid Dist., and then select the Recalculate Route menu item.
-
Page 70: Setup
Navigation Note Press the NAV button, and then Enabling user defined POI You can only define one single select the Destination menu item or warnings exclusion street or one exclusion the Previous Destinations menu item. You can define "POI warnings" for section at a time in the route list. -
Page 71: Map Sd Card
ROUTE OPTIONS delay. Opel Service Partner. menu, see chapter "Guidance" 3 65. Replacing a map SD card, see below . - Page 72 Navigation Important information on SD card ■ Do not store the SD card in Removing the SD card handling locations exposed to direct sunlight, or in high temperatures or Caution humidity. ■ Always place the SD card in its Never attempt to use an SD card storage case, when not in use.
-
Page 73: Setup Menu
Navigation Symbols overview Inserting the SD card No. Explanation Petrol station Route guidance and POI symbols Restaurant POI (points of interest) symbols are only shown on the map display, if the display of POIs is enabled. To enable the display of POIs: press the SETUP button, select the Navigation menu item, select the Map Setup menu item, and then set Show... - Page 74 Navigation Dynamic navigation to Automatic or Explanation Prompt, see chapter "Guidance" Traffic jam 3 65. Closed road Slippery road Road works Icy road Cross winds Narrowing Accident Danger Uneven road TMC (traffic) symbols are only shown on the map display, if dynamic route guidance via TMC messages is enabled.
-
Page 75: Phone
Phone Phone General information Important information for operation and traffic safety The Phone portal provides you with the possibility of having mobile phone 9 Warning conversations via a vehicle General information ..... 75 microphone and the vehicle Mobile phones have effects on Bluetooth connection .... -
Page 76: Bluetooth Connection
Phone Hereby, we declare that the Bluetooth phones is prohibited, if System Transceiver is in compliance interference is caused by the with the essential requirements and mobile phone or if dangerous other relevant provisions of Directive situations can occur. 1999/5/EC. Bluetooth Bluetooth connection The Bluetooth profiles HFP 1.1,... - Page 77 Phone Pairing a Bluetooth device Infotainment system's Bluetooth Connecting to another paired unit, CAR HF UNIT will be device Important information displayed. ■ Up to four devices can be paired to 4. On the Bluetooth device: select the system. CAR HF UNIT and then follow the ■...
-
Page 78: Emergency Call
Phone Emergency call 2. Select the desired device. Removing a paired device 3. On the Bluetooth device: if not activated already, activate the 9 Warning Bluetooth function (see user guide of Bluetooth device). Connection setup cannot be guaranteed in all situations. For On the Infotainment system's this reason you should not rely display: after a few seconds a... -
Page 79: Phone Menu
Phone Operation Note functions are active. You can Not every mobile phone supports all enquire about this with the local As soon as a connection via functions of the Phone portal. network operators. Bluetooth has been set up between Therefore deviations from the range your mobile phone and the The emergency call number can of functions described with these... - Page 80 Phone o thumbwheel: turn to adjust volume. Prerequisites The following prerequisites must be met in order to use the handsfree mode of the Infotainment system: ■ The Bluetooth function of the Infotainment system must be activated 3 76. ■ The Bluetooth function of the mobile phone must be activated In case a mobile phone is in the range The mobile phone is now connected...
- Page 81 Phone data and call lists data is transferred from the mobile phone to the Infotainment system. Detailed information on this, see "Phone book setup" below. Initiating a phone call Using the phone book In the phone book contacts are stored with name and phone number.
- Page 82 Phone Enter the first letters of the contact name you are searching for (select the Delete screen button once or several times to delete already entered letters). As soon as the system finds a contact name whose first letters match the entered letters, the entire name of the corresponding phone book entry is displayed (see image above).
- Page 83 Phone To initiate a phone call: select the To initiate a phone call: select the Accessing the voicemail box desired list entry. The corresponding { screen button. The displayed Enter the phone number of the phone number is dialled. phone number is dialled. connected mobile phone manually, see "Manually entering a phone Redialling a phone number...
- Page 84 Phone To answer the call: select the green Deactivating the microphone { screen button. temporarily Select the Mic. off screen button. The To reject the call: select the red } caller will not hear you any longer. screen button. To reactivate the microphone: select Second incoming phone call the Mic.
- Page 85 Phone Note Downloading the phone book Adjusting the sorting order Depending on the number of phone Set Sort Phonebook By to First book entries and the connected Name or Last Name to adjust the mobile phone, the data download sorting order for the phone book can take several minutes.
- Page 86 Phone Note In case you select a phone book that was not downloaded from the connected mobile phone, the Phonebk screen button in the PHONE menu will not be selectable.
- Page 87 Phone...
-
Page 88: Index
Index Activating the CD player....26 General information....Activating the radio....... 20 ....6, 25, 30, 31, 34, 36, 75 Adding waypoints......65 Guidance ........65 Address book........ 48 Address entry....... 48 Home address......48 AUX input socket........30 usage........30 Infotainment system control elements...... - Page 89 Regionalization......22 Replacing a map SD card..... 37 Navigation Operating a Bluetooth music Route calculation......65 adding waypoints...... 65 device........34 Route guidance...... 65, 70 address book......48 Operation ......11, 34, 79 Route list........65 control elements......37 creating user POIs....37 Pairing a Bluetooth device....
- Page 90 Usage......20, 26, 30, 37 USB port important information....31 playing saved audio files... 32 User POIs creating and downloading..37 selecting........48 Using the AUX input..... 30 Using the CD player..... 26 Using the Infotainment system..11 Using the navigation system..37 Using the radio......
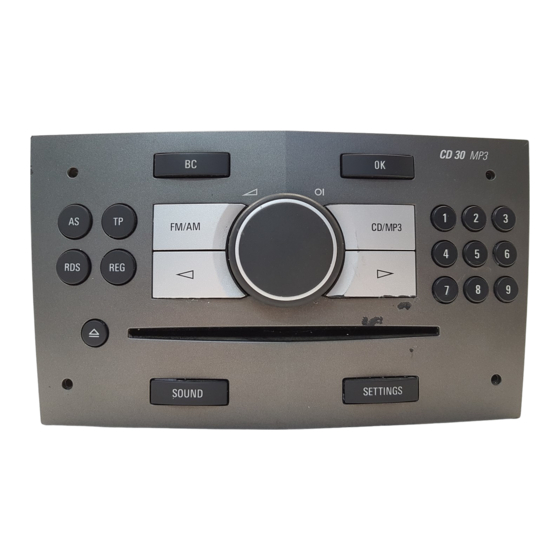
- Page 91 CD 30 / CD 30 MP3 Type 1 Introduction ........92 Radio ......... 103 CD Player ........109 AUX input ........113 Index .......... 114...
- Page 92 Introduction Introduction General information In addition the Infotainment system can be equipped with a Mobile phone The Infotainment system provides portal. you with state-of-the-art in-car Optionally, the Infotainment system infotainment. General information ..... 92 can be operated using controls on the The radio has nine automatic station steering wheel.
- Page 93 Introduction Radio reception Radio reception may be disrupted by static, noise, distortion or loss of reception due to ■ changes in distance from the transmitter, ■ multi-path reception due to reflection, ■ shadowing. Theft-deterrent feature The Infotainment system is equipped with an electronic security system for the purpose of theft deterrent.
- Page 94 Introduction Overview Control elements on instrument panel...
-
Page 95: Press: Switch On/Off Infotainment System
Introduction RDS ........105 m ........100 11 n ........103 Display programme name Radio: Page back in Radio: Page forward in or transmission frequency station memory, manual station memory, manual of the station ....... 105 and automatic station and automatic station search ......... - Page 96 Introduction Steering wheel audio controls Press: TID: no function ..97 c button ....... 103 Press: GID: call up/reset Radio: search down, scroll trip computer, select a trip back through station computer entry ...... 97 memory ....... 103 q button ......103 CD: Short press: Skip one track backwards ....
- Page 97 Introduction The steering wheel remote control Switching on and off with the ignition Enable/Disable Ignition Logic has other functions in conjunction key (automatic switch-on) TID only: with the Mobile phone portal, see If the automatic switch-on is enabled, 1. Press SETTINGS button to chapter for Mobile phone portal.
- Page 98 ■ The volume of an audio source We recommend having appliances press one of the function buttons FM/ connected via the AUX input can be installed by an Opel Partner. AM, CD/MP3 or BC to display the adjusted to suit the volumes of the relevant function.
- Page 99 Introduction For the best possible audio quality, Mobile phone portal information ■ If Random CD is enabled either the external audio source should be RDM or g is displayed 3 110. Display of the information provided if set to maximum volume. On units with a Mobile phone portal is fitted.
-
Page 100: Tone Settings
Introduction Tone settings Setting the volume distribution After a few seconds the most recent display reappears. between right - left Press the SOUND button to make the 3. Once you have changed settings, following settings: 1. Press the SOUND button until press one of the function buttons Balance appears on the display. - Page 101 Introduction Sound settings in the Settings The following menu items are 4. Adjust the value with m or n. available: menu After a few seconds the most ■ AUX Vol. AUX input volume, e.g. a recent display reappears. Alternatively, the settings for Fader, portable CD player Balance and Sound can be changed 5.
- Page 102 Introduction 4. Press the SETTINGS button 4. Press the SETTINGS button the Infotainment system has been off again and move back one level in again and move back one level in for at least five minutes with the the Settings menu. the Settings menu.
- Page 103 Radio Radio Usage Station search Radio mode Automatic search Switch from CD or AUX mode to radio Keep m or n pressed until Seek is Usage ........103 mode as shown below: displayed. Station search ......103 Press FM/AM button. Autostore lists ......
- Page 104 Radio Manual station search If RDS 3 105 is deactivated in the FM The station is stored in the desired memory slot. waveband or the AM waveband is The manual station search is used to active, tapping m or n moves the tune in to stations of known RDS on or RDS off 3 105 are stored frequency by on increment.
-
Page 105: Autostore Lists
Radio Autostore lists The automatic station storing is Storing new stations with AS started. If you drive out of the reception area Activate/deactivate AS level of a stored station, new stations need The 9 best receivable stations in the to be stored. selected waveband are stored to Tap the AS button. - Page 106 Radio If you switch RDS off, the RDS If the RDS function is not switched on, Keep m or n pressed until Seek is functions will be disabled and the the frequency of an RDS station is displayed. automatic station search will not only displayed, RDS is not displayed.
- Page 107 Radio Programme type selection Automatic regionalisation Traffic programme (TP) 1. Press the SETTINGS button. Press the REG button for a few Traffic programme stations are FM seconds. RDS stations which broadcast traffic 2. Press OK until PTY is displayed. news. REG Auto On appears on the display 3.
- Page 108 Radio ■ If on standby for traffic Deactivating traffic announcements announcement is switched on, then To switch off a traffic announcement, CD playback is interrupted during a e.g. during CD playback, proceed as traffic announcement. follows: ■ Traffic announcements are played Press TP button.
- Page 109 CD Player CD Player General information ■ Self-recorded CD-Rs and CD-RWs are more vulnerable to mishandling With the CD player you can play than prerecorded CDs. Correct standard commercial CDs with a handling, especially in the case of diameter of 12 cm. self-recorded CD-Rs and CD-RWs, General information ....
- Page 110 CD Player Applicable playlist extensions: Read CD and the CD symbol appear CD playback "m3u" or "pls". on the display, then the number of CD Switch from radio mode to CD mode tracks is displayed. as follows: When generating (coding) the MP3 files from audio data, a bitrate of up Press the CD/MP3 button.
- Page 111 CD Player Album selection for MP3 CDs Audio CD: Audio CD without CD text: You are listening to a track from an ■ Random on: activates random Track number and playing time album. mode Audio CD with CD text: Press the CD/MP3 button. ■...
- Page 112 CD Player Removing a CD Press the j button. Eject CD appears on the display. If a CD is ejected, the last radio station used will automatically be played. A CD can be ejected even if the appliance is turned off. The appliance switches off after the CD has been removed.
- Page 113 AUX input AUX input Usage The external audio source is transferred through on the The connector is located in the area Infotainment system. of the centre console. Enable the external audio source and To play back an audio source Usage ........113 set it to maximum volume.
- Page 114 Index Activating CD player....110 Ignition logic........97 AM..........103 AS..........105 Main display........97 Automatic search......103 Manual tuning......103 Automatic switch off...... 97 Multifunction knob......97 Autostore level......105 Autostore lists......105 AUX input......97, 113 On Volume........101 AUX volume........
- Page 115 Station search......103 Store........... 103 Switching the Infotainment system on or off......97 TA volume........101 Theft-deterrent feature ....93 Tone settings......100 TP..........105 Traffic announcements....105 Traffic programme...... 105 Treble......... 100 Update stations......103 Usage......103, 110, 113 Using the CD player....
- Page 117 CD 30 / CD 30 MP3 Type 2 Introduction ........ 118 Radio ......... 128 CD Player ........134 AUX input ........138 Index .......... 140...
- Page 118 Introduction Introduction General information The well-thought-out design of the control elements and the clear The Infotainment system provides displays enable you to control the you with state-of-the-art in-car system easily and intuitively. infotainment. General information ....118 Important information on The radio has nine automatic station Theft-deterrent feature ....
- Page 119 Introduction Theft-deterrent feature The Infotainment system is equipped with an electronic security system for the purpose of theft deterrent. The Infotainment system therefore functions only in your vehicle and is worthless for a thief.
- Page 120 Introduction Overview Control elements on instrument panel...
- Page 121 Introduction RDS ........130 oe knob ....... 122 CD/MP3: Next track, track fast forward ......135 Display programme name Press: Switch on/off or transmission frequency Change menu values ..122 Infotainment system .... 122 of the station ....... 130 12 Audio/MP3 CD slot ....135 Turn: Adjust volume ....
- Page 122 Introduction Operation Steering wheel audio controls d button ....... 128 Radio: search up, scroll Control elements forwards through station The Infotainment system is operated memory ....... 128 optionally via: CD: Short press: Skip one ■ the central control unit in the track forwards .....
- Page 123 Ignition. at a preset minimum volume Infotainment system. 2. Select the desired status with the 3 126. In this case External In is displayed. m n buttons. We recommend having appliances installed by an Opel Partner.
- Page 124 Introduction AUX input The following information can be displayed: An external audio source, e.g. a portable CD player, can be connected Audio Information via the AUX input of your vehicle. Display of the following audio Stereo sound from this source is information: played back via the loudspeakers of ■...
- Page 125 Introduction ■ Treble After a few seconds the most Sound recent display reappears. ■ Sound 1. Press the SOUND button until 3. Once you have changed settings, Sound and the set tone colour Setting the volume distribution press one of the function buttons appear on the display.
- Page 126 Introduction After a few seconds the AUX Vol. After a few seconds the respective audio source appears respective audio source appears Use this function to adjust the AUX on the display. on the display. input level in relation to other audio sources (e.g.
- Page 127 Introduction After a few seconds the Ext. In Vol. respective audio source appears Use this function to set a minimum on the display. volume of external audio sources such as a mobile phone. 3. Once you have changed settings, press one of the function buttons 1.
- Page 128 Radio Radio Usage Station search Radio mode Automatic search Switch from CD or AUX mode to radio Keep m or n pressed until Seek is Usage ........128 mode as shown below: displayed. Station search ......128 Press FM/AM button. Autostore lists ......
- Page 129 Radio Manual station search If RDS 3 130 is deactivated in the FM The station is stored in the desired memory slot. waveband or the AM waveband is The manual station search is used to active, tapping m or n moves the tune in to stations of known RDS on or RDS off 3 130 are stored frequency by on increment.
- Page 130 Radio Autostore lists The automatic station storing is Storing new stations with AS started. If you drive out of the reception area Activate/deactivate AS level of a stored station, new stations need The 9 best receivable stations in the to be stored. selected waveband are stored to Tap the AS button.
- Page 131 Radio If you switch RDS off, the RDS If the RDS function is not switched on, Keep m or n pressed until Seek is functions will be disabled and the the frequency of an RDS station is displayed. automatic station search will not only displayed, RDS is not displayed.
- Page 132 Radio Programme type selection Automatic regionalisation Traffic programme (TP) 1. Press the SETTINGS button until Press the REG button for a few Traffic programme stations are FM PTY is displayed. seconds. RDS stations which broadcast traffic news. 2. Select one of the 29 programme REG Auto On appears on the display types e.g.
- Page 133 Radio ■ If on standby for traffic Deactivating traffic announcements announcement is switched on, then To switch off a traffic announcement, CD playback is interrupted during a e.g. during CD playback, proceed as traffic announcement. follows: ■ Traffic announcements are played Press TP button.
- Page 134 CD Player CD Player General information ■ Self-recorded CD-Rs and CD-RWs are more vulnerable to mishandling With the CD player you can play than prerecorded CDs. Correct standard commercial CDs with a handling, especially in the case of diameter of 12 cm. self-recorded CD-Rs and CD-RWs, General information ....
- Page 135 CD Player Applicable playlist extensions: Read CD and the CD symbol appear CD playback "m3u" or "pls". on the display, then the number of CD Switch from radio mode to CD mode tracks is displayed. as follows: When generating (coding) the MP3 files from audio data, a bitrate of up Press the CD/MP3 button.
- Page 136 CD Player Album selection for MP3 CDs Audio CD: Audio CD without CD text: You are listening to a track from an ■ Random on: activates random Track number and playing time album. mode Audio CD with CD text: Press the CD/MP3 button. ■...
- Page 137 CD Player Removing a CD Press the j button. Eject CD appears on the display. If a CD is ejected, the last radio station used will automatically be played. A CD can be ejected even if the appliance is turned off. The appliance switches off after the CD has been removed.
- Page 138 AUX input AUX input Usage The external audio source is transferred through on the The connector is located in the area Infotainment system. of the centre console. Enable the external audio source and To play back an audio source Usage ........138 set it to maximum volume.
- Page 139 AUX input...
- Page 140 Index Activating CD player....135 Ignition logic........ 122 AM..........128 AS..........130 Main display........ 122 Automatic search......128 Manual tuning......128 Automatic switch off....122 Multifunction knob....... 122 Autostore level......130 Autostore lists......130 AUX input........138 Operation ........122 AUX volume........
- Page 141 Station search......128 Store........... 128 Switching the Infotainment system on or off....... 122 TA volume........126 Theft-deterrent feature ....119 Tone settings......124 TP..........130 Traffic announcements....130 Traffic programme...... 130 Treble......... 124 Update stations......128 Usage......128, 135, 138 Using the CD player....
-
Page 143: Mobile Phone Portal
Mobile phone portal Introduction ........ 144 Voice recognition ....... 157 Index .......... 162... - Page 144 Information on telephone-specific radio. The menu-driven operations adapters for the mobile telephone is and status are shown via the info available from your Opel Partner. display. Not all Mobile phone portal functions The fact that the most important are supported by every phone. The...
- Page 145 Introduction Declaration of conformity Do not forget to follow the special 9 Warning We hereby declare that the Mobile regulations that apply in specific phone portal is compliant with the areas and always switch off the The Infotainment system has to be basic requirements and other mobile phone if the use of mobile used so that the vehicle can be...
- Page 146 Introduction Charging the telephone Selection of the functional ranges in 1 Thumbwheel the headline and additional batteries Turn: select menu items and operations are described below: As soon as the Mobile phone portal commands has been switched on and the Steering wheel remote control system Press: confirm a selection (OK) telephone has been slotted into the...
- Page 147 A connection can be created between for your mobile telephone from your instructions. a mobile telephone and the Opel Partner. Fasten the adapter to the base plate Infotainment system via: For information on the Bluetooth™ Ensure that the contacts are ■...
- Page 148 Introduction Insert the mobile telephone into the If Bluetooth™ has been deactivated, adapter proceed as follows: Ensure that the contacts are 1. Select the Bluetooth menu item. connected properly. You must hear a If Bluetooth™ has been activated, click sound when the mobile the remaining menu items will telephone is being inserted appear on the display.
- Page 149 Introduction 5. Select the Start searching menu the display of the mobile The Paired devices menu item. telephone. appears on the display. During the search process for 7. Using the keypad on the mobile Bluetooth™ devices, the word telephone, enter the same Searching...
- Page 150 Introduction Emergency call 3. Deactivate Connect. instructions for the mobile telephone). The message Disconnected! appears followed once again by The message "Device found: 9 Warning the Bluetooth™ menu. UHP" appears on the display of the mobile telephone. Connection setup cannot be 4.
- Page 151 Introduction After a connection has been created functions are active. You can 9 Warning between the mobile telephone and enquire about this with the local the Infotainment system, data is network operators. Do not end the call until you are transferred from the mobile telephone requested to do so by the The emergency call number can...
- Page 152 Introduction In addition to operating using the ■ When the correct PIN code has steering wheel remote control been entered and confirmed, the system, some functions can also be previously selected menu appears operated using a speech recognition on the display. system 3 157.
- Page 153 Introduction Dial different, the phone book is loaded Under Phone book, select the desired afresh. This process may take a few entry. Dialling the telephone number minutes, depending on telephone manually A list of all numbers stored under this model. The new entries are only entry appears on the display.
- Page 154 Introduction Select the desired entry and start the Move the thumbwheel. dialling process. A context menu is opened. Incoming calls When a call is incoming, a selection menu appears for accepting or refusing a call. Accepting calls Select the Accept menu item. Select menu item Filtering.
- Page 155 Introduction Mobile phones and CB The DTMF menu is displayed. Seek advice on predetermined installation points for the external radio equipment antenna or equipment holder and ways of using devices with a Installation instructions and transmission power exceeding 10 operating guidelines watts.
- Page 156 Introduction Caution Mobile telephones and radio equipment may lead to malfunctions in the vehicle electronics when operated inside the vehicle with no exterior antenna, unless the above mentioned regulations are observed.
-
Page 157: Voice Recognition
Voice recognition Voice recognition Voice recognition Before you dial a telephone number, the following preconditions must exist: The speech recognition system ■ The mobile telephone must be enables you to operate some of the Voice recognition ....... 157 ready for operation and slotted into mobile telephone’s functions by voice the telephone-specific adapter, or a input. - Page 158 Voice recognition Ending the dialogue The Infotainment system ■ "Delete": The PIN code is deleted. simultaneously reacts to commands There are various ways to deactivate ■ "Additional digits": Additional with voice messages and displays. the speech recognition system and numbers can be entered. end the dialogue: Example of a dialogue whereby a PIN SIM card...
- Page 159 Voice recognition ■ "Delete" ■ "Call" or "Accept": The inputs are In order to make a foreign call, you accepted. can say the word "Plus" (+) in front of ■ "Phonebook" the number. The plus allows you to ■ "Change": The last block of ■...
- Page 160 Voice recognition User: "One One Nine Nine" "Redial" It can happen that the two names input are too different for the speech Using the "Redial" command, the Voice output repeats: "One One Nine recognition system, which then number most recently dialled can be Nine"...
- Page 161 ■ "Help": The dialogue is ended and pre-set languages to be shown on the Voice output: "One One Nine One" all commands available in this display. Contact your Opel Partner to context are listed. User: "Save" activate a different language from that Example of how to dial a telephone Instead of "Save"...
- Page 162 Index Accepting calls......151 Hang-up........151 Activating speech recognition..157 Lists..........151 Bluetooth connection....148 Making telephone calls....151 Call lists........151 Micro off........151 Changing the language....157 Mobile phones and CB radio Connection......... 147 equipment ......155 Cradle......... 147 Name..........
- Page 163 Telephone numbers....151 Telephone-specific adapter..147 Voice recognition ....... 157...
- Page 165 Copyright by ADAM OPEL AG, Rüsselsheim, Germany. The information contained in this publication is effective as of the date indicated below. Adam Opel AG reserves the right to make changes to the technical specifications, features and design of the vehicles relative to the information in this publication as well as changes to the publication itself.