Table of Contents
Advertisement
Advertisement
Table of Contents

Related Manuals for Miele DA 3460


Summary of Contents for Miele DA 3460
- Page 1 Operating and installation instructions Cooker hood DA 3460, DA 3460 EXT DA 3480 DA 3490, DA 3490 EXT en - GB To avoid the risk of accidents or damage to this appliance, it is essential to read these instructions before it is installed and used for the first time.
-
Page 2: Table Of Contents
Contents Caring for the environment ......... . 3 Warning and Safety instructions . -
Page 3: Caring For The Environment
Caring for the environment Disposal of the packing material Disposal of your old appliance The transport and protective packing Electrical and electronic appliances has been selected from materials which often contain materials which, if are environmentally friendly for handled or disposed of incorrectly, disposal, and should be recycled. -
Page 4: Warning And Safety Instructions
Any other usage is not supported by This appliance complies with all the manufacturer and could be relevant local and national safety dangerous. Miele cannot be held liable requirements. Inappropriate use for damage resulting from incorrect or can, however, lead to personal injury improper use or operation of the and damage to property. -
Page 5: Technical Safety
Technical safety Installation, maintenance and repairs may only be carried out by a Before installation, check the cooker Miele authorised person in accordance hood for visible signs of damage. with current national and local safety Under no circumstances should you regulations. - Page 6 These models may only be combined with a Miele external motor. This appliance must not be used in a non-stationary location (e.g. on a ship).
- Page 7 Warning and Safety instructions In order to ensure safe operation, and to prevent gases given off by the heating appliances from being drawn back into the room when the cooker hood and the heater are in operation simultaneously, an underpressure of 0.04 mbar (4 pa) is the maximum permissible in the room.
-
Page 8: Correct Use
Warning and Safety instructions Correct use The cooker hood can get very hot during cooking due to heat rising from Never use an open flame beneath the hob. the cooker hood. To avoid the danger Do not touch the housing or the grease of fire, do not flambé... - Page 9 Warning and Safety instructions All ducting, pipework and fittings must be of non-flammable material. These can be obtained from the Miele Spare Parts department or from builders' merchants. The appliance must not be connected to a chimney or vent flue which is in use.
-
Page 10: Description Of The Functions
Charcoal filters are available to order socket in the motor unit. through your Dealer or the Miele Spare Parts Department or via the internet on Having a non-return flap fitted in the www.miele-shop.com. (See back cover ducting ensures that air, once ducted for contact details and "Technical Data"... -
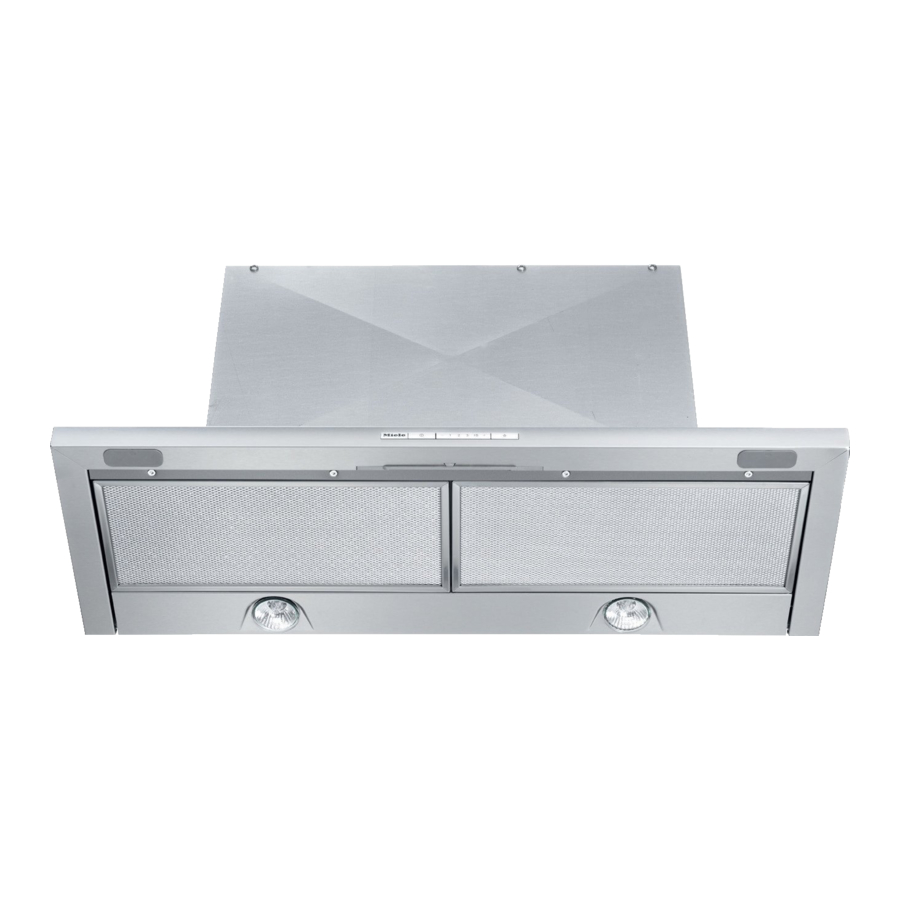
Page 11: Description Of The Appliance
Description of the appliance... - Page 12 Description of the appliance Exhaust socket C 150 mm Controls Grease filter Pull-out deflector plate Hob lighting Charcoal filter (extra accessory available to order for recirculation mode) Drop-down front panel A lightshield to match your kitchen furniture may be fitted instead of this panel.
-
Page 13: Operation
Operation The cooker hood is operated by pulling To switch the fan off out and pushing in the deflector plate. ^ Push the deflector plate back in. The next time the deflector plate is pulled To switch the fan on out, the cooker hood will operate at ^ Pull out the deflector plate. - Page 14 Operation Automatic switch-off of the Intensive Safety switch-off setting Should the cooker hood be left on, the You can set the Intensive setting so that fan will switch off automatically after 10 it always only runs for 10 minutes hours. The lighting will remain on. before reverting automatically to level 3.
-
Page 15: Cleaning And Care
(This infomation does not apply to the controls). Stainless steel surfaces can be cleaned using the Miele E-Cloth or with a Housing suitable, non-abrasive, proprietary cleaning agent for stainless steel, General following the manufacturer's instructions on the packaging. -
Page 16: Grease Filter
Cleaning and care Controls The controls may suffer discolouration or damage if soiling is left on them for too long. Remove soiling straight away. Observe the General notes on cleaning earlier in this section. When removing the grease filter do not tilt it downwards at an angle. - Page 17 Make sure that the spray arm can move freely. ^ Select a programme with a maximum temperature of 65° C. If a Miele dishwasher is being used, select the ^ When putting it back, make sure that Sensor wash programme.
-
Page 18: Fitting And Replacing The Charcoal Filters
It is fitted in the canopy above the grease filter. Replacement charcoal filters can be obtained from your dealer, Miele or via the internet at www.miele-shop.com. See back cover for contact details, and "Technical data" for type and reference number. -
Page 19: Changing A Halogen Lamp
Cleaning and care Changing a halogen lamp ^ Pull out the deflector plate, and remove the grease filter as described earlier. ^ Switch off the fan and the lighting. Exercise caution when changing halogen lamps. They get very hot during use, and remain hot for some time after being switched off. -
Page 20: After Sales Service
For information on the appliance under guarantee, please contact: guarantee specific to your country – Your Miele Dealer / Chartered Agent please contact Miele. See back cover for contact details. In the U.K. your appliance is –... -
Page 21: Appliance Dimensions
Appliance dimensions DA 3460 DA 3480... - Page 22 650 mm If this cooker hood is installed above DA 3490 a Miele Wok CS 1028 CombiSet 1) The front section of the wall housing appliance, a minimum safety unit must be fitted with a shelf to the distance of 760 mm must be depth of the partition wall.
-
Page 23: Installation
Installation Installation accessories... - Page 24 Installation 1 exhaust connection for exhaust ducting C 150 mm. 1 reducing collar 14 screws 4 x 15 mm for exhaust ducting C 125 mm. for securing the cooker hood into the wall unit. 1 non-return valve for fitting into the exhaust connection (not for recirculation mode).
- Page 25 Installation...
-
Page 26: Positioning The Appliance In The Wall Housing Unit
Installation Positioning the appliance in the wall housing unit To position the appliance correctly, cut the spacer strip to required depth T, and then attach it to the back of the appliance. T= Depth of carcase K minus depth of ^ Screw the spacer strip underneath appliance G the housing unit sides, flush with the... - Page 27 Installation Do not remove the protective film between the deflector plate and the ^ Screw the brackets onto the right and casing until the hood has been placed in the housing unit. left inside walls of the housing unit as shown.
- Page 28 Installation Note for dismantling the cooker hood: Undoing the screws on the left and right inside the housing releases the brackets, allowing the appliance to ^ When fitting an 80 cm or a 90 cm be removed from the unit. appliance into a 60 cm unit, unscrew the brackets on the deflector plate ^ Push the cooker hood back against...
-
Page 29: Attaching The Lightshield
Installation Attaching the lightshield ^ Attach the lightshield (if using). A DML 400 installation kit, available as ^ Remove the protective film between an optional accessory, is required for the deflector plate and the casing. this (available as a special accessory). Follow the installation instructions ^ Secure the front of the appliance to supplied. -
Page 30: Aligning The Deflector Plate
Installation Aligning the deflector plate Fitting the grease filter ^ Remove the protective strip around the edge of the grease filter. Fit the grease filter. ^ To do this, pull the deflector plate out. ^ The position of the deflector plate can be brought forward by up to 35 mm using the adjusting screws on either side of the deflector plate. -
Page 31: Vent Ducting
Installation Vent ducting ^ If the on-site ventilation system does not have a non-return flap, then the non-return flap supplied with the appliance must be fitted in the ^ When using C 150 mm ducting, exhaust socket in the motor unit. secure the exhaust connection supplied to exhaust ducting with hose clips. -
Page 32: Setting Up For Recirculation Mode
6-pole plug connector. ^ Separate fitting instructions are supplied with the external motor. For this, conversion kit DUU 151 (available from your Miele dealer or the Miele Spare Parts Dept.) is required. You will also need a charcoal filter (see “Technical data”). -
Page 33: Connection For Air Extraction
Connection for air extraction – Only use smooth pipes or flexible Important: To avoid the danger of hoses made from non-flammable toxic fumes, please observe the materials for the extraction ducting. Warning and Safety instructions. – When using an external motor, make This is especially crucial when using sure that the exhaust ducting is the cooker hood at the same time as... -
Page 34: Condensate Trap
Connection for air extraction Condensate trap – If the exhaust air is to be ducted into the open air, the installation of a (optional accessory) telescopic wall vent or roof vent (available as an optional accessory) is recommended. – If the exhaust air is to be ducted into a vent flue, the ducting must be directed in the flow direction of the flue. -
Page 35: Silencer
Connection for air extraction Silencer ...with air extraction: (optional accessory) The silencer not only reduces noise from the fan, but also sounds from outside (e.g. traffic noise). For this reason the silencer must be positioned as close as possible to the ducting exit ...in recirculation mode: The silencer needs to be positioned... -
Page 36: Electrical Connection
Electrical connection If the switch is not accessible after All electrical work should be installation (depending on country), an undertaken by a suitably qualified additional means of disconnection must and competent person in strict be provided for all poles. accordance with current national For extra safety it is advisable to protect and local safety regulations the appliance with a suitable residual... -
Page 37: Operation With Control Module Dsm 400
Operation with Control module DSM 400 The Miele DSM 400 control module can Components used in the central be used to combine the cooker hood ducting system are not supplied by with other components. Miele. It enables the following: If in any doubt, the advice of a... -
Page 38: Technical Data
Weight DA 3460 ....12 kg DA 3460 EXT ....10 kg DA 3480. - Page 40 Alteration rights reserved / 0613 M.-Nr. 09 190 950 / 05...