Miele DA 3466 Operating And Installation Instructions
Hide thumbs
Also See for DA 3466:
- Operating and installation instructions (52 pages) ,
- Operating and installation instructions (48 pages) ,
- Operating and installation instructions (48 pages)

Related Manuals for Miele DA 3466


Summary of Contents for Miele DA 3466
- Page 1 Operating and installation instructions Cooker hood To prevent the risk of accidents or damage to the appliance, it is essential to read these instructions before it is installed and used for the first time. en-GB M.-Nr. 11 468 570...
-
Page 2: Table Of Contents
Contents Warning and Safety instructions................ 4 Caring for the environment ................ 13 Guide to the appliance .................. 14 Modes of operation ..................... 16 Operation...................... 17 Switching on the fan....................17 Selecting the power level ..................17 Run-on time......................17 To switch the fan off ....................17 Switching the hob lighting on/off ................ - Page 3 Contents Electrical connection ..................... 38 Connection for air extraction ................. 39 Condensate trap....................40 Silencer......................40 Technical data...................... 42 Optional accessories for recirculation mode............42...
-
Page 4: Warning And Safety Instructions
Miele cannot be held liable for injury or damage caused by non- compliance with these instructions. Keep these instructions in a safe place and pass them on to any future owner. - Page 5 Warning and Safety instructions The cooker hood can only be used by people with reduced physical, sensory or mental capabilities, or lack of experience and knowledge, if they are supervised whilst using it, or have been shown how to use it in a safe way and recognise and understand the consequences of incorrect operation.
- Page 6 Unauthorised installation, maintenance and repairs can cause considerable danger for the user. Installation, maintenance and repairs must only be carried out by a Miele authorised technician. A damaged appliance can be dangerous. Check it for visible signs of damage. Do not use a damaged appliance.
- Page 7 Miele spare parts. If the electrical connection cable is faulty it must only be replaced by a Miele authorised service technician to protect the user from danger. During installation, maintenance and repair work, the appliance...
- Page 8 Warning and Safety instructions Using at the same time as another heating appliance that depends on the air from the room Danger of toxic fumes! Great care should be taken when using the cooker hood in the same room or the same area of the house at the same time as another heating appliance that depends on the air from the room.
- Page 9 Warning and Safety instructions In order to ensure safe operation and to prevent gases given off by the heating appliance from being drawn back into the room when the cooker hood and the heater are both operated simultaneously, an underpressure in the room of 0.04 mbar (4 Pa) is the maximum permissible.
- Page 10 Warning and Safety instructions Correct use Open flames are a fire hazard. The use of an open flame under the cooker hood is not permitted. To avoid the danger of fire, do not flambé or grill over an open flame. When switched on, the cooker hood could draw flames into the filter.
- Page 11 Wear gloves to protect your hands from being cut. Exhaust ducting must be of non-inflammable material. Suitable material is available from Miele specialist dealers or the Miele Spares Dept. The appliance must not be connected to a chimney or flue which is in use.
- Page 12 The steam could reach electrical components and cause a short circuit. Accessories Only use genuine original Miele accessories and spare parts with this appliance. Using accessories or spare parts from other manufacturers will invalidate the warranty and Miele cannot accept liability.
-
Page 13: Caring For The Environment
Please dispose of it at your local community waste collection / recycling centre for electrical and electronic appliances, or contact your dealer or Miele for advice. You are also responsible for deleting any personal data that may be stored on the appliance being disposed of. Please... -
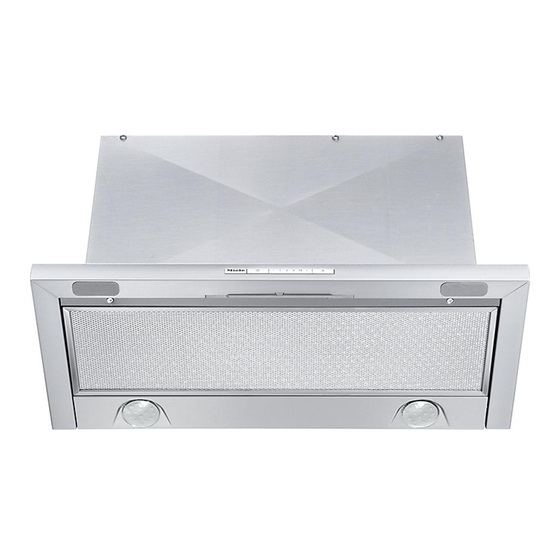
Page 14: Guide To The Appliance
Guide to the appliance... - Page 15 Guide to the appliance a Exhaust socket for air extraction/recirculation b Controls c Grease filter d Pull-out deflector plate e Hob lighting f Charcoal filter Accessory required for recirculation mode g On/Off control for the fan h Controls for setting the fan power level i On/Off control for the hob lighting j Drop-down front panel A front panel to match your kitchen furniture may be fitted instead of this panel...
-
Page 16: Modes Of Operation
Cooker hoods designed for use with an external motor have to be connected to If the on-site ventilation system does a Miele external motor located in a not have a non-return flap, the non- position of your choice outside the return flap supplied must be fitted in the room. -
Page 17: Operation
Operation Switching on the fan To switch the fan off Push the deflector plate in to switch Switch the fan on as soon as you start cooking. This is to ensure that vapours the fan off. The next time the are captured right from the start. -
Page 18: Power Management
Operation Press “” to switch Power Power management management off. The cooker hood is fitted with a power The 1 and B indicators will flash. management system. Power management helps to save energy. It To switch it on, press “”. ensures that the fan power level is The 1 and B indicators will light up reduced automatically and that the... -
Page 19: Energy Saving Tips
Energy saving tips This cooker hood operates very efficiently and economically. The following will help you to save even more energy when using it: – Ensure that there is sufficient ventilation in the kitchen when cooking. In extraction mode, if there is insufficient air flow the cooker hood cannot operate efficiently and this causes increased operating noise... -
Page 20: Cleaning And Care
Unsuitable cleaning agents can becoming dirty again, we recommend damage the surfaces and control treating them with a stainless steel care elements. product (available from Miele). Do not use any cleaning agents containing soda, acid, chloride or Important information for the control solvent. -
Page 21: Grease Filter(S)
Cleaning and care Grease filter(s) Fire hazard An oversaturated grease filter is a fire hazard. Clean the grease filter at regular intervals. The re-usable metal grease filter in the When removing the grease filter do appliance remove solid particles from not tilt it downwards at an angle. - Page 22 Cleaning and care Unsuitable cleaning agents When removing the filter for cleaning, also clean off any residues of oil or fat Unsuitable cleaning agents can cause from the now accessible casing to damage to the surface of the filters if prevent the risk of these catching fire.
-
Page 23: Charcoal Filter
Used charcoal filters can be disposed Charcoal filters are available to order via of with normal household waste. the Miele online shop, the Miele Customer Service Department (see end of these operating instructions for contact details) or from your Miele dealer. -
Page 24: Changing A Lamp
Manufacturer ....... EGLO Lamp type ........GU10 Specification........ 11427 Wattage ........... 3 W These lamps are available from Miele or from specialist retailers. Pull out the deflector plate, and remove the grease filter as described earlier. Switch off the fan and the lighting. -
Page 25: After Sales / Warranty
Miele dealer or the Miele Service Department. Contact details for Miele are given at the end of this booklet. N.B. A call-out fee will be charged for service visits where the problem could have been resolved as described in these instructions. -
Page 26: Installation
Installation Before installation Installation materials Before installation, it is important to read the information given on the following pages as well as the “Warning and Safety instructions” at the beginning of this booklet. Installation recommendations – To achieve optimum vapour extraction, the cooker hood must be positioned centrally over the hob, not to the side. - Page 27 Installation a 1 vent connection for exhaust ducting 150 mm b 1 non-return flap 14 screws 4 x 15 mm for securing the cooker hood into the for fitting into the exhaust socket on wall unit the motor unit (not needed for recirculation mode) c 2 brackets for securing the cooker hood into 8 screws M4 x 12 mm...
-
Page 28: Appliance Dimensions
Installation Appliance dimensions Dia. 1: DA 3466 in a 600 mm wide wall unit. The diagram is not drawn to scale. - Page 29 Installation Dia. 2: DA 3496 in a 900 mm wide wall unit. The diagram is not drawn to scale. See diagram 1 for side view.
- Page 30 Installation Dia. 3: DA 3496 in a 600 mm wide wall unit or in a 900 mm wide wall unit with side sections. The diagram is not drawn to scale. See diagram 1 for side view. Footnotes for diagrams 1 to 3: a The front section of the wall unit must be fitted with a base panel to secure the cooker hood.
-
Page 31: Safety Distance Between Hob And Cooker Hood (S)
Installation Safety distance between hob and cooker hood (S) When planning the installation height of your cooker hood, the minimum safety distance between the top of a cooker or hob and the bottom of the cooker hood is as follows, unless a greater distance is specified by the manufacturer of your cooking appliance. - Page 32 Installation a Example: Installation without a front panel fitted and with the front edge of the deflector plate flush with the front edge of the furniture housing unit. This installation needs a shelf of at least 95 mm deep. b Example: Installation with a front panel to match the kitchen furniture.
- Page 33 Installation Secure the spacer strip underneath the housing unit sides, flush with the wall. The brackets are designed for 16 and 19 mm thick unit sides. Orientate the bracket so that the vertical depth matches the thickness of the unit side.
- Page 34 Installation To avoid scratching the deflector plate, do not remove the protective film between the deflector plate and the casing until the hood has been placed in the housing unit. Installation of the cooker hood is carried out without the grease filter ...
- Page 35 Installation Secure the cooker hood to the Secure the spacer strip to the back of brackets from below using two the appliance from behind using 4 screws on each side. plastic rivets as shown. Pull out the deflector plate and remove the protective film between the deflector plate and the casing.
-
Page 36: Attaching The Front Panel
Installation Attaching the front panel Aligning the deflector plate The front of the deflector plate can be The position of the deflector plate can fitted with a front panel to match be brought forward by up to 35 mm existing kitchen furniture units. using the adjusting screws on either The front panel must not exceed side of the deflector plate. -
Page 37: Vent Connection
Installation Attach the ducting, e.g. flexible hose, to the exhaust connection using a hose clip (available as an optional When fitting the grease filter, make accessory). sure that the red plastic guides are at the front and facing upwards. ... -
Page 38: Recirculation Mode
Fit the charcoal filter (see “Cleaning recirculation. A conversion kit, available and care”). through your dealer of from Miele is required for operating the cooker hood Power connection in recirculation mode. You will also need a charcoal filter (see “Technical data”). -
Page 39: Connection For Air Extraction
Installation It is recommended that you connect the When using an external motor, make appliance via a suitable socket . The sure that the exhaust ducting is socket should be easily accessible after sufficiently rigid. The external motor the appliance has been installed. can cause an underpressure which can result in the exhaust ducting If the socket is no longer accessible... -
Page 40: Condensate Trap
Installation In addition to insulating the exhaust ducting, we recommend that a suitable condensate trap is also installed to collect and evaporate any condensate which may occur. Condensate traps for 125 mm or 150 mm ducting are available as optional accessories. If the exhaust air is to be ducted into ... - Page 41 Installation Extraction mode To minimise noise from the motor in the kitchen, the silencer should be positioned in front of the external motor if possible, or, if the ducting is long, above the exhaust socket on the cooker hood . In the case of an external motor located inside the house, fitting a silencer behind the external motor ...
-
Page 42: Technical Data
Technical data Fan motor* 180 W Hob lighting 2 x 3 W Total rated load* 186 W Mains voltage, frequency AC 230 V, 50 Hz Fuse rating 5 A Mains connection cable length 1.5 m Weight DA 3466 12 kg DA 3496 14 kg DA 3466 EXTA 10 kg DA 3496 EXTA 11.5 kg * For EXTA models, the rated load will depend on the type of external motor fitted. Length of connection cable to external motor: 1.9 m Optional accessories for recirculation mode DUU 150 or DUU 151 kit to convert from extraction mode to recirculation mode... - Page 43 Technical data Data sheet for household cooker hoods In acc. with delegated regulation (EU) No. 65/2014 and regulation (EU) No. 66/2014 MIELE Model name/identifier DA 3466 Annual Energy Consumption (AEC 69,5 kWh/year hood Energy efficiency class Energy efficiency index (EEI...
- Page 44 Power consumption in standby mode (P 0,20 W Nominal power of lighting system 6,0 W Average illumination of the lighting system on the cooking surface 320 Ix Time increase factor The above values were determined in combination with the Miele ABLG 202 external motor.
- Page 45 Technical data Data sheet for household cooker hoods In acc. with delegated regulation (EU) No. 65/2014 and regulation (EU) No. 66/2014 MIELE Model name/identifier DA 3496 Annual Energy Consumption (AEC 69,5 kWh/year hood Energy efficiency class Energy efficiency index (EEI...
- Page 46 Power consumption in standby mode (P 0,20 W Nominal power of lighting system 6,0 W Average illumination of the lighting system on the cooking surface 300 Ix Time increase factor The above values were determined in combination with the Miele ABLG 202 external motor.
- Page 47 Tel: +65 6735 1191 Fax. +971 4 3418 852 Fax: 011-46 900 001 Fax: +65 6735 1161 800-MIELE (64353) E-mail: customercare@miele.in E-Mail: info@miele.com.sg E-Mail: info@miele.ae Internet: www.miele.in Internet: www.miele.sg Website: www.miele.ae Manufacturer: Miele & Cie. KG, Carl-Miele-Straße 29, 33332 Gütersloh, Germany...
- Page 48 DA 3466, DA 3496, DA 3466 EXTA, DA 3496 EXTA en-GB M.-Nr. 11 468 570 / 00...