
Related Manuals for Teac LPU190


Summary of Contents for Teac LPU190
-
Page 1: User Manual
LPU190 USB Turntable Music Combo USER MANUAL IMPORTANT ! WARRANTY INFORMATION INSIDE. PLEASE READ www.teac.co.nz... -
Page 4: Table Of Contents
CONTENT IMPORTANT SAFETY INSTRUCTIONS FOR AUDIO PRODUCTS -------------------------------- PRECAUTIONS -------------------------------- -------------------------------- -------------------------------- Caution -------------------------------- BEFORE USE -------------------------------- Care and maintenance -------------------------------- ACCESSORY LIST -------------------------------- UNIT PARTS AND CONTROLS -------------------------------- -------------------------------- Turntable Parts -------------------------------- Front Panel Overview -------------------------------- BASIC OPERATION -------------------------------- -------------------------------- -------------------------------- Using an External Amplifier... -
Page 5: Important Safety Instructions For Audio Products
IMPORTANT SAFETY INSTRUCTIONS FOR AUDIO PRODUCTS - PLEASE READ THOROUGHLY When using electrical products, basic precautions should always be followed including: 1. Read Instructions All the safety and operating instructions should be read before the product is operated. 2. - Page 6 13. Mains plug The power plug at the wall outlet should always be easily accessible. 14. Lightning For added protection for this product during a lightning storm, or when it is left unattended and unused for long periods of time, unplug it from the wall outlet and disconnect the antenna or cable system.
-
Page 7: Precautions
PRECAUTIONS Safety Information Caution: 1. Use of controls and adjustments or performance of procedures other than those specified herein may result in hazardous radiation exposure. 2. If this product develops problems, contact qualified service centres, and do not use the product in defective states. -
Page 8: Caution
Never turn the unit off or disconnect a USB Storage Device (flash Drive) when it is being accessed. Doing so could damage the LPU190 and the connected USB storage device. Do not use a device that has a maximum current consumption of 100 mA or more. -
Page 9: Before Use
BEFORE USE 1. Before use, please remove and dispose all the packing. Remember to keep the packing away from children and pets. 2. Choose the unit installation location carefully. Avoid placing it in direct sunlight or close to a source of heat. Also avoid locations subject to vibrations and excessive dust, cold or moisture. -
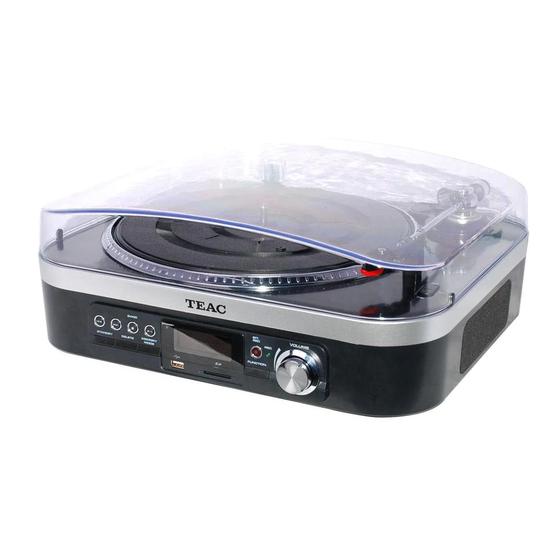
Page 10: Unit Parts And Controls
UNIT PARTS AND CONTROLS Connections CAUTION Switch off the power to all equipment before making connections. Read the instructions of each component you intend to use with this unit. Be sure to insert each plug securely. To prevent hum and noise, avoid bundling the signal interconnection cables ... -
Page 11: Turntable Parts
Turntable Parts Part Description A. Turntable Platter Holds and rotates vinyl records. B. 45 RPM Adaptor Use this adaptor when playing a 45 RPM record. C. Tone arm Control The indicator lights up when the tone arm is in use. Indicator D. -
Page 12: Front Panel Overview
Front Panel Overview Bu on/Part In USB/CARD Mode In AM/FM TUNER Mode In PHONO Mode Standby Mode 1. PLAY/PAUSE Press to start playback Press to listen to a or toggle pause. preset radio station. 2. STOP/BAND Press to stop playback. Press to end recording to USB/CARD devices. -
Page 13: Basic Operation
BASIC OPERATION Turning On and Selecting Playback Sources Connect the AC power cord to AC outlet and the power indicator will illuminate. Press STANDBY button to turn on the unit. Press the FUNCTION button repeatedly to select your desired source: PHONO, TUNER, USB or CARD. -
Page 14: Listening To Vinyl Records (Phono)
LISTENING TO VINYL RECORDS (PHONO) This turntable player can play 33, 45 and 78 RPM vinyl records. NOTE: Always keep vinyl records and the tone arm stylus clean so that they will last longer. Handle with clean hands and clean gently with soft, anti-static cloth or brushes only. Never play a record that has a crack on the surface. -
Page 15: Replacing The Turntable Stylus (Needle)
Replacing the Turntable Stylus (Needle) We recommend that your stylus should be replaced regularly for best playback results. Removing the old stylus Set a screwdriver at the tip of the stylus and push down in the direction (A). Remove the stylus by pulling it forward and down. Installing a new stylus Make sure you have a new 402-M208-165 stylus. -
Page 16: Listening To Usb/Card
LISTENING TO USB/CARD Connecting USB/CARD Devices When a compatible USB or CARD memory device is connected to the unit, you can play compatible audio files from the device or record audio to the device. NOTE: This unit supports USB/CARD memory devices up to 16GB and formatted in FAT32. ... -
Page 17: Usb Audio Playback
USB Audio Playback Press the FUNCTION button repeatedly to select the USB function. Insert an external audio source (i.e. MP3 player) into the USB slot. The display will show ‘USB’ and soon turn into ‘READING’. Note: If the USB device is not detected, ‘NO USB’... - Page 18 Repeat steps 3-4 to continue programming. You can add up to 20 tracks into the list. To remove a track from the playlist during programming, simply press the DELETE button. You can only delete from the end of the list. If playback is in progress, press STOP ( ...
-
Page 19: Recording To Usb/Card
RECORDING TO USB/CARD Record songs into your USB or CARD storage device in the MP3 file format. NOTE: This unit supports USB and SD/MMC/HCSD CARD devices up to 16GB and formatted in the FAT32 file system. Record to USB or CARD from PHONO/TUNER Connect a USB or CARD storage device into its appropriate slot on the unit’s front panel. -
Page 20: Record Between Usb And Sd/Mmc Card
Record Between USB and SD/MMC CARD Insert a USB and a SD/MMC/HCSD CARD device into their respective slots on the unit. Press the FUNCTION button repeatedly to select the recording source. If you are recording from USB to CARD, select the USB function. ... -
Page 21: Recording To Computer With Audacity
RECORDING TO COMPUTER WITH AUDACITY Audacity is a 3 party open source programme that is not affiliated with TEAC. For Audacity help and support, operating instructions, software download and details on computer specification requirements, please visit the Audacity website at http://audacity.sourceforge.net. - Page 22 Connecting to the Computer via USB To start recording with Audacity, make sure your computer is connected to the unit via USB as described below. To connect the turntable to your computer, plug one end of the USB cable into the USB port on the unit and the other end to a USB port on your computer.
-
Page 23: Audacity For Pc
AUDACITY FOR PC Installing Audacity to PC Insert the Audacity software CD that comes with your unit into your computer’s CD/DVD drive. On your computer, click the Start button, go to My Computer and double-click on the CD/DVD Drive. Double-click on the Audacity_for_WIN folder. -
Page 24: Preference Setup For Recording To Pc
Click on Finish to complete the installation. You can now run Audacity to record and edit audio. Preference Setup for Recording to PC In order to record from the turntable unit to Audacity on the PC, make sure that the settings are as below. - Page 25 Set the connected turntable unit as the recording device: In the Audio I/O tab, click “Device” and select "microphone (USB Audio Codec)” from the drop-down menu. Click "Channels" and select 2 (stereo) to record stereo sound. iii. Tick the two checkboxes below “Channels” so that you can listen to what is being recorded.
-
Page 26: Basic Controls
Basic Controls Use the File, Edit, View, Generate, Effect and Analyse drop-down menus to Save, Export, and edit the music. Use the large control buttons at the top of the screen to control music playback and recording. Button Description 1. -
Page 27: Audacity For Mac
AUDACITY FOR MAC Audacity is a 3 party open source programme that is not affiliated with TEAC. For Audacity help and support, operating instructions, software download and details on computer specification requirements, please visit the Audacity website at http://audacity.sourceforge.net. -
Page 28: Preference Setup For Recording To Mac
Basic Controls Use the File, Edit, View, Generate, Effect and Analyse drop-down menus to Save, Export, and edit the music. Use the large control buttons at the top of the screen to control music playback and recording. Button Description 1. - Page 29 Under the Quality tab, set the Default Sample Format to 16 bit. Select OK to save your setting and close the preferences window. You are now ready to record. NOTE: If “Core Audio (USB Audio CODEC)” does not appear in the Device list, exit the Audacity programme, reopen it and try again.
-
Page 30: Basic Audacity Controls (Mac)
Basic Audacity Controls (MAC) Use the File, Edit, View, Generate, Effect and Analyse drop-down menus to Save, Export, and edit the music. Use the large control buttons at the top of the screen to control music playback and recording. Part Description 1. -
Page 31: Troubleshooting (Audacity)
TROUBLESHOOTING (AUDACITY) If you are having trouble while recording to Audacity, please look through the list below and see if you can solve the problem by yourself before calling your dealer. NO SOUND: If you are not getting any sound into the software application, go back to the ... - Page 32 Vista and Windows 7 Other versions Other versions (e.g.: Windows XP): - Click "Start", then find and access the Control Panel. Select “Sound and audio devices” and choose the "Audio" tab. In Sound playback, change the default device using the drop-down menu.
- Page 33 THE FLUCTUANT WAVE DOES NOT APPEAR IN THE AUDACITY WINDOW OR THE RECORDED SOUND IS DISTORTED (FOR WINDOWS 7 OR SOME VISTA SYSTEMS ONLY) Click the Start button and go to the Control Panel. Navigate to the Sound menu: In Classic view, click the “Sound” icon. ...
- Page 34 Alternatively, if you are in Control Panel Home view, click “Hardware and Sound”, then click the Sound icon. 310 ...
- Page 35 In the Sound interface, select the Recording tab. Select “USB Audio Codec” for Microphone, then click the Properties button at the bottom right. Select the Levels tab in the pop-up window, adjust the input volume as required, then click the OK button to save the changes.
-
Page 36: Troubleshooting
TROUBLESHOOTING Problem Cause Solution GENERAL Unit does not turn on The unit is unplugged. Connect the unit to the AC power supply. Distorted sound The unit is too close Turn off the TV or another to a TV set or another appliance, and relocate the similar appliance. -
Page 37: Specifications
SPECIFICATIONS GENERAL Power Requirements AC 220-240 V ~ 50 Hz Power Consumption Dimensions (W x H x D) 390 x 160 x 355 mm Weight 3.6 kg Accessories User Manual, 45 RPM Adaptor, USB cable, RCA Line Out cable, Audacity Software CD AMPLIFIER Output Power 0.8W + 0.8W... - Page 38 Direct Imports Ltd, 203 Nelson Street South, Hastings, New Zealand, (06) 8730129...