
Related Manuals for Teac CRX313i


Summary of Contents for Teac CRX313i
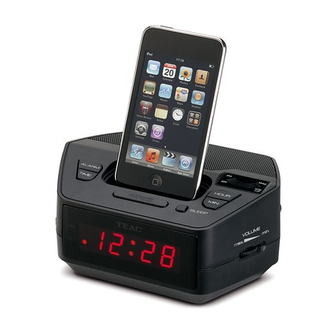
- Page 1 CRX313i Alarm Clock Radio with Dock for iPod USER MANUAL IMPORTANT ! WARRANTY INFORMATION INSIDE. PLEASE READ Trademark of TEAC Corporation JAPAN www.teac.com.au...
- Page 2 Keep your purchase receipt to enable you to proceed quickly in the event of a Warranty Service. If you require Warranty Service, please contact the TEAC Customer Support Hotline at 1300 553 315 for assistance. Please ensure that you have the model number, serial number and purchase receipt ready when you call.
- Page 3 Authorised Service Centre for repair. In this event, proof of purchase is required to support a warranty claim. After the repair, the product will be available for collection by or return to the purchaser at a fee upon request. TEAC in- home service can be made available at a fee upon request.
- Page 5 22.) Do not destroy the safety purpose of the polarized or grounding-type plug. A polarized plug has two blades with one wider than the other. A grounding type plug has two blades and a third grounding prong. The wide blade or the third prong is provided for your safety. If the provided plug does not fit into your outlet, consult an electrician for replacement of the obsolete outlet.
-
Page 6: Unpacking And Setting Up
Before Setting Up the Unit • Operate controls and switches as described in the manual. • Before turning on the power, make certain that the power cord is properly installed. • When moving the unit, be sure to first disconnect the AC power cord. •... -
Page 8: Side View
SIDE VIEW BOTTOM VIEW... -
Page 9: Ac Power Supply Connection
AC POWER SUPPLY CONNECTION 1. Check that rating label located at the bottom of the unit corresponds to your local power supply. 2. Make sure the wall socket is switched off, then plug the AC plug into the wall socket. 3. -
Page 10: Setting Alarm
Setting Alarm 1. Press and hold ALARM button on the unit and press the HOUR button to set the hour and press the MIN button to set the minute. 2. Release the buttons to confirm settings. 3. Slide the FUNCTION switch to AUTO / BUZZ to set the alarm. 4. -
Page 11: Listening To Radio
Listening to Radio Slide the FUNCTION switch to ON position. Select AM / FM mode by sliding the MODE switch. Tune to the desired radio station by rotating the TUNING WHEEL.The related frequency is displayed beneath the TUNING LENS. To turn off the radio, slide the FUNCTION switch to OFF position to switch the unit into standby mode. -
Page 12: Cleaning And Maintenance
Caution: Incorrect replacement of the battery may cause it to explode or leak. Replace only with same or equivalent type. Cleaning and Maintenance If the cabinet becomes dusty, wipe it with a soft cloth. If the cabinet becomes smudged or dirty, clean it with a soft, slightly dampened cloth. Never allow water or any liquid to get inside the cabinet. -
Page 13: Specifications
Specifications Power AC240V 50Hz 530 - 1600 kHz 88 - 108 MHz DC Backup 9V (6F22 9Vx1) Power Consumption Measurement 160(L)X125(W)X71(H)mm Weight 0.67 KG This marking indicates that this product should not be disposed with other household wastes throughout Australia. To prevent possible harm to the environment or human health from uncontrolled waste disposal, recycle it responsibly to promote the sustainable reuse of material resources. - Page 14 Compatible iPods chart Model Output Charge iPod 4th Gen Audio iPod 4th Gen Photo Audio iPod 4th Gen Color Audio iPod 5th Gen & iPod Classic Audio Mini 1st & 2nd Gen Audio Nano 1st & 2nd Gen Audio Nano 3rd Gen Audio Nano 4th Gen Audio...