
Related Manuals for Planet WNL-9320


Summary of Contents for Planet WNL-9320
- Page 1 802.11n Wireless PCI Adapter WNL-9320 User’s Manual Version: 1.00 Date: August 2007...
-
Page 2: Federal Communication Commission Interference Statement
Copyright Copyright © 2007 by PLANET Technology Corp. All rights reserved. No part of this publication may be reproduced, transmitted, transcribed, stored in a retrieval system, or translated into any language or computer language, in any form or by any means, electronic, mechanical, magnetic, optical, chemical, manual or otherwise, without the prior written permission of PLANET. - Page 3 Do not dispose of WEEE as unsorted municipal waste and have to collect such WEEE separately. Revision User’s Manual for PLANET 802.11n Wireless PCI Adapter Model: WNL-9320 Rev: 1.0 (August 2007) Part No. EM-WNL9320...
-
Page 4: Table Of Contents
CONTENTS Chapter 1 Introduction ................1 1.1 Features ........................1 1.2 Specifications ....................... 2 1.3 Package Contents ....................2 Chapter 2 Installation Procedure ............. 3 Chapter 3 Configuration Utility ............8 3.1 Site Survey ......................9 3.2 Profile ........................10 3.2.1 Add Profile - Configuration ................. -
Page 5: Chapter 1 Introduction
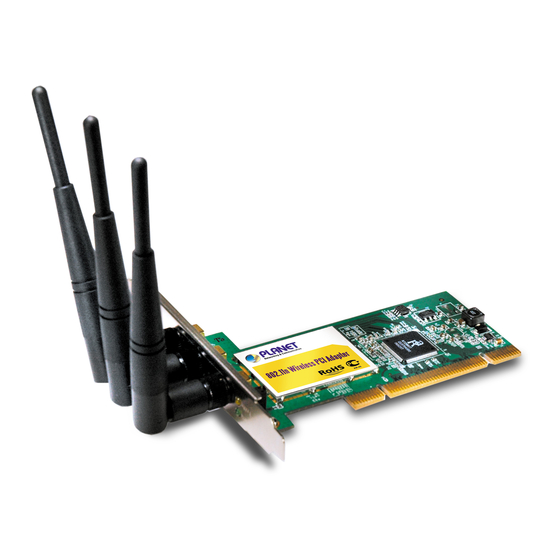
For higher wireless transfer performance, we are glad to introduce the PLANET 802.11n wireless PCI adapter – WNL-9320. It is a PCI 2.2 wireless adapter that can operate in either Ad-Hoc mode (Point to Point/Point to Multipoint without an Access Point) or Infrastructure mode (Point to Point/Point to Multipoint with an Access Point) 2.4GHz frequency band;... -
Page 6: Specifications
1.3 Package Contents Before you begin the installation, please check the items of your package. The package should include the following items: 1 x WNL-9320 3 x External Antenna 1 x Driver and User's manual CD 1 x Quick Installation Guide If any of the above items is missing, contact your supplier as soon as possible. -
Page 7: Chapter 2 Installation Procedure
1. Insert the bundled CD into the CD-ROM drive to launch the auto run program. Once completed, a menu screen will appear. 2. Click the “Configuration Utility” hyperlink in the WNL-9320 field to initiate the installation procedure. Note: If the menu screen does not appear, click “Start” at the taskbar. Then, select “Run” and type “E:\Utility\Win2KXP\UT-WNL9320.exe”, where the E is your CD-ROM drive. - Page 8 4. It is suggested to use “PLANET Configuration Tool” to manage the WNL-9320. Click “Next” to continue. 5. If “Optimize for performance mode” is selected, the “Tx BURST” option will be enabled to increase the transfer speed. However, the AP must support this feature as well. If the target AP is complying with 802.11b/g standard, please select “Optimize for WiFi mode”.
-
Page 9: Driver Installation
3. Secure this card to the rear of the computer chassis and put back the cover. 4. Secure the antenna to the antenna connector on the WNL-9320. 5. Windows O.S will detect WNL- 9320 and show you “the Found New Hardware Wizard”. Please choose “Install from a list or specific or specific location (Advanced)”. - Page 10 7. The screen will appear to inform that you are installing PLANET WNL-9320. Please click “Continue Anyway” to continue. 8. The screen will show the rate of progress for the installation of WNL-9320 as below. 9. Please click “Finish” to complete the driver installation...
- Page 11 10. The WNL-9320 utility will appear on the screen. Please select the AP you would like to connect and press “Connect” button to link it. Please click” OK” to continue. - 7 -...
-
Page 12: Chapter 3 Configuration Utility
Chapter 3 Configuration Utility The Configuration Utility is a powerful application that helps you configure the WNL-9320 and monitor the link status and the statistics during the communication process. When the WNL-9320 is installed, the configuration utility will be displayed automatically. This card will auto connect to wireless device which has better signal strength and no wireless security setting. -
Page 13: Site Survey
3.1 Site Survey When you open the Configuration Utility, the system will scan all the channels to find all the access points/stations within the accessible range of your card and automatically connect to the wireless device with the highest signal strength. From the “Site Survey”, all the networks nearby will be listed. You can change the connection to another network or add one of the networks to your own profile list. -
Page 14: Profile
3.2 Profile The “Profiles List” is for you to manage the networks you connect to frequently. You are able to Add/Delete/Edit/Activate a profile. Parameter Description Profiles List The profiles list display all the profiles and the relative settings of the profiles including Profile Name, SSID, Channel, etc. -
Page 15: Add Profile - Configuration
3.2.1 Add Profile - Configuration Parameter Description Profile Name Define a recognizable profile name for you to identify the different networks. SSID The SSID (up to 32 printable ASCII characters) is the unique name identified in a WLAN. The ID prevents the unintentional merging of two co-located WLANs. You may specify a SSID for the card and then only the device with the same SSID can interconnect to the card. - Page 16 Ad-Hoc – Select this mode if you want to connect to another wireless station in the Wireless LAN network without through an Access Point or Router. TX Power If you want to lower the transmit power of the card for saving the power of the system, you can select the lower percentages from the list.
-
Page 17: Add Profile - Authentication And Security
3.2.2 Add Profile - Authentication and Security Parameter Description Authentication Type This setting has to be consistent with the wireless networks that the card intends to connect. Open – No authentication is needed among the wireless network. Shared – Only wireless devices using a shared key (WEP Key identified) are allowed to connecting each other. - Page 18 authorized users may access their networks. For enterprises that have already deployed IEEE 802.1x authentication, WPA offers the advantage of leveraging existing authentication databases and infrastructure. WPA-PSK – It is a special mode designed for home and small business users who do not have access to network authentication servers.
-
Page 19: 802.1X Setting - Certification
wireless network. Note: All devices in the network should use the same encryption method to ensure the communication. WPA Pre-Shared Key The WPA-PSK key can be from 8 to 64 characters and can be letters or numbers. This same key must be used on all of the wireless stations in the network. - Page 20 An example for MD5 Authentication IEEE 802.1x RADIUS RADIUS Access Client Client Server Access Point Windows 2000 IAS (Internet Authentication Service) (1) Client requests to login the (3) Send username, password to network. RADIUS server. (4) Approve or deny user (2) Login with username, login to the LAN.
- Page 21 in that they specify a stand-alone authentication protocol be used within an encrypted tunnel. TTLS supports any protocol within its tunnel, including CHAP, MS-CHAP, MS-CHAPv2, PAP and EAP-MD5. PEAP specifies that an EAP-compliant authentication protocol must be used; this card supports EAP-MSCHAP v2, EAP-TLS/Smart card and Generic Token Card.
-
Page 22: 802.1X Setting - Ca Server
3.2.2.2 802.1x Setting - CA Server Parameter Description Use Certificate Chain When the EAP authentication type such as TLS, TTLS or PEAP is selected and required a certification to tell the client what server credentials to accept from the authentication server in order to verify the server, you have to enable this function. -
Page 23: Link Status
name found on the certificate. Domain name must end in When selected, the server name field identifies a domain. The specified name certificate must use a server name belonging to this domain or to one of its sub-domains (e.g. zeelans.com, where the server is blueberry.zeelans.com) but it may be any name used in the certificate name field. -
Page 24: Statistics
Link Speed (Mbps) Display the transmission and reception rate of the network. The maximum transmission rate is 54Mbps. Throughput (Kbits/sec) Display the speed of data transmitted and received. Link Quality This bar indicates the quality of the link. The higher the percentage, the better the quality. -
Page 25: Advance
3.5 Advance This option enables you to configure more advanced settings, for example: wireless mode, protection mode and etc. Parameter Description Wireless Mode 802.11 B/G/N mix – If you have a mix of 802.11b, 802.11g, and 802.11n wireless stations in your network, It is to maximize wireless compatibility with wireless access points and other wireless devices. - Page 26 country user located before importing. If you are in different country, you have to adjust the channel setting to comply the regulation of the country. Wireless Protection If you have a mix of 802.11b and 802.11g wireless stations in the network, it is recommended to enable the protection mechanism.
- Page 27 developed by Cisco used to improve the wireless performance with CCX compatible wireless devices. Check this box if you need to connect to CCX-compatible wireless devices. Turn on CCKM During normal operation, LEAP-enabled client devices mutually authenticate with a new access point by performing a complete LEAP authentication, including communication with the main RADIUS server.
-
Page 28: Qos
3.6 QoS This wireless network card provides QoS (Quality of Service) function, which can improve the performance of certain network applications, like audio / video streaming, network telephony (VoIP), and others. When you enable WMM (Wi-Fi MultiMedia) function of this network card, you can define the priority of different kinds of data, to give higher priority to applications which require instant responding. - Page 29 Direct Link Setup Enable Enable or disable direct link setup (DLS) function. This function will greatly improve the data transfer rate between WMM-enabled wireless devices. Please click ‘Apply’ button on the right of this check box after you check or uncheck this box, so corresponding settings in this window will be activated or deactivated respectively.
-
Page 30: Wps Configuration
3.7 WPS Configuration Wi-Fi Protected Setup (WPS) is the latest wireless network technology which makes wireless network setup become very simple. If you have WPS-enabled wireless access point, and you want to establish a secure connection to it, you don’t have to configure the wireless access point and setup data encryption. -
Page 31: Wps Setup - Pbc (Push-Button Configuration)
3.7.1 WPS Setup - PBC (Push-Button Configuration) 1. Push the ‘WPS’ button on your wireless access point (the button used to activate WPS standby mode), or use other way to start WPS standby mode as the instruction given by your wireless access point’s user manual. - Page 32 All access points found will be displayed. Please make sure the access point you wish to connect is displayed. If not, please click ‘Rescan’ few more times. You can also click ‘Information’ button to see the detailed information about selected access point. 5.
-
Page 33: Wps Setup - Pin
Sometime WPS may fail, and you can click ‘PBC’ button few more times to try again. When an access point is connected, you can click ‘Disconnect’ to disconnect your wireless network card from a connected access point, or select another WPS-enabled wireless access point, then click ‘Connect’ to establish connection to selected access point, if there are more than one WPS-enabled access point found. - Page 34 Click ‘PIN’ button now, and wait for few seconds to one minute. If a wireless access point with correct PIN code is found, you’ll be connected to that access point: - 30 -...
- Page 35 You may have to click ‘PIN’ for few more times to try again. If you still can not connect to access point by this way, please make sure the PIN code you provided to access point is correct. Note: This function is not support in the OS of Windows VISTA. - 31 -...
-
Page 36: About
By choosing this option, you can click the hyperlink to connect the PLANET website. You can also obtain basic information about the WNL-9320 such as the Driver, Utility and EEPROM Version. The MAC Address of the card is displayed in the screen as well. -
Page 37: Chapter 4 Appendix
This chapter provides solutions to problems usually encountered during the installation and operation of the adapter. Q. The PLANET WNL-9320 does not work properly. Ans.: 1. Right click on My Computer and select Properties. Select the device manager and click on the Network Adapter. - Page 38 can result in multiple singular BSSs being established, rather than a single BSS with multiple clients associated to it. 6. Check that the Network Connection for the wireless client is configured properly. If Security is enabled, make sure that the correct encryption keys are entered on both the Adapter and the access point.
-
Page 39: Glossary
2. Enable ‘Wireless Protection’ in ‘Advanced’ tab. 3. Try a lower TX Rate in ‘Advanced’ tab. 4. Disable ‘Tx Burst’ in ‘Advanced’ tab. 5. Enable ‘WMM’ in ‘QoS’ tab if you need to use multimedia / telephony related applications. 6. Disable ‘WMM – Power Save Enable’ in ‘QoS’ tab. 7. - Page 40 5. What is Infrastructure? An integrated wireless and wireless and wired LAN is called an Infrastructure configuration. Infrastructure is applicable to enterprise scale for wireless access to central database, or wireless application for mobile workers. 6. What is BSS ID? A specific Ad hoc LAN is called a Basic Service Set (BSS).
- Page 41 receiver, DSSS appears as low power wideband noise and is rejected (ignored) by most narrowband receivers. 13. What is Spread Spectrum? Spread Spectrum technology is a wideband radio frequency technique developed by the military for use in reliable, secure, mission-critical communication systems. It is designed to trade off bandwidth efficiency for reliability, integrity, and security.