Table of Contents
Advertisement
Advertisement
Table of Contents

Related Manuals for Fujitsu RC25


Summary of Contents for Fujitsu RC25
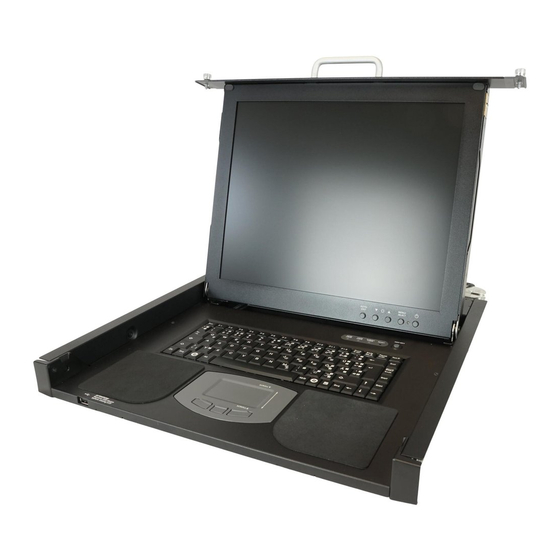
- Page 1 User's Manual 43cm/17" TFT Rack Console (RC25)
- Page 2 You shall not use this Product without securing the sufficient safety required for the High Safety Required Use. If you wish to use this Product for High Safety Required Use, please consult with our sales representatives in charge before such use. All Rights Reserved, Copyright FUJITSU LIMITED 2010...
-
Page 3: Table Of Contents
8-1. Installing the Rack Console ...................5 8-2. Installation Procedures ....................5 8-2-1. Assembling the Cable Management Part ..............5 8-2-2. Removing the RC25 Rack Mount Kits..............6 8-2-3. Installing the RC25 Rack Mount Kits...............7 8-2-4. Inserting the Rack Console ..................9 8-2-5. Installing the Cable Management Part ..............9 9. -
Page 4: Preface
1. Preface Thank you for purchasing the Rack Console RC25 (hereinafter called "the Rack Console", "this product", or "this device"). We believe that using this product will greatly improve the efficiency and functionality of your workspace. In addition, our compact slide module design saves space in comparison with previous layouts. -
Page 5: Packing List
We recommend keeping the box and packing material in which the Rack Console was purchased. They may be required if you move the device to another location. If something is missing from the package, contact your supplier or local Fujitsu representative/engineer. -
Page 6: Important Notices
Fujitsu maintenance representative. Only licensed engineers may repair the device. If any unlicensed user opens the device and makes incorrect repairs, electric shocks or fire may occur. -
Page 7: Rack Mount Instructions
Follow the instructions in the appropriate section in "13. Cleaning the Rack Console" when you clean this device. Keep this manual handy for reference with the device at all times. If you give the device to a third party, give the third party this manual as well. ... -
Page 8: Installation
8. Installation Note the safety information in "Important Notices". CAUTION 8-1. Installing the Rack Console Observe the specified environmental conditions when you use the CAUTION device. (See "15. Technical Specifications" for more information.) Avoid dust, humidity, and extreme temperatures. Installation may require two or more people in some situations. -
Page 9: Removing The Rc25 Rack Mount Kits
(1) Loosen the finger screws on the right and left front ends, and then remove the slide fixing brackets. (2) Remove the RC25 Rack Mount Kits. Push the fixing springs to unlock the RC25 Rack Mount Kits, and then pull them out backwards. -
Page 10: Installing The Rc25 Rack Mount Kits
RC25 Rack Mount Kits are at the same height unit (U). One RC25 Rack Mount Kit is for the left rear-side rack brace and the other is for the right. Find the letters LEFT or RIGHT on the side of each RC25 Rack Mount Kit and attach each RC25 Rack Mount Kit to the suitable side of the rack. - Page 11 Security lock. Front-side rack brace (2) Insert the unlocking tool into the opening in the Easy mounting-clip, disengage the lock, and then remove the RC25 Rack Mount Kit from the front-side rack brace.
-
Page 12: Inserting The Rack Console
(1) Secure the rear bracket of the cable management part assembled in "8-2-1. Assembling the Cable Management Part" (page 5) with the finger screw on the rear protrusions of the RC25 Rack Mount Kit on the left rear-side rack brace. Rear bracket ... -
Page 13: Connecting And Removing Cables
9. Connecting and Removing Cables 9-1 Connecting Cables (1) Turn off all devices that are connected to the RC25, except for hot-plug connections. (2) Connect the PS/2 or USB cable and monitor cable to the server and this device. (3) Plug the AC power cable connector into the power socket on this device. -
Page 14: Installing A Kvm Switch
To install a KVM switch, follow the instructions in the user's guide of the KVM Integration Kit. For more information on KVM switches that can be installed, contact the store where you purchased the device or a Fujitsu maintenance representative. When you install a KVM switch, make sure that the power cable of this... -
Page 15: Operations
1. Turn left two finger screws on the right and left sides of the front of the device. Pull this device while you hold the handle. Pull the device out until it locks into place. RC25 Rack Mount Kits Cable management part... - Page 16 2. Grip the monitor handle and open the monitor upward. 3. Press the power button to turn the monitor on. Fully open the monitor. If you cannot open the monitor upward with one hand, or if you feel that CAUTION the monitor is too heavy to open upward with one hand, open the monitor with both hands.
-
Page 17: Storing The Rack Console
11-2. Storing the Rack Console The device can be stored in the rack when the monitor and keyboard are not used. Slowly slide the Rack Console in and out of the rack. Press the monitor power button to turn off the monitor. Make sure that nothing is connected to the USB port on the front side of the device, and then hold the handle and slowly close the LCD monitor. - Page 18 Fixing spring Slide rail Stowing the Slide Module Finger screw Finger screws Storing the Rack Console...
-
Page 19: Adjusting The Monitor
11-3. Adjusting the Monitor The five buttons and one LED on the monitor are described in order: AUTO/EXIT DOWN UP MENU/SELECT Power Power button button button button button Power button: Press this button to turn on the power to the monitor, or, if the power is already on, to turn off the power to the monitor. -
Page 20: Basic Adjustment Procedure
11-4. Basic Adjustment Procedure The following figure shows the basic adjustment procedure. Select an item with the MENU/SELECT button. Main menu Press the Press the MENU/SELECT or button. button. The main menu is opened. Select the item to be adjusted. Press the AUTO/EXIT button to cancel the adjustment. -
Page 21: Adjustment Items
11-5. Adjustment Items Symbol Item Adjustment details Brightness Adjusts the screen brightness and contrast. /Contrast Adjusts the H-position (horizontal position), V-position Image adjust (vertical position), clock (width), and phase of the screen. Adjusts the colour of the screen. Allows setting a colour Colour value or adjusting the hue for red, green, and blue. -
Page 22: Notes On The Lcd Display
11-7. Notes on the LCD Display While the on-screen display may shift, blink, or otherwise be disturbed just after the power is turned on or the OS starts up/shuts down, this does not indicate a machine failure, and the device may be used normally. While 1280 ... -
Page 23: Keyboard Operations
11-9. Keyboard Operations Using the Fn key on the compact layout keyboard of this device allows functions equivalent to a full keyboard. By pressing both the Fn key and a key with underscored characters, you can use the function indicated by the characters. (For example, Scr Lk, Prt Sc, and SysRq) ... -
Page 24: Pointing Device Operations
11-10. Pointing Device Operations When you operate the pointing device, touch or tap lightly on the touchpad surface. Moving the pointer : Slide your finger lightly on the touchpad surface in the direction you want to move the cursor. Single clicking : Lightly tap the touchpad surface once, or click the left button once. -
Page 25: Hot-Key And Reset Switches
11-11. Hot-Key and Reset Switches Hot-key switch Outputs the Make/Break code for the Ctrl key twice. When a KVM switch is installed, pressing this switch enables the hot-key mode. Reset switch Resets the keyboard and pointing device on this device. Hot-key switch Reset switch... -
Page 26: Troubleshooting
12. Troubleshooting This chapter explains how to solve some problems you may encounter while you use this product. 1. No image is displayed on the monitor Symptom Cause Action The power LED is out. The power cable is incorrectly Connect the power cable connected. - Page 27 2. The monitor display looks strange Symptom Cause Action Grid screen that flickers. The monitor is unfocused. Adjust the focus of the monitor. Vertical stripes are visible. Monitor adjustment is not Adjust the clock, and then adjust correct. the focus. Display is larger or The display position setting is Adjust the clock, and then adjust...
-
Page 28: Cleaning The Rack Console
14. Environmental Protection Environmentally-friendly product design and development This product has been designed in accordance with the Fujitsu standard for "environmentally friendly product design and development". This means that key factors such as durability, selection and labeling of materials, emissions, packaging, ease of dismantling and recycling have been taken into account. - Page 29 Further information can be found at http://ts.fujitsu.com/recycling. Details regarding the return and recycling of devices and consumables within Europe can also be found in the "Returning used devices" manual, via your local Fujitsu branch or from our recycling center in Paderborn: Fujitsu Technology Solutions...
-
Page 30: Technical Specifications
50/60 Hz Rated current 100V/0.65A, 240V/0.5A External Dimensions 15 mm (W) 708 to 786 mm (freely RC25 Rack Mount Kit adjustable) (D) 43.4 mm (H) Main unit (including the handle, excluding the rear protrusions) 486 mm 444 mm 42.5 mm... - Page 31 Keyboard Layout English Number of keys Connector PS/2 or USB (Select one.) Pointing Device Method Static touchpad Resolution 220 cpi (character/inch) Additional function Scrolling function Connector PS/2 or USB (Select one.) Number of buttons Other Functions Virtual Media port Used for connecting with the corresponding port on an Avocent KVM switch USB1.1 High speed Certified Standards...
- Page 32 Published by FUJITSU LIMITED The content of this manual may be modified without prior notice. Fujitsu bears no responsibility for infringement of patent or other rights of third parties ascribable to the use of data in this manual.