Table of Contents
Advertisement
Quick Links
Advertisement
Table of Contents

Related Manuals for AEG LAVAMAT REGINA 2551F


Summary of Contents for AEG LAVAMAT REGINA 2551F
- Page 1 LAVAMAT REGINA 2551F Washing machine User information...
- Page 2 Dear customer, Please read this User Information carefully and keep it to refer to at a later date. Pass this User Information on to any subsequent owner of the appli- ance. The following symbols are used in the text: Safety instructions Warning: Notes that concern your personal safety.
-
Page 3: Table Of Contents
Contents Operating Instructions ........Safety . - Page 4 Child safety device..........26 Cleaning and maintenance .
-
Page 5: Operating Instructions
Operating Instructions 1 Safety Prior to using for the first time • Follow the ”Instructions for installation and connection”. • If the appliance is delivered in the winter months when there are mi- nus temperatures: Store the washing machine at room temperature for 24 hours before using for the first time. -
Page 6: General Safety
General safety • Repairs to the washing machine must only be carried out by qualified service engineers. • Never use the washing machine if the mains cable is damaged; or if the control panel, work top or plinth area is damaged such that the inside of the appliance is freely accessible. -
Page 7: Description Of The Appliance
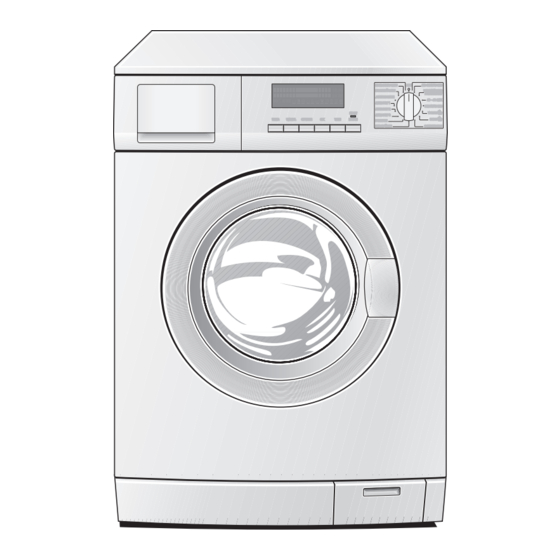
Description of the appliance Detergent dispenser Control panel drawer Rating plate (behind door) Three screw feet (height adjustable); Plinth flap/ rear left: Drain pump Automatic foot Control panel Programme knob and Display On/Off dial Function keys START/PAUSE key What is shown in the display Information field, shows the current settings 12.45 COTTON... -
Page 8: Program Overview
Program overview Options Times Spin speed Program ENERGY SAVING • • • • • • • • • • COTTONS • • • • • • • • • • • • LINEN/EASY-CARES • • • • • • • •... - Page 9 Care Use/Features symbols Energy-saving program at 60 °C for lightly to normally soiled whites/coloureds made of cotton/linen. Energy-saving program at 95 °C for normally to heavily soiled whites/coloureds made of cotton/linen. General program for whites/coloureds made of cotton/linen as well as for easy-care I K N mixed fibres and synthetics.
-
Page 10: Overview Of Terms
Overview of terms The English terms used in this User Information booklet correspond to the German/French names below that are to be found at your appli- ance’s control panel. Programme selector Buttons AUS/ARRET TEMP. TEMP.C° KOCHWÄSCHE/ U/MIN. COTTONS BLANC T/MIN. BUNTWÄSCHE/ OPTION OPTION... -
Page 11: Prior To Using For The First Time
Prior to using for the first time Switching on the appliance for the first time - setting the language The display is set to German as standard in the factory. Important: If the display does not show the menu for setting the lan- guage when the appliance is switched on, the appliance has been switched on before. -
Page 12: Setting The Time
Setting the time So that the time and the end of the program are correctly displayed, please check the display and set the current time if necessary. To do this, please see the section “Setup/Clock”. Carrying out a wash program prior to first use In order to remove any residues from the drum and water container which may have been left during manufacturing, perform the first wash cycle without any washing in the machine. -
Page 13: Running A Washing Cycle
Running a washing cycle Opening the door/loading washing 1. To open the door: pull the door by the handle. 2. Unfold washing and load it loosely into the machine. Mix large and small items. Important: Do not get any washing caught between the door and the rubber seal. - Page 14 1. Pull the detergent dispenser drawer out as far as the stop. 2. Add the detergent/additives. 3. Push the drawer in fully. In-wash stain treatment/ Washing powder/tablets tablets for the main wash Washing powder/tablets Softeners/ for the pre-wash wash-care products or for water softener to preserve the shape of garments/...
-
Page 15: Switching On The Appliance/Selecting A Program
Switching on the appliance/selecting a program Select the program using the program knob, e.g., LINEN/ EASY-CARES. By selecting a program, you switch the appliance on at the same time. – The display lights up and shows the program set, the current time and the esti- mated end of the cycle. -
Page 16: Setting Options
Setting options Options can be added to a wash cycle that has already been selected. Press the OPTION key. The display shows the symbols for the options. PREWASH Pre-washes at about 30 °C before the main wash cycle, which follows automatically. SENSITIVE Enhanced rinse action through an additional rinse cycle togeth- er with decreased drum movement (improved fabric care). -
Page 17: Prewash, Sensitive, Stain, Night Cycle
Prewash, Sensitive, Stain, Night Cycle 1. Press the OPTION key repeat- 12.45 LINEN/EASY CARE edly until the desired sym- 14.37 Prewashing bol flashes, e. g., aýýýýýVýSýFýLýBýaýaýaýa PREWASH (With each press of the key, the next TEMP. C° U/MIN. OPTION ZEIT TEMP. -
Page 18: Setting Times
Setting times Shortened cycles and the delay of the start time can be set for a wash cycle that has already been selected. Press the TIME key. The display shows the symbols for TIME SAVING and DELAY START. TIME SAVING: SHORT or VERY SHORT Shortened wash cycle for lightly soiled washing. -
Page 19: Delay Start
Delay Start 1. Press the TIME key repeatedly, until the DELAY START symbol flashes. 2. Press the OK key. In the display, “Start in 0 min” is displayed. 3. Press the TIME key repeated- 12.45 Delay Start ly, until the display shows 18.37 Start in 4h the desired period by which... -
Page 20: Program Progress
Program progress The display indicates the 12.45 LINEN/EASY CARE stage of the program that is 14.37 Washing currently being performed as 50C 800 aýýýýýaýaýaýaýaýaýaýaýa well as the time of the end of the program. TEMP. C° U/MIN. OPTION ZEIT TEMP. C° T/MIN. -
Page 21: Washing Cycle Complete/Removing The Washing
Washing cycle complete/Removing the washing At the end of the cycle a long acoustic signal sounds 3 times (when the SOUND setting is NORMAL or LOW) and the messages “Cycle ended” and “Door openable” appear alternately in the display. 1. Open the door and remove the washing. 2. - Page 22 Setting the Memory Example: Program position 12.45 LINEN/EASY CARE MEMORY 1 is to be given the 14.37 Cycle end at following program combina- 40C 800 aýýýýýVýaýaýaýaýaýaýaýa tion: LINEN/EASY- CARES 40 °C, 800 rpm, with TEMP. C° U/MIN. OPTION ZEIT TEMP. C° T/MIN.
-
Page 23: Volume
Volume The volume of the acoustic signal can be selected. 1. Turn the program knob to any program and press the OPTION key re- peatedly until the SETUP symbol flashes. 2. Press the OK key. 3. Press the OPTION key repeatedly, until VOLUME is shown in the display. 4. -
Page 24: Language
Language 1. Turn the program knob to any program and press the OPTION key repeatedly until the SETUP symbol flashes. 2. Press the OK key. 3. Press the OPTION key repeatedly, until the display shows LANGUAGE. 4. Press the OK key. 5. -
Page 25: Contrast And Brightness
Contrast and brightness 1. Turn the program knob to any program and press the OPTION key re- peatedly until the SETUP symbol flashes. 2. Press the OK key. 3. Press the OPTION key repeatedly, until the display shows CONTRAST or or BRIGHTNESS. -
Page 26: Child Safety Device
Child safety device When the child safety device is set, the door can no longer be closed. Setting the child safety device: Use a coin to turn the knob (on the inside of the door) in a clockwise di- rection as far as it will go. Warning! The knob must not be sunk-in after being set, otherwise the child safety device is not active. -
Page 27: Cleaning And Maintenance
Cleaning and maintenance Important! Do not use furniture care products or aggressive cleaners to clean the appliance. Wipe control panel and body with a damp cloth. Cleaning procedure If you plan to wash mainly at low temperature, you should run a hot programme from time to time. -
Page 28: What To Do If
Door and rubber collar Regularly check whether deposits or foreign bodies are present in the folds of the rubber collar or on the inside of the glass door. Clean the glass in the door and the rubber collar regularly. What to do if... Remedying small malfunctions yourself If while the appliance is operating a short acoustic signal sounds 3 times and one of the following messages appears in the display:... - Page 29 Problem Possible cause Remedy Tap turned off. Turn the tap on. Filter in the screw con- Turn off the water tap. Un- Display shows: “No inco- nection of the inlet hose screw hose, take out filter ming water/Check tap & is blocked.
-
Page 30: If The Wash Results Are Not Satisfactory
Problem Possible cause Remedy Conditioner insert in the Fabric softener not rinsed Clean detergent dispenser compartment for addi- compartment for ad- drawer, insert conditioner in- tives is not correctly at- ditives is filled with water. sert firmly. tached or is blocked. Wait until the display shows Door locked. -
Page 31: Carrying Out An Emergency Drain
There are white residues on the washing. • This is due to the insoluble ingredients in modern detergents. They are not caused by insufficient rinsing. Shake or brush the washing. If possible turn the washing inside out before washing. Check your choice of detergent. Especially with dark colours it is advisable to use liquid detergents. -
Page 32: Drain Pump
Drain pump The drain pump is maintenance-free. It is only necessary to open the pump cover if there is a malfunction and water is no longer being pumped out, e. g. if the pump wheel is blocked. Please make sure before loading the washing that there are no foreign bodies in the pockets or caught between the washing. -
Page 33: Disposal
Disposal Packaging material The packaging materials are environmentally friendly and can be recy- cled. The plastic components are identified by markings, e.g. >PE<, >PS<, etc. Please dispose of the packaging materials in the appropriate container at the community waste disposal facilities. Old appliance The symbol on the product or on its packaging indicates that this... -
Page 34: Technical Data
Technical data This appliance conforms with the following EU Directives: – 73/23/EEC dated 19.02.1973 Low Voltage Directive – 89/336/EEC dated 03.05.1989 EMC Directive inclusive of Amending Directive 92/31/EEC – 93/68/EEC dated 22.07.1993 CE Marking Directive Height x Width x Depth 850 x 598 x 603 mm Depth when door is open 980 mm... -
Page 35: Installation And Connection Instructions
Installation and connection instructions 1 Safety information for the installation • This washing machine cannot be built-in. • Before using for the first time, check the appliance for damage sus- tained while it was being transported. Do not under any circumstanc- es connect an appliance that is damaged. -
Page 36: Installing The Appliance
Installing the appliance Transporting the appliance Warning! The washing machine is very heavy. Risk of injury. Be careful when lifting. • Do not lay the appliance on its front nor on its right side (as seen from the front). Electrical components may get wet. •... - Page 37 3. Remove both plastic caps sideways. Special spanner A and sealing caps B (2 off) and C (1 off) are supplied with the appliance. 4. Remove screw D with its compres- sion spring using special spanner A. 5. Turn sealing cap C upside down as shown in the illustration.
-
Page 38: Where To Install
Where to install Important! The appliance must not be used in a room where there is a danger of frost. Frost damage or impaired operation! Frost damage is not covered by the warranty. • The surface on which the appliance is to be installed must be firm and level. -
Page 39: Electrical Connection
The four feet of the appliance are pre-adjusted. Large degrees of unevenness can be compensated for by individually ad- justing the height adjustable screw feet. Use the special spanner supplied to do this. Important! Do not use pieces of wood, cardboard or such like to lev- el out unevenness in the floor, but adjust the height adjustable screw feet instead. -
Page 40: Water Inflow
Water inflow A 1.50 m long pressure hose is supplied with the appliance. If a longer water inlet hose is required, only original hoses are to be used. The Customer Care Department stocks hose kits of different lengths. Sealing rings are either inserted in the plastic nuts of the threaded hose fitting or are included as spare parts . -
Page 41: Water Drainage
Water drainage The maximum permitted difference between the height of the surface on which the appliance is installed and the water outlet is 1 metre. Only original hoses may be used to extend hoses. (A maximum of 3 m laid on the floor and then 80 cm vertically). The Customer Care Depart- ment stocks outlet hoses of different lengths. -
Page 42: Customer Services
Customer Services Servicestellen Points de Service Servizio dopo vendita 5506 Mägenwil/Zürich 1028 Préverenges 6916 Grancia Industriestrasse 10 Le Trési 6 Zona Industriale E 9000 St. Gallen Vonwilstrasse 15 4127 Birsfelden Hauptstrasse 52 8604 Volketswil Hölzliwisenstrasse 12 6032 Emmen Buholzstrasse 7000 Chur Comercialstrasse 19 3063 Ittigen/Bern Ey 5... -
Page 43: Service
Service In the event of technical faults, please first check whether you can remedy the problem yourself with the help of the operating instruc- tions (section “What to do if…”). If you were not able to remedy the problem yourself, please contact the Customer Care Department or one of our service partners. - Page 44 USD 14 billion in more than 150 countries around the world. AEG Hausgeräte GmbH Postfach 1036 D-90327 Nürnberg http://www.aeg-electrolux.de © Copyright by AEG 105 176 367-02-020805-04 Subject to change without notice...