
Related Manuals for Korg EC350


Summary of Contents for Korg EC350
- Page 1 Digital Piano Piano Numérique Digital-Piano Pianoforte Digitale ENGLISH FRANÇAIS DEUTSCH ITALIANO User’s manual Mode d’emploi Bedienungseinleitung Manuale di istruzioni...
- Page 3 English User’s Manual Français Mode d’emploi Deutsch Bedienungseinleitung Italiano Manuale di istruzioni...
- Page 5 Digital Piano User’s Manual...
- Page 6 Connect the equipment into an outlet on a cir- equipment. If something does slip into the cuit different from that to which the receiver is equipment, unplug the AC adapter from the connected. wall outlet. Then contact your nearest Korg...
- Page 7 These products are warranted by the Korg distributor RECORDER DATA only in each country. Any Korg product that is not sold with the manufacturer’s or distributor’s war- Since it is possible for the contents of memory to ranty, or without a serial number, cannot benefit...
-
Page 8: Table Of Contents
Using the EC350 as a multitimbral tone generator ....... . . - Page 9 Program Change ............38 Control Change .
-
Page 10: Introduction
Stereo Concert Grand Piano. You can use the Layer function to simulta- neously play two sounds. Effects. The EC350 provides built-in digital effects that can simulate the natural ambience of a concert hall (Reverb) and add richness to the sound (Chorus). Three pedals. - Page 11 MIDI allows two or more devices to control or be controlled by each other, and also allows you to use the EC350 as a 4 or 16-part multitimbral tone generator. EC350 includes a powerful, 35 + 35 Watt Powerful integrated amplification.
-
Page 12: Panels
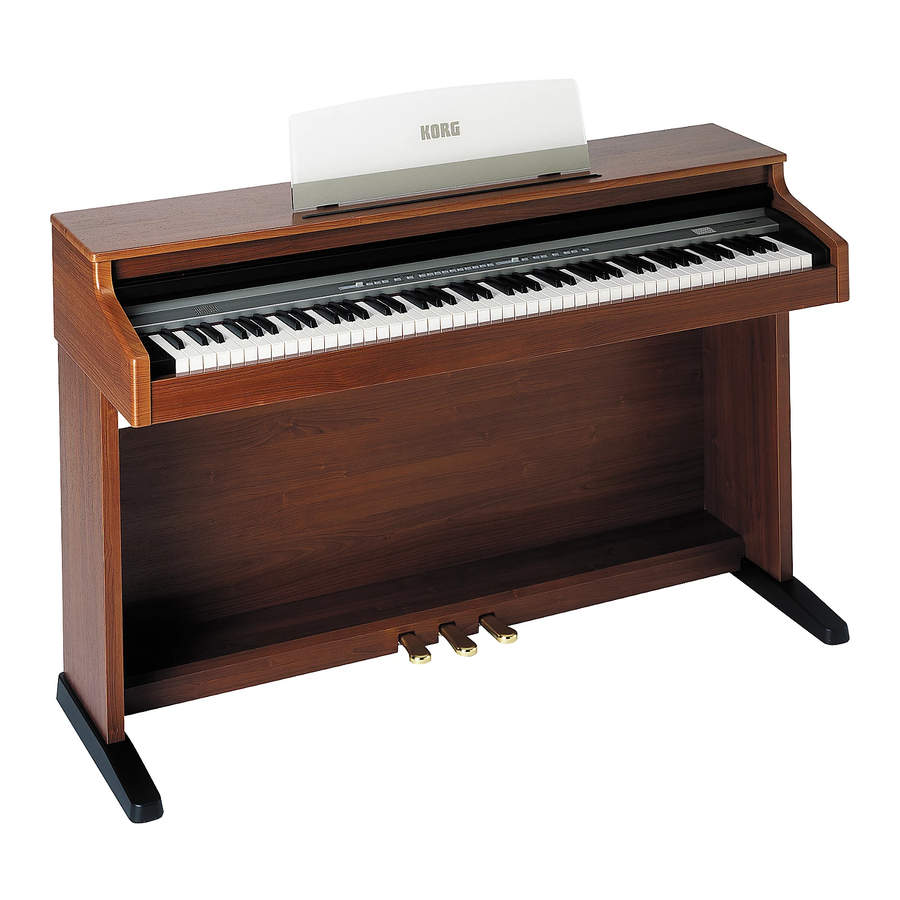
CHAPTER Panels Front panel 1 POWER switch: On/off switch. See page 15. 2 PHONES connectors: Connect one or two pairs of headphones to these jacks, located underneath the keyboard. See page 14. 3 MASTER VOLUME slider: Adjusts the volume for the Internal Speakers, the Outputs and the Phones connectors. - Page 13 5 CHORUS button: Turns the chorus on/off. This makes the sound richer. See page 19. 6 TOUCH button: Lets you select the keyboard sensitivity. See page 24. 7 TRANSPOSE/FUNCTION button: Multifunction button to be used in order to modify the transpose and fine tuning functions, to program the MIDI parameters and to carry on other adjustments.
-
Page 14: Rear Panel
Warning: Change the setting of the PC/MIDI switch only when the instrument is turned off. 3 PC TO HOST connector: This connector allows the EC350 to be directly con- nected to a personal computer, provided it is fitted with a serial interface. A dedi- cated software driver may be needed, and can be freely downloaded from our web site. - Page 15 (With a hi-fi system use the AUX or TAPE connec- tors, not the PHONO connector). To amplify the EC350 in mono, connect the single L/MONO connector. Use the MASTER VOLUME slider to set the output volume.
-
Page 16: Before You Begin
CHAPTER Before you begin Opening the keyboard cover Lightly lift the center of the front edge and support it as you slide the cover gently away from yourself. Raising the music stand Raise the music stand and use the two stoppers located at the back to prevent it from falling over. -
Page 17: Turning The Instrument On
Note: It is always better to start with a low volume and then increase gradually. Listening to the Demo The EC350 contains 30 pre-recorded demo songs. Listen to them to experience the rich sound and expressive potential of this instrument. - Page 18 Korg Original (M. Tem- F. Chopin: Fantasie- lune pia): Jumper Impromptu Op.66 E.PIANO 2 Korg Original (M. Tem- Korg Original (M. Tem- J.S. Bach: Prelude in C pia): Lullaby for a Little pia): All the Ones You major (from Das Wohl- Star Don’t Know...
- Page 19 Button Bank 1 (1-10) Bank 2 (11-20) Bank 3 (21-30) STRINGS Korg Original (M. Tem- J.S. Bach: Air on the G P.D. Paradisi: Toccata in /PAD pia): Old Feather Blues string A major CHOIR Korg Original (M. Tem- Korg Original (M. Tem- Korg Original (M.
-
Page 20: Basic Functions
CHAPTER Basic functions Playing a single sound (Single mode) You can select a sound from the thirty sounds supplied with the instrument. Press one of the sound selection buttons in order to select a sound. The LED on the button you pressed will light. Use the SOUND BANK button to select one of the three available banks (1-10, 11- 20, 21-30). -
Page 21: Choosing The Reverb And The Chorus
Choosing the reverb and the chorus The EC350 has two effects: reverb and chorus. The reverb simulates the sound reverberation in a room, while the chorus simulates a modulating effect that makes the sounds richer. -
Page 22: Using The Pedals
Hold down the REVERB or CHORUS button, and press either the PIANO 1/L, PIANO 2/M, or E.PIANO1/H sound selection button to select the reverb or chorus depth. Button Reverb depth Chorus depth PIANO 1/L Light reverb Light chorus PIANO 2/M Normal reverb Normal chorus E.PIANO 1/H... -
Page 23: The Metronome
When the pedal is assigned to the desired sound(s), release the TRANSPOSE/ FUNCTION button. The metronome The EC350 incorporates a metronome, with which you can set the tempo during practice. Note: When the instrument is turned on, the following metronome parameters are automatically reset to their default status. - Page 24 Numeric tempo input. In some cases, you may require an exact tempo (like 127 BPM). It is possible to enter a precise tempo, using the numeric input. Hold down the METRONOME button. Use the keyboard to input the three-digit tempo value (insert a “0” before a two- number value).
- Page 25 While the metronome is playing, hold down the METRONOME button, then press the VIBES/GUITAR sound selection button. The LED on the button will light, and a bell sound will be heard on the first beat of the bar. To return to the normal accent, hold down the METRONOME button and press the HARPSI/CLAV sound selection button to switch on the LED on the HARPSI/ CLAV button.
-
Page 26: Other Functions
CHAPTER Other functions Touch settings The keyboard sensitivity, or touch, can be programmed. Keep the TOUCH button pressed, and press the appropriate button to select one of the available touch settings. Strong ÿ Light Button Touch sensitivity Note Standard loudness PIANO 1/L Light. -
Page 27: Transpose
C7 key. The TRANSPOSE/FUNCTION LED will turn off. Fine tuning In order to adapt the EC350 pitch to that of another instrument, you can adjust the pitch in steps of 0.5 Hz over a range of A4 = 427.5 ~ 452.5 Hz. The standard tuning is A4 = 440 Hz. -
Page 28: Selecting A Temperament
There are numerous classical compositions that were composed using tempera- ments that differ from the “equal temperament” commonly used today.In order to reproduce the original sound of such compositions, the EC350 provides Kirnberger and Werckmeister classical temperaments, in addition to the equal temperament, allowing you to select from a total of three temperaments. -
Page 29: Resetting The Memorized Settings
range slightly flatter than equal temperament, and the upper range slightly sharper. This is how an acoustic piano is normally tuned by professional tuners. Resetting the memorized settings Data memorized in the internal memory when turning the instrument off, can be deleted, to reset all parameters to their original (default) values. -
Page 30: The Recorder
CHAPTER The recorder The EC350 contains a built-in recorder that lets you record and playback your per- formance as easily as using a tape recorder. You can record your playing on two parts. These parts can be played back simultaneously to create a single song, or used to record two separate songs. -
Page 31: Recording A Layer
When the START/STOP button is pressed, recording will begin after a two-measure count. During recording, the START/STOP LED will blink in time with the time signature, a longer light on the first beat, and a shorter one on other beats. Note: If you wish to record with the metronome, you can turn it on using the method already described. -
Page 32: Second-Pass Recording
If you press the PAUSE button, recording will pause at that location, and the PAUSE LED will light. To resume recording, press the REC button, press the PART1 (or PART2) button, then play on the keyboard. Note: Recording may not always begin correctly from the paused location. Second-pass recording After recording, you can enter recording again, and start overdubbing on the already recorded data of a part. -
Page 33: Erasing Recorded Data
While playback is stopped, hold down the TRANSPOSE/FUNCTION button, and press either the PART 1 or PART 2 button. The LEDs of the TRANSPOSE/FUNC- TION button and either the PART 1 or PART 2 buttons will blink, and the EC350 will be ready to erase recorded data. - Page 34 Simultaneously press and hold the TRANSPOSE/FUNCTION and the START/ STOP button. The amount of performance data already recorded will be shown by how many of the first five sound selection button are turned on. As more perfor- mance data is recorded, more of the LEDs will light. Amount of recorded data If during recording, the amount of available space decreases to less than 10 percent of the memory capacity (when less than about 1,400 notes can be recorded, or when...
-
Page 35: Connecting External Audio Devices
Warning: Avoid connecting the output of a power amplifier to these inputs! Connecting to an external amplification system Use the OUTPUT connectors, if you like to connect your EC350 to a high-quality mixer, stereo hi-fi, or a couple of active monitors. When using a stereo hi-fi, connect the OUTPUTs to the AUX or TAPE inputs (never use the PHONO inputs). -
Page 36: Turning The Internal Speakers On Or Off
Turning the internal speakers on or off Whether you prefer listening to the internal speakers or to an external amplification system, you can turn the internal speakers on or off. Just insert a jack into one of the headphone connectors underneath the keyboard to turn the speakers off. Remove the jack to turn the speakers on again. -
Page 37: Midi
EC350, and use a sequencer to create complex musical pieces. When you use the EC350 keyboard or pedal, or select a sound, the notes, pedal acti- vation and change in sound are transmitted to another instrument, or are recorded by a sequencer. -
Page 38: Selecting The Midi Base Channel
To connect the EC350 to a computer, you need a MIDI interface for the computer, sequencing or musical notation software, and two standard MIDI cables. Connect the EC350 MIDI OUT connector to the MIDI IN connector of the computer. Con- nect the EC350 MIDI IN connector to the MIDI OUT connector of the computer. -
Page 39: Using The Ec350 As A Multitimbral Tone Generator
Using the EC350 as a multitimbral tone generator When EC350 is controlled from an external MIDI device, it can work as a 4- or 16- part multitimbral tone generator. You can select a different sound on each of the 4 or 16 MIDI channels. -
Page 40: Local On/Off
MIDI data and not play the internal sound (Local Off). Local Off should be chosen when you wish to use the EC350 as a mute keyboard, to play another instrument. It should be chosen also when EC350 is connected to a sequencer via its MIDI IN and MIDI OUT connectors. - Page 41 EC350, as shown in the following table. Only Program Change (PC) num- bers in the range 0–29 have effect on the EC350, while other numbers (30-127) are ignored.
-
Page 42: Control Change
Control Change message is sent to a con- nected external MIDI device. At the same time, EC350 can receive a Control Change message from an external MIDI device connected to its MIDI IN, to control the damper pedal, volume adjustment, and other data. -
Page 43: Pc To Host Settings
Here is how to save recorded data on an external MIDI data filer. Use a MIDI cable to connect the EC350 MIDI OUT to the MIDI IN of the data filer. Prepare the data filer to receive MIDI data. On the EC350, hold down the TRANSPOSE/FUNCTION button, and press the VIBES/GUITAR sound selection button. - Page 44 Here is how to save the memorized parameter data of the EC350. Use a MIDI cable to connect the EC350 MIDI OUT to the MIDI IN of the data filer. Prepare the data filer to receive MIDI data. On the EC350, hold down the TRANSPOSE/FUNCTION button, and press the VIBES/GUITAR sound selection button.
-
Page 45: Assembling The Stand
CHAPTER Assembling the stand Caution: At least two persons are needed to assemble the stand. • When placing the piano on the stand, be careful not to pinch your hand. • Be sure that the correct parts are assembled in the correct orientation and position, and follow the steps in order. - Page 46 List of parts × 1 Leg panel - Right × 1 Leg panel - Left × 1 Pedal “beam” × 1 Rear panel × 1 Piano (main body) × 1 Power Supply × 9 Wood Screws × 4 Long bolts ×...
- Page 47 Lay the two cushion sheets included in the packaging on the ground, and put the left leg panel (B) on it, with the metal guide facing upwards. Fit the pedal beam (C) and the left leg panel (B) together, so that pedal ends direct to the front (see figure).
- Page 48 Place the stand, which is now partially assembled, on the ground, with the outer part of the leg panel resting on the floor. Fit the right side panel (A) to the pedal beam (C). Insert two long bolts (b) into the two holes at the end of the pedal beam, from the inside of it, and tighten up the bolts.
- Page 49 If you like, turn the stand over, with the outer part of the right leg panel resting on the floor, and, after removing the protective tape, fix the power supply (F) with the Velcro strip located under the pedal beam, as shown in the diagram. Fix power sup- ply cables with the small clamps located under the pedal beam, as shown in the dia- gram.
- Page 50 Lift the piano and fix it to the stand, placing the two bolts, sticking out of the bottom part, into the back of the holes of the stand’s metal guides. Place the remaining two short bolts (c) in the two holes underneath the piano. Tighten up the four bolts.
- Page 51 Connect the pedal and power cables to the corresponding piano connectors. Fix the power supply cable with the dedicated cable-holder, as shown in the diagram. Place the piano in the location where it will be played. Note: Be careful not to pinch the power cable under the piano feet. Regulate the screwable pedal-adjuster (d) underneath the pedals, so that it touches the ground.
-
Page 52: Check After Assembly
If this occurs, re-tighten the screws and bolts. If you need to packup the EC350, reverse the assembly order by Disassembly. which the piano was attached to the stand and the stand was assembled. After disas- sembly, save the screws and other parts so that no parts are lost. -
Page 53: Appendix
ON (or turn the instrument off and then on again). Polyphony The EC350 contains sampled sounds, which have been recorded, analyzed and pro- cessed from the actual sounds of the original musical instruments. These sounds usually consist of one or more different samples reproduced by pressing a key. Each sample is played back by a single oscillator. -
Page 54: Memorized Data
Please refer to the table on page 18 for more information about the number of oscil- lators used by each sound. Memorized data When turning the instrument off, most parameter settings are preserved in the inter- nal memory. Some parameters are reset when turning the instrument on. Memorized parameters Layered sounds volume balance MIDI base channel... -
Page 55: Technical Specifications
55 × 19 × 34.5 inch (1395 × 482 × 878 mm), excluding music Dimensions (W x D x H) stand Weight 115.5 lbs (52.4 kg) Color Dark Rosewood, Cherry Sounds processed with INFINITY™. Korg reserves the right to change the specifications without notice. Appendix... -
Page 56: Control Panel Shortcuts
Control panel shortcuts …while pressing this one HARPSI/ VIBES/ PIANO 1 PIANO2 E.PIANO 1 E.PIANO 2 ORGAN 1 CLAV GUITAR Keep this button pressed… REVERB Depth = Low Depth = Med. Depth = High CHORUS Depth = Low Depth = Med. Depth = High TOUCH Light... - Page 57 Piano numérique Mode d’emploi...
- Page 58 Position de l’instrument dans l’instrument, déconnecter l’adaptateur L’instrument ne doit jamais être installé : AC de la prise secteur et contacter le reven- deur Korg ou le magasin le plus proche. • Aux rayons directs du soleil • Dans des milieux extrêmement froids ou MARQUE CE POUR L’HARMONISA-...
- Page 59 Pour empêcher toute perte accidentelle du con- dans chaque pays. Ces produits sont garantis par tenu de la mémoire, on conseille de sauvegarder le distributeur KORG dans le pays où ils ont été sur un dispositif externe les données les plus vendus. Le fabricant/distributeur décline toute importantes.
- Page 60 Sélectionner le canal de base du MIDI ......... . . 88 Utiliser le EC350 en tant que générateur de sons multimbres ......89 Réception sur 4 ou 16 canaux MIDI .
- Page 61 Program Change ............91 Control Change .
-
Page 62: Introduction
“Stereo Concert Grand Piano”. La fonction Layer permet de jouer deux timbres ensemble. Effets. Le EC350 est doté d’effets numériques qui simulent une salle de concert (Reverb) et étoffent le timbre (Chorus). Pédale de résonance Damper. La pédale Damper du EC350 correspond à la pédale de résonance ou “Forte”... - Page 63 Le protocole MIDI permet à deux dispositifs (ou plus) de piloter ou d’être pilotés l’un l’autre ; le EC350 peut ainsi fonctionner comme un générateur sonore à 4 ou 16 parties multitimbres.
-
Page 64: Faces Avant Et Arrière
CHAPITRE Faces avant et arrière Face avant 1 Interrupteur POWER : Interrupteur de mise sous/hors tension de l’instrument. Voir page 67. 2 Bornes PHONES : Permet de brancher un ou deux casques à ces bornes situées en- dessous du clavier. Voir page 66. 3 Curseur MASTER VOLUME : Règle le volume des Haut-parleurs Internes, des bornes Output et Phones. - Page 65 5 Bouton CHORUS : Active/coupe l’effet de Chorus. Enrichit le son. Voir page 71. 6 Bouton TOUCH : Sélectionne la courbe de dynamique du toucher du clavier. Voir page 76. 7 Bouton TRANSPOSE/FUNCTION : Bouton multifunctions que l’on utilise pour modifier la transposition et l’accordage fin, pour programmer les paramètres MIDI et effectuer d’autres réglages.
-
Page 66: Face Arrière
2 Sélecteur PC/MIDI : Cet interrupteur sélectionne alternativement les bornes MIDI ou la borne PC (TO HOST). 3 Borne PC TO HOST : Cette borne permet de brancher le EC350 directement à un ordinateur, à condition que celui-ci soit doté d’une interface série. Parfois, il faut installer un logiciel dédié. - Page 67 être branché à ces bornes. (Avec un système hi-fi, utilisez les bornes AUX ou TAPE et non pas la borne PHONO). Pour amplifier votre EC350 en mono, branchez-vous à la borne individuelle L/MONO. Pour réglez le volume de sortie, utilisez le curseur MASTER VOLUME.
-
Page 68: A Lire En Premier
CHAPITRE A lire en premier Ouvrir le clavier Positionnez la main à mi-clavier et soulevez le couvercle avec précaution. Posez-le dou- cement. Monter le pupitre Soulevez le pupitre et posez-le sur les deux arrêts prévus en face arrière, de façon à ce qu’il ne tombe pas. Brancher les casques Pour jouer ou s’exercer la nuit, ou pour ne pas déranger d’autres personnes présen- tes dans la même pièce, vous pouvez utiliser un ou deux casques de qualité... -
Page 69: Mettre L'instrument Sous Tension
Mettre l’instrument sous tension Introduire la fiche DC de l’adaptateur AC fourni dans la borne DC du EC350 et ensuite connecter la fiche AC à la prise secteur ; appuyer sur l’interrupteur POWER. DC IN Lorsque l’instrument est sous tension, les témoins du tableau de commande s’allument. - Page 70 Korg Original (M. Tem- F. Chopin: Fantasie- lune pia): Jumper Impromptu Op.66 E.PIANO 2 Korg Original (M. Tem- Korg Original (M. Tem- J.S. Bach: Prelude in C pia): Lullaby for a Little pia): All the Ones You major (from Das Wohl- Star Don’t Know...
- Page 71 Bouton Banque1 (1-10) Banque 2 (11-20) Banque 3 (21-30) ORGAN 2 F. Mendelssohn-Bar- Korg Original (M. Tem- F. Chopin: Valse tholdy: Wedding March pia): Sunflowers no.6 in D -major Op.64, no.1 STRINGS Korg Original (M. Tem- J.S. Bach: Air on the G P.D.
-
Page 72: Fonctions De Base
CHAPITRE Fonctions de base Jouer un timbre (mode Single) Sélectionner l’un des trente timbres à disposition. Appuyez sur l’un des boutons de sélection des timbres. Le témoin du bouton enfoncé s’allume. Appuyez sur le bouton SOUND BANK pour sélectionner l’une des trois banques disponibles (1-10, 11-20, 21-30). -
Page 73: Jouer Deux Timbres À La Fois (Mode Layer)
Choisir les effets de réverbération et de chorus Le EC350 est doté de deux effets : réverbération et chorus. La réverbération simule la réflexion du son dans une salle, tandis que le chorus simule un effet modulant qui étoffe le son. -
Page 74: Utiliser Les Pédales
Note : Les réglages des effets effectués en mode Single restent mémorisés même si vous sélectionnez le mode Layer, mais aucune des modifications effectuées en mode Layer ne sera mémorisée. Maintenez enfoncé le bouton REVERB ou CHORUS et appuyez sur l’un des bou- tons de sélection des timbres PIANO 1/L, PIANO 2/M ou E.PIANO1/H pour sélec- tionner la profondeur de l’effet de réverbération ou de chorus. -
Page 75: Le Métronome
Lorsque la pédale est ainsi affectée au(x) timbre(s) désiré(s), relâchez le bouton TRANSPOSE/FUNCTION. Le métronome Le EC350 est doté d’un métronome qui vous permet de régler le tempo lorsque vous vous exercez. Note : Lors de la mise sous tension de l’instrument, les suivants paramètres du métronome sont automatiquement rétablis à... - Page 76 deux boutons STRINGS/PAD et CHOIR (ou sur les touches Si5 et Do6 du clavier) tout en maintenant enfoncé le bouton METRONOME. Touche Effet Touche Effet Volume faible Volume élevé Régler le tempo par le biais du curseur TEMPO. Le curseur TEMPO permet de régler le tempo dans une plage de = 40 ~ 200.
- Page 77 Sélectionner la “time signature”. Cette fonction permet d’accentuer le premier battement de la mesure. Bouton Métrique (Time signature) PIANO 1 2 mouvements (2/4, 2/8...) PIANO 2 3 mouvements (3/4, 3/8...) E.PIANO 1 4 mouvements (4/4, 4/8...) E.PIANO 2 6 mouvements (6/4, 6/8...) Avec le métronome activé, enfoncez le bouton METRONOME et appuyez sur le bouton correspondant à...
-
Page 78: Fonctions Diverses
CHAPITRE Fonctions diverses Réglage du toucher Vous pouvez régler la sensibilité du clavier ou réponse au Strong ÿ Light toucher. Maintenez enfoncé le bouton TOUCH et appuyez sur le bouton correspondant au réglage de dynamique sou- Note Standard loudness haité. Heavy Soft Bouton... -
Page 79: Fonction Transpose
Bouton Toucher Normal. Toucher normal d’un piano. Ré4 Lourd. Les notes graves ne sont reproduites que si l’on joue très fort. Fonction Transpose Parfois, la clé d’écriture d’un morceau est particulièrement difficile (par ex. beau- coup de bémols) ou vous désirez modifier la hauteur pour insérer un autre instru- ment ou voix. -
Page 80: Accordage Fin
Accordage fin Pour adapter la hauteur de votre EC350 à celle d’un autre instrument, vous pouvez la régler par pas de 0.5 Hz, dans la plage La4 = 427.5 ~ 452.5 Hz. L’accordage stan- dard correspond à La4 = 440 Hz. -
Page 81: Rétablir Les Réglages Mémorisés
Bouton Tempérament Les deux Tempérament égal. C’est la gamme normalement utilisée de nos jours témoins éteints dans le monde occidental, caractérisée par un intervalle égal entre tous les 12 demi-tons. Pour vérifier le tempérament en cours, maintenez enfoncé le bouton TOUCH et regardez lequel des témoins s’allume. -
Page 82: Le Magnétophone
CHAPITRE Le magnétophone Le EC350 est doté d’un magnétophone interne qui vous permet d’enregistrer et de reproduire facilement vos morceaux. Lorsque vous jouez, vous pouvez enregistrer deux parties. Ainsi, vous pouvez soit les reproduire simultanément pour créer un seul morceau, soit les utiliser pour enregistrer deux morceaux différents. -
Page 83: Enregistrer Un Layer
L’enregistrement commence soit lorsque vous appuyez sur le bouton START/STOP, soit sur une touche du clavier, soit sur une pédale, soit sur un bouton quelconque de sélection d’un timbre, soit à la réception d’un message MIDI. Si vous appuyez sur START/STOP, l’enregistrement commence après un compte à rebours de deux mesures. -
Page 84: Deuxième Passage D'enregistrement
L’enregistrement commence soit lorsque vous appuyez sur le bouton START/STOP, soit sur une note, soit sur une pédale, soit à la réception d’un message MIDI. Si vous appuyez sur le bouton START/STOP, l’enregistrement commence après un compte à rebours de deux mesures. Pendant l’enregistrement, le témoin de START/ STOP clignote à... -
Page 85: Reproduire Le Morceau Enregistré
Reproduire le morceau enregistré Lorsque l’enregistrement est terminé, vous pouvez reproduire la partie jouée. Si des données sont enregistrées, le(s) témoin(s) de PART 1 et/ou PART 2 s’allume(nt). Si vous ne désirez pas reproduire l’une des deux parties, appuyez sur le bouton correspondant. -
Page 86: Effacer Les Données Enregistrées
Avec la reproduction à l’arrêt, enfoncez TRANSPOSE/FUNCTION et appuyez soit sur PART 1, soit sur PART 2. Les témoins de TRANSPOSE/FUNCTION, ainsi que les boutons de PART 1 ou PART 2 commencent à clignoter et le EC350 est prêt pour effacer les données enregistrées. -
Page 87: Branchement De Dispositifs Audio Externes
Utilisez les bornes OUTPUT pour brancher une table de mixage de qualité élevée, un hi-fi stéréo ou une paire de retours de scène à votre EC350. Si vous utilisez un hi- fi stéréo, branchez les bornes OUTPUT de l’appareil aux bornes d’entrée AUX ou TAPE de votre EC350 (ne jamais utiliser les entrées PHONO). -
Page 88: Couper/Activer Les Haut-Parleurs Internes
Couper/activer les haut-parleurs internes Selon si vous préférez les haut-parleurs internes ou un système d’amplification externe, vous pouvez couper/activer les haut-parleurs internes. Il suffit d’insérer une prise dans les bornes du casque situées en-dessous du clavier pour couper les haut- parleurs internes. -
Page 89: Midi
EC350, ainsi que d’utiliser un séquenceur pour composer des morceaux musicaux complexes. Lorsque vous jouez sur le clavier de votre EC350, ou vous appuyez sur la pédale, ou vous sélectionnez un timbre, les notes, l’activation de la pédale et le changement de timbres sont transmis à... -
Page 90: Sélectionner Le Canal De Base Du Midi
MIDI, d’un logiciel de “sequecing” ou de notation musicale et de deux câbles MIDI standards. Connectez la borne MIDI OUT de votre EC350 à la borne MIDI IN de l’ordinateur. Connectez la borne MIDI IN de votre EC350 à la borne MIDI OUT de l’ordinateur. -
Page 91: Utiliser Le Ec350 En Tant Que Générateur De Sons Multimbres
Utiliser le EC350 en tant que générateur de sons multimbres Si le EC350 est piloté par un dispositif MIDI externe, il peut fonctionner en tant que générateur de sons à 4 ou 16 parties. Vous pouvez sélectionner un timbre différent sur chacun des 4 ou 16 canaux MIDI. -
Page 92: Réception Sur 4 Ou 16 Canaux Midi
MIDI, sans jouer ses sons internes (Local Off). Local Off est utile si votre EC350 doit fonctionner en tant que clavier étouffé et donc pour jouer d’un autre instrument. Ce paramètre peut être sélectionné même si le EC350 est connecté... -
Page 93: Program Change
Program Change MIDI à un dispositif MIDI connecté à la borne MIDI OUT de votre EC350, pour changer ses timbres. Si vous sélectionnez l’un des sons internes du EC350 en appuyant sur l’un des boutons de sélection des timbres, un numéro de Program Change MIDI sera transmis, comme indiqué... - Page 94 Bouton Banque Timbre Digital E.Piano E.PIANO 2 60’s E.Piano Vintage E.Piano Harpsichord HARPSI/CLAV Clav. Wah Clav. Vibraphone VIBES/GUITAR Marimba Acoustic Guitar Jazz Organ 1 ORGAN1 Jazz Organ 2 Jazz Organ 3 Church Organ 1 ORGAN2 Church Organ 2 Church Organ 3 Strings STRINGS/PAD Slow Strings...
-
Page 95: Control Change
Eteint Régler la borne PC To Host Lorsque vous connectez votre EC350 à un ordinateur via la borne PC TO HOST, vous devez sélectionner sur le piano la même vitesse de celle de l’interface série de l’ordinateur. Voir les informations détaillées de l’interface série sur le mode d’emploi de l’ordinateur. -
Page 96: Midi Data Dump
Pour sauvegarder les données enregistrées sur votre EC350, procédez comme suit : A l’aide d’un câble MIDI, connectez la borne MIDI OUT de votre EC350 à la borne MIDI IN du “data filer”. Prédisposez le “data filer” à la réception des données MIDI. - Page 97 Les données précé- demment sauvegardées sur un “data filer” peuvent être rechargées sur votre EC350. A l’aide d’un câble MIDI, connectez la borne MIDI IN de votre EC350 à la borne MIDI OUT du “data filer”. Sur le EC350, maintenez enfoncé le bouton TRANSPOSE/FUNCTION et appuyez sur le bouton de sélection de timbres VIBES/GUITAR.
-
Page 98: Montage Du Support
CHAPITRE Montage du support Attention: L’assemblage du support doit être effectué par deux ou plusieurs personnes. • Attention! Prenez garde à vos mains quand vous positionnez le piano sur son sup- port. • Vérifiez que les éléments sont montés dans leur correcte position et procédez par étapes, comme détaillé. - Page 99 Eléments × 1 Pied droit × 1 Pied gauche × 1 Barre des pédales × 1 Panneau face arrière × 1 Piano × 1 Alimentation × 9 × 4 Boulons longs × 4 Boulons courts × 1 Petit pied pour la barre des pédales NB: Un tournevis à...
- Page 100 Poser par terre la feuille en polyéthylène fournie dans l’emballage et y poser le pied gauche (B) avec la coulisse métallique tournée vers le haut. Unir la barre des pédales (C) au pied gauche (B) avec les pédales tournées vers la partie antérieure du pied (voir figure).
- Page 101 Positionner le support, qui est maintenant partiellement inséré, avec la partie posté- rieure du pied posée sur le sol. Monter le pied droit (A) sur la barre des pédales (C). Insérerer deux boulons longs (b) dans les deux perçages de la barre des pédales, depuis l’intérieur, et les serrer.
- Page 102 Si nécessaire, tournez le stand en posant la partie externe du pied droit par terre. Maintenant, vous pouvez fixer l’alimentation (F) à la barre des pédales à l’aide du ruban adhésif Velcro (enlevez préalablement le ruban de protection) situé sous la barre même, comme illustré...
- Page 103 Soulever le piano et le fixer au support en enfilant les deux boulons, qui forjettent de la partie inférieure du piano, dans les perçages postérieurs des coulisses métalliques du support. Enfiler les deux restants boulons courts (c) dans les perçages disponibles sous le piano.
- Page 104 Branchez les câbles des pédales et de l’alimentation aux bornes correspondantes du piano. Fixez le câble d’alimentation à l’aide du serre-câble, comme illustré dans la figure. Positionner le piano dans le lieu définitif. Régler le petit pied à vis (d) sous les péda- les, de manière à...
-
Page 105: Vérifier L'assemblage
Vérifier l’assemblage [•] Est-ce que tous les éléments sont installés? Si tous les éléments sont installés, voir les diagrammes et contrôler leur utilisation. [•] Vérifier le serrage de toutes les vis at boulons. Attention Pour le transport, le piano doit Précautions pour le transport de l’instrument. -
Page 106: Appendice
Si lors de l’utilisation vous détectez les problèmes décrits, examinez l’instrument pour comprendre le problème et essayez de le résoudre en recourant aux conseils proposés. Si l’instrument continue à ne pas fonctionner correctement, adressez-vous à votre revendeur de confiance ou au Centre d’Assistance Agréé Korg le plus pro- che. Problème... -
Page 107: Données Mémorisées
excède la limite du son, certaines notes sont “stoppées” et les nouvelles notes ne sont pas reproduites. Par conséquent, en jouant plus de deux notes en mode Layer, la polyphonie maxi- mum dépend du nombre d’oscillateurs utilisés au total. Si en plus vous appliquez un REVERB ou un CHORUS, la polyphonie est ultérieurement réduite, respectivement de 10 et de 3 notes. -
Page 108: Spécifications Techniques
1395 × 482 × 878 mm (55 × 19 × 34.5 inch), pupitre exclu Dimensions (L x P x H) Poids 55 kg (121.2 lbs) Couleurs Palissandre foncé, cerisier Sons élaborés avec INFINITY™. Korg se réserve le droit de modifier les spécifications sans préavis. Chapitre 9... -
Page 109: Détails Du Tableau De Commande
Détails du tableau de commande …pendant que vous appuyez sur cel u i - ci HARPSI/ VIBES/ PIANO 1 PIANO2 E.PIANO 1 E.PIANO 2 ORGAN 1 CLAV GUITAR Maintenez ce bouton enfoncé… REVERB Prof = Grave Prof = Moyen Prof = Aigu CHORUS Prof = Grave Prof = Moyen... - Page 111 Digital-Piano Bedienungsanleitung...
- Page 112 Räumen Sie sofort den Stecker aus der Steckdose und • bei starken Vibrationen wenden Sie sich an Ihren Korg Händler, bei dem Sie das Instrument gekauft haben. Stromversorgung Der im Lieferumfang enthaltene Universal-Ws- CE-ZEICHEN ZUR VEREINHEIT- Adapter kann des Instruments an eine WS-Steck- LICHUNG DER EUROPÄISCHEN...
- Page 113 Sie bei Ihrem Korg Händler. KORG IM INTERNET Korg & More: www.korg.de Korg Inc.: www.korg.co.jp Korg USA: www.korg.com Korg UK: www.korg.co.uk Jam Industries (Canada): www.jam-ind.com Gaffarel Musique (France): www.korgfr.net Syncro (Italy): www.korg.it © 2003 Korg Italy Spa. Drücken in Italy. Letusa (Spain): www.letusa.es...
- Page 114 EC350 als multitimbraler Tongenerator ........
- Page 115 Program Change ............146 Control Change .
-
Page 116: Einführung
Stereo-Konzertflügelklang. Sie können die Layer Funktion zum gleichzei- tigen Spielen von zwei Klängen nutzen. Effekte. Das EC350 besitzt eingebaute, digitale Effekte, die die Klangeigenschaften einer Konzerthalle (Reverb) nachahmen und den Klang voller machen (Chorus). Drei Pedale. Im Lieferumfang sind die drei Pedale eines traditionellen Konzertflügels ent- halten, wobei das Lautstärke- und das Softpedal auch zur Hälfte gedrückt werden können. - Page 117 MIDI können zwei oder mehr Instrumente gesteuert werden oder zur Steuerung eingesetzt werden; das EC350 kann als 4- oder 16-Part multitimbraler Tongenerator eingesetzt werden. Leistungsstarke integrierte Verstärkeranlage. Das EC350 besitzt einen lei- stungsstarken, 35 + 35 Watt Verstärker mit vier Bass Reflex Lautsprechern.
-
Page 118: Paneele
KAPITEL Paneele Vorderseite 1 POWER Schalter: Ein-/Aus-Schalter. Siehe Seite 121. 1 KOPFHÖRER Stecker: Es können zwei Kopfhörer in diese Buchsen unterhalb der Tastatur eingesteckt werden. Siehe Seite 120. 2 MASTER VOLUME Schieberegler: Regelt die Lautstärke der internen Lautspre- cher, der Ausgänge und der Kopfhörerbuchsen. Siehe Seite 121. 3 REVERB Taster: Schaltet den Halleffekt ein oder aus. - Page 119 4 CHORUS Taster: Schaltet den Choruseffekt ein oder aus. Damit erhält der Klang mehr Fülle. Siehe Seite 125. 5 TOUCH Taster: Dient zur Einstellung der Anschlagdynamik. Siehe S. 28 6 TRANSPOSE/FUNCTION Taster: Multifunktionstaste zur Änderung der Trans- ponier- und Feinstimmungsfunktionen, zur Programmierung der MIDI-Parameter sowie zur Ausführung weiterer Einstellungen.
-
Page 120: Rückseite
Warnung: Ändern Sie die Position des PC/MIDI Schalters nur bei ausgeschaltetem Instrument. 3 PC TO HOST Buchse: Über diese Buchse kann das EC350 direkt an einen PC angeschlossen werden, vorausgesetzt, dass dieser eine serielle Schnittstelle besitzt. Möglicherweise benötigen Sie eine spezielle Treiber-Software, die Sie aus dem Internet herunterladen können. - Page 121 Buchsen eine externe Verstärkeranlage an. (Für HiFi-Systeme ist nicht die PHONO- Buchse, sondern die AUX oder TAPE Buchsen zu verwenden). Zur Mono- Verstärkung des EC350 ist die Einzelbuchse L/MONO zu benutzen. Mit dem MASTER VOLUME Schieberegler wird die Ausgangslautstärke reguliert. Siehe Seite 140.
-
Page 122: Bevor Sie Beginnen
KAPITEL Bevor Sie beginnen Klavierdeckel öffnen Heben Sie den Deckel leicht an der Mitte der Vorderkante an und schieben Sie ihn vorsichtig nach hinten. Notenständer aufstellen Stellen Sie den Notenständer auf und benutzen Sie die beiden Halter auf der Rückseite, damit er nicht umfällt. Kopfhörer anschließen Wenn Sie zu späten Stunden spielen oder üben wollen oder wenn Sie von anderen, im Raum anwesenden Personen nicht gehört... -
Page 123: Instrument Einschalten
Anmerkung: Es empfiehlt sich, bei geringer Lautstärke zu beginnen und diese dann allmählich zu erhöhen. Demos abspielen Das EC350 enthält 30 werkseitig aufgenommene Demosongs. Spielen Sie die Songs ab, um einen Eindruck von der Klangfülle und den Ausdrucksmöglichkeiten Ihres Instruments zu erhalten. - Page 124 Korg Original (M. Tem- F. Chopin: Fantasie- lune pia): Jumper Impromptu Op.66 E.PIANO 2 Korg Original (M. Tem- Korg Original (M. Tem- J.S. Bach: Prelude in C pia): Lullaby for a Little pia): All the Ones You major (from Das Wohl- Star Don’t Know...
- Page 125 Taster Bank 1 (1-10) Bank 2 (11-20) Bank 3 (21-30) ORGAN 1 W.A. Mozart: A la turque Korg Original (M. Tem- F. Mendelssohn-Bar- (from the Sonata in A- pia): Cool “B” tholdy: Spring Song, major K.331) Op.62, no.6 ORGAN 2 F.
-
Page 126: Basisfunktionen
KAPITEL Basisfunktionen Mit nur einem Klang spielen (Single Modus) Sie können einen der dreißig im Instrument enthaltenen Klänge auswählen. Drücken Sie einen der Klangauswahltaster, um einen Klang zu selektieren. Die LED des Tasters schaltet sich ein. Mit dem SOUND BANK Taster selektieren Sie eine der drei verfügbaren Bänke (1- 10, 11-20, 21-30). -
Page 127: Mit Zwei Klängen Gleichzeitig Spielen (Layer Modus)
Selektieren derselben Layer-Klänge wieder aufgerufen. Hall- und Chorus-Effekt wählen Das EC350 besitzt zwei Effekte: Hall und Chorus. Der Halleffekt ahmt die Klange- igenschaften eines Raumes nach, während Chorus einen Modulationseffekt nach- ahmt, der den Klang voller macht. Diese Effekteinstellungen bleiben auch dann erhalten, wenn ein anderer Klang selektiert wird. -
Page 128: Pedale Benutzen
Anmerkung: Effekteinstellungen, die im Single Modus vorgenommen werden, bleiben auch im Layer Modus erhalten. Änderungen, die im Layer Modus vorge- nommen werden, werden jedoch nicht gespeichert. Halten Sie den Taster REVERB oder CHORUS gedrückt und drücken Sie gleichzei- tig einen der Klangauswahltaster PIANO 1/L, PIANO 2/M oder E.PIANO1/H, um die Intensität des Hall- oder Chorus-Effekts einzustellen. -
Page 129: Das Metronom
Wenn das Pedal dem/den gewünschten Klang/Klängen zugewiesen ist, können Sie den TRANSPOSE/FUNCTION Taster loslassen. Das Metronom Das EC350 besitzt ein eingebautes Metronom, mit dem das Tempo beim Üben vor- gegeben werden kann. Anmerkung: Wenn das Instrument eingeschaltet wird, werden die folgenden Metronom-Parameter automatisch auf die Default-Werte zurückgesetzt. - Page 130 (oder die Tasten B5 und C6), während Sie den METRONOME Taster gedrückt hal- ten. Notentaste Effekt Notentaste Effekt geringere Lautstärke höhere Lautstärke Tempo mit Hilfe des TEMPO Schieberegler regulieren. Benutzen TEMPO Schieberegler, um das Tempo zu verändern. Das Tempo kann im Bereich = 40 ~ 200 verändert werden.
- Page 131 Taktunterteilung selektieren. Sie können den ersten Taktschlag betonen. Taster Taktunterteilung PIANO 1 2 Viertelnoten (2/4, 2/8...) PIANO 2 3 Viertelnoten (3/4, 3/8...) E.PIANO 1 4 Viertelnoten (4/4, 4/8...) E.PIANO 2 6 Viertelnoten (6/4, 6/8...) Halten Sie den METRONOME Taster bei laufendem Metronom gedrückt und drük- ken Sie gleichzeitig den Taster, der der gewünschten Taktunterteilung entspricht (siehe Tabelle oben).
-
Page 132: Weitere Funktionen
KAPITEL Weitere Funktionen Einstellung des Anschlags Die Anschlagempfindlichkeit der Tastatur kann unter- Strong ÿ Light schiedlich eingestellt werden. Halten Sie den TOUCH Taster gedrückt und drücken Sie gleichzeitig den entspre- Note Standard loudness chenden Taster zur Einstellung der gewünschten Anschlag- Heavy empfindlichkeit. -
Page 133: Transponierung
Taste Anschlagempfindlichkeit Normal. Normaler Klavieranschlag. Schwer. Nur bei sehr starkem Anschlag werden laute Noten gespielt. Transponierung Bisweilen kommt es vor, dass Stücke in einer schwierig zu spielenden Tonart geschrieben sind (z.B. mit vielen schwarzen Tasten) oder die Tonhöhe zur Abstim- mung auf ein anderes Instrument oder einen Sänger verändert werden muss. -
Page 134: Feinstimmung
Feinstimmung Um die Stimmung des EC350 der eines anderen Instruments anzupassen, können Sie die Stimmung in Intervallen von 0.5 Hz im Bereich von A4 = 427.5 ~ 452.5 Hz einstellen. Die Standardstimmung ist A4 = 440 Hz. Drücken Sie den TRANSPOSE/FUNCTION Taster und Schlagen Sie die entspre- chende Notentaste zur Veränderung der Stimmung an. -
Page 135: Gespeicherte Einstellungen Erneut Aufrufen
Taster Temperament VIBES/GUITAR Kirnberger. Die Stimmung Kirnberger III wurde von Johann Phillip Kirn- berger zu Beginn des 18. Jahrhunderts entwickelt und wird vorzugsweise für Cembalos verwendet. Beide LEDs sind Wohltemperierten Stimmung. Beinahe alle modernen Tasteninstrumente ausgeschaltet basieren auf dieser Stimmung. Die Halbtöne sind vollkommen gleichmä- ßig voneinander entfernt. -
Page 136: Die Aufnahmeeinheit
KAPITEL Die Aufnahmeeinheit Das EC350 enthält ein eingebautes Aufnahmegerät, mit dem Sie Ihre Ausführungen auf ebenso einfache Weise aufnehmen und wieder abspielen können, wie bei einem Kassettenrecorder. Sie können Ihre Ausführungen auf zwei Parts aufnehmen. Beide Parts können gleichzeitig abgespielt werden, um einen einzigen Song zu kreieren oder für die Aufnahme zweier separater Songs verwendet werden. -
Page 137: Layer Aufnehmen
Die Aufnahme beginnt, wenn Sie entweder den START/STOP Taster, eine Note, ein Pedal oder einen beliebigen Klangauswahltaster drücken oder wenn das Instrument eine MIDI Meldung empfängt. Wenn der START/STOP Taster gedrückt wird, beginnt die Aufnahme nach zwei Einzähltakten. Während der Aufnahme blinkt die LED des START/STOP Tasters im Takt, mit einem längeren Aufblinken beim ersten Viertel und einem etwas kür- zeren Aufblinken bei den übrigen Vierteln. -
Page 138: Zweiter Aufnahmeschritt
men.Wenn Sie beispielsweise Grand Piano 1 + Strings selektieren und anschließend nur Part 2 zur Aufnahme aktivieren, wird nur der Piano-Sound in Part 2 aufgenom- men. Die Aufnahme beginnt, wenn Sie entweder den START/STOP Taster, eine Notentaste oder ein Pedal drücken oder wenn MIDI Daten empfangen werden. Wenn Sie den START/STOP Taster drücken, beginnt die Aufnahme nach zwei Ein- zähltakten. -
Page 139: Aufgenommene Ausführungen Abspielen
Sobald Sie auf dem Keyboard spielen, beginnt automatisch die Aufnahme. Wenn Sie die Aufnahme beendet haben, drücken Sie den START/STOP Taster, um den Recorder zu stoppen. Aufgenommene Ausführungen abspielen Nach der Aufnahme können Sie Ihre aufgenommenen Ausführungen abspielen. Wenn Daten aufgenommen wurden, sind die LED(s) der Taster PART 1 und/oder PART 2 eingeschaltet. -
Page 140: Aufnahmedaten Löschen
Taster gedrückt und drücken Sie entweder den PART 1 oder PART 2 Taster. Die LEDs des TRANSPOSE/FUNCTION Tasters und des PART 1 bzw. PART 2 Tasters blinken; das EC350 ist bereit, die aufgenommenen Daten zu löschen. Wenn Sie erneut den TRANSPOSE/FUNCTION Taster drücken, verlassen Sie den Löschen-Standby-Modus. - Page 141 Tipp: Wir empfehlen die Verwendung eines handelsüblichen Datenfilers oder eines entsprechenden Computerprogramms zur Speicherung von Aufnahmedaten, die Sie aufbewahren möchten. Die Aufnahmeeinheit...
-
Page 142: Externe Audiogeräte Anschließen
Warnung: Schließen Sie keinesfalls die Ausgänge eines Leistungsverstärkers an diese Eingänge an! An externe Verstärkungssysteme anschließen Verwenden Sie die OUTPUT Verbinder, um Ihr EC350 an einen Hochleistungsmi- xer, eine Stereo-Hi-fi-Anlage oder verstärkte Bühnenlautsprecher anzuschließen. Bei Anschluss eines Stereo-Hi-fi-Geräts sind die OUTPUT-Buchsen mit den AUX- oder TAPE-Eingängen zu verbinden (verwenden Sie keinesfalls die PHONO-Ein-... -
Page 143: Interne Lautsprecher Ein- Bzw. Ausschalten
Interne Lautsprecher ein- bzw. ausschalten Je nachdem, ob Sie über die internen Lautsprecher oder lieber über ein externes Verstärkungssystem hören wollen, können Sie die internen Lautsprecher ein- oder ausschalten. Stecken Sie den Stecker in eine der Kopfhörerbuchsen unterhalb der Tastatur, um die Lautsprecher auszuschalten. Um die Lautsprecher wieder einzu- schalten, ziehen Sie den Stecker einfach wieder heraus. -
Page 144: Midi
Instrumente zur Steuerung des EC350 einsetzen und einen Sequenzer zur Kreation komplexer Musikstücke benutzen. Wenn Sie die Tastatur oder das Pedal des EC350 benutzen oder einen Klang selek- tieren, werden die Noten, die Pedalaktivierung und die Klangänderungen an ein anderes Instrument übertragen oder von einem Sequenzer aufgenommen. -
Page 145: Midi Basiskanal Selektieren
Computer, Software für Sequencing oder Notenaufzeichnung sowie zwei Standard MIDI Kabel. Schließen Sie die MIDI OUT Buchse des EC350 an die MIDI IN Buchse des Computers und die MIDI IN Buchse des EC350 an die MIDI OUT Buchse des Computers an. Zum Beispiel: EC350 Rückseite... -
Page 146: Ec350 Als Multitimbraler Tongenerator
Tongenerator verwendet werden. Sie können auf jedem der 16 MIDI Kanäle einen anderen Klang wählen. Schließen Sie die MIDI In Buchse des EC350 mit einem MIDI Kabel an die MIDI OUT Buchse eines Sequenzers o.ä. an. Übertragen Sie MIDI Daten vom angeschlossenen Sequenzer (oder einem anderen Gerät). -
Page 147: Local On/Off
Selektieren Sie Local Off, wenn das EC350 als stummes Keyboard verwendet wer- den soll, das auf einem anderen Instrument spielt. Diese Einstellung sollte auch dann gewählt werden, wenn das EC350 über seine MIDI IN und MIDI OUT Buch- sen an einen Sequenzer angeschlossen ist. Auf diese Weise vermeiden Sie, dass bestimmte Noten zweimal, d.h. -
Page 148: Program Change
Sie können einen MIDI Program Change Program Change Befehle übertragen. Befehl an ein MIDI Gerät übertragen, das an die MIDI OUT Buchse des EC350 angeschlossen ist, um dessen Klang zu ändern. Wenn Sie einen der internen Klänge des EC350 mit den Klangauswahltastern selektieren, wird eine entsprechende MIDI Program Change Nummer übertragen, wie aus der nachstehenden Tabelle zu erse-... -
Page 149: Control Change
Einstellungen auf dem Bedienfeld vornehmen, wird ein entsprechender Control Change Befehl an ein externes MIDI Gerät gesen- det. In gleicher Weise kann das EC350 Control Change Befehle von einem externen MIDI Gerät empfangen, das an der MIDI IN Buchse des Instruments angeschlossen... -
Page 150: Pc To Host Einstellungen
PC To Host Einstellungen Wenn das EC350 über die PC TO HOST Schnittstelle an einen Computer ange- schlossen ist, muss das Klavier auf diesselbe Geschwindigkeit wie die serielle Schnittstelle des Computers eingestellt werden. Eingehendere Informationen über die serielle Schnittstelle finden Sie in der Bedienungsanleitung Ihres Computers. - Page 151 So können Sie die aufgenommenen Daten Ihres EC350 auf einem externen MIDI Datenfiler speichern. Schließen Sie die MIDI OUT Buchse des EC350 mit einem MIDI Kabel an die MIDI IN Buchse des Datafiler an. Stellen Sie den Datafiler auf den Empfang von MIDI Daten ein.
- Page 152 Vorgang beginnt, wenn Sie den Taster TRANSPOSE/FUNCTION oder VIBES/ GUITAR drücken. Schließen Sie die MIDI IN Buchse des EC350 mit einem MIDI Kabel an die MIDI OUT Buchse des Datafiler an. Halten Sie den TRANSPOSE/FUNCTION Taster des EC350 gedrückt und drücken Sie gleichzeitig den VIBES/GUITAR Klangauswahltaster.
-
Page 153: Montage Des Ständers
KAPITEL Montage des Ständers Vorsichtsmaßnahmen: Zum Aufbauen des Gestells sind mindestens zwei Perso- nen erforderlich. • Achten Sie beim Auflegen des Klaviers auf das Gestell darauf, Ihre Hand nicht dar- unter einzuklemmen. • Versichern Sie sich, dass die Teile in der richtigen Richtung montiert werden und befolgen Sie die Anweisungen in der angegebenen Reihenfolge. - Page 154 Versichern Sie sich, dass alle nachfolgend aufgezählten Teile in der Verpackung ent- halten sind. Teile × 1 Fuß, rechts × 1 Fuß, links × 1 Pedalleiste × 1 Rückwand × 1 Klavier × 1 Netzgerät × 9 Schrauben × 4 Bolzen, lang ×...
- Page 155 Stecken Sie den Stützfuß (d) in die Pedalleiste (C). Legen Sie die in der Verpackung enthaltene Plastikfolie auf dem Boden aus und stel- len Sie den linken Fuß (B) mit der Metallführung nach oben darauf ab. Montage des Ständers...
- Page 156 Verbinden Sie die Pedalleiste (C) mit dem linken Fuß (B). Achten Sie darauf, dass die Stützfüße zur Vorderseite des Fußes hin zeigen (siehe Abbildung). Schrauben Sie die beiden langen Bolzen (b) von innen in die beiden Löcher der Pedalleiste und ziehen Sie sie an.
- Page 157 dabei auf die Führung am Seitenteil des Fußes aus. Schrauben Sie die beiden langen Bolzen (b) von innen in die beiden Löcher der Pedalleiste und ziehen Sie sie an. Drehen Sie die Halterung um, so dass die Füße auf dem Boden stehen. Legen Sie das rückwärtige Paneel (D) an die bereits montierte Halterung an und achten Sie darauf, dass die unlackierte Seite nach hinten zeigt.
- Page 158 Wenn Sie wollen, können Sie die Halterung umdrehen, indem Sie die Außenseite des rechten Fußes auf den Boden auflegen. Nun kann das Netzteil (F) am Pedalbalken mit Hilfe des Klettbandes (Schutzstreifen vorher abziehen) unter dem Balken befestigt werden, wie in der Abbildung gezeigt wird. Heben Sie das Klavier (E) zu zweit hoch, um an die Unterseite desselben zu gelangen.
- Page 159 Heben Sie das Klavier hoch und verbinden Sie es mit der Halterung, indem Sie die auf der Unterseite herausstehenden Bolzen in die rückwärtigen Löcher der Metallführung der Halterung stecken. Schrauben Sie die beiden übrigen kurzen Bolzen (c) in die auf der Unterseite des Kla- viers befindlichen Löcher.
-
Page 160: Kontrollieren Sie Nach Der Montage, Dass
Schließen Sie die Kabel der Pedale und des Netzteils an die entsprechenden Verbinder des Klaviers an. Befestigen Sie das Netzkabel mit den hierfür vorgesehenen Kabel- schellen, wie in der Abbildung gezeigt wird. Stellen Sie das Klavier am vorgesehenen Ort auf. Regulieren Sie das Füßchen (d) unter den Pedalen so, dass diese den Boden berühren. -
Page 161: Vorsichtsmaßnahmen
Vorsichtsmaßnahmen Nehmen Sie das Klavier von der Hal- Vorsicht beim Transport des Instruments! terung und transportieren Sie die beiden Teile einzeln. Gehen Sie zur Montage des Klaviers und der Halterung nach dem Transport entsprechend den Anleitungen vor. Nach einiger Zeit des Gebrauchs können sich die Ziehen Sie die Schrauben nach. -
Page 162: Anhang
(oder schalten Sie das Instrument aus und anschließend wieder ein). Polyphonie Das EC350 enthält gesampelte Klänge, die durch Aufnahme, Analyse und Bearbei- tung der Klänge von Original-Musikinstrumenten entstehen. Diese Klänge bestehen normalerweise aus einem oder mehreren unterschiedlichen Klängen, die durch Anschlagen einer Taste wiedergegeben werden. -
Page 163: Gespeicherte Daten
mige Polyphonie verfügen. Klänge, bei denen mehrere Oszillatoren mitwirken, haben eine begrenztere Polyphonie. Wenn die Anzahl der Noten die Klanggrenze überschreitet, werden manche Noten unterbrochen, damit neue erklingen können. Wenn Sie im Layer Modus mit mehr als zwei Noten spielen, hängt die maximale Polyphonie davon ab, wieviele Oszillatoren insgesamt verwendet werden. -
Page 164: Technische Daten
55 × 19 × 34.5 Zoll (1395 × 482 × 878 mm), ohne Notenstän- Abmessungen (B x T x H) Gewicht 52,4 kg (115.5 lbs) Farbe Rosenholz, dunkel, Kirschbaum Klangerzeugung mittels INFINITY Korg behält sich das Recht auf Änderungen ohne Vorankündigung vor. Kapitel 9... -
Page 165: Bedienfeld-Kurzbefehle
Bedienfeld-Kurzbefehle …while pressing this one HARPSI/ VIBES/ PIANO 1 PIANO2 E.PIANO 1 E.PIANO 2 ORGAN 1 CLAV GUITAR Keep this button pressed… REVERB Int = geringe Int = mittlere Int = hoch CHORUS Int = geringe Int = mittlere Int = hoch TOUCH Leicht Normal... - Page 167 Pianoforte Digitale Manuale di istruzioni...
- Page 168 GARANZIA liquidi infiammabili. Attenzione: Non usate alcool per pulire il leggio. In caso di sporco I prodotti Korg sono costruiti in accordo alle più tenace, adoperate un detergente blando per vetro e rigorose normative elettriche e meccaniche in superfici dure per uso domestico.
- Page 169 Data Filer (dispositivo di memorizzazione dati) esterno, o in qualsiasi altro dispositivo del genere. Korg non si assume in alcun caso nessuna responsabilità per danni cau- sati dalla perdita dei dati.
- Page 170 Selezionare il canale base di trasmissione ........198 Usare EC350 come generatore sonoro multitimbrico ....... 199 Ricezione su 4 o 16 canali MIDI .
- Page 171 Program Change ............200 Control Change .
-
Page 172: Caratteristiche Principali
La funzione Layer permette di suonare insieme due suoni. Effetti. EC350 include due processori di effetti digitali, che permettono di simulare il riverbero naturale di una sala da concerto (Reverb) e aggiungere spessore al suono (Chorus). - Page 173 fini dell’intonazione. MIDI. EC350 è compatibile con il protocollo MIDI, lo standard che permette di col- legare strumenti musicali diversi e computer. Il MIDI permette a due o più disposi- tivi di controllare od essere controllati, e permette di usare l’EC350 come generatore sonoro multitimbrico a 16 parti.
-
Page 174: Pannello Frontale
CAPITOLO Prospetti Pannello frontale 1 Interruttore POWER: Interruttore di accensione/spegnimento. Vedi pagina 177. 2 Connettori PHONES: Collegate una o due cuffie stereo a queste prese, situate sotto la tastiera. Vedi pagina 176. 1 Cursore MASTER VOLUME: Regola il volume degli altoparlanti interni, delle uscite audio (Output) e delle cuffie (Phones). - Page 175 3 Tasto CHORUS: Attiva/disattiva il chorus. Il chorus dona spessore al suono. Vedi pagina 181. 4 Tasto TOUCH: Permette di regolare la sensibilità della tastiera. Vedi pagina 186. 5 Tasto TRANSPOSE/FUNCTION: Tasto multifunzione, da usare per cambiare la trasposizione e l’intonazione fine, per programmare i parametri del MIDI, e per ese- guire altre regolazioni.
-
Page 176: Pannello Posteriore
Attenzione: Modificate la posizione del selettore PC/MIDI solo a strumento spento. 3 Connettore PC TO HOST: Questo connettore permett edi collegare direttamente l’EC350 ad un personal computer dotato di interfaccia seriale. Può rendersi neces- sario un apposito driver software, che può essere scaricato liberamente dal nostro sito. - Page 177 6 Connettori OUTPUT (L/MONO, R): Uscite audio. Collegate questi connettori ad un sistema di amplificazione. (Nel caso di impianti hi-fi, usate gli ingressi AUX o TAPE, e non l’ingresso PHONO). Per prelevare il segnale audio dell’EC350 in mono, collegare solo il connettore L/MONO. Usate il cursore MASTER VOLUME per regolare il volume di uscita.
-
Page 178: Prima Di Iniziare
CAPITOLO Prima di iniziare Aprire il coperchio Alzate leggermente il coperchio, afferran- dolo nella parte centrale, poi spingetelo delicatamente in avanti. Sollevare il leggio Alzate il leggio, ed usate i due supporti sul retro per tenerlo sollevato. Collegare le cuffie Per suonare o esercitarvi durante le ore notturne, o quando non desiderate essere uditi da altre persone che si trovano nella stessa stanza, collegate delle cuffie di alta qualità... -
Page 179: Accendere Lo Strumento
Nota: È sempre meglio accendere lo strumento con un volume basso e poi aumen- tare il volume gradualmente. Ascoltare i brani dimostrativi EC350 contiene 30 brani dimostrativi preregistrati. Ascoltateli per rendervi conto della ricchezza timbrica e delle potenzialità espressive dello strumento. Ascoltare tutti i brani. - Page 180 Korg Original (M. Tem- F. Chopin: Fantasie- lune pia): Jumper Impromptu Op.66 E.PIANO 2 Korg Original (M. Tem- Korg Original (M. Tem- J.S. Bach: Prelude in C pia): Lullaby for a Little pia): All the Ones You major (from Das Wohl- Star Don’t Know...
- Page 181 Banco 1 (1-10) Banco (11-20) Banco 3 (21-30) ORGAN 2 F. Chopin: Valse no.6 in F. Mendelssohn-Bar- Korg Original (M. Tem- D -major Op.64, no.1 tholdy: Wedding March pia): Sunflowers STRINGS Korg Original (M. Tem- J.S. Bach: Air on the G P.D.
-
Page 182: Operazioni Di Base
CAPITOLO Operazioni di base Selezionare un solo suono (modo Single) Potete selezionare uno dei trenta suoni contenuti nello strumento. Premete uno dei tasti di selezione suoni per selezionare uno dei suoni. L’indicatore luminoso del tasto premuto si accende. Usate il tasto SOUND BANK per selezionare uno dei tre banchi disponibili (1-10, 11-20, 21-30). -
Page 183: Selezionare Due Suoni Allo Stesso Tempo (Modo Layer)
Scegliere il riverbero e il chorus EC350 ha due effetti: riverbero e chorus. Il riverbero simula l’effetto di riverbera- zione del suono in una stanza, mentre il chorus riproduce un effetto di modulazione che rende il suono più ricco. -
Page 184: Usare I Pedali
Nota: Le impostazioni degli effetti eseguite in modo Single rimangono memoriz- zate quando si seleziona il modo Layer, mentre le impostazioni eseguite in modo Layer non vengono conservate. Tenete premuto il tasto REVERB o CHORUS, e premete uno dei tasti di selezione suoni PIANO 1/L, PIANO 2/M, o E.PIANO1/H per selezionare l’intensità... -
Page 185: Il Metronomo
Una volta assegnato il pedale al suono o ai suoni desiderati, rilasciate il tasto TRANSPOSE/FUNCTION. Il metronomo EC350 incorpora un metronomo, con il quale si può battere il tempo quando si stu- dia un pezzo. Nota: All’accensione dello strumento, i parametri del metronomo vengono automa- ticamente riportati ai valori originali. - Page 186 STRINGS/PAD e CHOIR (o le note B5 e C6 sulla tastiera) mentre continuate a tenere premuto il tasto METRONOME. Tasto Effetto Tasto Effetto STRINGS/PAD / B5 Volume maggiore CHOIR / C6 Volume minore Regolare il tempo mediante il cursore TEMPO. Usate il cursore TEMPO per regolare il tempo.
- Page 187 Selezionare una segnatura metrica. Potete sottolineare il primo movimento della battuta con un accento. Tasto Segnatura metrica PIANO 1 2 movimenti (2/4, 2/8...) PIANO 2 3 movimenti (3/4, 3/8...) E.PIANO 1 4 movimenti (4/4, 4/8...) E.PIANO 2 6 movimenti (6/4, 6/8...) Mentre il metronomo è...
-
Page 188: Altre Funzioni
CAPITOLO Altre funzioni Regolazione del tocco Potete regolare la risposta della tastiera al tocco. Tenete premuto il tasto TOUCH e premete il tasto corrispondete Forte alla regolazione desiderata. Leggero Volume Normale della nota Tasto Regolazione del tocco Duro PIANO 1/L Leggero. - Page 189 Tasto Regolazione del tocco Normale. Normale curva di dinamica del pianoforte. Duro. È possibile produrre note a volume elevato solo suonando molto forte. Trasposizione Può accadere che il brano da eseguire sia scritto in una tonalità complessa (che usa, cioè, molti tasti neri), o che desideriate cambiarne l’intonazione per renderlo più adatto ad un altro strumento o alla voce del cantante.
-
Page 190: Selezione Di Un Temperamento
Intonazione fine Per adeguare l’intonazione di EC350 a quella di un altro strumento, potete regolare l’intonazione in passi di 0,5 Hz, nell’ambito di A4 = 427,5 ~ 452,5 Hz. L’intona- zione standard è A4 = 440 Hz. Tenete premuto il tasto TRANSPOSE/FUNCTION, e premete il tasto che corri- sponde alla variazione di intonazione desiderata. -
Page 191: Ripristinare I Dati Memorizzati
Tasto Temperamento Entrambi gli indi- Temperamento equabile. Quasi tutti gli strumenti a tastiera dei nostri catori luminosi giorni seguono questa accordatura, in cui tutti i semitoni sono uguali, ed spenti è consentita qualsiasi trasposizione. Per verificare quale temperamento sia selezionato, tenete premuto il tasto TOUCH, e controllate quale indicatore luminoso sia acceso. -
Page 192: Il Registratore
CAPITOLO Il registratore L’EC350 include un registratore di dati musicali, che permette di registrare l’esecu- zione sulla tastiera del pianoforte, come se si stesse usando un registratore a cas- sette. Potete registrare un massimo di due parti separate, che possono poi essere riascoltate in un singoo brano, o costituire due brani diversi. -
Page 193: Registrare Un Layer
La registrazione inizia non appena viene premuto il tasto START/STOP, viene suo- nata una nota, viene premuto un pedale, viene premuto un tasto di selezione suoni, o viene ricevuto un messaggio MIDI. Se si preme il tasto START/STOP, la registrazione inizia dopo un conteggio iniziale di due battute. -
Page 194: Registrazione Del Secondo Passaggio
La registrazione ha inizio non appena si preme il tasto START/STOP, si suona una nota, si preme un pedale, o viene ricevuto un messaggio MIDI. Se premete il tasto START/STOP, la registrazione ha inizio dopo un conteggio ini- ziale di due battute. Durante la registrazione, l’indicatore luminoso di START/ STOP lampeggia a tempo –... -
Page 195: Riascoltare La Registrazione
Riascoltare la registrazione Dopo la registrazione, potete riascoltare il brano registrato. Se ci sono dati registrati, l’indicatore luminoso di PART 1 e/o PART 2 è acceso. Potete premere il tasto di una parte che non desiderate ascoltare, facendo spegnere l’indicatore luminoso e disattivando la parte corrispondente. Premete il tasto START/STOP per avviare la riproduzione. -
Page 196: Cancellare I Dati Registrati
(PART 1 o PART 2). L’indicatore lumi- noso del tasto TRANSPOSE/FUNCTION e del tasto PART 1 o PART 2 inizia a lampeggiare, e l’EC350 è pronto a cancellare i dati. Se premete nuovamente il tasto TRANSPOSE/FUNCTION, la cancellazione è... -
Page 197: Collegare Dei Dispositivi Audio Esterni
Collegare lo strumento ad un sistema di amplificazione esterno Se desiderate amplificare EC350 con un sistema di amplificazione esterno, collegate le prese OUTPUT agli ingressi di un mixer, di un impianto hi-fi, o di diffusori amplificati di alta qualità. In un impianto hi-fi usate le prese AUX o TAPE (e non la presa PHONO). -
Page 198: Attivare E Disattivare Gli Altoparlanti Incorporati
Attivare e disattivare gli altoparlanti incorporati A seconda che preferiate ascoltare dagli altoparlanti incorporati o da un sistema di amplificazione esterno, potete attivare o disattivare gli altoparlanti, inserendo o disinserendo un jack in uno dei connettori cuffia. Inserite il jack per disattivare gli altoparlanti, estraetelo per riattivarli. -
Page 199: Che Cos'è Il Midi
EC350, usare un sequencer per creare complessi brani musi- cali. Quando si usano la tastiera e il pedale di EC350, o si seleziona un suono, le note, l’attivazione del pedale e i cambi di suono vengono inviati ad un altro strumento, o vengono registrati da un sequencer. -
Page 200: Selezionare Il Canale Base Di Trasmissione
Lo standard MIDI prevede 16 canali separati per la trasmissione e la ricezione dei dati. EC350 riceve normalmente su tutti e 16 i canali, e trasmette su un solo canale. Per trasmettere dati da EC350, occorre stabilire quale dei 16 canali sia il canale base. -
Page 201: Usare Ec350 Come Generatore Sonoro Multitimbrico
4 o 16 parti. Potete selezionare un suono diverso su ognuno dei 4 o 16 canali MIDI disponibili. Usate un cavo MIDI per collegare la presa MIDI IN di EC350 alla presa MIDI OUT di un sequencer (o altro dispositivo master). - Page 202 MIDI. Va scelto anche quando EC350 è collegato ad un sequen- cer sia attraverso il MIDI IN che il MIDI OUT. Se non si ponesse EC350 in Local Off, le note già suonate dalla tastiera verrebbero rispedite ad EC350 dal sequencer, creando un fastidioso effetto di eco.
- Page 203 MIDI di Program Change ad un dispositivo MIDI col- legato al MIDI OUT di EC350. Quando si seleziona uno dei suoni interni di EC350 mediante i tasti di selezione suoni, viene trasmesso un messaggio MIDI di Program Change, come mostrato nella seguente tabella.
- Page 204 Layer, o si eseguono altre regolazioni sul pannello di controllo, viene inviato un messaggio di Control Change ad un dispositivo MIDI collegato al MOIDI OUT di EC350. Allo stesso modo, EC350 può ricevere messaggi di Control Change da un dispositivo MIDI collegato al suo MIDI IN, per controllare l’effetto del pedale di risonanza, la regolazione del volume e altri aspetti del funzionamento dello stur- mento.
-
Page 205: Impostazione Interfaccia Pc To Host
TRANSPOSE/FUNCTION o il tasto VIBES/GUITAR. Salvataggio dei dati del registratore nel data filer. Ecco come salvare i dati del registratore di EC350. Usate un cavo MIDI per collegare il MIDI OUT di EC350 al MIDI IN del data filer. MIDI... - Page 206 EC350. Usate un cavo MIDI per collegare il MIDI OUT di EC350 al MIDI IN del data filer. Preparate il data filer per ricevere dati MIDI. In EC350, tenete premuto il tasto TRANSPOSE/FUNCTION, e premete il tasto di selezione suoni VIBES/GUITAR.
-
Page 207: Assemblaggio Del Supporto
CAPITOLO Assemblaggio del supporto Attenzione: L’assemblaggio del supporto deve essere effettuato da due o più persone. • Attenzione alle mani e alle dita durante il posizionamento del pianoforte sul sup- porto. • Verificate che le parti siano installate correttamente, e procedete seguendo i passi elencati. - Page 208 Elenco delle parti × 1 Piede destro × 1 Piede sinistro × 1 Barra dei pedali × 1 Pannello posteriore × 1 Pianoforte × 1 Alimentatore × 9 Viti × 4 Bulloni lunghi × 4 Bulloni corti × 1 Piedino per la barra dei pedali NB: Per il montaggio è...
- Page 209 Adagiate a terra il foglio di polietilene contenuto nell’imballo, ed appoggiateci sopra il piede sinistro (B), con la guida metallica rivolta verso l’alto. Unite la barra dei pedali (C) al piede sinistro (B), con i pedalini rivolti verso la parte anteriore del piede (vedi immagine).
- Page 210 Appoggiate a terra il supporto fin qui assemblato, con la parte posteriore del piede appoggiata a terra. Unite il piede destro (A) alla barra dei pedali (C), allineandoli con la guida presente nel fianco del piede. Inserite due bulloni lunghi (b) nei due fori della barra dei pedali, dall’interno di essa, e serrate i bulloni.
- Page 211 Se lo desiderate, rovesciate il supporto, appoggiando la parte esterna del piede destro a terra. A questo punto, potete fissare l’alimentatore (F) alla barra dei pedali, mediante l’apposita striscia adesiva di velcro (da cui avrete rimosso il nastro protet- tivo) situata sotto la barra stessa, come mostrato in figura. In due persone, sollevate il pianoforte (E), in modo da avere accesso alla sua parte inferiore.
- Page 212 Sollevate il pianoforte ed unitelo al supporto, infilando i due bulloni (sporgenti dalla parte inferiore del pianoforte) nei fori posteriori delle guide metalliche del supporto. Infilate i rimanenti due bulloni corti (c) nei due fori situati sotto il pianoforte. Ser- rate i quattro bulloni.
- Page 213 Collegate i cavi dei pedali e dell’alimentazione ai rispettivi connettori del piano- forte. Fissate il cavo di alimentazione con l’apposito fermacavi, come mostrato in figura. Posizionate il pianoforte nella sua sistemazione finale. Regolate il piedino a vite (d) situato sotto i pedali, in modo che tocchi il suolo. Serrate e controllate tutte le viti.
- Page 214 Dopo un lungo periodo di utilizzo, le viti e i bulloni tendono ad allentarsi. Per Viti. evitare danni allo strumento, è necessario procedere al loro controllo e all’eventuale serraggio. Per smontare l’EC350, seguite in senso inverso le presenti istruzioni. Smontaggio. Dopo le smontaggio, conservate tutte le viti e tutte le parti. Capitolo 8...
-
Page 215: Soluzione Dei Problemi
Polifonia EC350 contiene suoni campionati, cioè registrati dal suono degli strumenti musicali reali, successivamente elaborato. Questi suoni possono essere costituiti uno o più campioni diversi che vengono riprodotti quando si preme un tasto. I suoni costituiti da un solo campione hanno una polifonia massima di 60 voci, mentre i suoni costi- tuiti da due campioni hanno una polifonia limitata ad un massimo di 30 note. -
Page 216: Notazione Inglese E Notazione Italiana
Inoltre, quando si suonano più di due note in modo Layer, la polifonia massima dipende dal numero totale di suoni campionati che costituiscono i suoni utilizzati. L’uso di REVERB e CHORUS riduce ulteriormente la polifonia, rispettivamente, di 10 e 3 note. Dati memorizzati Quando si spegne lo strumento, la maggior parte delle impostazioni viene conser- vata nella memoria interna. - Page 217 Consumo 35 Watt 1395 × 482 × 878 mm, escluso leggio Dimensioni (L x P x H) Peso 52,4 kg Colore Palissandro scuro, ciliegio Suoni elaborati con INFINITY™. Korg si riserva il diritto di cambiare le specifiche senza preavviso. Appendice...
-
Page 218: Scorciatoie Da Pannello Di Controllo
Scorciatoie da pannello di controllo …mentre premete HARPSI/ VIBES/ PIANO 1 PIANO2 E.PIANO 1 E.PIANO 2 ORGAN 1 CLAV GUITAR Tenete premuto… REVERB Leggero Normale Intenso CHORUS Leggero Normale Intenso TOUCH Leggero Normale Pesante Werck. Kirnberger METRONOME Metro: 2/4 Metro: 3/4 Metro: 4/4 Metro: 6/4 Accento... -
Page 219: Midi Implementation Chart
MIDI Implementation Chart KORG EC350 Digital Piano May 01, 2003 Function Transmitted Recognized Remarks Default Basic Channel Changed 1–16 1-16 Default Mode Messages Altered ****************** 15–113 0–127 Note Number: True Voice ****************** 21–108 Note On O 9n, V=1–127 O 9n, V=1–127... - Page 221 Care Card Garantie...
- Page 230 Address KORG ITALY Spa Via Cagiata, 85 I-60027 Osimo (An) Italy Web servers www.korg.co.jp www.korg.com www.korg.co.uk www.jam-ind.com www.korgfr.net www.korg.de www.korg.it www.letusa.es PART NUMBER: MAN0001092 © KORG Italy 2003. All rights reserved...