Nokia 101 User Manual
Hide thumbs
Also See for 101:
- User manual (55 pages) ,
- Owner's manual (38 pages) ,
- Service manual (16 pages)
Table of Contents
Advertisement
Advertisement
Table of Contents

Related Manuals for Nokia 101


Summary of Contents for Nokia 101
- Page 1 Nokia 101 User Guide Issue 1.4 EN...
-
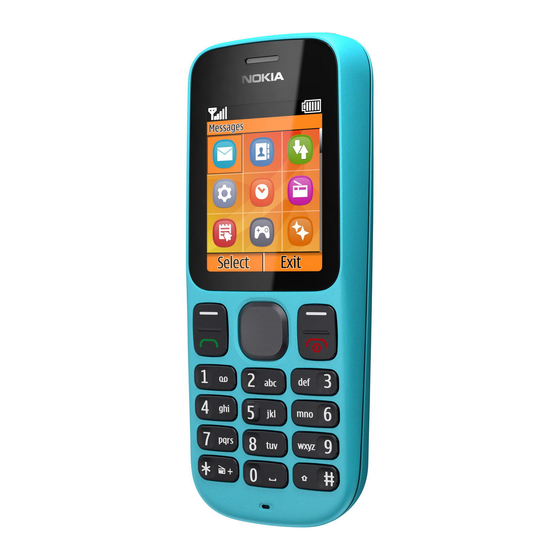
Page 2: Keys And Parts
Keys and parts Earpiece Microphone Screen Scroll key End/Power key Call key Keypad Selection keys... - Page 3 Charger connector 10 Flashlight 11 Memory card slot 12 Loudspeaker 13 Headset connector...
-
Page 4: Insert The Sim Card And Battery
Insert the SIM card and battery Slide the back cover down. Close the SIM card holder. Open the SIM card holder. Slide SIM2 under the metal part. Insert SIM1. Make sure the plastic tab holds the SIM card in place. -
Page 5: Insert A Memory Card
Insert a memory card Line up the contacts. Open the cover of the memory card slot. See vi) in General information. Push the battery in. Make sure the contact area is facing up, and push the card in. Slide the back cover up. Close the cover. -
Page 6: Charge The Battery
Charge the battery Switch on 2 seconds Connect the charger to a wall outlet. Press and hold the power key Dual SIM SIM1 SIM2 Connect the charger to the phone. Set which SIM card to use. Press OK. See v) in General Information. Back The phone indicates a full charge. - Page 7 15:00 Back Menu Go to To set the minutes, press right, and The phone is ready to use. then press up or down. Press OK. Time is set The time is changed. Date: .04.2011 Exit To set the date, press up or down. Press OK.
-
Page 8: Explore Your Phone
Explore your phone Select Back Menu Go to To see the available functions, press To select an item, press Select. Menu. Select Exit Select Back To go to a function, press the scroll To return to the previous view, press key up, down, left, or right. -
Page 9: General Information
Select a SIM card for calls and messages Default SIM for calls Ask every time SIM1 Default SIM for SIM2 msgs Ask every time Select Back SIM1 SIM2 You can use two SIM cards, and share Select Default SIM for calls. your phone with your family. - Page 10 Default SIM for calls Ask every time Default SIM for msgs Ask every time Select Back Select Default SIM for msgs. Tip: To open Dual SIM settings from the home screen, press and hold *. Ask every time SIM1 SIM2 Select Back Select Ask every time.
- Page 11 Use one SIM card only Dual SIM SIM1 SIM2 Select Exit Menu Go to Select Back To save battery power, use only SIM1. Select SIM1. SIM2 is disconnected Press Menu. Select Settings. from the network. Dual SIM Dual SIM settings Tone settings SIM1 Display...
-
Page 12: Make Or Answer A Call
Lock or unlock keypad Make or answer a call Menu Go to To avoid accidental pressing of keys, Make a call to a number that you have. use the keypad lock. 012345 Options Clear Press Menu, and then quickly press *. Enter the phone number. -
Page 13: Change The Volume
Change the volume Calling 0123456789 End call Press Is the volume too loud during a call or when listening to the radio? Volume 9876543210 calling Silence A friend's phone rings. To answer, Press left for quieter, right for louder. press You can enjoy chatting with your Better. -
Page 14: Use The Loudspeaker
Use the loudspeaker Use the headset Others in the room can join in with a You can make a hands-free call with a call. headset. 0123456789 00:00:05 Options Loudsp. 0123456789 calling During a call, press Loudsp.. Connect a headset. Calling 0123456789 End call Place the phone on a table. -
Page 15: Switch Off
Switch off Save a name and number To save battery power, switch the Add a friend's number to your phone. phone off. Switch off 2 seconds Menu Go to Select Exit Press and hold the power key Press Menu. Select Contacts. Search Add contact Delete... - Page 16 SIM1 Phone number: Phone number: SIM2 Phone 0123456789 0123 Clear Clear Select Back Select where to save the contact. Enter the phone number. Press OK. Contact name: Clear Back Write the name. Go to a picture, and press Use. Mike Contact name: 9876543210 calling...
-
Page 17: Change The Ringtone
Display Coconut settings Desk phone Select Back Back Select Tone settings. Press OK. SIM1 Ringing tone Done Beach SIM2 Ringing volume Nokia tune Level 4 Back Select Back Select Select Ringing tone and a SIM card. The ringtone is selected. - Page 18 Flashlight SIM2 SIM1 Tip: To select different ringtones for Use the flashlight if you need more SIM1 and SIM2, repeat steps 3-5. light. See iii) in General Information. Song 1 My favourite 01:10 01:18 songs Demo songs Use as ringtone Options Back Select...
-
Page 19: Send And Receive Messages
Send and receive messages Hello Anna, how are you today? Menu Go to Select Exit Options Clear Press Menu. Select Messages. Press Options, and select Send. See i) in General Information. Create SIM1 message Inbox SIM2 Sent items Select Back Select Back Select Create message. -
Page 20: Write Text
Write text Press a key repeatedly until the letter is shown. Change the writing language: select Menu > Settings > Phone settings > Language, the language, and OK. See iv) in General Information. The message is sent. Insert a space: press 0. Change a word: press * repeatedly until the word is shown. -
Page 21: Set An Alarm
Set an alarm Back Use your phone as an alarm clock to To set the hour, press up or down. wake you up. 08:30 Menu Go to Select Exit Back Press Menu. Select Clock. To set the minutes, press right and then up or down. -
Page 22: Set A Reminder
Set a reminder Alarm on Meeting Postp. Quit The alarm is ready. Set a reminder to meet your friends. Alarm! 08:30 Menu Go to Select Exit Stop Snooze An alarm sounds at the set time. Press Menu. Select Extras. Press Stop. Expense Countd. - Page 23 Alarm on Feb 2011 Week 5 M T W T F S Alarm off 3 4 5 6 8 9 10 11 12 13 15 16 17 18 22 23 26 27 1 2 3 4 5 6 Options Back Back Go to the date, and press Options.
-
Page 24: Listen To Music
Listen to music All songs My favourite songs Demo songs Select Back Enjoy your music on the go. Make sure Press Options. Select All songs. a memory card is in your phone. Root Song 1 Song 2 Song 3 Song 4 Menu Go to Select... -
Page 25: Listen To The Radio
Listen to the radio Tip: To go to the previous or next Use your phone to listen to the radio. song, press 2 or 8. To pause, press 5. See ii) in General Information. Mp3 Music player 00:00 00:00 Options Back Tip: Press left for quieter, right for Connect a headset. - Page 26 Mp3 Music Switch off player Manual tuning Save channel Radio Auto tuning Set frequency Delete channel Select Back Select Back Select Radio. The radio is on. To save the channel, press Options, and select Save channel. Search all available Channel name: channels? Station 1 Back...
- Page 27 Calculator Save channel Auto tuning Set frequency Delete channel Rename Loudspeaker Select Back To use the loudspeaker, press Use your phone to make a calculation. Options, and select Loudspeaker. Switch off Radio off Save channel Auto tuning Set frequency Delete channel Rename Menu Go to...
-
Page 28: Nokia Original Accessories
Equals Clear An extensive range of accessories is available for your device. For more details, see www.nokia-asia.com/ accessories. To enter numbers, press the keys. Practical rules about accessories • Keep all accessories out of the reach of small children. - Page 29 Important: Battery talk and stand- by times are estimates and only possible under optimal network conditions. Actual battery talk and standby times depend on SIM cards, features used, battery age and condition, temperatures to which battery is exposed, network conditions, and many other factors, and may be significantly shorter than those specified above.
-
Page 30: General Information
General information Read these simple guidelines. Not following PROTECT YOUR HEARING them may be dangerous or illegal. For further To prevent possible hearing info, read the complete user guide. damage, do not listen at high volume levels for long periods. Exercise caution when holding SWITCH OFF IN RESTRICTED your device near your ear while the... - Page 31 Keep the device dry. Precipitation, vi) Use only compatible memory cards humidity, and all types of liquids or moisture approved by Nokia for use with this device. can contain minerals that corrode electronic Incompatible cards may damage the card and circuits.
- Page 32 • Do not use or store the device in dusty and promote the recycling of materials. or dirty areas. Moving parts and electronic Check how to recycle your Nokia products at components can be damaged. www.nokia.com/recycling. • Do not store the device in high temperatures.
- Page 33 not leave a fully charged battery connected explosion, or other hazard, and may to a charger, as overcharging may shorten invalidate any approval or warranty. If you the battery’s lifetime. If left unused, a fully believe the battery or charger is damaged, charged battery will lose its charge over time.
- Page 34 solely on any wireless device for essential • Follow the manufacturer directions for communications like medical emergencies. the implanted medical device. Small children If you have any questions about using your Your device and its accessories are not toys. wireless device with an implanted medical They may contain small parts.
- Page 35 Nokia does not accessories. Remember that air bags inflate endorse or assume liability for such sites. with great force. Do not place your device or accessories in the air bag deployment area.
- Page 36 The highest SAR value under the ICNIRP Telecommunications. Information about the guidelines for use of the device at the ear is SAR level of Nokia devices can be obtained 1.28 W/kg. from Nokia’s website at www.nokia.com. Use of device accessories may result in Your mobile device is also designed to meet different SAR values.
- Page 37 To the maximum extent permitted by applicable law, under no circumstances shall Nokia or any of its licensors be responsible for any loss of data or income or any special, incidental, consequential or indirect Nokia is transitioning between EU Notified damages howsoever caused.