
Related Manuals for SMC Networks SMCD3GN2


Summary of Contents for SMC Networks SMCD3GN2
- Page 1 DOCSIS 3.0 Wireless Cable Modem Gateway FastFind Links Getting to Know Your Gateway SMCD3GN2 User Manual Installing Your Gateway Configuring Your Computer for TCP/IP Configuring Your Gateway...
- Page 2 Copyright © 2011 SMC Networks All Rights Reserved Information furnished by SMC Networks, Inc. (SMC) is believed to be accurate and reliable. However, no responsibility is assumed by SMC for its use, or for any infringements of patents or other rights of third parties which may result from its use.
-
Page 3: Table Of Contents
Disabling Proxy Settings in Firefox ..............28 Disabling Proxy Settings in Safari ..............29 Disabling Firewall and Security Software ............29 Accessing the Gateway’s Web Management ............30 Understanding the Web Management Interface Screens ......... 31 SMCD3GN2 Wireless Cable Modem User Manual... - Page 4 Using the Reboot Menu to Reboot the Gateway ..........99 Viewing Status Information................100 Viewing Cable Status Information ..............101 Appendix A - Compliances ................. 103 Appendix B - Technical Specifications.............. 104 Index ........................108 SMCD3GN2 Wireless Cable Modem User Manual...
-
Page 5: Preface
Congratulations on your purchase of your SMCD3GN2 Wireless Cable Modem Gateway. Your SMCD3GN2 Wireless Cable Modem Gateway is the ideal all-in-one wired and wireless solution for the home or business environment. SMC is proud to provide you with a powerful, yet simple communication device for connecting your local area network (LAN) to the Internet. -
Page 6: Key Features
Quality of Service (QoS) ensures high-quality performance with existing networks Effortless plug-and-play installation Intuitive graphical user interface (GUI) configuration, regardless of operating system Comprehensive front panel LEDs for network status and troubleshooting Compatible with all popular Internet applications SMCD3GN2 Wireless Cable Modem User Manual... -
Page 7: Document Organization
Electric Shock Hazard This symbol warns users of electric shock hazard. Failure to take appropriate precautions such as not opening or touching hazardous areas of the equipment could result in injury or death. SMCD3GN2 Wireless Cable Modem User Manual... -
Page 8: Typographic Conventions
[ ] square Indicates optional values. brackets { } braces Indicates required or expected values. | vertical bar Indicates that you have a choice between two or more options or arguments. viii SMCD3GN2 Wireless Cable Modem User Manual... -
Page 9: Getting To Know Your Gateway
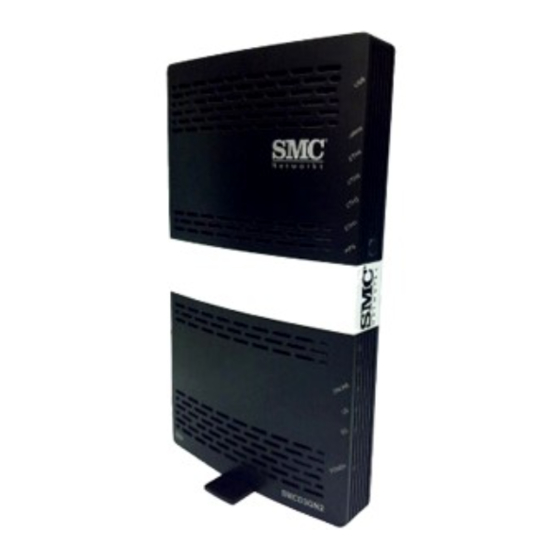
1 Getting to Know Your Gateway Before you install your SMCD3GN2 Wireless Cable Modem Gateway, check the package contents and become familiar with the Gateway’s front and back panels. The topics covered in this chapter are: Unpacking Package Contents (page 10) -
Page 10: Unpacking Package Contents
Getting to Know Your Gateway Unpacking Package Contents Your SMCD3GN2 package should include the following items: One SMCD3GN2 Wireless Cable Modem Gateway One power cord One Category 5E Ethernet cable One CD that contains this User Manual System Requirements To complete the installation, you will need the following items:... -
Page 11: Front Panel
Getting to Know Your Gateway Front Panel The front panel of your SMCD3GN2 Wireless Cable Modem Gateway contains a set of light- emitting diode (LED) indicators. These LEDs show the status of the Gateway and simplify troubleshooting. The front panel also contains a WPS button for configuring wireless security automatically. - Page 12 ON = connected at 1 Gbps. OFF = no Ethernet link detected. WIFI Green Blinking = data is transmitting. ON = Wi-Fi is enabled. OFF = Wi-Fi is disabled. Green Reserved for future use. SMCD3GN2 Wireless Cable Modem User Manual...
-
Page 13: Configuring Wireless Security
If no client joins, the LED stops blinking after 4 minutes. Rear Panel The rear panel of your SMCD3GN2 Wireless Cable Modem Gateway contains a reset button and the ports for attaching the supplied power adapter and making additional connections. -
Page 14: Restoring Factory Defaults
1. Leave power plugged into the Gateway. 2. Find the Reset button on the back panel, then press and hold it for at least 10 seconds. 3. Release the Reset button. SMCD3GN2 Wireless Cable Modem User Manual... -
Page 15: Installing Your Gateway
2 Installing Your Gateway This chapter describes how to install your SMCD3GN2 Wireless Cable Modem Gateway. The topics covered in this chapter are: Finding a Suitable Location (page 16) Connecting to the LAN (page 16) Connecting the WAN (page 17) -
Page 16: Finding A Suitable Location
Installing Your Gateway Finding a Suitable Location The SMCD3GN2 Wireless Cable Modem Gateway can be installed in any location with access to the cable network. All of the cables connect to the rear panel of the Gateway for better organization and utility. The LED indicators on the front panel are easily visible to provide you with information about network activity and status. -
Page 17: Connecting The Wan
LEDs show the Gateway’s status (see Table 1 on page 12). WARNING: Only use the power cord supplied with the Gateway. Using a different power cord can damage the Gateway and void the warranty. SMCD3GN2 Wireless Cable Modem User Manual... -
Page 18: Configuring Your Computer For Tcp/Ip
3 Configuring Your Computer for TCP/IP After you install your SMCD3GN2 Wireless Cable Modem Gateway, configure the TCP/IP settings on a computer that will be used to configure the Gateway. This chapter describes how to configure TCP/IP for various Microsoft Windows and Apple Macintosh operating systems. -
Page 19: Configuring Microsoft Windows 2000
6. Click Obtain an IP address automatically to configure your computer for DHCP. 7. Click the OK button to save this change and close the Local Area Connection Properties dialog box. 8. Click OK button again to save these new changes. 9. Restart your computer. SMCD3GN2 Wireless Cable Modem User Manual... -
Page 20: Configuring Microsoft Windows Xp
DHCP. Click the OK button to save this change and close the Internet Protocol (TCP/IP) Properties dialog box. 7. Click the OK button again to save your changes. 8. Restart your computer. SMCD3GN2 Wireless Cable Modem User Manual... -
Page 21: Configuring Microsoft Windows Vista
5. In the Local Area Connection Properties dialog box, verify that Internet Protocol (TCP/IPv4) is checked. Then select Internet Protocol (TCP/IPv4) and click the Properties button (see Figure 7). The Internet Protocol Version 4 Properties dialog box appears. Figure 7. Local Area Connection Properties Window SMCD3GN2 Wireless Cable Modem User Manual... - Page 22 Figure 8. Internet Protocol Properties Window 7. Click the OK button to save your changes and close the dialog box. 8. Click the OK button again to save your changes. Figure 9. Local Area Connection Status Window SMCD3GN2 Wireless Cable Modem User Manual...
-
Page 23: Configuring Microsoft Windows 7
Figure 11. Example of Network Connections List 2. Right-click the Local Area Connection icon and click Properties. 3. In the Networking tab, click either Internet Protocol Version 4 (TCP/IPv4) or Internet Protocol Version 6 (TCP/IPv6), and then click Properties. SMCD3GN2 Wireless Cable Modem User Manual... - Page 24 Configuring Your Computer for TCP/IP Figure 12. Local Area Network Connection Properties Dialog Box 4. In the properties dialog box, click Obtain an IP address automatically to configure your computer for DHCP (see Figure 13). SMCD3GN2 Wireless Cable Modem User Manual...
-
Page 25: Configuring An Apple Macintosh Computer
1. Pull down the Apple Menu, click System Preferences, and select Network. 2. Verify that the NIC connected to your SMCD3GN2 is selected in the Show field. 3. In the Configure field on the TCP/IP tab, select Using DHCP (see Figure 14). - Page 26 Configuring Your Computer for TCP/IP Figure 14. Selecting Using DHCP in the Configure Field SMCD3GN2 Wireless Cable Modem User Manual...
-
Page 27: Configuring Your Gateway
This chapter describes how to use a Web browser to configure the Gateway. The topics covered in this chapter are: Pre-configuration Guidelines (page 28) Accessing the Gateway’s Web Management (page 30) Understanding the Web Management Interface Screens (page 31) Web Management Interface Menus (page 32) SMCD3GN2 Wireless Cable Modem User Manual... -
Page 28: Pre-Configuration Guidelines
3. Click the Advanced tab. 4. In the Advanced tab, click the Network tab. 5. Click the Settings button. 6. Click Direct connection to the Internet. 7. Click the OK button to confirm this change. SMCD3GN2 Wireless Cable Modem User Manual... -
Page 29: Disabling Proxy Settings In Safari
9. Click Apply Now to finish. Disabling Firewall and Security Software Disable any firewall or security software that may be running on your computer. For more information, refer to the documentation for your firewall. SMCD3GN2 Wireless Cable Modem User Manual... -
Page 30: Accessing The Gateway's Web Management
5.5 or later), you will log in to the interface to define system parameters, change password settings, view status windows to monitor network conditions, and control the Gateway and its ports. To access your SMCD3GN2 Wireless Cable Modem Gateway’s web-based management screens, use the following procedure. 1. Launch a Web browser. -
Page 31: Understanding The Web Management Interface Screens
Figure 17. Example of System Submenu The top-right side of the page contains a Home button that displays the Home (Status) page and a Logout button for logging out of the Web management interface. SMCD3GN2 Wireless Cable Modem User Manual... -
Page 32: Web Management Interface Menus And Submenus
Enable or disable Wi-Fi Protected Setup (WPS). • Wireless > MAC Filtering Allow all wireless client stations or only trusted PCs to connect over a wireless • connection. Wireless > Advanced Settings Configure advanced wireless settings for the Gateway. • SMCD3GN2 Wireless Cable Modem User Manual... - Page 33 DHCP client PCs current connected to the Gateway. The submenu lets you: Status > Cable Status • View cable initialization procedures, and cable downstream and upstream status. SMCD3GN2 Wireless Cable Modem User Manual...
-
Page 34: System Settings Menu
Network Magic or any software application that discovers and manages network devices. Check = HNAP is enabled on the Gateway. . (default) • Uncheck = HNAP is disabled on the Gateway • SMCD3GN2 Wireless Cable Modem User Manual... -
Page 35: Password Settings Menu
To access the Password Settings menu, click System in the menu bar and then click the Password Settings submenu. Figure 19 shows an example of the menu and Table 5 describes the settings you can select. Figure 19. Password Settings Menu SMCD3GN2 Wireless Cable Modem User Manual... -
Page 36: Lan Settings Menu
Using the LAN Settings menu, you can define private LAN IP addresses. To access the LAN Settings menu, click LAN in the menu bar. Figure 20 shows an example of the menu and Table 6 describes the settings you can select. SMCD3GN2 Wireless Cable Modem User Manual... - Page 37 Domain name of the Gateway’s private LAN settings. Enable DHCP Server Enables or disables the DHCP server to allow automatic allocation of IP addresses to LAN client PCs. Checked = DHCP server is enabled. (default) Unchecked = DHCP server is disabled. SMCD3GN2 Wireless Cable Modem User Manual...
- Page 38 Private IP Address Pool Start IP Starting IP address range for the pool of allocated for private IP addresses. End IP Ending IP address range for the pool of allocated for private IP addresses. SMCD3GN2 Wireless Cable Modem User Manual...
-
Page 39: Ether Switch Port Control Menu
To access the Ether Switch Control menu, click LAN in the menu bar and then click the Ether Switch Control submenu in the menu bar. Figure 21 shows an example of the menu. Figure 21. Ether Switch Port Control Menu SMCD3GN2 Wireless Cable Modem User Manual... - Page 40 Under the Mode H/F column, leave the check mark for full-duplex mode or uncheck it for half-duplex mode. 2. To disable a port, regardless of the auto-negotiation and duplex settings, uncheck Enable for the port. 3. Click Apply. SMCD3GN2 Wireless Cable Modem User Manual...
-
Page 41: Lan Access Control Menu
To access the LAN Access Control menu, click LAN in the menu bar and then click the Ether Access Control submenu in the menu bar. Figure 22 shows an example of the menu. Figure 22. LAN Access Control Menu SMCD3GN2 Wireless Cable Modem User Manual... -
Page 42: Controlling Lan Access
Under MAC Address, enter the MAC address of the device. c. Under Trusted?, click Y. d. Click Add to add the client station to the Lan Trusted Table. e. To manually add more client stations (up to 16), repeat steps 3a through 3d. SMCD3GN2 Wireless Cable Modem User Manual... -
Page 43: Adding And Deleting Untrusted Client Stations
Delete button. A precautionary message does not appear before deleting an untrusted client station. 5. To enforce this policy, click Untrusted PC list at the top of the menu. 6. When you finish, click Apply. SMCD3GN2 Wireless Cable Modem User Manual... -
Page 44: Qos Settings Menu
Queue - lets you specify whether QoS behavior runs with strict or weighted priority. See page 50. DSCP Remarking - lets you define the DSCP remarking action and mode. See page 52. Figure 23. QoS Settings Menu SMCD3GN2 Wireless Cable Modem User Manual... -
Page 45: Port Based Qos Menu
Apply. Note: The Port submenu is not available in the menu bar if Enable QOS Module is not checked in the QoS Settings menu (see page 39). Figure 24. Port Based QoS Menu SMCD3GN2 Wireless Cable Modem User Manual... -
Page 46: Cos Settings Menu
Figure 25 shows an example of the menu. Note: The COS submenu is not available in the menu bar if Enable QOS Module is not checked in the QoS Settings menu (see page 39). Figure 25. CoS Settings Menu SMCD3GN2 Wireless Cable Modem User Manual... - Page 47 CoS setting from 0 to 3 = normal priority. Packets in this queue leave the port after the high-priority queue is emptied. – CoS setting from 4 to 7 = high priority. Packets in this queue leave the port first. 4. Click Apply. SMCD3GN2 Wireless Cable Modem User Manual...
-
Page 48: Dscp Based Qos Menu
Figure 26 shows an example of the menu. Note: The DSCP submenu is not available in the menu bar if Enable QOS Module is not checked in the QoS Settings menu (see page 39). SMCD3GN2 Wireless Cable Modem User Manual... - Page 49 3. Under Queue, select a queue (from 0 to 3) you want to map to this DSCP value. Higher priority values are evaluated as being of higher importance than lower priority values. 4. To define DSCP-based QoS values for other queues, repeat steps 2 and 3. 5. Click Apply. SMCD3GN2 Wireless Cable Modem User Manual...
-
Page 50: Queue Settings Menu
Figure 27 shows an example of the menu. Note: The Queue submenu is not available in the menu bar if Enable QOS Module is not checked in the QoS Settings menu (see page 39). Figure 27. Queue Settings Menu SMCD3GN2 Wireless Cable Modem User Manual... - Page 51 8. 3. For each Gateway queue, enter a weight. Each weight corresponds to a percentage of consumed bandwidth, as shown in the % of Bandwidth column. 4. When you finish, click Apply. SMCD3GN2 Wireless Cable Modem User Manual...
-
Page 52: Dscp Remarking Menu
Module is not checked in the QoS Settings menu (see page 39). Figure 29. DSCP Remarking Menu To configure DSCP remarking settings: 1. Check Enable DSCP Remarking. 2. Complete the options in the menu and refer to Table 8. 3. When you finish, click Apply. SMCD3GN2 Wireless Cable Modem User Manual... - Page 53 Others When checked, lets the Gateway request a remarking action if DSCP equals a non-zero value. By default, this option is checked, but does not take effect until the OSPF Status changes to ENABLE. SMCD3GN2 Wireless Cable Modem User Manual...
-
Page 54: Wireless Basic Settings Menu
To access the Wireless Basic Settings menu, click Wireless in the menu bar. Figure 30 shows an example of the menu and Table 9 describes the settings you can select. Figure 30. Wireless Basic Settings Menu SMCD3GN2 Wireless Cable Modem User Manual... - Page 55 Select the appropriate channel from the list provided to correspond with your network settings, between 1 and 11 (in North America). Default is Auto, which selects the appropriate channel automatically. All devices in your wireless network must use the same channel to work properly. SMCD3GN2 Wireless Cable Modem User Manual...
-
Page 56: Wireless Encryption Settings Menu
Note: The Encryption submenu is not available in the menu bar if wireless operation is disabled in the Wireless Basic Settings menu (see page 54). Figure 31. Wireless Encryption Settings Menu SMCD3GN2 Wireless Cable Modem User Manual... - Page 57 WPA-Personal = select this option if your wireless adapters support WPA-Personal. This encryption method is superior to WEP and offers two cipher types, TKIP and AES, with dynamic encryption keys. If you select WPA-Personal, select the options in Figure 33 and Table 12. (default) SMCD3GN2 Wireless Cable Modem User Manual...
- Page 58 8 to 63 ASCII characters. You can use upper-case, lower-case, and numeric characters to from your passphrase. A Generate Keys button next to this field lets the Gateway generate a passphrase based on the characters typed in this field. SMCD3GN2 Wireless Cable Modem User Manual...
- Page 59 Shared secret between the Gateway and access points and wireless clients. Please check whether a default pre-shared key is required. Pre-Authentication Enables secure fast roaming, without noticeable signal latency. By default, this option is disabled. SMCD3GN2 Wireless Cable Modem User Manual...
-
Page 60: Wps Setup
To access the WPS Setup menu, click Wireless in the menu bar and then click the WPS submenu. Figure 34 shows an example of the menu. Using the WPS Config drop-down list, select the appropriate option to enable or disable WPS setup. SMCD3GN2 Wireless Cable Modem User Manual... - Page 61 Configuring Your Gateway Figure 34. WPS Setup Menu By default, WPS is disabled. If you select ENABLE and click Apply, the options in Figure 35 are displayed. Table 13 describes the options shown. SMCD3GN2 Wireless Cable Modem User Manual...
- Page 62 PBC = Push Button Configuration. Lets you use the WPS button on the front panel of the Gateway • to configure WPS. WPS PIN If PIN was selected for WPS mode, enter the PIN required to enable WPS. The PIN must be 8 alpha- numeric characters long. SMCD3GN2 Wireless Cable Modem User Manual...
-
Page 63: Mac Filtering
Note: The MAC Filtering submenu is not available in the menu bar if wireless operation is disabled in the Wireless Basic Settings menu (see page 54). Figure 36. MAC Filtering Menu SMCD3GN2 Wireless Cable Modem User Manual... -
Page 64: Adding And Deleting Wireless Client Stations
3. To delete wireless client stations from the Wireless Control List,. click the radio button corresponding to the wireless client station you want to delete and click the Delete button. A precautionary message does not appear before deleting a wireless client station. 4. When you finish, click Apply. SMCD3GN2 Wireless Cable Modem User Manual... -
Page 65: Advanced Wireless Settings Menu
Table 15 describes the settings you can select. Note: The Advanced Wireless Settings submenu is not available in the menu bar if wireless operation is disabled in the Wireless Basic Settings menu (see page 54). Figure 37. Wireless Advanced Settings Menu SMCD3GN2 Wireless Cable Modem User Manual... - Page 66 Enables or disables the BA request function. Default is disable. Other HT TxStream Select 1 or 2 from the pull-down menu. Default is 2. HT RxStream Select 1 or 2 from the pull-down menu. Default is 2. SMCD3GN2 Wireless Cable Modem User Manual...
-
Page 67: Port Forwarding Menu
To access the Port Forwarding menu, click NAT in the menu bar and then click the Port Forwarding submenu in the menu bar. Figure 38 shows an example of the menu. Figure 38. Port Forwarding Menu SMCD3GN2 Wireless Cable Modem User Manual... -
Page 68: Adding Predefined Services
7. To delete a predefined service, click the radio button to the left of the service you want to delete and click the Delete button. No precautionary message appears before you delete a predefined service. SMCD3GN2 Wireless Cable Modem User Manual... - Page 69 End IP Enter the ending IP address in the remote IP address range. This field is unavailable if the Gateway is configured for any remote IP addresses or for a single remote IP address. SMCD3GN2 Wireless Cable Modem User Manual...
-
Page 70: Adding Customer-Defined Services
7. To delete a customer-defined service, click the radio button to the left of the service you want to delete and click the Delete button. No precautionary message appears before you delete a customized service. SMCD3GN2 Wireless Cable Modem User Manual... - Page 71 Configuring Your Gateway Figure 40. Customer Defined Service Menu SMCD3GN2 Wireless Cable Modem User Manual...
- Page 72 Numbers of the ports whose traffic the Gateway forwards to the LAN. If there is a range of ports, enter the starting private port here and check Enable Port Range. The Gateway automatically calculates the end private port. The LAN PC server listens for traffic/data on this port (or these ports). SMCD3GN2 Wireless Cable Modem User Manual...
-
Page 73: Security Settings (Firewall) Menu
By default, the Gateway’s firewall settings are enabled. To disable the firewall, uncheck Enable Firewall Module and click Apply. Disabling the firewall hides the submenus below the Firewall menu. Figure 41. Security Settings (Firewall) Menu SMCD3GN2 Wireless Cable Modem User Manual... -
Page 74: Configuring Access Control
By default, the Gateway does not block attempts to access the LAN from the Internet. To enable access control, check Enable Access Control if it is unchecked and click Apply. When Access Control is enabled, you can configure up to 35 predefined and customer- defined filtering tables. SMCD3GN2 Wireless Cable Modem User Manual... - Page 75 Configuring Your Gateway Figure 42. Access Control Menu SMCD3GN2 Wireless Cable Modem User Manual...
- Page 76 7. To delete a predefined rule, click the radio button to the left of the rule you want to delete and click the Delete button. No precautionary message appears before you delete a rule. Click Apply in the Access Control menu to save your settings. SMCD3GN2 Wireless Cable Modem User Manual...
- Page 77 Configuring Your Gateway Figure 43. Predefined Access Rules Menu SMCD3GN2 Wireless Cable Modem User Manual...
- Page 78 Ending IP address in the local IP address range to which the access rule will be applied. This field is unavailable if the Gateway is configured for any local IP address or a single local IP address. SMCD3GN2 Wireless Cable Modem User Manual...
- Page 79 7. To delete a customer-defined rule, click the radio button to the left of the rule you want to delete and click the Delete button. No precautionary message appears before you delete a rule. Click Apply in the Access Control menu to save your settings. SMCD3GN2 Wireless Cable Modem User Manual...
- Page 80 Configuring Your Gateway Figure 44. Customer Defined Access Rules Menu SMCD3GN2 Wireless Cable Modem User Manual...
- Page 81 Starting port number on which the access rule will be applied. If necessary, contact the application vendor for this information. To Port Ending port number on which the access rule will be applied. If necessary, contact the application vendor for this information. SMCD3GN2 Wireless Cable Modem User Manual...
- Page 82 7. To delete a predefined filter, click the radio button to the left of the filter you want to delete and click the Delete button. No precautionary message appears before you delete a predefined filter. Click Apply in the Access Control menu to save your settings. SMCD3GN2 Wireless Cable Modem User Manual...
- Page 83 Ending IP address in the local IP address range to which the filter will be applied. This field is unavailable if the Gateway is configured for any local IP address or a single local IP address. SMCD3GN2 Wireless Cable Modem User Manual...
- Page 84 7. To delete a customer-defined filter, click the radio button to the left of the filter you want to delete and click the Delete button. No precautionary message appears before you delete a customer-defined filter. Click Apply in the Access Control menu to save your settings. SMCD3GN2 Wireless Cable Modem User Manual...
- Page 85 Configuring Your Gateway Figure 46. Customer Defined Filter Menu SMCD3GN2 Wireless Cable Modem User Manual...
- Page 86 Starting port number on which the filter will be applied. If necessary, contact the application vendor for this information. To Port Ending port number on which the filter will be applied. If necessary, contact the application vendor for this information. SMCD3GN2 Wireless Cable Modem User Manual...
-
Page 87: Configuring Special Applications
Enable Triggering checkbox and click Apply. To disable it, uncheck the Enable Triggering checkbox and click Apply. Note: The Special Application submenu is not available in the menu bar if Enable Firewall Module is disabled in the Security Settings (Firewall) menu (see page 73). SMCD3GN2 Wireless Cable Modem User Manual... - Page 88 7. To delete a trigger, click the radio button to the left of the trigger you want to delete and click the Delete button. No precautionary message appears before you delete a trigger. Click Apply in the Special Application menu to save your settings. SMCD3GN2 Wireless Cable Modem User Manual...
- Page 89 A. B uses this information to communicate directly to A. So initially, A is talking to MGC, but the final step has B initiating a session to A. If the third-party host-initiated session is not allowed in this example, the whole communication fails. SMCD3GN2 Wireless Cable Modem User Manual...
-
Page 90: Configuring Url Blocking
Tip: The Gateway provides a Schedule Rules feature that lets you configure URL blocking for certain days, if desired. For more information, see “Configuring Schedule Rules” on page 92. Figure 49. URL Blocking Menu SMCD3GN2 Wireless Cable Modem User Manual... - Page 91 To remove a site from being blocked by a keyword or domain name, use the Delete or Delete All buttons next to the field to delete selected or all keywords and/or domains. 4. Click Apply. SMCD3GN2 Wireless Cable Modem User Manual...
-
Page 92: Configuring Schedule Rules
Then specify the start and end times when you want to apply schedule rules to URL blocking. Select AM or PM, where AM refers to times from Midnight to Noon and PM refers to times from Noon to Midnight. 3. Click Apply. SMCD3GN2 Wireless Cable Modem User Manual... -
Page 93: Configuring Email And Syslog Alerts
The bottom area lets you define the alerting schedule. Note: The Email/Syslog Alert submenu is not available in the menu bar if Enable Firewall Module is disabled in the Security Settings (Firewall) menu (see page 73). SMCD3GN2 Wireless Cable Modem User Manual... - Page 94 Configuring Your Gateway Figure 51. Email/Syslog Alert Menu SMCD3GN2 Wireless Cable Modem User Manual...
- Page 95 5. To delete an email recipient, click the radio button to the left of the recipient and click Delete. No precautionary message appears before you delete the email recipient. 6. Click Apply. Figure 52. Recipient Adding Menu SMCD3GN2 Wireless Cable Modem User Manual...
- Page 96 To configure the Gateway to send an entry to a syslog if it detects an intrusion: 1. Perform step 1 under “Configuring Syslog Entries” on page 96. 2. Under Alert Options, check Send Syslog next to When intrusion is detected. 4. Click Apply. SMCD3GN2 Wireless Cable Modem User Manual...
-
Page 97: Configuring Dmz Settings
1. In the DMZ (Demilitarized Zone) menu, check Enable DMZ Host. The 2 rightmost fields next to this option become available. 2. Enter the last two octets in the IP addresses of the computer to be used as the DMZ server. 3. Click Apply. SMCD3GN2 Wireless Cable Modem User Manual... -
Page 98: Using The Tools Settings Menu
To reset the Gateway and restore its factory default settings: 1. Click Factory Reset. The warning message in Figure 55 appears. 2. Click OK to restore the Gateway’s factory default settings or click Cancel to retain the Gateway’s current settings. SMCD3GN2 Wireless Cable Modem User Manual... -
Page 99: Using The Reboot Menu To Reboot The Gateway
2. Click OK to reboot the Gateway or click Cancel to not reboot it. If you clicked OK, the reboot is complete when the POWER LED stops blinking and you will need to log in to the Web interface again. SMCD3GN2 Wireless Cable Modem User Manual... -
Page 100: Viewing Status Information
The Status menu appears when you first log in to the Web management interface. You can also display it by clicking Status in the menu bar. Figure 58 shows an example of the status information shown. SMCD3GN2 Wireless Cable Modem User Manual... -
Page 101: Viewing Cable Status Information
The Cable Status menu appears when you first log in to the Web management interface. You can also display it by clicking Status in the menu bar and then clicking the Cable Status submenu. Figure 59 shows an example of the cable status information shown. SMCD3GN2 Wireless Cable Modem User Manual... - Page 102 Configuring Your Gateway Figure 59. Example of Cable Status Page SMCD3GN2 Wireless Cable Modem User Manual...
-
Page 103: Appendix A - Compliances
Section 820-93 of the National Electric Code which provide guideline for proper grounding and, in particular, specify that the Coaxial cable shield shall be connected to the grounding system of the building, as close to the point of cable entry as practical. SMCD3GN2 Wireless Cable Modem User Manual... -
Page 104: Appendix B - Technical Specifications
Downloadable configuration files allow for easy setup and installation. Universal Plug and Play (UPnP) enabling any UPnP devices seamlessly SAMBA for USB Host port connection of USB hard drives MIB object that executes any CLI command SMCD3GN2 Wireless Cable Modem User Manual... - Page 105 Intrusion Detection Denial of Service (DoS) prevention Trojan Horse Prevention Smart Tracking Domain & URL Filtering Multiple User Profiles Dynamic Address-User Mapping Web based authentication Comprehensive Logging VPN Termination Pass-Through (IPSec, PPTP, L2TP, IKE) SMCD3GN2 Wireless Cable Modem User Manual...
- Page 106 960, 1920, 3840, 7680,15360,30720kpbs (64QAM) – 8960,17920,35840kbps (128QAM) Frequency Range: 5MHz- 42MHz Output Signal Level: – TDMA: +8 to +54dBmV (32QAM, 64QAM);+8 to +55dBmV (8QAM, 16QAM);+8 to +58dBmV (QPSK) – S-CDMA: +8 to +53dBmV( all modulation) SMCD3GN2 Wireless Cable Modem User Manual...
- Page 107 LEDs: Power, DS ( Downstream), US ( Upstream), Online, ETH (4), Wireless, USB POWER SUPPLY: AC on board; AC power: 90~120V * Actual speeds will vary based on factors including networks configuration and service tiers. SMCD3GN2 Wireless Cable Modem User Manual...
-
Page 108: Index
Changing login password, 35 security software, 29 Cipher type, 56 Disabling proxy settings Computer exempted from URL blocking, 91 Firefox, 28 Configuration, 27 Internet Explorer, 28 Configuring Safari, 29 access control, 74 DMZ (Demilitarized Zone) menu, 97 SMCD3GN2 Wireless Cable Modem User Manual... - Page 109 LAN Settings, 36 powering on, 17 MAC Filtering, 63 preconfiguring, 28 Password Settings, 35 rear panel, 13 Port Based QoS, 45 rebooting and losing custom settings, 14 Port Forwarding, 67 system requirements, 10 QoS Settings, 44 SMCD3GN2 Wireless Cable Modem User Manual...
- Page 110 Predefined filter, 82 Private LAN IP settings DHCP, 36 domain name, 36 TACACS configuration, 35 IP address, 36 TACACS+ configuration, 35 IP subnet mask, 36 TCP/IP configuration, 18 lease time, 36 Apple Macintosh, 25 SMCD3GN2 Wireless Cable Modem User Manual...
- Page 111 Ether Switch Port Control menu, 39 Wireless Basic Settings menu, 54 LAN Access Control menu, 41 Wireless Encryption Settings menu, 56 LAN Settings menu, 36 WPA mode, 56 logging in, 30 WPS Setup menu, 60 MAC Filtering menu, 63 SMCD3GN2 Wireless Cable Modem User Manual...
- Page 112 20 Mason Irvine, CA. 92618 U.S.A. http://www.smc.com Document number: 2013...