
Related Manuals for DeLonghi F270


Summary of Contents for DeLonghi F270
- Page 1 f 270 UK 30-11-2000 16:11 Pagina 1 E L E C T R I C F R Y E R I N S T R U C T I O N S F O R U S E...
-
Page 2: Description Of The Appliance
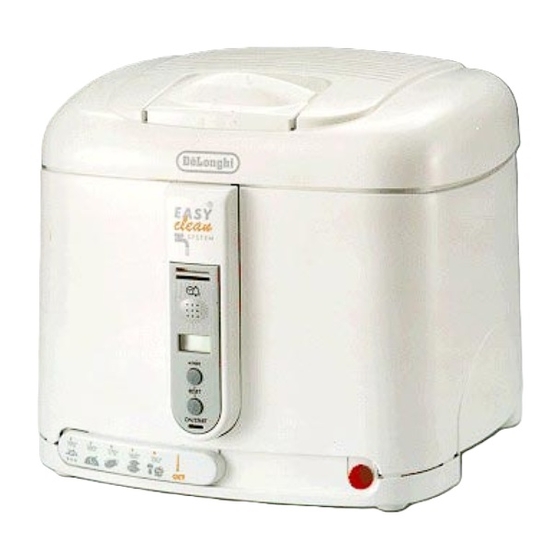
f 270 UK 30-11-2000 16:11 Pagina 2 DESCRIPTION OF THE APPLIANCE A Basket Control light B Basket handle with lock Drainage tube panel “Easy Clean C Inner lid System” D Lid opening handle M Drainage tube “Easy Clean System” E Electronic timer (if supplied) N Sliding thermostat control/OFF switch F Cooking time button O Cord compartment access... -
Page 3: Technical Specifications
f 270 UK 30-11-2000 16:11 Pagina 3 I M P O R T A N T • This appliance has been designed to fry In this case, it is necessary to contact foods and is exclusively for domestic one of our authorized service centres use. -
Page 4: Warning! This Appliance Must Be Earthed
f 270 UK 30-11-2000 16:11 Pagina 4 E L E C T R I C A L R E Q U I R E M E N T S Before using this appliance ensure that the voltage indicated on the product corresponds with the main voltage in your home, if you are in any doubt about your supply contact your local electricity company. - Page 5 f 270 UK 30-11-2000 16:11 Pagina 5 Read this instruction booklet carefully before using your machine. In this way, you will obtain the best possible results and maximum operating safety. O P E R A T I N G I N S T R U C T I O N S •...
- Page 6 f 270 UK 30-11-2000 16:11 Pagina 6 2. Models with an electronic timer (E), may be set to whatever cooking time you desire. If the timer comes with a battery protection tab (H), pull the tab out slightly and then proceed as follows: •...
- Page 7 f 270 UK 30-11-2000 16:11 Pagina 7 4. Drain the oil into a suitable receptacle (fig. 7) 5. Use a sponge or a paper kitchen towel to remove any deposits from the bowl. 6. Replace the drainage tube in its compartment. Do not forget to replace the cap.
- Page 8 f 270 UK 30-11-2000 16:11 Pagina 8 solidify. CHANGING THE ANTI-ODOUR FILTERS After a while, the anti-odour filters fitted to the lid tend to lose their effectiveness. They should changed after approximately 20 frying operations. To replace the filters, remove the screws from the inner lid as shown in fig. 11. Replace the filters.
- Page 9 f 270 UK 30-11-2000 16:11 Pagina 9 C O O K I N G S U G G E S T I O N S Changing the oil or fat • The food to be fried should not When oil goes below minimum level mark, be lowered into the oil until the add new oil.
- Page 10 f 270 UK 30-11-2000 16:11 Pagina 10 F R Y I N G F R O Z E N F O O D S Frying frozen foods 2. Frozen foods frequently 1. Due to their extremely low temperature, covered with a coating of ice frozen foods inevitably lower the crystals, which must be removed temperature of the oil.