
Related Manuals for Samsung HMX-QF30


Summary of Contents for Samsung HMX-QF30
- Page 1 USER MANUAL HMX-QF30/HMX-QF33 HMX-QF300/HMX-QF310/HMX-QF320 www.samsung.com/register For video recording, use a memory card that supports faster write speeds. - Recommended Memory Card: 6MB/s (Class 6) or above.
-
Page 2: Before Reading This User Manual
Before reading this user manual Before reading this user manual, review the following. Precautions Safety warnings Icon Definition Meaning Warning! • When using the AC power adaptor with your camcorder, connect There is a potential risk of death or serious Warning injury. -
Page 3: Important Information On Use
) will appear on the screen. event such as a show, performance, or exhibition for personal • Samsung is not responsible for any injury or damage caused by not enjoyment, we strongly recommend that you obtain permission following the user manual. - Page 4 • Always use caution when transferring files via Wi-Fi. There is Definition Multimedia Interface are a danger that your data could be intercepted. trademarks or registered trademarks of • Take the appropriate security precautions when using HDMI Licensing LLC. wireless network products. Samsung is not responsible for • Adobe, the Adobe logo, and Adobe Acrobat are either registered any damages that may arise from security problems caused by trademarks or trademarks of Adobe Systems Incorporated in the the failure to implement security measures or from unavoidable United States and/or other countries.
-
Page 5: Safety Information
Safety information The safety precautions illustrated below are to prevent personal injury or material damages. Heed all instructions carefully. WARNING There is a potential risk of death or serious injury. Do not overload outlets or extension Using the camcorder at temperatures Do not allow water, metal or cords as this may result in abnormal over 60˚C may result in fire. - Page 6 There is a risk of fire. and poses a risk electric shock. request service from a Samsung service centre. There is a risk of fire or personal injury. If the camcorder malfunctions,...
- Page 7 Safety information CAUTION There is a potential risk of personal injury or damage to the product. Do not press the surface of the LCD Do not drop or expose the camcorder, Do not use the camcorder on a tripod with force, or hit it with a sharp object. battery, AC adaptor, or other (not supplied) in a place where it is If you press or strike the LCD surface,...
- Page 8 Using products from other surface that is well ventilated. the camcorder on a PC, DVD disc, CD manufacturers may lead to disc, etc. Samsung is not responsible overheating, fire, explosion, electric for data loss. shock or personal injuries caused by abnormal operation.
-
Page 9: Table Of Contents
Contents Getting Started ..........11 Extended functions ........44 Unpacking ................12 Using the Manual modes ............ 45 White Balance ............... 45 Camcorder layout ..............13 EV (Exposure Value) ..............46 Inserting/Ejecting the battery and memory card ....15 Back Light ................47 Inserting/ejecting the battery ............ - Page 10 Contents Dubbing videos to VCR or DVD/HDD recorders ....88 Divide ..................68 Combine ................69 Transferring files to your Windows computer ...... 89 File Info................... 70 Transferring files with Intelli-studio ..........90 Transferring files by connecting the camcorder as a removable Wireless network ..........
-
Page 11: Getting Started
Getting Started Learn about your camcorder’s layout, icons, and home screen. Unpacking ................12 Camcorder layout ..............13 Inserting/Ejecting the battery and memory card ....15 Inserting/ejecting the battery ............ 15 Inserting/ejecting a memory card (not supplied) ......16 Charging the battery ............20 Checking the battery state ............ -
Page 12: Unpacking
Unpacking Your new camcorder comes with the following accessories. If any of these items is missing from your box, call Samsung’s Customer Care Centre. Checking your accessories Battery AC power adaptor USB cable Model name Internal memory Lens HMX-QF30 Audio/Video cable... -
Page 13: Camcorder Layout
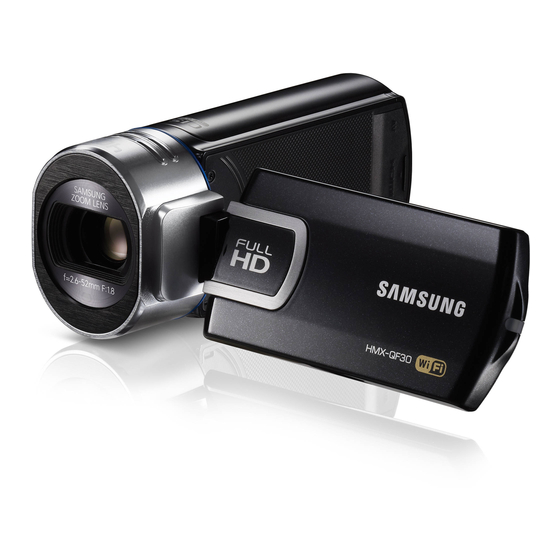
Camcorder layout Top/Front/Left Lens Charging indicator Home ( ) button LCD screen (Touch screen) Internal microphone Internal speaker Jack cover (AV/HDMI/micro USB) AV (Audio/Video) jack HDMI jack micro USB jack Be careful not to cover the internal microphone and lens during recording. - Page 14 Camcorder layout Rear/Right/Bottom Lens open/close switch Grip belt Jack cover (DC IN) DC IN jack Zoom (T/W) button 11 12 My Clip ( ) button Recording start/stop button Battery slot Memory card slot Battery/Memory card cover Battery release switch Tripod receptacle Getting Started...
-
Page 15: Inserting/Ejecting The Battery And Memory Card
Close the battery slot cover. Close the battery slot cover. • Samsung is not responsible for problems that are caused by using unapproved batteries. If you use batteries from other manufacturers, there is a danger of overheating, fire, or explosion. -
Page 16: Inserting/Ejecting A Memory Card (Not Supplied)
Inserting/Ejecting the battery and memory card Inserting/ejecting a memory card (not supplied) To insert a memory card To eject a memory card Slide, and then open the memory card cover as shown in Slide, and then open the memory card cover as shown in the figure. - Page 17 Inserting/Ejecting the battery and memory card Compatible memory cards • You can use SD, SDHC, and SDXC cards with this camcorder. We Usable memory card (1GB~64GB) recommend you use an SDHC card. This camcorder supports SD cards up to 2GB. We cannot guarantee normal operation with SD cards bigger than 2GB.
- Page 18 • Do not bend, drop, or subject the card to strong impacts. • Do not place foreign substances on the memory card terminals. • Samsung is not responsible for data loss due to misuse, including Use a soft dry cloth to clean the terminals if required.
- Page 19 Inserting/Ejecting the battery and memory card Recording time available for video in minutes 1GB ≒ 1,000,000,000 bytes : Actual formatted capacity may be less as the internal firmware uses a portion of the memory. Storage media (Capacity) Resolution 16GB 32GB 64GB • Actual recording times may differ depending on the recording conditions and the subject.
-
Page 20: Charging The Battery
Charging the battery Charge the battery using the AC power adaptor or the USB cable. The charging indicator lights up and charging starts. After the battery is fully charged, the charging indicator turns green. Using the AC power adaptor • Make sure that there are no foreign substances on the plug and in the socket when you connect the AC power supply to the Connect the AC power adaptor to the camcorder properly, and then camcorder. -
Page 21: Checking The Battery State
Charging the battery Checking the battery state Battery level display The battery level display shows the You can check the charging state and remaining battery capacity. STBY 00:00:00 [253Min] amount of battery power remaining in the battery. To check the charging state The colour of the LED indicates the power or charging state. - Page 22 • Charging time: Approximate time in minutes required to fully charge a completely exhausted battery. • Recording/Playback time: Approximate time available when you have fully charged the battery. • Times shown above are measured under Samsung’s test conditions. Your times may differ, depending on your usage and conditions. Continuous Recording (without zoom)
- Page 23 Charging the battery • Check whether the battery terminal is damaged if the battery About the battery falls or is dropped. • Battery properties - If you install a battery with the damaged terminal into the A lithium-ion battery is small-sized and has a high capacity. Low camcorder, you can damage the camcorder.
-
Page 24: Turning Your Camcorder On/Off
Turning your camcorder on/off [Home ( )] button • The camcorder operates the self-diagnosis function when you turn it on. pages 109~113 • If the Quick On STBY function is set to 5 Min and you close the LCD screen when the power is on, the power saving mode activates. page 106 • The camcorder turns on automatically if you connect the AC power adaptor or insert the battery into the camcorder with the LCD screen... -
Page 25: Using The Touch Screen
Using the touch screen The touch screen lets you playback and recording with a simple touch of your finger. Place your hand on the rear side of the LCD screen to support it. Then, touch the items displayed on the screen. Drag Touch Drag the touch screen up, down, left, or right to select the desired... - Page 26 Using the touch screen Switching the information display mode Warning icons and messages may appear, depending on the recording conditions. pages 109~113 You can switch the on-screen information display mode. Each time you touch the LCD screen, the full and minimum display modes alternate.
- Page 27 Using the touch screen Adjusting the LCD screen When you reverse and close the LCD screen by rotating it The wide LCD screen on your camcorder offers high quality image to 180° towards the lens, the camcorder switches to the viewing.
-
Page 28: Performing The Initial Setup
Performing the initial setup Set the date and time of your local area when turning on this camcorder for the first time. Open the LCD screen to turn on the camcorder. Make sure the clock is correctly set, and then touch the tab. -
Page 29: Selecting The Language
Selecting the language You can select the language in which the camcorder displays the menu screen or messages. The camcorder retains the language setting even when you turn it off. Press the [Home ( )] button, and then drag the Home Touch the desired language. -
Page 30: Learning Icons
Learning icons The available functions vary depending on the operation mode you have selected. Different icons appear depending on the setting values. Video recording mode Left of the LCD screen Right of the LCD screen STBY 00:00:00 [253Min] Icon Description Icon Description Smart Auto mode/Manual mode/... - Page 31 Learning icons Photo recording mode Left of the LCD screen Right of the LCD screen 9999 Icon Description Icon Description Smart Auto mode/Manual mode/ Photo image counter 9999 Art Film mode (total number of recordable photos) Storage media (Memory card) Video/Photo recording mode tab Battery information (remaining charge level)
- Page 32 Learning icons Video playback mode: Thumbnail view Icon Description Icon Description Video thumbnail view tab Erase protection Photo thumbnail view tab My Clip Combine tab Delete tab Video recording mode tab Video playback mode: Single view Top of the LCD screen Bottom of the LCD screen 00:00:20/00:01:03 100_0001...
- Page 33 Learning icons Photo playback mode: Thumbnail view Icon Description Icon Description Video thumbnail view tab Erase protection Photo thumbnail view tab Delete tab Photo recording mode tab Photo playback mode: Single view Top of the LCD screen Bottom of the LCD screen 1/12 100_0001 Icon...
-
Page 34: Using The Home Screen
Using the Home screen Accessing the Home screen Icons on the Home screen You can select an operating mode or access the settings menu by Icon Description touching the icons on the Home screen. Smart Auto: Record a video or photo using a scene Press the [Home ( )] button to access the Home screen. -
Page 35: Using The Grip Belt
Using the grip belt Adjust the length of the grip belt so that the camcorder is stable when 180˚ Switch grip you press the [Recording start/stop] button with your thumb. The camcorder is designed so you can use it conveniently with either your right or left hand. -
Page 36: Basic Functions
Basic functions Learn about basic functions for video and photo shooting. Recording videos..............37 Recording videos in portrait mode ........... 39 Tagging great moments while recording (My Clip function) ..40 Recording photos ..............41 Recording with ease for beginners (SMART AUTO) .... 42 Zooming ................ -
Page 37: Recording Videos
Recording videos Learn how to record videos easily and quickly in the video recording mode. Press the [Recording start/stop] button. The recording ( ) icon appears and recording starts. • 00:00:20 [253Min] [Recording start/stop] button To stop recording, press the [Recording start/stop] button In STBY mode, touch the Video recording mode ( ) tab. - Page 38 • If the power is interrupted or an error occurs during recording, the video may not be recorded/edited. • Samsung is not responsible for any damage caused by a failure of normal recording or playback operation because of memory card error.
-
Page 39: Recording Videos In Portrait Mode
Recording videos Recording videos in portrait mode Select a subject to record. The camcorder can record videos in portrait mode. Set your Press the [Recording start/stop] button. camcorder to the vertical position. The recording ( ) icon appears and recording starts. •... -
Page 40: Tagging Great Moments While Recording (My Clip Function)
Recording videos Tagging great moments while recording The camcorder tags the scene as My Clip ( • (My Clip function) 00:00:07 [253Min] Using the My Clip function, you can tag good scenes while recording, and then extract the scenes tagged as My Clip ( ) from a long video later for viewing. -
Page 41: Recording Photos
Recording photos Learn how to capture photos easily and quickly in the photo recording mode. Centre the subject in the LCD screen, and then press the [Recording start/stop] button. The shutter sound is heard and the photo is recorded. • [Recording start/stop] button In STBY mode, touch the Photo recording mode ( ) tab. -
Page 42: Recording With Ease For Beginners (Smart Auto)
Recording with ease for beginners (SMART AUTO) User-friendly SMART AUTO optimises your camcorder to the recording conditions automatically, providing beginners with the best performance. Press the [Home ( )] button touch Smart Auto. Icon Description Appears when the camcorder fails to recognise the recording situations. -
Page 43: Zooming
Zooming This camcorder allows you to record using optical X20 zoom and digital X40 zoom by pressing the [Zoom (T/W)] button or touching the Zoom ) tab on the LCD screen. Example of zoom-in/out W: Wide-angle T: Telephoto W: Recording wide T: Recording enlarged area (wide-angle) image (telephoto) -
Page 44: Extended Functions
Extended functions Learn how to record a video and photo by selecting a mode. Using the Manual modes ............ 45 White Balance ............... 45 EV (Exposure Value) ..............46 Back Light ................47 Focus ..................48 Super C.Nite ................49 Self Timer ................ -
Page 45: Using The Manual Modes
Using the Manual modes White Balance To set the white balance manually The colour of your image depends on the type and quality of the light In Manual mode, touch White Balance ( ) tab source. If you want the colour of your image to be realistic, select a Custom WB ( ) tab. -
Page 46: Ev (Exposure Value)
Using the Manual modes EV (Exposure Value) Understanding EV (Exposure Value) Depending on the intensity of the ambient light, your videos and Exposure value is the total amount of light allowed to fall on the photos may be too bright or dark. In these cases, you can adjust the photographic medium (Image sensor) during the process of taking exposure to get a better videos and photos. -
Page 47: Back Light
Using the Manual modes Back Light Back lighting causes the subject to be darker than the background When a subject is lit from behind, this function compensates for back lighting so that the subject does not appear too dark. • The subject is in front of a window. • The person you want to record is wearing white or shiny clothes and Press the [Home ( )] button ... -
Page 48: Focus
Using the Manual modes Focus Icon Description Auto: In most situations, it is better to use the automatic focus The camcorder usually focuses on a subject automatically (auto focus). feature, as it lets you concentrate on the creative side of your When you turn the camcorder on, focus is always set to automatic. -
Page 49: Super C.nite
Using the Manual modes Super C.Nite Icon Description You can adjust the shutter speed when recording a slow moving object Off: Disables the function. or recording a brighter image in dark places without compromising Normal: The shutter opens for 1/50 of a second in the normal colour. -
Page 50: Self Timer
Using the Manual modes Self Timer Cont. Shot When the self-timer is enabled, there is a time delay of 10 seconds The Continuous Shot function lets you capture up to eight photos in before recording starts. You can take photos of yourself. rapid succession. -
Page 51: Using The Art Film Modes
Using the Art Film modes Fader Recording a video with Fade effect You can give your recording a professional look by using special Fade In (Approx.3 seconds) effects such as fade in at the beginning of a sequence or fade out at the end of a sequence. -
Page 52: Digital Effect
Using the Art Film modes Digital Effect Icon Description Using the Digital Effect function gives your recording a creative look. Off: Without any Digital Effect, a normal, natural image is displayed during recording or playback. Press the [Home ( )] button touch Art Film. Touch the Digital Effect ( ) tab in the video recording mode. -
Page 53: Using The Art Time Lapse Mode
Using the Art Time Lapse mode Using the Art Time Lapse function, you can set the camcorder to add emotion and something different experience on a dry and boring time lapse video. Press the [Home ( )] button touch Art Time Lapse. In Art Time Lapse mode, you can record videos in •... - Page 54 Using the Art Time Lapse mode Example of Art Time Lapse recording The Art Time Lapse function records image frames at a predefined Total time for recording interval over the total recording time to produce a Recording interval time-lapse video. Art Time Lapse is useful for filming the following subjects: • Blooming flowers • A bird building a nest...
-
Page 55: Playback/Editing
Playback/Editing Learn how to play back and edit videos and photos. Viewing videos or photos in playback mode ....... 56 Starting the playback mode ............. 56 Playing back videos ..............57 Tagging great moments during playback ........60 Viewing photos ............... 61 Editing videos or photos ............. -
Page 56: Viewing Videos Or Photos In Playback Mode
Viewing videos or photos in playback mode Starting the playback mode You can switch to the playback mode by selecting Album on the Home screen. You can also switch the operation mode directly into the playback thumbnail display by touching the Playback ( ) tab on the LCD screen. -
Page 57: Playing Back Videos
Viewing videos or photos in playback mode Playing back videos Find videos in various ways You can preview recorded videos in the thumbnail view and find and Drag the thumbnails up or down play your desired video directly. on the LCD screen to search for Select the video playback mode. - Page 58 Viewing videos or photos in playback mode To adjust the volume during video playback Do not power off or eject the memory card during photo playback. Doing so may damage the recorded data. You can hear the sound through the internal speaker of the camcorder while the video is playing back on the LCD screen.
- Page 59 Viewing videos or photos in playback mode Playback/Pause/Stop • Touching the Forward skip ( ) tab plays the next video. • Touching the Reverse skip ( ) plays the beginning of the scene. • Playback and pause alternate when you touch the Playback If reverse skip ( ) is touched within 3 seconds from the start of )/Pause (...
-
Page 60: Tagging Great Moments During Playback
Viewing videos or photos in playback mode Tagging great moments during playback To stop playback and return to the thumbnail view, touch the Thumbnail view ( ) tab. You can use My Clip ( ) to tag good scenes during playback, and then view only the scenes tagged as My Clip ( ) later. -
Page 61: Viewing Photos
Viewing videos or photos in playback mode Viewing photos Find photos in various ways You can view recorded photos by using various playback functions. Drag the thumbnails up or down on the LCD screen to search for the Select the photo playback mode. page 56 thumbnails you want. - Page 62 Viewing videos or photos in playback mode Viewing a slide show Zooming during photo playback You can view a photo slide show with background music. You can magnify a playback image. Touch the desired photo. Touch the Slide show ( ) tab during photo playback.
-
Page 63: Editing Videos Or Photos
Editing videos or photos Share Touch the desired submenu item. The list of sharing web sites displayed on the LCD screen may • During video or photo playback, you can upload the video or photo be different from them in the user manual. page 79 you are viewing to a sharing web site. - Page 64 Editing videos or photos Touch the desired submenu item. Sharing photos The list of sharing web sites displayed on the LCD screen may • Select the photo playback mode. page 56 be different from them in the user manual. page 79 Touch the thumbnail of the desired photo.
-
Page 65: Delete
Editing videos or photos Delete Touch the tab. A message appears asking for your confirmation. • You can erase your recordings one by one or all at once. Touch Yes. Select the video or photo playback mode. page 56 The camcorder deletes all the files having the selection ( •... -
Page 66: Delete My Clip
Editing videos or photos Delete My Clip Touch the desired submenu item. You can delete the My Clip tags from a video tagged as ‘My Clip’. Select the video playback mode. page 56 My Clip Creation Start Touch a thumbnail tagged as My Clip ( Preview Touch the MENU ( ) tab ... -
Page 67: Protect
Editing videos or photos Protect Smart BGM You can protect important recordings from accidental erasure. You can enjoy music during video playback. If the original sound in the The protected videos and photos cannot be deleted unless you format video is loud, the volume of the background music will be decreased the memory card or cancel the protection. -
Page 68: Divide
Editing videos or photos Divide Touch the Pause ( ) tab at the point of division the Cutting ( ) tab. You can divide a video into two, and easily delete a section you no A message appears asking for your confirmation. •... -
Page 69: Combine
Editing videos or photos Combine Touch the tab. A message appears asking for your confirmation. • You can combine two different videos. As this function edits the original files, make sure to back up the original files before combining them. Touch Yes. -
Page 70: File Info
Editing videos or photos File Info You can see image information for each image. Select the video or photo playback mode. page 56 Touch a thumbnail. Touch the MENU ( ) tab File Info. The information for the selected file appears. •... -
Page 71: Wireless Network
Wireless network Learn to connect to wireless local area networks (WLANs) and use functions. Connecting to a WLAN and configuring network settings ... 72 Connecting to a WLAN ............72 Configuring the network settings ..........73 Manually setting the IP address ..........74 Network connection tips ............ -
Page 72: Connecting To A Wlan And Configuring Network Settings
Connecting to a WLAN and configuring network settings Connecting to a WLAN The Wi-Fi Setting screen appears. Scroll to the bottom of the screen, and then touch WPS PIN. You can connect to a WLAN using an AP (access point) in the wireless Record the PIN code displayed on the screen, and then network service area. -
Page 73: Configuring The Network Settings
802.11n AP connection, you can access in the 802.11g mode. In the 802.11g mode, the network connection and speed are not guaranteed. Wi-Fi Setting Samsung 1 Samsung 2 Samsung 3 Samsung 4 Touch each submenu and enter the required information. -
Page 74: Manually Setting The Ip Address
Connecting to a WLAN and configuring network settings Manually setting the IP address Touch each submenu item and then enter the required value using the virtual keyboard. page 75 By entering the IP address, you can connect to a WLAN via an AP (access point) in the wireless network service area. -
Page 75: Network Connection Tips
Connecting to a WLAN and configuring network settings Network connection tips • Before you connect to a network, ensure your battery is fully charged. • Files that you transfer to another device may not be supported by the device. • Compatibility with an AP that has not been formally Wi-Fi certified cannot be In this case, use a computer to playback the files. -
Page 76: Sending Videos Or Photos To A Smart Phone
Android 2.2 or higher. This feature is also supported by the 7 and 10.1 inch Galaxy Tab. • You should install the Samsung MobileLink application on your phone or device before using this feature. You can download the application from Samsung Apps or Play Store. -
Page 77: Broadcasting Live Streaming Video From Your Camcorder
• During the Ustream broadcast, your streaming may not be saved in the Ustream’s server depending on the situation of the Ustream’s server or network connection. • The Ustream function has been serviced by the contract between Samsung and Ustream. The service may be changed or discontinued depending on the service provider. - Page 78 Broadcasting live streaming video from your camcorder Press the [Home ( )] button touch Ustream. Touch the tab. The camcorder will automatically attempt to connect to a WLAN If you have more than two channels, the list of your channels will •...
-
Page 79: Using Video Or Photo Sharing Web Sites
Using video or photo sharing web sites Upload your photos or videos to file sharing web sites. Available web sites will be displayed on your camcorder. Accessing a web site Uploading videos or photos Press the [Home ( )] button touch Social Sharing. Access a sharing web site with your camcorder. -
Page 80: Viewing Videos Or Photos On A Tv Link-Enabled Tv
TV. The more files you select, the slower the camcorder operates. We recommend selecting fewer than 1000 files. videos or photos. • This function may not operate properly on a Samsung HDTV that has For information about searching for the camcorder and browsing •... -
Page 81: Using Auto Backup To Send Videos Or Photos
Using Auto Backup to send videos or photos You can send videos or photos that you captured with the camcorder to a PC via wireless network. Installing the programme for Auto backup on Sending videos or photos to a PC your PC Press the [Home ( )] button ... -
Page 82: About The Wakeup On Lan (Wol) Feature
About the Wakeup on LAN (WOL) feature WOL (Wakeup on LAN) WOL is a technology that allows you to turn on a PC from another location over a network connection or the Internet or to set a PC to wake up from sleep mode. - Page 83 Click the Advanced tab, and then set the WOL menu values. Any changes to your PC’s BIOS settings other than the ones described below may damage your PC. Samsung is not responsible for damage caused by your changing your PC’s BIOS settings.
-
Page 84: Using With Other Devices
Using with other devices Learn how to connect your camcorder to your TV, VCR or DVD/ HDD recorders, photo printer, or computer. Connecting to a TV .............. 85 Connecting to a high definition TV with HDMI ......85 Connecting to a regular TV ............86 Viewing on a TV screen ............ -
Page 85: Connecting To A Tv
Connecting to a TV Connecting to a high definition TV with HDMI Set the TV’s input or source selector to the HDMI input you’ve attached the camcorder to. You can view High Definition (HD) quality videos recorded in HD Refer to the TV’s instruction manual to see how to select the •... -
Page 86: Connecting To A Regular Tv
Connecting to a TV Connecting to a regular TV Connect the camcorder to a TV with an Audio/Video cable. Set the TV’s input or source selector to the input you’ve You can view images recorded with your camcorder on a regular attached the camcorder to. -
Page 87: Viewing On A Tv Screen
Connecting to a TV Viewing on a TV screen Image appearance depends on the TV screen aspect ratio Recording ratio Appearance on Wide (16:9) TV Appearance on 4:3 TV Images recorded in a 16:9 ratio • Adjust the volume to a moderate level. If the volume is too high, the video information may include noise. • If TV Display is set to Off, the TV screen does not display the camcorder’s OSD (On Screen Display) menus. -
Page 88: Dubbing Videos To Vcr Or Dvd/Hdd Recorders
Dubbing videos to VCR or DVD/HDD recorders You can dub videos recorded on your camcorder to a VCR or DVD/HDD recorder. Start the playback on your camcorder, and record it on the VCR or DVD/HDD recording device. recorder Refer to the instruction manuals supplied with your recording •... -
Page 89: Transferring Files To Your Windows Computer
Athlon X2 Dual-Core 2.6GHz or higher is recommended) programme. 1GB or higher is recommended Samsung is not responsible for any damage that results from using a Video Card NVIDIA GeForce 8500 GT or higher, computer that does not meet the requirements such as a computer you ATI Radeon HD 2600 series or higher have assembled yourself. -
Page 90: Transferring Files With Intelli-Studio
• main window. If your camcorder has no new files, the pop-up • Use the provided USB cable. (Supplied by Samsung) window for saving new files will not appear. • Make sure you insert the USB plug into the micro USB jack with the Depending on your version of Windows, the Windows •... - Page 91 Transferring files to your Windows computer Step 2. About the Intelli-studio main window For details, select Help Help on the Intelli- When the Intelli-studio starts up, video and photo thumbnails appear in studio screen. the main window. Description Menu items Display files in the selected folder.
- Page 92 Transferring files to your Windows computer Step 3. Playing back videos or photos Step 4. Editing videos or photos You can play back the recordings conveniently using the Intelli-studio You can edit the videos or photos in various ways with various application.
- Page 93 Transferring files to your Windows computer Click Upload to start uploading. Step 5. Sharing the videos/photos online A pop-up window appears containing your web browser • Share your contents with the world by uploading photos and videos displaying the selected site or a pop-up window appears asking directly to a web site with one click.
-
Page 94: Transferring Files By Connecting The Camcorder As A Removable Disk
Connect the camcorder to the PC with the USB cable. page 90 Photos Videos The Removable Disk or Samsung window appears on the • PC’s screen after a moment. Setting folder Select Open folders to view files using Windows Explorer, •... - Page 95 Transferring files to your Windows computer Video file (H.264) 1 File format • HD-quality videos have an HDV_####.MP4 name format. Video files • The file number used in the file name automatically increases when • Video files are compressed in H.264 format. The file extension is you create a new video file.
-
Page 96: Settings
Settings Refer to items to configure your camcorder’s settings. Settings menu ..............97 Accessing the settings menu ..........97 Shooting ................98 Playback ................99 Display ................. 102 Connectivity................104 General ................105... -
Page 97: Settings Menu
Settings menu Accessing the settings menu Touch a submenu. The OIS Duo function is used here as an example. • The instructions below are an example of how to access and use the Settings menu items. When you access and use other Settings menu Shooting items (pages 98~107), use this example as a guide. -
Page 98: Shooting
Settings menu Shooting * : Default * : Default Item Description Item Description Set the video resolution. Set to compensate for camcorder shake/blur. • Full HD 1080/50i* ( ): Records in the Full HD • Off*: Disables the function. (1920x1080/50i) format. • On ( ): Enables to compensate for camcorder shake. -
Page 99: Playback
Settings menu Shooting Playback * : Default * : Default Item Description Item Description Set thumbnails to display in 3x3 or 4x4 format. Set to increases the amount of zoom available with a • 3X3*: Displays thumbnails three across and three zoom lens. - Page 100 Settings menu Playback Using external songs as background music (Smart BGM II) You can enjoy external songs by saving them into a memory card, as well as the sounds in Smart BGM Option of the camcorder. To set external songs as background music You should convert your songs to a compatible format using the Intelli- studio programme built in your camcorder to be recognised by the camcorder.
- Page 101 Settings menu Playback In the case of the camcorder sold in Europe, you should save external songs as follows. Using external songs as background music (Smart BGM II) Follows steps 1~3 as the figure on the left. To delete the external songs in the memory card Change the external song’s name You can delete the external songs from Manage BGM in the Smart ...
- Page 102 Settings menu Playback Display * : Default * : Default Item Description Item Description Set the playback options for a slide show, and then Set the brightness of the LCD screen. touch the tab. Touch the tab between 0 and 10. • Music: Turns the background music on or off.
-
Page 103: Display
Settings menu Display * : Default * : Default Item Description Item Description Set to display the date and time on the camcorder’s Set the HDMI video output to match the TV you have display. connected the camcorder to. • Off*: Does not display the current date/time • Auto*: The video signals are output in the same information. -
Page 104: Connectivity
TV set. the TV automatically turns on. Guide • HDMI: Displays the HDMI guide. • For details on the Anynet+(HDMI-CEC) function, • Composite: Displays the Composite guide. refer to the user manual of the Samsung Anynet+ supported TV. Settings... -
Page 105: General
Settings menu General * : Default * : Default Item Description Item Description View the storage information of the inserted storage Set a date format. media such as memory space used and available • 2013/01/01: Displays the date in the year/month memory space. - Page 106 Settings menu General * : Default * : Default Item Description Item Description Set whether or not to play the shutter sound. Use to reduce energy consumption and battery drain • Off: Disables the function. when recording frequently for an extended time. • On*: Turns on the shutter sound.
- Page 107 Settings menu General * : Default * : Default Item Description Item Description Use to delete all files completely or to correct Reset all menu settings to the factory defaults (factory problems on the storage media. settings). Touch Yes if you want all the settings returned to the • Do not remove the storage media or perform any Default Set defaults.
-
Page 108: Appendixes
Appendixes Get information about error messages, maintenance, and specifications. Troubleshooting ..............109 Warning icons and messages ..........109 Symptoms and solutions ............114 Maintenance ..............121 Using your camcorder abroad ........... 123 Glossary ................124 Specifications ..............125... -
Page 109: Troubleshooting
Troubleshooting Before contacting a Samsung authorised service centre, perform the following simple checks. They may save you the time and expense of an unnecessary call. Warning icons and messages Problems may occur because of the following reasons. Check the information and take corrective action. - Page 110 Troubleshooting Storage media Message Icon Informs that... Action The memory card has a problem and the camcorder Card Error • Replace the memory card with another card. cannot recognise it. Not Formatted The memory card is not formatted in this camcorder. • Format the memory card using this camcorder.
- Page 111 Troubleshooting Recording Message Icon Informs that... Action • Delete unnecessary files from the storage media. • Back up files to your PC or another storage media The limit of video and delete files. files is reached. The number of video files that can be stored is 9,999. • Change to another card which has enough free Cannot record space.
-
Page 112: Editing Videos
Troubleshooting Playback Message Icon Informs that... Action • Use the camcorder to format the storage media A problem has occurred while the camcorder was Read Error after backing up important files to a PC or another reading data from the storage media. storage device. - Page 113 Troubleshooting Wireless Network Message Icon Informs that... Action • Configure the IP settings (auto or manual) of your The camcorder’s WLAN configuration does not match Connection failed. camcorder to match the AP’s. that of the AP. Or it has failed to connect to a device. • Try connecting to the device again.
-
Page 114: Symptoms And Solutions
Troubleshooting Symptoms and solutions If these instructions do not solve your problem, contact your nearest Samsung authorised service centre. Power Symptom Explanation/Solution • The battery may not be installed in your camcorder. Insert the battery into the camcorder. • The inserted battery may be discharged. - Page 115 Troubleshooting Display Symptom Explanation/Solution Unknown icon appears on the screen. • A warning icon or message appears on the screen. pages 109~113 • This occurs if you disconnect the AC power adaptor or remove the battery before turning the An afterimage remains on the LCD screen. power off.
- Page 116 Troubleshooting Recording Symptom Explanation/Solution During recording, the date/time does not • Date/Time Display is set to Off. Set the Date/Time Display to On. page 103 display. • Set your camcorder to the photo recording mode. page 41 • Release the lock on the write-protection tab of the memory card if any. You cannot record a photo image.
- Page 117 Troubleshooting Storage Media Symptom Explanation/Solution • Insert a memory card into your camcorder properly. page 16 Memory card functions do not operate. • If you use a memory card formatted on a computer, format it again directly on your camcorder. page 107 • Release the lock on the write-protect tab of the memory card (SDHC/SD memory card), if any.
- Page 118 Troubleshooting Adjusting the image during recording Symptom Explanation/Solution • The white balance is incorrect. Set the proper White Balance. page 45 Image’s colour balance is not natural. • This is called the focal plane phenomenon. This is not a malfunction. Because of the way A subject passing quickly through the frame the image device (CMOS sensor) reads out video signals, a subject passing through a frame appears distorted.
- Page 119 Troubleshooting Connecting/Dubbing with other devices (Recorder, PC, Printer, etc.) Symptom Explanation/Solution You cannot dub correctly using the HDMI • You cannot dub images using the HDMI cable. cable. • The Audio/Video cable is not connected properly. Make sure that the Audio/Video cable is You cannot dub correctly using the Audio/ connected to the proper jack, i.e.
-
Page 120: Overall Operations
Troubleshooting Connecting to a computer Symptom Explanation/Solution • Video playback or sound may stop temporarily depending on your computer. The video or sound copied to your computer is not affected. Your computer is not playing videos, images, • If your camcorder is connected to a computer that does not support Hi-speed USB (micro or sound located on your camcorder properly. -
Page 121: Maintenance
Maintenance • To clean the LCD screen Cautions when storing Wipe very gently with a soft, dry cloth. Be careful not to damage the • To protect your camcorder safely, turn it off. screen. - Remove the battery. - Remove the memory card. Cleaning the camcorder Before cleaning, turn off the camcorder and remove the battery. - Page 122 1~2 hours before using it. • Use the camcorder only after dew condensation has completely disappeared. • Be sure to use the recommended accessories supplied with the camcorder. For service, contact your nearest Samsung authorised service centre. Appendixes...
-
Page 123: Using Your Camcorder Abroad
Philippines, Taiwan, United States of America, etc. transcoder (For example, an PAL to NTSC format converter). You can make recordings with your camcorder and view pictures The format transcoder is not provided by Samsung. on the LCD screen anywhere in the world. Appendixes... -
Page 124: Glossary
Glossary AF (Auto Focus) F. No (F-Number) A system that automatically focuses the camcorder lens on the subject. Your camcorder The f-number defines the brightness of lens. Smaller number lens has generally brighter uses the contrast to focus automatically. image. The f-number is directly proportional to the focal length and inversely proportional to the lens diameter. -
Page 125: Specifications
Specifications Model name HMX-QF30/HMX-QF33/HMX-QF300/HMX-QF310/HMX-QF320 Video signal Picture compression format H.264 (MPEG-4.AVC) Audio compression format AAC (Advanced Audio Coding) Image device 1/4” CMOS System Effective pixels 1.75 mega pixels Total pixels 5.1 mega pixels Lens F1.8 ~ F3.9, X20 Optical Zoom, X40 Digital Zoom Focal length 2.6mm ~ 52mm... -
Page 126: Declaration Of Conformity
※ This is not the address of Samsung Service Centre. For the address or the phone number of Samsung This is not the address of Samsung Service Centre. For the address or the phone number of Samsung Service Centre, Representative in the EU see the warranty card or contact the retailer where you purchased your product. - Page 127 Hereby, Samsung Electronics declares that this digital camera is in compliance with the essential requirements and English other relevant provisions of Directive 1999/5/EC. Por medio de la presente Samsung Electronics declara que la cámara digital cumple con los requisitos esenciales y Español cualesquiera otras disposiciones aplicables o exigibles de la Directiva 1999/5/CE.
- Page 128 Bu belge ile, Samsung Electronics bu dijital kameranın 1999/5/EC Yönetmeliginin temel gerekliliklerine ve ilgili Türkiye hükümlerine uygun olduğunu beyan eder. Hér með lýsir Samsung Electronics því yfir að þessi stafræna myndavél sé í samræmi við grunnkröfur og önnur ákvæði Íslenska tilskipunar 1999/5/EB.
- Page 129 Contact SAMSUNG WORLD WIDE If you have any questions or comments relating to Samsung products, please contact the SAMSUNG customer care centre. Region Country Contact Centre Web Site Region Country Contact Centre Web Site www.samsung.com/ca (English) CANADA 1-800-SAMSUNG (726-7864)
- Page 130 1-800-8-SAMSUNG(726-7864) for Globe SLOVAKIA 0800 - SAMSUNG (0800-726 786) www.samsung.com/sk 02-5805777 Asia SINGAPORE 1800-SAMSUNG(726-7864) www.samsung.com SPAIN 902 - 1 - SAMSUNG (902 172 678) www.samsung.com Pacific THAILAND 1800-29-3232, 02-689-3232 www.samsung.com/th SWEDEN 0771 726 7864 (SAMSUNG) www.samsung.com 0800-329-999 www.samsung.com/ch (German) TAIWAN www.samsung.com...
- Page 131 Correct disposal of batteries in this product Correct Disposal of This Product (Waste Electrical & Electronic Equipment) (Applicable in countries with separate collection systems) (Applicable in countries with separate collection systems) This marking on the battery, manual or packaging indicates that the batteries in this product should This marking shown on the product or its literature, not be disposed of with other household waste at the end of their indicates that it should not be disposed with other...
- Page 132 Samsung Electronics Co., Ltd. 129, Samsung-Ro, Yeongtong-Gu, Suwon-Si, Gyeonggi-Do 443-742 Korea Samsung Electronics Euro QA Lab. Blackbushe Business Park Saxony Way, Yateley, Hampshire GU46 6GG, UK RoHS compliant Our product complies with “The Restriction Of the use of certain Hazardous Substances in electrical and electronic equipment”, and we do not use the 6 hazardous materials- Cadmium (Cd), Lead...