Table of Contents
Advertisement
Advertisement
Table of Contents

Related Manuals for Westinghouse PEK1370W


Summary of Contents for Westinghouse PEK1370W
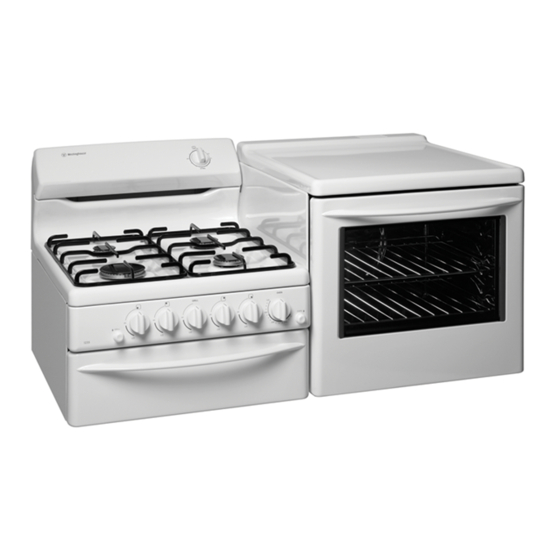
- Page 1 USER MANUAL PEK1370W, PEK1350W, GEK1235W, GEK1385W ELEVATED COOKING APPLIANCES...
-
Page 2: Table Of Contents
CONTENTS CONGRATULATIONS CONTENTS Dear customer, Important safety warnings ..............3 Congratulations on the purchase of your new oven. Description of your appliance ............. 5 Follow the instructions below to ensure that you install Before operating your appliance for the first time ....... 7 your oven safely and that it runs efficiently. -
Page 3: Important Safety Warnings
SAFETY IMPORTANT SAFETY INSTRUCTIONS Please read the user manual carefully and store in a handy place for later reference. WARNING The symbols you will see in this booklet have these meanings: • T his appliance is not intended for use by persons (including children) with reduced physical, sensory or mental capabilities, or lack of experience and WARNING knowledge, unless they have been given supervision or... - Page 4 SAFETY WARNING WARNING GRILL COOKTOPS The grill door must be left fully open whilst grilling Do not allow pots to boil dry, as damage to both in a separate grill wall oven. pan and cooktop may result. The grill drawer must be left approximately two Do not operate the cooktop for an extended period finger widths ajar whilst grilling in a separate grill of time without a utensil on the hot plate.
-
Page 5: Description Of Your Appliance
DESCRIPTION DESCRIPTION OF YOUR APPLIANCE PEK1370W Hotplate Control Knob • A djusts temperature of hotplate. Can be rotated in either direction. Hotplate Indicator Lamp • Comes on when a hotplate is turned on. Oven light switch • Located on oven temperature control knob. 2 Hour Cut-Off Timer • Sets baking/grilling reminder time. • S ets automatic baking cut-off time. (See page 17 for more information). - Page 6 DESCRIPTION DESCRIPTION OF YOUR APPLIANCE GEK1235W Hotplate Burner Control Knob • S ets the hotplate cooking temperature. (See pg 16 for more information). Grill Burner Control Knob • S ets the grilling temperature. (See pg 14 for more information). Oven Burner Control Knob • S ets the baking temperature. (See pg 10 for more information).
-
Page 7: Before Operating Your Appliance For The First Time
OPERATION BEFORE OPERATING YOUR APPLIANCE FOR THE FIRST TIME FITTING OVEN SHELVES • E nsure shelf orientation is correct (refer picture). TIPS & INFORMATION • S lide into oven at an angle until raised back of shelf is past the stop on side runners. SETTING THE TIME • L ower front of shelf and push in until stop is reached. If you have purchased a model fitted with a 3 button • N ote: the top ledge is not a shelf position. -
Page 8: Parts Of Your Electric Cooker
PARTS PARTS OF YOUR ELECTRIC COOKER Check the parts of your cooker against the diagram before you use your cooker for the first time. Splashback 10. Inner Door Glass Grill Vent 11. Oven Vent 12. Fan & Element Cover Control Panel 13. Oven Element Grill Reflector 14. -
Page 9: The Parts Of Your Gas Cooker
PARTS OF YOUR GAS COOKER Check the parts of your cooker against the diagram before you use your cooker for the first time. Splashback 10. Inner Door Glass Grill Flue Vent 11. Oven Flue Vent Removable Hotplate Burner 12. Fan Cover (fan forced ovens only) Removable Trivet 13. Oven Burner Cover Control Panel... -
Page 10: Using Your Oven
USAGE USING YOUR OVEN OVEN SAFETY WARNINGS USING THE OVEN OF YOUR ELECTRIC COOKER Fan Baking (Fan forced oven models) WARNING • W ith fan forced ovens, heat comes from the element • A LWAYS follow the instructions for putting the shelves surrounding the fan (see diagram below). and fittings into the oven, to avoid accidents. • T he fan circulates the hot air and so the temperature • DO NOT line the oven with foil. - Page 11 USING THE OVEN OF YOUR GAS COOKER Lighting the oven 1. Press the oven burner control knob and turn it a quarter of the way. Baking • W ith conventional oven models heat comes from the 2. For manual ignition models burner below the food at rear of oven. – K eep the oven burner control knob pushed in and • T he burner is controlled by the thermostat which sets at the same time press the oven igniter button on the...
-
Page 12: Get To Know Your Oven
KNOW YOUR OVEN GET TO KNOW YOUR OVEN Get to know your new oven with this ‘Simple Test Cake’ Although we strive for a perfect performing oven, it’s possible that there will be some variation in colour when baking. Therefore, we suggest this simple, easy and delicious to make Simple Test Cake, it can help you understand your new oven. -
Page 13: Oven Cooking Guide
COOKING GUIDE OVEN COOKING GUIDE The following is intended as a guide and experience may show some slight variation to be necessary to meet individual requirements. FOOD CONVENTIONAL OVEN FAN FORCED OVEN Temperature in °C Temperature in °C Oven Shelf Position* Time in minutes Oven Shelf Position* Time in minutes... -
Page 14: Handling Baking Problems
HANDLING BAKING HANDLING BAKING PROBLEMS PROBLEM POSSIBLE CAUSE WHAT TO DO uneven cooking • I ncorrect shelf position • S elect shelf which puts food in centre of oven • O ven tray too large • T ry other trays or dishes • T ray not in centre of oven • P ut trays in centre of oven • A ir flow in oven uneven • T urn food during cooking Baked products too brown • O ven not pre-heated • P re-heat until indicator light goes off on top... -
Page 15: Using Your Grill
USAGE USING YOUR GRILL GRILL SAFETY WARNING Handling grilling problems PROBLEM CAUSES WHAT TO DO WARNING Grilled meats • M eat too close • G rill at lower overcooked on to grill shelf position • A LWAYS turn the grill off immediately after you have outside and raw finished cooking. Fat left in the grill can catch fire. in centre • ALWAYS leave the grill door open during grilling. -
Page 16: Using Your Hotplates
USAGE USING YOUR HOTPLATES HOTPLATE SAFETY WARNING Ceramic hotplates • T he cooktop is made from ceramic glass, a tough, durable material that withstands heating and cooling WARNING without breaking. It is strong enough to hold the • D O NOT leave the hotplate on with no pot or pan on top. heaviest utensil. However, it must be remembered that • D O NOT use pots and pans which are unsteady, as as it is GLASS, it may break. Treat it accordingly! these could overbalance. -
Page 17: Choosing Utensils
CHOOSING UTENSILS GOOD (recessed base) (convex base) (undersiz e) (oversize) (moisture on hotplate) (no utensil) Look at this diagram above which shows you which utensils to use on the hotplates and which utensils should not be used. • A LWAYS use pots and pans with flat bottoms. uneven or thin bottoms will waste electricity and cook slowly. • A LWAYS use pots and pans which are slightly larger than the hotplate. Small pans waste electricity. • A LWAYS put pots and pans which are dry on the hotplates. • D O NOT use pots and pans which are too large. Pans which overhang the hotplate more than 50mm can damage enamel cooktops. USING HOTPLATE BURNERS Using the Burners of your Gas Cooker Manual ignition Models... -
Page 18: Using The Timer And Clock
USAGE USING THE TIMER AND CLOCK OPERATING THE PROGRAMMABLE CLOCK Using the 60 minute ringer timer To set the timer: WARNING 1. Turn the knob clockwise to the required number of • T he Clock MuST be set to operate oven. minutes. When the time has elapsed the timer will give a short ring. -
Page 19: Cleaning The Cooker
OPERATION OPERATING THE PROGRAMMABLE CLOCK CLEANING THE COOKER (continued) Setting the cooking end time 1. Check the clock displays the correct time of day. WARNING 2. Select the desired oven function temperature. The oven indicator light will glow and the heating source will Safety Warnings about cleaning come on. - Page 20 CLEANING Refitting the burner crowns and caps Ceramic hotplates The burner crown must be fitted correctly into the burner cup • R emove all spilt food with the razor blade scraper or damage will occur during operation. supplied while the hotplate is still warm – NOT HOT. • T o do this ensure that the 2 ribs on either side of the • I f aluminium foil, plastic items or foods with a high spark plug hole are positioned into the 2 slots on the sugar content melt onto glass, use the razor blade burner cup.
- Page 21 CLEANING THE COOKER (continued) Removing the grill dish supports The grill dish supports can be removed for easy cleaning WARNING of the grill compartment. • D O NOT use harsh abrasive cleaners or sharp metal 1. Hold the grill dish supports at the front and pull them scrapers to clean the oven door glass since they can scratch inwards (see diagram below).
-
Page 22: Solving Problems
SOLVING PROBLEMS SOLVING PROBLEMS If you have a problem with your appliance, check the table If you need more information, please contact the below before calling service. You may be able to avoid a service Customer Care Centre on: call by fixing the problem yourself – and so continue cooking. Note: You may be charged for the service call even in the Australia 1300 363 640 guarantee period if the problem is due to the causes listed below. -
Page 23: Installing The Electric Cooker
INSTALLING INSTALLING THE ELECTRIC COOKER SAFETY WARNINGS ABOUT INSTALLATION Wiring requirements The cooker MuST be installed in compliance with • Wiring connections in AS/NZS 3000 Wiring Rules WARNING • L ocal regulations, municipal building codes and other • T he cooker MuST be installed and serviced by statutory regulations a qualified technician. • A Certificate of Compliance MuST be supplied Data plate g ives information about rating to be kept by the customer. •... -
Page 24: Installing The Gas Cooker
INSTALLING INSTALLING THE GAS COOKER SAFETY WARNINGS ABOUT INSTALLATION Checking gas pressures The cooker MuST be installed in compliance with: • T he Installation Code for Gas Burning Appliances WARNING and Equipment – AS 5601/AG 601 – issued by • T he cooker MuST be installed and serviced by Standards Australia (Particular reference to sections a qualified technician. 4.8 & 5.12.1). • A Certificate of Compliance MuST be supplied • L ocal gas fitting regulations, municipal building codes to be kept by the customer. - Page 25 INSTALLING THE GAS COOKER (continued) Gas connection Operation on SNG Read these points before connecting to the gas supply: • I f the cooker is to be used with SNG, then the grill • T he cooker inlet connection point is the inlet to the burner MuST be modified by the replacement of the regulator or LP test point adaptor. This connects to the shutter which fits into the throat of the grill burner. flexible hose fitted to the appliance. The appliance • Y ou can buy the kit for this modification from your must be installed using the hose supplied.
-
Page 26: Testing The Operation Of The Cooker
TESTING TESTING THE OPERATION OF THE GAS COOKER Testing appliance operation Checking the Function of the Regulator (Apparatus: manometer and connecting tube) The operation of the regulator can be confirmed by After installation, test the appliance and ensure that it connecting a manometer to the pressure test point located operates correctly, before handing it over to the customer. -
Page 27: Warranty
Warranty FOR SALES IN AUSTRALIA AND NEW ZEALAND APPLIANCE: WESTINGHOUSE 540mm Upright Oven This document sets out the terms and conditions of product warranties for (a) The Appliance is damaged by: Electrolux branded appliances. It is an important document. Please keep it... - Page 28 TOP SERVICE Top Service encompasses the after sales service provided by The Electrolux Group to consumers including delivery, home service and spare parts. Westinghouse. We are part of the Electrolux family. Share more of our thinking at www.electrolux.com © 2009 Electrolux Home Products Pty Ltd ABN 51 004 762 341 Print code: WMAN_540mmupright Issue Date: Nov09...