Table of Contents
Advertisement
Quick Links
Advertisement
Table of Contents

Related Manuals for Westinghouse PEK1370W


Summary of Contents for Westinghouse PEK1370W
- Page 1 USER MANUAL PEK1370W, PEK1350W, GEK1235W, GEK1385W ELEVATED COOKING APPLIANCES...
-
Page 2: Table Of Contents
CONGRATULATIONS CONTENTS IMPORTANT SAFETY INSTRUCTIONS Dear customer, Please read the user manual carefully and store in a handy Important safety warnings ..............3 Congratulations on the purchase of your new oven. place for later reference. WARNING Description of your appliance ............. 5 Follow the instructions below to ensure that you install The symbols you will see in this booklet have these meanings: • T his appliance is not intended for use by persons... -
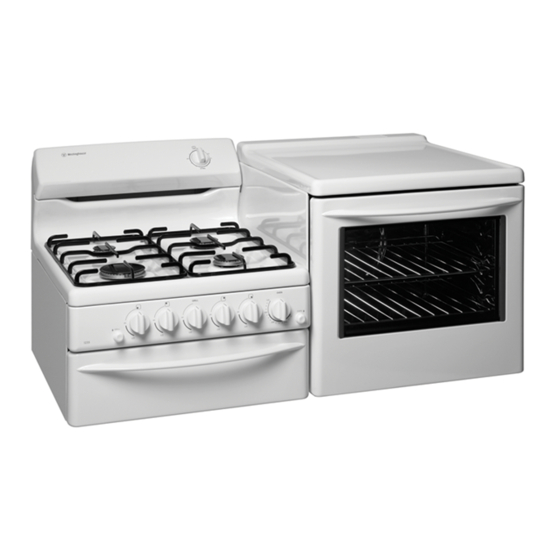
Page 3: Description Of Your Appliance
DESCRIPTION OF YOUR APPLIANCE WARNING WARNING GRILL COOKTOPS PEK1370W The grill door must be left fully open whilst grilling Do not allow pots to boil dry, as damage to both Hotplate Control Knob • A djusts temperature of hotplate. in a separate grill wall oven. pan and cooktop may result. Can be rotated in either direction. -
Page 4: Before Operating Your Appliance For The First Time
DESCRIPTION OF YOUR APPLIANCE BEFORE OPERATING YOUR APPLIANCE FOR THE FIRST TIME GEK1235W Hotplate Burner Control Knob FITTING OVEN SHELVES • s ets the hotplate cooking temperature. TIPS & INFORMATION • e nsure shelf orientation is correct (refer picture). (see pg 16 for more information). • s lide into oven at an angle until raised back of shelf is past the stop on side runners. SETTING THE TIME • L ower front of shelf and push in until stop is reached. -
Page 5: Parts Of Your Electric Cooker
PARTS OF YOUR ELECTRIC COOKER PARTS OF YOUR GAS COOKER Check the parts of your cooker against the diagram before you use your cooker for the first time. Check the parts of your cooker against the diagram before you use your cooker for the first time. splashback 10. Inner Door Glass splashback... -
Page 6: Using Your Oven
USING YOUR OVEN OVEN SAFETY WARNINGS USING THE OVEN OF YOUR ELECTRIC COOKER USING THE OVEN OF YOUR GAS COOKER Lighting the oven 1. Press the oven burner control knob and turn it a quarter of the way. Fan Baking (Fan forced oven models) Baking WARNING • W ith fan forced ovens, heat comes from the element... -
Page 7: Get To Know Your Oven
GET TO KNOW YOUR OVEN OVEN COOKING GUIDE The following is intended as a guide and experience may show some slight variation to be necessary to meet individual requirements. Get to know your new oven with this ‘Simple Test Cake’ Although we strive for a perfect performing oven, FOOD CONVENTIONAL OVEN... -
Page 8: Handling Baking Problems
HANDLING BAKING PROBLEMS USING YOUR GRILL GRILL SAFETY WARNING Handling grilling problems PROBLEM POSSIBLE CAUSE WHAT TO DO PROBLEM CAUSES WHAT TO DO uneven cooking • I ncorrect shelf position • s elect shelf which puts food in centre of oven WARNING • O ven tray too large • T ry other trays or dishes Grilled meats • M eat too close • G rill at lower • T ray not in centre of oven • P ut trays in centre of oven... -
Page 9: Using Your Hotplates
USING YOUR HOTPLATES CHOOSING UTENSILS HOTPLATE SAFETY WARNING Ceramic hotplates • T he cooktop is made from ceramic glass, a tough, durable material that withstands heating and cooling WARNING without breaking. It is strong enough to hold the • D O NOT leave the hotplate on with no pot or pan on top. heaviest utensil. However, it must be remembered that • D O NOT use pots and pans which are unsteady, as as it is GLAss, it may break. Treat it accordingly! these could overbalance. -
Page 10: Using The Timer And Clock
USING THE TIMER AND CLOCK OPERATING THE PROGRAMMABLE CLOCK OPERATING THE PROGRAMMABLE CLOCK CLEANING THE COOKER (continued) Using the 60 minute ringer timer Setting the cooking end time To set the timer: 1. Check the clock displays the correct time of day. WARNING WARNING 1. - Page 11 CLEANING THE COOKER (continued) Refitting the burner crowns and caps Ceramic hotplates Removing the grill dish supports The burner crown must be fitted correctly into the burner cup • R emove all spilt food with the razor blade scraper The grill dish supports can be removed for easy cleaning WARNING or damage will occur during operation.
-
Page 12: Solving Problems
SOLVING PROBLEMS INSTALLING THE ELECTRIC COOKER If you have a problem with your appliance, check the table If you need more information, please contact the SAFETY WARNINGS ABOUT INSTALLATION Wiring requirements below before calling service. You may be able to avoid a service Customer Care Centre on: The cooker MusT be installed in compliance with call by fixing the problem yourself – and so continue cooking. • Wiring connections in As/NZs 3000 Wiring Rules WARNING Note: You may be charged for the service call even in the Australia 1300 363 640... -
Page 13: Installing The Gas Cooker
INSTALLING THE GAS COOKER INSTALLING THE GAS COOKER (continued) SAFETY WARNINGS ABOUT INSTALLATION Checking gas pressures Gas connection Operation on SNG The cooker MusT be installed in compliance with: Read these points before connecting to the gas supply: • I f the cooker is to be used with sNG, then the grill • T he Installation Code for Gas Burning Appliances • T he cooker inlet connection point is the inlet to the burner MusT be modified by the replacement of the WARNING and equipment – As 5601/AG 601 – issued by... -
Page 14: Warranty
Warranty FOR SALES IN AUSTRALIA AND NEW ZEALAND APPLIANCE: BUILT-IN OVEN, COOKTOP AND FREESTANDING COOKER This document sets out the terms and conditions of the product 6. P roof of purchase is required before you can make a claim under warranties for Electrolux Appliances. It is an important document. this warranty. TESTING THE OPERATION OF THE GAS COOKER Please keep it with your proof of purchase documents in a safe place 7. Y ou may not make a claim under this warranty unless the defect claimed for future reference should you require service for your Appliance. - Page 15 NEW ZEALAND phone: 09 573 2384 fax: 0800 363 600 email: customercare@electrolux.co.nz web: www.westinghouse.co.nz TOP SERVICE Top service encompasses the after sales service provided by The electrolux Group to consumers including delivery, home service and spare parts. Westinghouse. We are part of the Electrolux family. Share more of our thinking at www.electrolux.com P/No. 342 001 568 eCN 11A086C © 2011 electrolux Home Products Pty Ltd ABN 51 004 762 341 Print code: WMAN_540 upright_Jun11...