Table of Contents
Advertisement
Quick Links
Advertisement
Table of Contents

Related Manuals for Naxa NSM-436


Summary of Contents for Naxa NSM-436
-
Page 2: Protect Your Hearing
Please read this manual carefully before operation PRECAUTIONS CAUTION: TO REDUCE THE RISK OF ELECTRIC SHOCK, DO NOT REMOVE COVER ( OR BACK ), NO USER-SERVICEABLE PARTS INSIDE. REFER SERVICING TO QUALIFIED SERVICE PERSONNEL. The lightning flash with arrowhead symbol within an equilateral triangle !... - Page 3 PRECAUTIONS Follow the advice below for safe operations. ON PROTECTION AGAINST LASER ENERGY EXPOSURE • As the laser beam used in this compact disc player is harmful to the eyes, do not attempt to disassemble the casing. • Stop operation immediately if any liquid or solid object should fall into the cabinet. •...
-
Page 4: Important Safety Instructions
IMPORTANT SAFETY INSTRUCTIONS Read these instructions - All the safety and operating instructions should be read before the appliance is operated Keep these instructions - The safety and operating instructions should be kept for future reference. Heed all warnings - All warnings on the appliance and in the operating instructions should be adhered to. -
Page 5: Compliance With Fcc Regulations
COMPLIANCE WITH FCC REGULATIONS This equipment has been tested and found to comply with the limits for a Class B Digital Device, pursuant to Part 15 of the FCC Rules . These limits are designed to provide reasonable protection against harmful interference in a residential installation .This equipment generates , uses ,and can radiate radio frequency energy and ,if not installed and used in accordance with the instructions , may cause harmful interference to radio communication . -
Page 6: Cd Care & Maintenance
CD CARE & MAINTENANCE Handling CDs Holds a CD by its edges .Avoid touching the recorded side of the disc .To remove a CD from its storage case , press down on the center retention mechanism of the case and lift the disc , Cleaning the CDs Use a dry cloth to wipe off any fingerprints and dusts from the playing surface of the disc .Wipe in a straight line radially from the center to the outside edge of the disc . -
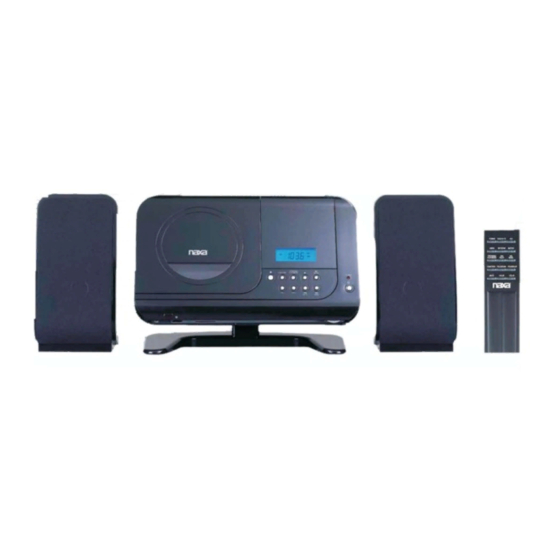
Page 9: Functions And Controls
20. RIGHT SPEAKER JACK 21. LEFT SPEAKER JACK 22. WALL MOUNTING SLOT FUNCTIONS AND CONTROLS Remote Control 1. POWER 2. TRACK+10 3. ID3 4. MENU 5. ENTER► STOP 7. PROGRAM PLAY MODE FM.ST BAND 10. FUNCTION 11. FOLDER-DN 12. FOLDER-UP 13. - Page 10 CONNECTIONS Speakers ◆ Connect the black wire of the left speaker to the black terminal marked “L-“on the rear of the main unit . ◆ Connect the white wire of the left speaker to the red terninal marked”L+” on the rear of the main unit.
-
Page 12: Press Enter
Basic Operation 1. Press FUNCTION repeatedly to select CD mode. 2. To open the CD Door ,press the CD open button on the top of the unit. Insert a CD with its label facing up.Close the CD Door (it will click into place) 3. -
Page 13: Radio Operation
DRM-encrypted WMA files are not supported. Basic Operation ◆ Press FUNCTION to select USB or SD CARD mode . ◆ Connect a USB drive containing MP3/WMA files to the USB port or SD/MMC CARD to the SD/MMC CARD slot on the bottom side of the unit. Playback will start automatically. ◆... -
Page 14: Program Play Operation
PROGRAM PLAY OPERATION Program a sequence of up to 20 tracks to be played . IN CD disc mode 1. Press STOP to make sure playback is stopped . 2. Press PROGRAM PLAY MODE button to enter program mode .The LCD screen will display 『MEMORY』, 『P01』and flashing 『00』. -
Page 15: Menu Function
MENU FUNCTION TIMER (AUTOMATICAL POWER ON ) 1. Press MENU on the remote control repeatedly until the LCD screen displays “TIMER” , press ENTER ► to enter to set the TIMER . Press FM.ST or BAND to select the TIMER ON, then press ENTER ►... -
Page 16: Troubleshooting
Basic Operation 1. Use a 3.5mm male to male line in cable (included) to connect the Line-out or Headphone out jack of an audio device to this system Auxiliary Line-In jack. 2. Press POWER to turn the player on . 3. -
Page 17: Technical Specifications
Playback is “skipping” ◆ Ensure that the CD is not damaged ,scratched ,or dirty. ◆ Ensure that the unit has been installed in a stable location to avoid vibration and shock . The player will only play one track ,repeatly . ◆...