Table of Contents
Advertisement
Available languages
Available languages
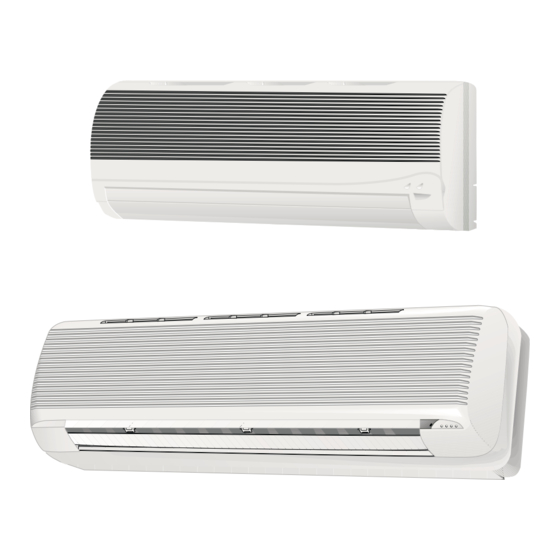
Cooling Only and Heat Pump Duct-Free High Wall Systems
INTRODUCTION . . . . . . . . . . . . . . . . . . . . . . . . . . . . . . . . . 2
GENERAL. . . . . . . . . . . . . . . . . . . . . . . . . . . . . . . . . . . . . . .2,3
OPERATING MODES . . . . . . . . . . . . . . . . . . . . . . . . . . . . 2
REMOTE CONTROL. . . . . . . . . . . . . . . . . . . . . . . . . . . . . 2
OPERATION . . . . . . . . . . . . . . . . . . . . . . . . . . . . . . . . . . . 3-7
REMOTE CONTROL OPERATION . . . . . . . . . . . . . . . . 3
UNIT OPERATION. . . . . . . . . . . . . . . . . . . . . . . . . . . . . . . 7
CLEANING AND MAINTENANCE . . . . . . . . . . . . . . .8,9
AIR FILTERS. . . . . . . . . . . . . . . . . . . . . . . . . . . . . . . . . . . . 8
Manufacturer reserves the right to discontinue, or change at any time, specifications or designs without notice and without incurring obligations.
PC 111
Catalog No. 533-80098
Book 1
4
Tab
3e 2f
OWNER'S MANUAL
38BNB,BNE018-036
40BNB,BNE018-036
CONTENTS
Page
Printed in U.S.A.
INDOOR UNIT FRONT PANEL . . . . . . . . . . . . . . . . . . . 8
INDOOR UNIT COIL . . . . . . . . . . . . . . . . . . . . . . . . . . . . 8
OUTDOOR UNIT COIL . . . . . . . . . . . . . . . . . . . . . . . . . . 8
CONDENSATE DRAINS . . . . . . . . . . . . . . . . . . . . . . . . . 8
SYSTEM OPERATION CHECK LIST . . . . . . . . . . . . . . 9
DIP SWITCH SETTINGS . . . . . . . . . . . . . . . . . . . . . . . . . 9
ENERGY SAVING RECOMMENDATIONS. . . . . . . . . 9
TROUBLESHOOTING GUIDE . . . . . . . . . . . . . . . . 10-12
Form OM38/40-4
Pg 1
Page
4-03
Replaces: New
Advertisement
Chapters
Table of Contents

Related Manuals for Carrier 38BNB


Summary of Contents for Carrier 38BNB
-
Page 1: Table Of Contents
OWNER’S MANUAL 38BNB,BNE018-036 40BNB,BNE018-036 Cooling Only and Heat Pump Duct-Free High Wall Systems CONTENTS Page Page INTRODUCTION ....... . . 2 INDOOR UNIT FRONT PANEL . -
Page 2: Introduction
INTRODUCTION FAN ONLY — In Fan Only mode, the system filters and cir- culates room air without changing room air temperature. Thank you for choosing a Streamline® Duct Free System. HEATING — In Heating mode, the system heats and filters The same pride in craftsmanship and engineering knowledge room air. -
Page 3: Operation
The remote control can perform the following functions: NOTE: When transmitting a command from the controller to the unit, be sure to point the controller toward the right side of • Turn the system ON and OFF the unit. See Fig. 4. The unit will confirm receipt of a com- •... - Page 4 INFRARED SIGNAL TRANSMITTER WINDOW TEMPERATURE SENSOR CLOCK TRANSMISSION INDICATOR LOW BATTERY INDICATOR TIMER START/STOP ONE-TIME/DAILY INDICATORS UP/DOWN BUTTON MODE BUTTON OPERATION MODE INDICATORS - DESIRED TEMPERATURE COOLING, FAN, HEATING, DEHUMIDIFICATION, AUTO SENSOR ACTIVE INDICATOR FAN INDICATORS - LOW, MEDIUM, HIGH, AUTO SWEEP INDICATOR ON/OFF BUTTON TIMER...
- Page 5 2. Press the TIMER button. Each time the button is pressed the next Start or Stop set time appears on the display. See Fig. 6 and 7. SLEEP TIMER 3. Press UP/DOWN button to set the time. INDICATOR 4. To set another time period, press the TIMER button to go to another time period and repeat steps 2 and 3 above.
- Page 6 To set Local Sense function: 1. Slide down front cover of controller below ON/OFF button. See Fig. 4. 2. Press the SENSE button. The “House” symbol will ap- DAILY TIMER pear on the display screen. See Fig. 12. INDICATOR 3. Place the remote control in desired location in room. Be sure there is a direct line between the remote control and the unit.
-
Page 7: Unit Operation
Unit Operation (Fig. 13) — light will light. The unit will operate at the settings that have In the event that the remote been programmed using the remote control. control is not working or has been misplaced, the unit will operate as follows: 40BN036 —... -
Page 8: Cleaning And Maintenance
CLEANING AND MAINTENANCE Indoor Unit (40BN) Front Panel — To clean the front panel on the indoor unit, wipe the outside with a soft, dry cloth. If necessary, a mild liquid detergent can be applied and wiped off with a dry cloth. To avoid the possibility of electric shock, always turn off power to the system before performing any cleaning or maintenance to the system. -
Page 9: System Operation Check List
System Operation Check List — ON — Displays temperature in °F, with a 12-hour clock The items outlined (PM indictor) format. in the following list will help to assure proper system operation: To operate the special systems characteristics: • Be sure unit is connected directly to electrical supply. •... -
Page 10: Troubleshooting Guide
TROUBLESHOOTING GUIDE Your air conditioner is very reliable and requires little maintenance. However, the air conditioner’s proper operation can be interrupt- ed by a malfunction in the electrical system or by incorrect operation. You can try to overcome these simple malfunctions yourself, with the aid of the following table and the malfunction displays shown in Fig. - Page 11 On each Malfunction, Indicator Light (red) will flash at a constant rate: 40BN018,024 AND 030 40BN036 40BN018,024 AND 03040BN036 Malfunction Indication Display For 40BN036 the malfunction can be read by the rate of the flashing light on the control. (Raise the front grille list.) For 40BN018,024,030 the malfunction can be read without raising the front grille by the rate of the flashing service light.
-
Page 12: Printed In U.s.a. Form Om38/40-4 Pg
Indoor Model #_____________________________________ Outdoor Model #_______________________________________ Indoor Serial # _____________________________________ Outdoor Serial # _______________________________________ Copyright 2003 Carrier Corporation Manufacturer reserves the right to discontinue, or change at any time, specifications or designs without notice and without incurring obligations. Book 1 PC 111 Catalog No. - Page 13 MANUEL D’UTILISATION 38BNB,BNE018-036 40BNB,BNE018-036 Systèmes de climatisation et pompe à chaleur sans conduites pour installation murale TABLE DES MATIÈRES Page Page INTRODUCTION ......14 FACE AVANT DE L'UNITÉ...
-
Page 14: Introduction
INTRODUCTION VENTILATION UNIQUEMENT — En mode de ventilation seule, le système filtre et fait circuler l’air de la pièce sans changer Merci d'avoir opté pour un système sans conduites la température de l’air. Streamline®. Cet appareil a été construit avec le même soin et les CHAUFFAGE —... -
Page 15: Fonctionnement
La télécommande peut déclencher les fonctions suivantes : REMARQUE : Lors de la transmission d’une commande à partir • Mise en marche et arrêt du système de la télécommande vers l’appareil, s’assurer de pointer la • Sélection du mode de fonctionnement télécommande en direction du côté... - Page 16 OUVERTURE DE TRANSMISSION DE SIGNAL INFRAROUGE CAPTEUR DE TEMPÉRATURE HORLOGE INDICATEUR DE TRANSMISSION BAS INDICATEUR DE BATTERIE INDICATEURS DE DÉBUT/FIN S TA R T DE MINUTERIE JOURNALIÈRE S TO P BOUTON HAUT/BAS 3 S L E E P D A I LY BOUTON DE MODE MODE SWEEP...
- Page 17 1. Faire coulisser le couvercle frontal de la télécommande sous le bouton ON/OFF (marche/arrêt). Voir Figure 4. 2. Appuyer sur le bouton TIMER (minuterie). À chaque INDICATEUR S TA R T pression sur le bouton, l'heure de marche ou d'arrêt suivante DE MINUTERIE S TO P DE NUIT...
- Page 18 l’endroit où la télécommande se trouve dans la pièce. L’appareil fonctionnera de manière à ce que l'air situé à proximité de la télécommande atteigne la température désirée. S TA R T Pour régler la fonction de détection locale : S TO P INDICATEUR D A I LY 1.
-
Page 19: Fonctionnement De L'appareil
« House » (maison) disparaît de l'écran et la fonction de détection Pour allumer l’appareil — Appuyer sur le bouton Auto/Off locale est annulée. (auto/arrêt) situé sous le couvercle frontal. Voir élément I, Figure 13. Le témoin lumineux AUTO/OFF (auto/arrêt) s’allumera. Fonction de l’appareil (Figure 13) —... -
Page 20: Nettoyage Et Entretien
74F et sélectionnera automatiquement le mode de fonctionnement (marche/arrêt) pendant 5 secondes sur les appareils et la vitesse de soufflerie nécessaire pour maintenir cette 40BN018,024 et 036. température. 8. Placer le commutateur de fonctionnement sur la position REMOTE (télécommande) pour reprendre le mode de fonctionnement par télécommande. -
Page 21: Liste De Vérification De Fonctionnement Du Système
Liste vérification fonctionnement Le commutateur numéro 4 doit être réglé comme suit : système — Les éléments décrits dans la liste ci-dessous OFF — Affiche la température en °C avec un format de temps aideront à assurer un bon fonctionnement du système : en cycles de 24 heures. -
Page 22: Guide De Dépannage
GUIDE DE DÉPANNAGE Votre climatiseur est très fiable et ne nécessite que peu d’entretien. Ceci dit, le fonctionnement correct du climatiseur peut être interrompu par un mauvais fonctionnement dans le système électrique ou par une autre cause. Vous pouvez essayer de remédier à ces petits problèmes vous-même, à... - Page 23 Pour chaque défaillance, un témoin lumineux (rouge) clignotera à vitesse constante : 40BN018,024 AND 030 40BN036 40BN018,024 AND 03040BN036 Indicateur de défaillance Pour le 40BN036, la défaillance peut être identifiée par la vitesse de clignotement de l’indicateur lumineux. (Soulever la liste de la grille frontale). Pour les modèles 40BN018,024,030 la cause de la défaillance peut être lue sans soulever la grille frontale, par la vitesse de clignotement du témoin d'entretien.
- Page 24 Numéro de série de l’unité intérieur____________________ Numéro de série de l’unité extérieure ______________________ Copyright 2003 Carrier Corporation Le fabricant se réserve le droit d’interrompre ou de changer à tout moment les spécifications ou la conception sans préavis et sans engagement de sa part.
- Page 25 MANUAL DEL PROPIETARIO 38BNB,BNE018-036 38BNB,BNE018-036 Sistemas de calefacción y de sólo refrigeración sin conductos y de instalación elevada en pared CONTENIDO Página Página INTRODUCCIÓN ......26 PANEL FRONTAL UNIDAD INTERIOR .
-
Page 26: Introducción
INTRODUCCIÓN SÓLO VENTILADOR (FAN ONLY) — En esta modalidad, el sistema filtra y hace circular el aire de la habitación sin cambiar la Gracias por haber comprado un sistema sin conductos de temperatura del aire. Streamline®. El mismo orgullo con que se fabrican los equipos CALENTAR (HEATING) —... -
Page 27: Operación
Con el mando a distancia se puede hacer lo siguiente: • Botón ON/OFF— (ENCENDER/APAGAR) se usa para • Encender (ON) y apagar (OFF) el sistema encender o apagar el sistema y para transmitir a la unidad • Seleccionar las modalidades de operación los cambios de programación que se hayan seleccionado. - Page 28 VENTANA DE TRANSMISIÓN DE SEÑALES INFRARROJAS SENSOR DE TEMPERATURA RELOJ INDICADOR DE TRANSMISIÓN INDICADORES TEMPORIZADOR INDICADOR DE PILA GASTADA START (ENCENDER)/STOP (APAGAR) S TA R T UNA VEZ /DAILY (DIARIO) S TO P BOTÓN UP/DOWN (SUBIR/BAJAR) 3 S L E E P D A I LY BOTÓN MODE (MODALIDAD)
- Page 29 2. Oprima el botón TIMER. Cada vez que se oprime el botón en el visor aparece la próxima hora de encendido o de apagado programada. Vea las figuras 6 y 7. INDICADOR S TA R T DE TEMPORIZADOR 3. Oprima el botón UP/DOWN para fijar la hora. S TO P NOCTURNO 4.
- Page 30 Para programar la función de detección local: 1. Deslice la cara frontal abajo del botón ON/OFF en el mando a distancia. Vea la figura 4. S TA R T 2. Oprima el botón SENSE (DETECCIÓN). En el visor S TO P D A I LY aparecerá...
-
Page 31: Operación De La Unidad
Operación de la unidad (Figura 13) — En el caso de AUTO/OFF se encenderá. La unidad funcionará de acuerdo a los que el mando a distancia no funcione o no lo encuentre, la unidad parámetros que se hayan programado con el mando a distancia. operará... -
Page 32: Limpieza Y Mantenimiento
LIMPIEZA Y MANTENIMIENTO Panel frontal unidad (40BN) interior — Para limpiar el panel frontal de la unidad interior, pase un trapo suave y seco por la superficie del mismo. Si es necesario, se podría aplicar un PRECAUCION detergente líquido suave y luego retirarlo con un trapo seco. Para evitar la posibilidad de una descarga eléctrica, apague PRECAUCION siempre el sistema antes de limpiarlo o darle mantenimiento. -
Page 33: Lista De Verificación Para La Operación Del Sistema
Lista de verificación para la operación del El interruptor 4 debe fijarse de la siguiente manera: sistema — Los pasos en esta lista servirán de guía para que use OFF — (APAGADO) muestra la temperatura en °C y usa un el sistema como es debido: reloj de 24. -
Page 34: Guía De Solución De Problemas
GUÍA DE SOLUCIÓN DE PROBLEMAS La unidad de aire acondicionado es muy confiable y necesita sistema eléctrico o por una operación incorrecta del mismo. Usted muy poco mantenimiento. No obstante, el funcionamiento mismo puede intentar arreglar estos problemas con la ayuda de correcto de la unidad se puede ver afectado por un problema en el esta guía y de las ilustraciones de la Figura 16. - Page 35 Cada vez que haya un malfuncionamiento, la luz indicadora (roja) destellará a una frecuencia constante: 40BN018,024 AND 030 40BN036 40BN018,024 AND 03040BN036 Indicaciones de malfuncionamiento En los modelos 40BN036 se puede advertir el tipo de malfuncionamiento según la frecuencia con la que destella la luz en el control. (Levante la rejilla frontal.) En los modelos 40BN018,024,030 se puede advertir el tipo de malfuncionamiento, sin tener que levantar la rejilla frontal, según la frecuencia con que destella la luz de servicio.
- Page 36 Modelo interior No._____________________________________ Modelo exterior No. ________________________________________ No. de serie interior _____________________________________ No. de serie exterior ________________________________________ Copyright 2003 Carrier Corporation El fabricante se reserva el derecho a descontinuar o cambiar en cualquier momento las especificaciones o los diseños sin notificación previa y sin incurrir en ninguna obligación al respecto.