Table of Contents
Advertisement
Advertisement
Table of Contents

Related Manuals for Pyle PTED01


Summary of Contents for Pyle PTED01
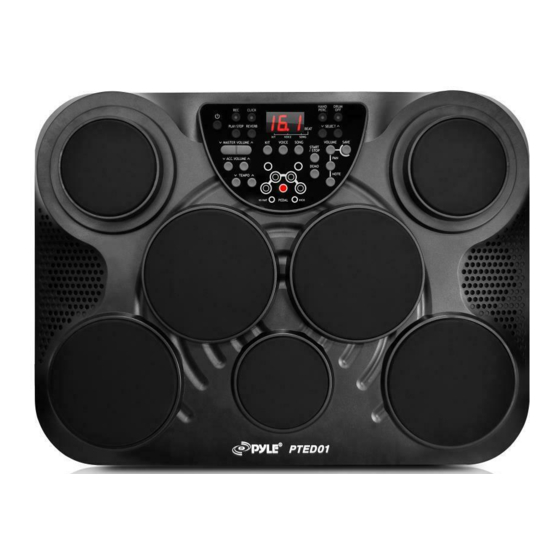
- Page 1 Pyle Pro PTED01 Owner's Manual www.PyleAudio.com PORTABLE Digit al Drum...
-
Page 2: Power Supply
Congratulations! Thank you for purchasing this Portable Digital Drum, The Digital Drum is developed to act and play like a drum but with greater ease. Before you use the instrument, we recommend you to read through this manual. Taking Care of Your Portable Digital Drum Your Digital Drum will give you years of playing pleasure if you follow the rules shown below:... -
Page 3: Table Of Contents
Contents Panel Controls - Top Panel - Rear Panel Operation Select a Drum Kit Set Pad Voice Set pad volume Set pad pan Set pad gain Save Kit Play Song Main Volume Accompaniment Volume Drum Off Tempo Metronome Hand Percussion Demo - Reverb - Record... -
Page 4: Using Batteries
Setting up Power Supply Your digital drum will run on either batteries or power adaptor. Follow the instructions below according to Using an AC- Adaptor Do not use adaptors other than the one specified. The technical specification of the adaptor is DC 12V output, center positive type. -
Page 5: Panel Controls
Panel Controls Top panel Drum pad (x7) Control panel 1.power on---off This switch turns power on/off. 10.kit 2.tempo + & - This button is used to enter kit menu. These buttons are used to change current tempo. 11.pad assign 3.master volume + & - This button is used to enter voice or volume menu. -
Page 6: Rear Panel
19.reverb This button is used to change the reverb level. 20.dial This button can be used to change values (kit number, voice number, song number, etc.) when editing. 21.demo This button can be used to start or stop demo song playing. 22.gain This button can be used to change the gain of pad. -
Page 7: Operation
Operation Select a Drum Kit Kit menu is the default menu after power on, default value is 001. Press [kit] button to enter kit menu. The 3-digit LED will s how the current kit number with the corresponding menu indicator lit up. The button select [+] / [ ] or [dial] can be used to select any kit (1-30, loop) as current kit. -
Page 8: Set Pad Pan
Set pad pan Press [pan] button to enter pad assign menu. If pad assign menu is selected, the corresponding menu indicator will be lit up. In this menu, the 3-digit LED will show the pan of current pad, which can be selected by pressing pad button on the top panel or by pad hitting. -
Page 9: Set Pad Gain
Set pad gain Press [gain] button to enter pad assign menu. If pad assign menu is selected, the corresponding menu indicator will be lit up. In this menu, the 3-digit LED will show the gain of current pad, which can be selected by pressing pad assign button on the top panel or by pad hitting. -
Page 10: Play Song
Play Song Press [song] button to enter song menu. Default value is 001, The 3-digit LED will show current song number with corresponding menu indicator lit up. The button select [+]/[ ] or [dial] can be used to select current song ( 1-100, loop ). -
Page 11: Tempo
Tempo Press the tempo [+] and [ ] button to enter the tempo menu.Button can be used to change current tempo ( 30-280, not loop ), which affects the speed of clicking, and song playing. Press both will reset current tempo to its default value (current song tempo). -
Page 12: Reverb
Reverb Press [ reverb ] button to enter reverb function. In this menu, the digit on far left of LED will display letter ' R ' . The two digits on the right will display current reverb level. The button select [+] / [ ] or [dial] can be used to adjust the reverb level (0-3, not loop). -
Page 13: Input And Output
Input and Output Pedals this appliance supports 1 hi-hat pedal and 1 kick pedal as input device. PHONES KICK HI HAT Phones output The phones output supports a stereo headphones as output device. PHONES KICK HI HAT USB jack this appliance will output all the MIDI codes generated by pads hitting or pedal stepping via the MIDI output connector. -
Page 14: Appendix
Appendix Voice list NO.. . NO.. NO.. NAME NAME NAME Kick KIT Snare 001 Acoustic Tom 004 Rock Kick 001 Snare 002 Acoustic Tom 005 Rock Kick 002 Snare 003 Acoustic Tom 006 Rock Kick 003 Acoustic Snare 001 Hihat KIT Standard Kick 001 Acoustic Snare 002 Standard Hihat Close... - Page 15 NO.. . NO.. NO.. NAME NAME NAME Mute Hi Conga Tambourine001 SFX033 Open Hi Conga Tambourine002 SFX034 Low Conga Tambourine003 SFX035 Hi Bongo Tambourine004 SFX036 Low Bongo Tambourine005 SFX037 High Timbale Sfx KIT SFX038 Low Timbale SFX001 SFX039 High Agogo SFX002 SFX040 Low Agogo...
-
Page 16: Kits List
Kits list NAME NAME Pop1 Jazz2 Pop2 Funk Standard 1 Clave Room Drum Bass Rock 1 Hip Hop Electronic Conga1 Analog Conga2 Jazz 1 Timbales Brush Latin Standard 2 Funk Rock2 User 1 (pop1) Boss User 2 (pop2) Rock3 User 3 (Standard1) Standard 3 User 4 (Room) Rock4... - Page 17 NO.. NO.. NAME BEAT NAME BEAT Swing Dance Swing 1 Dance 1 Swing 2 Dance 2 Swing 3 Dance 3 Others Dance 4 Waltz Dance 5 3/4 Ballad Dance 6 Swing Blues Blues Rap 1 March 1 Rap 2 March 2 Rap 3 R&B Bounce...
-
Page 18: Midi Implementation Chart
MIDI Implementation Chart Function Transmitted Recognized Remarks Basic Default 10ch 1-16ch Channel Changed Default Mode Messages Altered *********** 27-88 Note 0 127 Number : True voice 0 127 *********** Velocity : Note on O 9nH,V=1-127 O 9nH,V=1-127 Note off (9nH,V=0 (9nH,V=0;... -
Page 19: Specifications
Specifications Main features: 7 drum pads with touch sensitivity and two pedals (kick and hi-hat) 3-digit LED displays 1 phones output and 1 USB jack (MIDI IN/OUT). 25 preset drum kits,5 user drum kits. 215 percussion voices and 128 GM voices, 8M bytes voice data 100 songs (include 80 styles and 20 songs). - Page 20 Art: DD305 Version:017...