Table of Contents
Advertisement
Available languages
Available languages
Quick Links
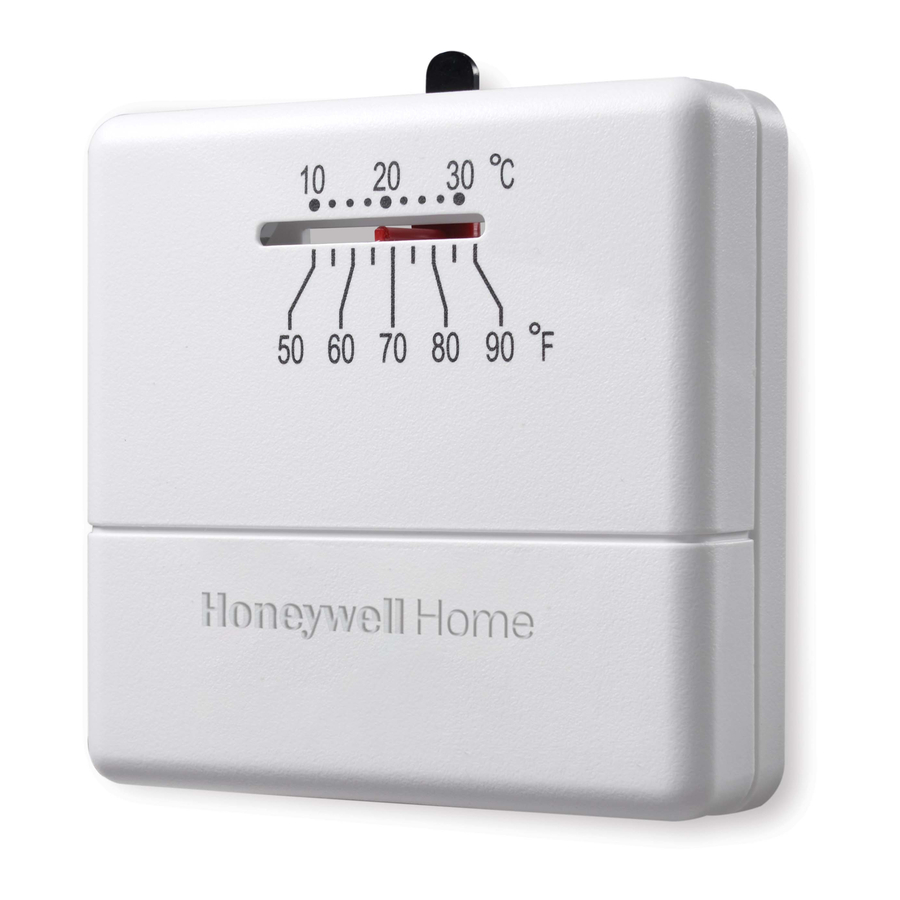
CT30/CT33
Low-voltage Thermostat
Getting started
Check to make sure your package includes the following items:
CT30/CT33 thermostat
Before you begin, make sure you have:
• Screwdriver
• Hammer
• Level (optional)
• Pencil
• Drill bit (3/16" for drywall, 7/32" for plaster)
® U.S. Registered Trademark. Patents pending.
Copyright © 2005 Honeywell International Inc.
All rights reserved.
Cover plate
Owner's
Manual
Wire labels
Wall anchors and
mounting screws
(2 each)
Caution card
Advertisement
Table of Contents

Related Manuals for Honeywell CT30


Summary of Contents for Honeywell CT30
-
Page 1: Getting Started
Before you begin, make sure you have: • Screwdriver • Hammer • Level (optional) • Pencil • Drill bit (3/16” for drywall, 7/32” for plaster) ® U.S. Registered Trademark. Patents pending. Copyright © 2005 Honeywell International Inc. All rights reserved. -
Page 2: Remove Your Old Thermostat
Owner’s Manual Remove your old thermostat 1 T T u u r r n n o o f f f f p p o o w w e e r r at heating/cooling system (or fuse/circuit-breaker panel). 2 Remove cover and thermostat, but leave wallplate with wires attached. Leave wallplate in place Is there a sealed tube containing mercury? If so, see mercury notice below. - Page 3 CT30/CT33 Low-voltage Thermostat Label wires and remove old wallplate Use a screwdriver to disconnect wires one by one.As you disconnect each wire, wrap it with the label matching the letter on your old thermostat. (Adhesive labels are supplied in your thermostat package.) Remove the old wallplate only after all wires are labeled.
-
Page 4: Wire Connections
Owner’s Manual Mount thermostat base 1 Drill holes at pencil-marked locations (3/16” holes for drywall, 7/32” holes for plaster). 2 Use hammer to tap anchors into holes until flush with wall. 3 [Optional] Pull wires through cover plate (if needed to cover marks left by your old thermostat). -
Page 5: Finish Installation
CT30/CT33 Low-voltage Thermostat Set adjustment lever (CT30 only) 1 Separate cover from thermostat, and remove the plastic insert. 2 Use a pencil to move the adjust- ment lever to the proper setting for your system (see table below). Your system... -
Page 6: Operation
Owner’s Manual Operation Temperature setting Move lever to adjust desired indoor temperature. System off (CT33 only) Move lever to far left to turn off heating system. -
Page 7: Limited Warranty
MN 55422, or whether a replacement product can be sent to you. This warranty does not cover removal or reinstallation costs.This warranty shall not apply if it is shown by Honeywell that the defect or malfunction was caused by damage which occurred while the product was in the possession of a consumer. -
Page 8: Need Help
Need Help? For assistance with this product please visit www.honeywell.com/yourhome or call Honeywell Customer Care toll-free at 1-800-468-1502 Automation and Control Solutions Honeywell International Inc. Honeywell Limited-Honeywell Limitée 1985 Douglas Drive North 35 Dynamic Drive Golden Valley, MN 55422 Scarborough, Ontario M1V 4Z9 www.honeywell.com/yourhome... -
Page 9: Manual Del Usuario
Herramientas y materiales necesarios • Destornillador • Martillo • Nivel (optativo) • Lápiz • Mecha de taladro (3/16” para mampostería en seco, 7/32” para yeso) ® U.S. Marque déposée. Brevets en instance. Copyright © 2005 Honeywell International Inc. Tous droits réservés. - Page 10 Manual del usuario Remueva su viejo termostato 1 D D e e s s c c o o n n e e c c t t e e l l a a a a l l i i m m e e n n t t a a c c i i ó ó n n en el sistema de calefacción/refrigeración (o en el panel de fusibles/disyuntor).
- Page 11 Termostato de bajo voltaje CT30/CT33 Rotule los cables y retire la vieja placa de montaje Use un destornillador para desconectar los cables uno a uno.A medida que desconecte cada cable, péguele alrededor el rótulo con la misma letra que figura en su viejo termostato.
- Page 12 Manual del usuario Coloque la placa de montaje 1 Taladre orificios en las posiciones marcadas. Orificios de 3/16” para mampostería en seco. Orificios de 7/32” para yeso. 2 Con un martillo golpee suavemente los soportes de pared e introdúzca- los en los orificios hasta que queden al ras de la pared.
-
Page 13: Finalice La Instalación
Termostato de bajo voltaje CT30/CT33 Coloque la palanca de ajuste en posición (CT30 únicamente) 1 Separe la cubierta del termostato y retire la lámina de plástico 2 Con un lápiz mueva la palanca de ajuste hasta la posición apropiada para su sistema. (Ver tabla a continuación). -
Page 14: Instrucciones De Manejo
Manual del usuario Instrucciones de manejo Ajuste de temperatura Mueva la palanca para ajustar la temperatura deseada en el interior. Sistema apagado (CT33 únicamente) Mueva la palanca hacia el extremo izquierdo para apagar el sistema de calefacción. -
Page 15: Garantía Limitada
Termostato de bajo voltaje CT30/CT33 Garantía limitada Honeywell garantiza que, a excepción de la batería y en condiciones de uso y servicio normales, este producto no tendrá defectos de fabricación ni de materi- ales durante un (1) año a partir de la fecha de compra por parte del consumidor. -
Page 16: Necesita Ayuda
¿Necesita ayuda? Consulte sobre este producto en www.honeywell.com/yourhome o llamando sin cargo a atención al cliente de Honeywell 1-800-468-1502 Automation and Control Solutions Honeywell International Inc. Honeywell Limited-Honeywell Limitée 1985 Douglas Drive North 35 Dynamic Drive Golden Valley, MN 55422 Scarborough, Ontario M1V 4Z9 www.honeywell.com/yourhome...