
Related Manuals for Zte Optik


Summary of Contents for Zte Optik
-
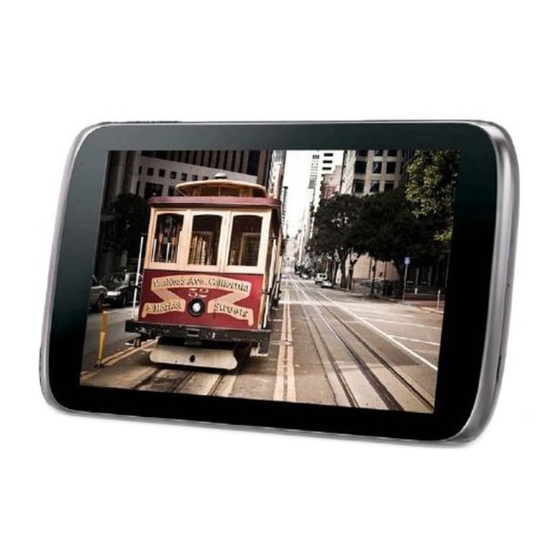
Page 1: User Guide
ZTE Optik User Guide ©2012 Sprint. Sprint and the logo are trademarks of Sprint. Other marks are trademarks of their respective owners. -
Page 2: Table Of Contents
Table of Contents Get Started ..........................1 Your Device at a Glance ......................1 Set Up Your Device ........................ 2 Activate Your Device ......................3 Complete the Setup Application....................4 Sprint Account Information and Help ..................5 Sprint Account Passwords ....................5 Manage Your Account...................... - Page 3 Mobile Networks ........................21 Sound Settings ........................22 Screen Settings ........................22 Location & Security Settings ....................23 My Location ........................24 Lock Screen: Configure Lock Screen .................24 Encryption: Encrypt tablet ....................26 Passwords: Visible Passwords ...................27 Device Administration: Device Administrators ..............27 Credential Storage ......................27 Applications Settings ......................27 Accounts &...
- Page 4 Assign a New Picture to a Contact ..................39 Delete a Contact ........................40 Search for a Contact ......................40 Import or Export Contacts ......................40 Synchronize Contacts ......................41 Share a Contact ........................41 Accounts and Messaging ......................42 Gmail / Google ........................42 Create a Google Account ....................42 Sign In to Your Google Account ..................43 Access Gmail ........................43 Send a Gmail Message ......................44...
- Page 5 Request a Refund for a Paid Application ................56 Open an Installed Application.....................57 Uninstall an Application ......................57 Get Help with Android Market ....................57 Navigation ..........................57 Google Maps ........................58 Google Navigation ......................58 Latitude ..........................59 Music .............................60 Music Player ........................60 Playlists ..........................61 Sprint Music Plus .......................62 Web and Data ...........................64 Wi-Fi ............................64 Turn Wi-Fi On and Connect to a Wireless Network ............64...
- Page 6 Create Website Settings ....................75 Reset the Browser to Default .....................75 Set the Browser Home Page ....................75 Create Bookmarks ......................76 Create a New Homepage ....................76 Add Bookmarks to Your Home Screen ................77 Portable Hotspot ........................77 Camera and Video ........................79 Take Pictures ........................79 Open or Close the Camera ....................79 Camera Screen ........................80 Review Screen ........................80...
- Page 7 Invite Guests to Your Event (Google Account Only) ............92 Send a Meeting Request (Exchange ActiveSync only) ............93 Event Alerts ........................93 View Events ........................94 Erase Events ........................96 Show or Hide Calendars ....................96 Synchronize an Exchange ActiveSync Calendar ..............96 Send a vCalendar ......................97 Clock .............................97 Calculator ..........................97 File Manager .........................98...
-
Page 9: Get Started
Get Started This section gives you all the information you need to set up your tablet and Sprint service the first time. Your Device at a Glance Set Up Your Device Activate Your Device Complete the Setup Application Sprint Account Information and Help Your Device at a Glance The following illustration outlines your device’s primary external features and buttons. -
Page 10: Set Up Your Device
Set Up Your Device You must first charge the battery to begin setting up your device. 1. Charge your battery. Insert the larger end of the connection cord into the charger jack on the bottom of your device. Get Started... -
Page 11: Activate Your Device
Insert the USB end of the cord into the AC adapter. Plug the AC adapter into an electrical outlet. Fully charging a battery may take up to three hours. Note: Your device’s battery should have enough charge for the device to turn on and find a signal and run the setup application. -
Page 12: Complete The Setup Application
● If you received your device in the mail and it is for a new Sprint account or a new line of service, it is designed to activate automatically. When you turn the device on for the first time, you may see a Hands Free Activation screen, which may be followed by a PRL Update screen and a Firmware Update screen. -
Page 13: Sprint Account Information And Help
Sign in with your Google Account: Complete the steps to create or sign in to your Google account if applicable. Backup and Restore: Complete your Backup and Restore options. 3. Set time and date for your tablet. Note: You do not need to sign up for a Google account to use your device. However, to download applications from the Android Market, you must link your device to a Google account. - Page 14 ● View and pay your bill. ● Enroll in Sprint online billing and automatic payment. ● Purchase accessories. ● Shop for the latest Sprint devices. ● View available Sprint service plans and options. ● Learn more about data services and other products like games, applications, and more. From Any Phone ●...
-
Page 15: Device Basics
Device Basics Your device is packed with features that simplify your life and expand your ability to stay connected to the people and information that are important to you. The topics in this section will introduce the basic functions and features of your device. Your Device’s Layout Turn Your Device On and Off Turn Your Screen On and Off... -
Page 16: Your Device's Layout
Your Device’s Layout The illustrations and descriptions below outline your tablet’s basic layout. Main Key Functions ● Power Key lets you turn on/off your device, wake it up from the sleep mode, or reset the tablet to default by holding the Power Key for 15 seconds. ●... -
Page 17: Turn Your Device On And Off
● Headset Jack allows you to plug in either a stereo headset or an optional headset for convenient, hands-free listening. ● Speaker lets you hear the different sounds. ● Volume Key allows you to adjust the media volume. ● Charger Jack allows you to connect the USB charger or power adapter. CAUTION! Inserting an accessory into the incorrect jack may damage the device. -
Page 18: Touchscreen Navigation
Touchscreen Navigation Your device’s touchscreen lets you control actions through a variety of touch gestures. Touch When you want to type using the onscreen keyboard, select items onscreen such as application and settings icons, or press onscreen buttons, simply touch them with your finger. Touch and Hold To open the available options for an item (for example, a link in a Web page), touch and hold the item. - Page 19 Device Basics...
-
Page 20: Your Home Screen
Your Home Screen The home screen is the starting point for your device’s applications, functions, and menus. You can customize your home screen by adding application icons, shortcuts, folders, widgets, and more. Your home screen extends beyond the initial screen. Swipe the screen left or right to display additional screens. - Page 21 2. On the above opened screen, touch the type of item you want to add (Widgets, Apps, Wallpapers, or More) and then drag a certain item into the designated screen. Widgets: Add widgets to a screen such as a clock, calendar, mail, people, Wi-Fi and Bluetooth toggles, social networking apps, and more.
-
Page 22: Extended Home Screens
To remove the item, drag it to the Remove icon at the upper right corner of the screen and release it. Extended Home Screens In addition to the main home screen, your tablet has four extended home screens to provide more space for adding icons, widgets, and more. -
Page 23: Status Bar
Status Bar The status bar at the lower right corner of the home screen provides device and service status information on the right side and notification alerts on the left. To view notification alerts, touch the status bar. Status Icons Icon Description ®... -
Page 24: Enter Text
3G (data service) airplane mode sync active battery (charging) battery (full charge) Notification Icons Icon Description New email New Gmail Goolge Talk message Wi-Fi in range SD card installed Error Enter Text You can type on your device using the virtual Android keyboard. Touchscreen Keyboards Tips for Editing Text Input Options... -
Page 25: Tips For Editing Text
Android Keyboard is a keyboard layout similar to a desktop computer keyboard. You can choose to use the landscape or portrait orientation of the on-screen keyboard, by turning the tablet sideways. Meanwhile, you can also use other input methods from English Voice (Android keyboard) and Swype by simply touching the small icon at the bottom of the screen. -
Page 26: Touch Input Settings
Next to each of the methods, you can touch the quick settings icon to bring up the settings menu for each method. For English (US) keyboard/English Voice, you can configure the following items: ● Auto-capitalization ● Vibrate on keypress ● Sound on keypress ●... - Page 27 Voice output ● Text-to speech settings: Set text-to-speech parameters. Keyboard settings ● Current input method: Select an input method. ● Input method selector: Select how the input method selector will be displayed. ● Configure input methods: Configure each of your input methods. Mouse and trackpad settings ●...
-
Page 28: Device Settings
Device Settings This section provides an overview of items you can change using your device’s Settings menus. Wireless & Network Settings Sound Settings Screen Settings Location & Security Settings Applications Settings Accounts & Sync Settings Privacy Settings Storage Settings Language & Input Settings Accessibility Settings Date &... -
Page 29: Airplane Mode
Airplane Mode Airplane Mode allows you to use many of your device’s features, such as Gallery, Camera, and Music, when you are on an airplane or in any other area where data service is prohibited. When you set your device to Airplane Mode, it cannot access online information. To turn Airplane Mode on or off in Settings: 1. -
Page 30: Sound Settings
Touch to activate/deactivate warning messages for domestic & International data roaming. Roaming Mode Touch > and select Settings > Wireless & networks > Mobile networks > Roaming Mode. Select Sprint Only or Automatic according to your preference. Roaming Settings This is for you to turn on/off data roaming function and decide the data type. Touch >... -
Page 31: Location & Security Settings
Adjusting your device’s screen settings not only helps you see what you want, it can also help increase the battery life. Brightness You can check the Automatic brightness check box to let your device adjust the brightness automatically, or touch to adjust the brightness by yourself. Auto-rotate Screen You can select to switch your screen orientation to landscape or portrait mode automatically when rotating your tablet. -
Page 32: My Location
Passwords Device Administration Credential Storage My Location Check the check box beside the listed items to configure the location settings. ► Touch > > Settings > Location & security and then touch the check boxes to select or deselect an option. Use Wireless Networks Use Wi-Fi and/or mobile networks to determine your location. - Page 33 4. Draw the screen unlock pattern by connecting at least four dots in a vertical, horizontal, or diagonal direction. Lift your finger from the screen when finished. 5. The device records the pattern. Touch Continue. 6. When prompted, draw the screen unlock pattern again, and then touch Confirm. Note: Clear the Use visible pattern check box if you do not want the unlock pattern to display on the screen when you unlock it.
-
Page 34: Encryption: Encrypt Tablet
If you fail to enter the correct PIN after five attempts, you will be prompted to wait for 30 seconds before you can try again. Use a Screen Unlock Password 1. Touch > and touch Settings > Location & security > Configure lock screen. 2. -
Page 35: Passwords: Visible Passwords
Passwords: Visible Passwords When you check the Visible passwords check box, your passwords will be shown as you type. ► Touch > > Settings > Location & security and then touch the check boxes to select or deselect Visible passwords. Device Administration: Device Administrators View or deactivate device administrators. - Page 36 ► Touch > > Settings > Applications > Manage applications. Your tablet will show you the applications in a list. To remove an installed application: Touch > > Settings > Applications > Manage applications. Select the application you would like to delete. Touch Uninstall and then OK to confirm.
-
Page 37: Accounts & Sync Settings
Move an Application from or to the Memory Card You can move the applications downloaded or installed on your tablet to the memory card when the tablet memory is full. You can also move applications to your tablet if the memory card is getting full. -
Page 38: Privacy
Manage Existing Accounts 1. Touch > and select Settings > Accounts & sync. 2. Touch an account to edit its settings. Touch a field to edit its settings. Touch Remove account at upper right corner of the screen to delete the account from your device. -
Page 39: Storage Settings
To reset your device: 1. Touch > and select Settings > Privacy > Factory Data Reset. Read the Factory Data Reset information. 2. If applicable, select check marks for Erase internal storage area (media area) or Erase USB Storage. 3. Touch Reset tablet. 4. -
Page 40: Accessibility Settings
Language Settings: Select Language Touch to select your preferred screen language from the language list. Language Settings: User Dictionary Add words to your user dictionary for fast input and manage them. Voice Input: Voice Recognizer Settings Touch to configure Google voice recognition settings: language, SafeSearch, offensive words, personalized recognition, and Google account dashboard. -
Page 41: Activate This Device
Clear the Automatic date & time and Automatic time zone check boxes if you want to set time and date by yourself Configure the time and date settings: Check the Automatic date & time check box to use network-provided time. ... -
Page 42: System Updates
System Updates Check available system updates and update your system. ► Touch > > Settings > About tablet > System updates. Status View the status of battery, network, and other more information. ► Touch > > Settings > About tablet > Status. Battery Use Touch to see what has been using the battery. -
Page 43: Contacts
Contacts The Contacts application lets you store and manage contacts from a variety of sources, including contacts you enter and save directly in your device as well as contacts synchronized with your Google account, your PC and compatible email programs (including Exchange Server). Get Started With Contacts Add a Contact Edit a Contact... - Page 44 The Contacts list displays all contacts currently stored in your device, including Google contacts, Exchange ActiveSync contacts and contacts on your device. Scroll through the list to view all your contacts. The contact names are listed on the left side of the screen, with more information shown for the highlighted name on the right side.
-
Page 45: Add A Contact
Settings: Change the display options by choosing how the contact list will be sort and how the contact name will be shown. Accounts: Access Accounts & sync settings to manage your accounts and sync settings. Import/Export: Import/export contacts from or to the microSD card, or share visible contacts. -
Page 46: Edit A Contact
More: Touch Add another field to include additional information such as IM address, Nickname, etc. Note: To select a type (label) for a phone number, email address, or address (such as Mobile, Home, Work, etc.), touch the type to the right of the field. Note: To add more phone numbers, email addresses, etc., touch on the right side of the entry field. -
Page 47: Assign A Stored Picture To A Contact
With a contact being highlighted, touch the icon on the top of the screen to add or edit information. Touch any field you want to change or add. See Add a Contact. Add or edit the information, and then touch Done on the top of the editing screen. Note: To select a type (label) for a phone number, email address, or postal address (such as Mobile, Home, Work, etc.), touch the type to the right of the field. -
Page 48: Delete A Contact
Touch Take photo. to take a picture. If you’re satisfied with the picture, touch Ok to continue. Touch You may be prompted to crop the picture for use with contacts. Touch and drag the square to frame the portion of the picture to use. Touch and drag the side of the square to resize the square. -
Page 49: Synchronize Contacts
Synchronize Contacts Syncing data from your managed accounts lets you add and manage new or existing contacts from your online or remote accounts to your device. Prior to syncing, you must have an active Google or Corporate account with associated contacts, and be signed into your account with the device. -
Page 50: Accounts And Messaging
Accounts and Messaging With Sprint service and your device’s messaging capabilities, you have the opportunity to share information through many different channels and accounts. Gmail Email Social Networking Accounts Gmail / Google You will need a Google account to access several device features such as Gmail, Google Maps, Google Talk, and the Android Market applications. -
Page 51: Sign In To Your Google Account
Create a Google Account Using Your Device 1. Touch > and select Settings > Accounts & Sync. 2. Touch Add account at the upper right corner of your screen, and then touch Google Accounts. 3. Touch Create an account now. 4. -
Page 52: Send A Gmail Message
1. Touch > and select Gmail. 2. Do any of the following: View more email messages: If the Inbox is full, swipe your finger up the screen to view more messages and conversations. Read a new email message: Touch the unread message or the conversation with an unread message (just-arrived items display in bold). -
Page 53: Read And Reply To Gmail Messages
2. Touch the icon to compose an email. 3. Enter the message recipient’s email address in the To field. If you are sending the email message to several recipients, separate the email addresses with a comma. As you enter email addresses, any matching addresses from your contacts list are displayed. Touch a match to enter that address directly. -
Page 54: Email
Email Use the Mail application to send and receive email from your webmail or other accounts, using POP3 or IMAP, or access your Exchange ActiveSync account for your corporate email needs. Add an Email Account (POP3 or IMAP) Add an Exchange ActiveSync Account Create another Email Account Compose and Send Email View and Reply to Email... -
Page 55: Add An Exchange Activesync Account
Important: If the account type you want to set up is not in the device database, you will need to complete the process by yourself. You should get all pertinent information for the email account, such as incoming and outgoing server settings, before you proceed. -
Page 56: View And Reply To Email
Enter email addresses directly in the To field. If you’re sending the email to several recipients, separate the email addresses with a comma. As you enter email addresses, any matching addresses from your contacts list are displayed. Touch a match to enter the address directly. -
Page 57: Manage Your Email Inbox
Manage Your Email Inbox Your email inbox provides management options for viewing, filtering, sorting, and deleting your email messages. View Your Email Inbox 1. Touch > and select Email. 2. Touch Inbox on the navigation bar at the left of the screen to check your received emails. Refresh an Email Account Whatever your automatic synchronization settings are, you can also synchronize your sent and received email messages manually at any time. -
Page 58: Exchange Activesync Email Features
Delete an Email Message 1. On the email account Inbox, touch and hold the message you want to delete. 2. Touch the icon in the upper-right corner to delete the message. Delete Multiple Email Messages 1. Touch the check boxes next to the messages you want to delete. 2. -
Page 59: Edit Email Account Settings
5. Set the dates and times for the period when you will be out of the office. 6. Enter the auto-reply message. 7. Touch Save. Send a Meeting Request 1. Touch > and select Email. 2. Switch to the Exchange ActiveSync account. 3. -
Page 60: Delete An Email Account
Remove account: Touch this option and then touch OK to remove the selected account from your device. Delete an Email Account If you no longer want an email account on your device, you can delete it through the mail settings menu. -
Page 61: Twitter
Twitter Twitter is a social networking site that allows users to instantly connect using microblogging services and text-based posts. Having Twitter installed will allow you to easily follow friends, family, experts, celebrities and news on the go. Launch Android Market on your tablet. Find and download the Twitter application. -
Page 62: Applications And Entertainment
Applications and Entertainment All your device’s features are accessible through the Applications list. Android Market Navigation Music Android Market Android Market™ is the place to go to find new apps for your device. Choose from a wide variety of free and paid apps ranging from productivity apps to games. When you find an app you want, you can easily download and install it on your device. - Page 63 2. When you open Android Market for the first time, the Terms of Service window will appear. Touch Accept to continue. 3. Do any of the following to find an app: Browse through featured apps. Scroll through the list of featured apps when you open Android Market.
-
Page 64: Create A Google Checkout Account
Note: You need a Google Checkout account to purchase items on Android Market. See Create a Google Checkout Account to set up a Google Checkout account if you do not have one. 6. The subsequent screen notifies you whether the app will require access to your personal information or access to certain functions or settings of your device. -
Page 65: Open An Installed Application
1. Touch > and select Market > My apps. 2. Touch the application to uninstall for a refund. The details screen for the application opens. 3. Touch Uninstall & refund. Your application is uninstalled and the charge is cancelled. 4. Choose the reason for removing the application, and then touch OK. Open an Installed Application There are several options for opening an installed application. -
Page 66: Google Maps
Note: Before using any location-based services, make sure you've selected location options in the Location & security menu. Touch > > Settings > Location & security and select your options under My Location. Google Maps Google Navigation Latitude Google Maps You use Maps to find your current location;... -
Page 67: Latitude
Speak Destination: Speak a destination to your device, and your device will begin to get directions automatically. Type Destination: Type a specific destination to let your device get directions. Contacts: Select a contact with an address and your device will begin to get directions to that address. -
Page 68: Music
Each time you launch Maps application, your location will be determined using GPS and your Latitude status will be updated. You can touch > Latitude in Maps or > > Latitude to see your status as well as that of your selected friends. In Latitude, touch and refresh the friends’... -
Page 69: Playlists
Playlists While playing music, you can create and manage playlists to organize your music files. Creating a Playlist Touch and hold a music file you want to add to a new playlist. Select Add to playlist > New… . Type a name for the playlist and touch Save. Managing Your Playlist Touch Playlists from the Music Screen to view all playlists. -
Page 70: Sprint Music Plus
Touch Rename and enter a new name to rename the playlist. Adding Songs to Your Playlist Open the folder where the song you want to add to a playlist is. Touch and hold a song and select Add to playlist from the pop-up menu. Select a playlist from the list. - Page 71 Checking Music Downloads Touch > > Sprint Music Plus to launch the application. Touch Downloads to view the music downloading progress. Playing Music Touch > > Sprint Music Plus to launch the application. Touch My Library. The music files you downloaded and any other music you have loaded onto your tablet or microSD card will be available here with categories of Artists, Albums, Tracks, Genres, and Playlists.
-
Page 72: Web And Data
Web and Data Your device’s data capabilities let you wirelessly access the Internet or your corporate network through a variety of connections, including: ● Wi-Fi ● Data Services (Sprint 3G Network) ● Virtual Private Networks (VPN) This section addresses your device’s data connections and the built-in Web browser. Additional data-related features can be found in Accounts and Messaging,... -
Page 73: Check The Wireless Network Status
Security types may include WEP, WPA/WPA2 PSK, or 802.1x EAP. Follow the prompts to enter the correct sign-in information or password for each type. 4. Touch a Wi-Fi network to connect. If you selected an open network, you will be automatically connected to the network. -
Page 74: Data Services (Sprint 3G Network)
Note: If the wireless network you want to connect to is not in the list of detected networks, scroll down the screen, and touch Add Wi-Fi network. Enter the wireless network settings and touch Save. Data Services (Sprint 3G Network) This section will help you learn the basics of using your data services, including managing your user name, launching a data connection, and navigating the Web with your device. -
Page 75: Data Connection Status And Indicators
To change the device’s default launch page to your current page, touch Tip: and touch Settings > General > Set homepage > Current page and then touch OK. Note: The Browser automatically launches when a Web link is touched from within either an email or text message. -
Page 76: Set Up Secure Credential Storage
Set Up Secure Credential Storage If your network administrator instructs you to download and install security certificates, you must first set up the device’s secure credential storage. 1. Touch > and select Settings > Location & security, and then touch Set password under the Credential storage heading. -
Page 77: Browser
4. Open the Web browser to access resources such as intranet sites on your corporate network. Disconnect From a VPN 1. Touch the Status & Notifications area of your tablet. 2. Touch the VPN connection to return to the VPN settings screen, and then touch the VPN connection to disconnect from it. - Page 78 To scroll through a website’s page: ► In a single motion, touch and drag across or up and down a page. Selecting To select onscreen items or links: ► Drag across a page, and then touch an onscreen link to select the link. ...
-
Page 79: Browser Menu
2. Touch the icon or touch the Enter key on the keyboard to launch the new page. Browser Menu The browser menu offers additional options to expand your use of the Web on your device. Open the Browser Menu The browser menu may be opened anytime you have an active data session, from any page you are viewing. -
Page 80: Select Text On A Web Page
● Page info: Displays the Name and URL (website address) of the site you’re currently viewing. ● Downloads: Keeps a list of previously downloaded content. ● Settings: Allows you to configure your browser. General: Configure common options, sync settings, and auto-fill mode. ... -
Page 81: Go To A Specific Website
4. Select an onscreen option: Select all, Copy, Share (Bluetooth, Email, Gmail, etc), Find (on page), or Web Search (Search on web). Go to a Specific Website Go to any website by entering a URL (website address). Touch the address area at the top of the Web page and enter a Web address (for example, www.sprint.com). -
Page 82: Adjust Browser Privacy And Security Settings
3. Select Advanced and navigate to the Page content settings area and select from one of the following page settings: Text size: Select the desired text size. Default zoom: Sets the default browser viewing size. Choose from: Far, Medium, or Close. -
Page 83: Create Website Settings
Accept cookies: Allows sites that require cookies to save and read cookies from your device. Clear all cookie data: Clears all current browser cookie files. Remember form data: Allows the device to store data from any previously filled-out forms. -
Page 84: Create Bookmarks
2. Touch Settings > General > Set homepage. 3. Delete the current address and enter a new Web address. You can also touch Current page to set the current page as the home page or Default page to revert to the device's default home page. 4. -
Page 85: Add Bookmarks To Your Home Screen
3. Touch and hold a thumbnail or an entry from the screen to display an onscreen popup menu. 4. Touch Set as homepage to assign the selected entry as your new homepage. Add Bookmarks to Your Home Screen 1. From any open Web page, touch the icon at right of the browser tool bar. - Page 86 Connect to Portable Wi-Fi Hotspot 1. Enable Wi-Fi (wireless) functionality on your target device (laptop, media device, etc.). 2. Scan for Wi-Fi networks from the device and select your device hotspot from the network list. The default name for your device hotspot is OptikXXXXXX. You can change the name by touching Portable hotspot >...
-
Page 87: Camera And Video
Camera and Video You can use the camera or camcorder to take and share pictures and videos. Your device comes with a 5.0 megapixel back camera with an autofocus feature that lets you capture sharp pictures and videos. Take Pictures Record Videos Camera Settings View Pictures and Videos Using Gallery... -
Page 88: Camera Screen
Camera Screen The camera screen lets you view your subject and access camera controls and options. 1. Zoom control: Zoom in or zoom out while taking picture. For more information, see Zoom. 2. White balance: Adjust the white balance mode, which can be Auto, Incandescent, Daylight, Fluorescent, or Cloudy. -
Page 89: Zoom
1. Play pictures as slide show. 2. Share or send the picture or video using Picasa, Bluetooth, Gmail, Email, etc. 3. Delete the captured image or video. 4. Learn More options for the captured image or video. Zoom Before taking a photo or video, you can first use the onscreen zoom control to zoom in or out of your subject. -
Page 90: Record Videos
4. Frame your subject on the screen. Tip: Hold the device vertically when taking portrait shots or hold the device horizontally when taking landscape shots. Then you will not need to rotate the photo after capturing it. 5. You can let the camera autofocus on the center of the screen. 6. -
Page 91: Camera And Camcorder Settings
Camera and Camcorder Settings The camera and camcorder screens let you access camera and camcorder settings. You can also switch between photo and video modes from the menu panel. Camera Settings The right side of the camera capture screen gives you access to camera settings options. Adjust White Balance 1. -
Page 92: Camcorder Settings
Contrast: Lets you select the contrast level for capturing photos. Sharpness: Lets you select the sharpness level when capturing photos. Picture quality: Lets you select the quality level to use for capturing photos. Picture size: Lets you select the size of the picture when capturing photos. ... -
Page 93: Open Or Close Gallery
Open or Close Gallery Use the Gallery application to view your saved photos and videos, both from your device's internal memory and from an installed microSD card. Open Gallery ► Touch > and select Gallery. The Gallery application opens in the Albums tab where your photos and videos are organized by albums for easy viewing. -
Page 94: View Photos And Videos
View Photos and Videos After selecting an album from the Albums tab, you can browse through the photos and videos of that album either in filmstrip or grid view. Touch a photo or video to view it in full screen. By default, photos and videos are presented in a filmstrip. - Page 95 2. Choose whether to browse photos and videos in the album in filmstrip or grid view. See View Photos and Videos. 3. Touch and hold on the thumbnail to select the item. You can also touch the thumbnail to view the photo full-size. 4.
-
Page 96: Share Photos And Videos
You can also crop a photo while you’re viewing it in full screen. Touch the Tip: icon, touch Crop, and follow the same cropping steps as above. Share Photos and Videos The Gallery application lets you share pictures and videos using messaging applications such as Gmail and Email, social applications such as Facebook, Twitter, Picasa, and YouTube, or direct transfer applications such as Bluetooth. -
Page 97: Share Photos On Picasa
In the next few steps, you’ll be asked to turn on Bluetooth on your device and connect to the receiving Bluetooth device so the files can be sent. For more information, see Bluetooth. Share Photos on Picasa You need to be signed in to a Google Account to upload pictures to the Picasa™ photo organizing service. - Page 98 Touch the album that contains the photos or videos you want to share. Open the specific videos. Touch and then on the Share options menu, touch Facebook or Twitter. Enter the prompted information, such as description and tags, and select a privacy option.
-
Page 99: Tools And Calendar
Tools and Calendar Learn how to use many of your device’s productivity-enhancing features. Calendar Alarm & Timer Calculator Filer Voice Search Bluetooth microSD Card Update Your Device Calendar Use Calendar to create and manage events, meetings, and appointments. Your Calendar helps organize your time and reminds you of important events. -
Page 100: Invite Guests To Your Event (Google Account Only)
Calendar application on your device. For more information about creating and managing multiple Google Calendars, visit the Google website: calendar.google.com. Note: If you have synchronized your device with an Exchange ActiveSync account or Outlook on your computer, you can also select these calendars. ... -
Page 101: Send A Meeting Request (Exchange Activesync Only)
When you're adding guests, you will see matches from your device's Google contacts. Touch an entry to add it to the list of guests. 4. Touch Done to add the event to your Google Calendar. If the people to whom you send invitations use Google Calendar, they’ll receive an invitation in Calendar and by email. -
Page 102: View Events
To view, dismiss, or snooze the reminder: 1. Touch the status area on the bottom right side of the screen. 2. Touch the upcoming event name to display the event. Note: If you have other pending event reminders, these events will also appear on the screen. 3. - Page 103 When in Day view, slide left or right across the screen to view earlier or later days. Note: In Day view, the weather information appears only if the event is within the five-day forecast of the Weather application. Note: Weather information does not appear in Day view when you change Day view to display as a time list.
-
Page 104: Erase Events
● Touch on the upper right corner to create a new event. ● Touch a day to view the events of that day. ● Slide up or down the screen to view earlier or later months. Erase Events It's easy to remove scheduled events from your calendar. 1. -
Page 105: Send A Vcalendar
Send a vCalendar You can send a calendar event as a vCalendar to someone’s mobile device or your computer. You can also send it as a file attachment with your message. 1. Touch > and select Calendar. 2. Press and hold the calendar event you want to send, and then touch Share vCalendar. In Month view, you need to touch the day when the event takes place before you can press and hold the event. -
Page 106: File Manager
Enter a number. Touch an operation symbol. Simple operation symbols appear on the right (add, subtract, mutliply, divide, etc.). More complex operations are on the left (sine/cosine/tangent, pi, exponents, square root, etc.). Enter another number. Touch =. Touch CLR to reset the calculator. File Manager With this feature, you are able to view and manage files on your device. -
Page 107: Turn Bluetooth On Or Off
The Bluetooth Settings Menu Change the Device Name Connect a Bluetooth Headset Reconnect a Headset Disconnect or Unpair From a Bluetooth Device Send and Receive Information Using Bluetooth Turn Bluetooth On or Off Use the Wireless & settings menu to enable for disable your device's Bluetooth capabilities. 1. -
Page 108: Change The Device Name
Change the Device Name The device name identifies your device to other devices. 1. Touch > and select Settings > Wireless & networks. 2. If the Bluetooth check box is not selected, select it to turn Bluetooth on. 3. Touch Bluetooth settings > Device name. 4. -
Page 109: Reconnect A Headset
3. Make sure that the headset is discoverable, so that your device can find the headset. Refer to the instructions that came with the headset to find out how to set it to discoverable mode. 4. Touch Find nearby devices > Scan for devices. Your device will start to scan for Bluetooth devices within range. -
Page 110: Send And Receive Information Using Bluetooth
Disconnect from a Device 1. Touch > and select Settings > Wireless & networks > Bluetooth settings. 2. In the Bluetooth devices section, touch the device to disconnect. 3. Touch Disconnect. Unpair from a Bluetooth Device You can make your device forget its pairing connection with another Bluetooth device. To connect to the other device again, you may need to enter or confirm a passcode again. - Page 111 Photos and videos (in Gallery). On the Albums tab, touch and hold an album. Touch the Share button , and then touch Bluetooth. To select individual photos instead of an entire album, touch an album to open it and then touch and hold an item to bring up the selection menu.
-
Page 112: Microsd Card
2. If Bluetooth is not switched on, touch the Bluetooth check box to switch it on. 3. Touch the Discoverable check box. 4. On the sending device, send one or more files to your device. Refer to the device’s documentation for instructions on sending information over Bluetooth. 5. -
Page 113: Remove The Microsd Card
2. Insert the microSD card into the miroSD card slot. Push it in fully until you feel it lock into place. You should hear a small click. 3. Close the microSD card slot cover. 4. Touch > > Settings > Storage > Mount SD storage to mount the microSD card. -
Page 114: View The Microsd Card Memory
Note: You can easily damage the microSD card by improper operation. Please be careful when inserting, removing, or handling the microSD card. Note: Make sure your battery is fully charged before using the microSD card. Your data may become damaged or unusable if the battery runs out while using the microSD card. View the microSD Card Memory The Storage settings menu gives you access to your microSD card memory information. -
Page 115: Use The Device's Microsd Card As A Usb Drive
3. Remove the microSD card. See Remove the microSD Card. Use the Device’s microSD Card as a USB Drive To transfer music, pictures, and other files from your computer to your device’s microSD card, you need to set the device’s microSD card as a USB drive. 1. - Page 116 To back up your Gmail information: 1. Touch > and select Settings > Accounts & Sync. 2. Touch the Auto-sync option to enable the feature (checkmark). If the Auto-sync option is on, email, Calendar and Contacts automatically synchronize whenever a change is made. ...
-
Page 117: Update Your Android Operating System
2. Touch Update Firmware. (Your device automatically downloads and installs any available updates. You may be required to power your device off and back on to complete the software upgrade.) - or - 1. Locate the System Update Available icon ( ) in Notifications. -
Page 118: Update Your Prl
1. Touch > and select Settings > About tablet > System updates > Update Profile. 2. Follow the onscreen instructions. Note: If your data services or account syncing ever seems to go out unexpectedly, use this feature to reconnect with the network. Update Your PRL This option allows you to download and update the PRL (preferred roaming list) automatically. -
Page 119: Index
Index Accessibility, 32 Accessory Jack, 9 Account Passwords, 5 Accounts, 42 Add new, 29 Manage, 30 Settings, 29 Activation, 3 Airplane Mode, 21 Animation, 23 Applications, 54 Settings, 27 Auto-rotate Screen, 23 Battery Charge, 2 Bluetooth Settings, 21 Brightness, 23 Calendar, 91 Camera, 79 Lens, 8... - Page 120 Home Screen, 12 Add Items, 12 Customize, 12 Extended, 14 Move or remove items, 13 Internal Storage, 31 Keyboard Input method, 32 Settings, 32 Touchscreen, 16 Language, 32 Location Settings, 24 Messaging, 42 My Location, 24 Notification Icons, 16 Notifications, 15 Passwords, 27 Pinch, 10 Power Off, 9...
- Page 121 Storage Settings, 31 Swipe, 10 Text Editing, 19 Text Entry, 16 Tools, 91 Touch, 10 Touch and Hold, 10 Touchscreen Device layout, 8 Keyboard, 16 Navigation, 10 Turn off, 9 Turn on, 9 Turn Device Off, 9 Turn Device On, 9 Typing, 16 User Dictionary, 32 Volume, 22...