Table of Contents
Advertisement
Service
This manual is to be used by qualified appliance
technicians only. Maytag does not assume any
responsibility for property damage or personal
injury for improper service procedures done by
an unqualified person.
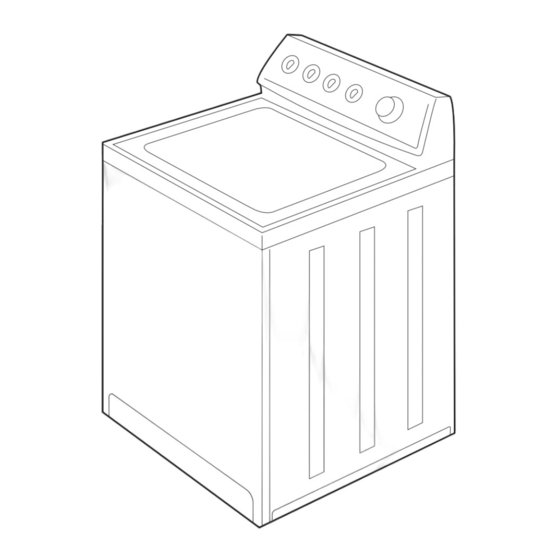
Top Load
Washer
AAV4000AW*
AAV7000AG*
AAV7000AJ*
AAV7000AK*
AAV7000AW*
AAV8000AG*
AAV8000AJ*
AAV8005EW*
AAV9000AG*
CAV1004AW*
CAV2004AJ*
CAV2004AK*
CAV2005AW*
CAV4004AG*
CAV4004AW*
CW5500*
©2005 Maytag Services
All manuals and user guides at all-guides.com
CW6500*
CW9505*
HAV1200AR*
HAV1200AW*
HAV4200AK*
HAV4200AT*
HAV4200AW*
MAV1655AW*
MAV1755AW*
MAV208DAW*
MAV2755AJ*
MAV2755AW*
MAV2757AW*
MAV275SAW*
MAV308DAW*
This Base Manual covers general information.
Refer to individual Technical Sheet
for information on specific models.
This manual includes, but is
not limited to the following:
MAV3757AW*
MAV3758AW*
MAV3855AG*
MAV3855AK*
MAV3855AW*
MAV385SAW*
MAV3905AW*
MAV3955EW*
MAV408DAW*
MAV4755AW*
MAV4757AW*
MAV4758AW*
MAV551EEW*
MAV5758EW*
MAV5920AG*
MAV5920EW*
MAVT236AW*
MAVT346AW*
MAVT446AW*
MAVT546EW*
NAV2335AJ*
NAV2335AW*
NAV3335AW*
NAV5805AW*
NAV8805EW*
PAV2755AA*
PAV3855AA*
PAVT910AW*
PAVT915AW*
PAVT920AW*
16026502
December 2005
Advertisement
Chapters
Table of Contents
Troubleshooting

Related Manuals for Maytag AAV4000AW Series


Summary of Contents for Maytag AAV4000AW Series
- Page 1 Service This manual is to be used by qualified appliance technicians only. Maytag does not assume any responsibility for property damage or personal injury for improper service procedures done by an unqualified person. Top Load Washer This Base Manual covers general information.
-
Page 2: Important Information
Important Notices for Servicers and Consumers Maytag will not be responsible for personal injury or property damage from improper service procedures. Pride and workmanship go into every product to provide our customers with quality products. It is possible, however, that during its lifetime a product may require service. -
Page 3: Table Of Contents
Transmission Operation ..........29 Determine Brake Rotor Condition ......29 Brake Adjustment ............. 29 Check Brake Disengagement ........30 To Adjust Brake Disengagement ....... 30 Appendix A Installation Instructions ........... A-1 Appendix B Use & Care Information ........... B-1 16026502 ©2005 Maytag Services... -
Page 4: Important Safety Information
Important Safety Information when required. Do not do it yourself unless you know how! To reduce the risk of fire, electric shock, serious injury • To reduce the risk of fire, clothes which have traces or death to persons when using your washer, follow of any flammable substances such as vegetable oil, these basic precautions: cooking oil, machine oil, flammable chemicals,... - Page 5 About Ground Wires Important Safety Information In the event of an electrical short circuit, a ground wire reduces the risk of electric shock by providing an escape wire for the electric current. Standard accepted color coding for ground wires is green To avoid personal injury or death from improper servicing, or green with a yellow stripe.
-
Page 6: Grounding Instructions
Important Safety Information Explanation Polarization–This means that the larger slot must be neutral and the small slot must be at line voltage. Mispolarized–The outlet is incorrectly wired so that the larger slot is at line voltage and the smaller slot is neutral. Grounded–This means the round hole connection is con- nected to earth ground through a connection to the main power panel. -
Page 7: General Information
To locate an authorized • For Maytag product call 1-800-688-9900 or visit the technician: • For Maytag call 1-800-462-9824 or visit the Web Site at Web Site at www.maytag.com • For product in Canada call 1-866-587-2002 or visit the www.maytag.com. -
Page 8: Model Nomenclature
General Information Washer Nomenclature White A = Admiral Bisque M = Maytag Metallic Blue P = Performa C = Crosley N = Amana Hoover Australia 220-240V-50 Hz Generic Europe 220-240V-60 Hz AV = Automatic Vertical 220V-60 Hz (2 wire) 220V-50 Hz... -
Page 9: Troubleshooting Troubleshooting General Symptoms
In cold climates check for frozen drain hose. • Check condition of drive belt. • Check tub to pump hose for twist in hose. • Check drain system in the home is functioning properly. • Check for blocked or kinked drain hose. 16026502 ©2005 Maytag Services... - Page 10 Model I.D. is displayed by the LED’s around the bottom of the dial. • Model I.D. can be redisplayed while in Service Mode by setting knob to “Handwash” and pressing. • Refer to chart for Model I.D. 16026502 ©2005 Maytag Services...
- Page 11 Power Off LED blinks. • Pause and Delicates LED’s are illuminated. Rotate the Cycle Selection Knob clockwise for ascending, and counterclockwise for decending test mode. Rotate 32 clicks in the same direction to complete the test. 16026502 ©2005 Maytag Services...
- Page 12 Press knob Spin LED blinking. Fast spin. • Press Knob Complete LED illuminates. • Press knob exit back to Service Mode. NOTE: Fills are skipped if Pressure Switch is satisfied. Press knob until Pause LED begins blinking to pause cycle. 16026502 ©2005 Maytag Services...
-
Page 13: Model Numbers
Motor Thermal protector opened more than 5 times during a cycle Thermistor Possible Short Thermistor Possible Open Thermistor out of range Power Failure detected No code MODEL CODE CHART Model Numbers MAV546E MAV5920 AGW (INT) MAV508DE, MAV551E MAV5758, MAV5858 MAV5920E NAV8805 16026502 ©2005 Maytag Services... -
Page 14: Troubleshooting (Mechanical Controls)
90 seconds. • • Check slow spin speed is not selected. Check motor slide and spring for proper movement. • Check condition of drive belt. • Check drain system in the home is functioning properly. 16026502 ©2005 Maytag Services... -
Page 15: Component Testing Information (Electronic)
(Hot valve) Pin #9 PK of PS5 and Pin #3 OR of PS5..1120 ohms (Cold valve) Pin #7 PU of PS5 and Pin #3 OR of PS5..1120 ohms (Thermistor) Pin #1 GY and Pin #11 GY of PS5....53000 ohms @ 70F 16026502 ©2005 Maytag Services... -
Page 16: Component Testing Information (Mechanical)
Do not disconnect the pressure hose from pressure switch to Refer to Technical perform measurements. Measure resistance across the Data Sheet for following terminals. wiring diagram & schematic for correct contacts. Terminal 1 to 2................. Continuity >1Ω Ω Terminal 1 to 3................Infinite 16026502 ©2005 Maytag Services... -
Page 17: Service Specifications
Intermittent 58 opm Medium Cycles between 3 minutes at 88 opm and 3 minutes at 58 opm Normal 88 opm Spin Speeds Fast Spin 620 +/- 25 rpm (revolutions per minute) Slow Spin 413 +/-17 rpm 16026502 ©2005 Maytag Services... -
Page 18: Disassembly Procedures
Console forward. 6. Depress the PCB locking tab and remove Circuit Board. 4. Disconnect and remove Rocker Switches from Console. 7. Remove Switches by lifting locking tab and rotating Switch to align with hole molded in Console. 16026502 ©2005 Maytag Services... -
Page 19: Drain Pump/Belt Removal
Drain Pump/Belt Removal 1. Disconnect power supply to unit. 2. Remove back Cover. 3. Remove Drain Hose Clamps. 5. Remove three screws retaining Drain Pump. NOTE: There will be water remaining in the hose from the last cycle. 16026502 ©2005 Maytag Services... -
Page 20: Top Cover Removal
Hinge/Lid Removal 1. Disconnect power supply to unit. 2. Lift Top Cover, see “Top Cover Removal” procedure. 3. Remove Hinge screw on each side. 4. Remove Lid Switch from housing. 4. Remove Hinge from Pivot Post. 16026502 ©2005 Maytag Services... -
Page 21: Water Valve Removal
4. Lift Water Valve to align with cutout in back cabinet. Front Panel Removal 1. Disconnect power supply to unit. 2. Lift Top Cover, see “Top Cover Removal” procedure. 3. Remove two screws, 1 each side on Front Panel top edge. 16026502 ©2005 Maytag Services... -
Page 22: Motor Removal
5. Remove Motor Shield. 5. Remove two Flume retaining screws from bottom of Top Cover. 6. Remove Motor wire harness connector. 6. Remove hose clamp and Flume/Diverter Hose. 7. Remove three screws retaining Motor to Base. 16026502 ©2005 Maytag Services... -
Page 23: Tub Top Removal
Pump/Belt Removal” procedure steps 1 - 4. 3. Lift Top Cover, see “Top Cover Removal” procedure. 4. Remove Tub Top, see “Tub Top Removal” procedure. 5. Unsnap Fabric Softener Dispenser from Agitator. 8. Lift Agitator Base from Washer. 16026502 ©2005 Maytag Services... - Page 24 Wrench and Seal Nut tool to remove Seal Nut. 14.Remove Suspension Springs using the spring 11. Remove gasket from Hub. removal tool. Be careful not to let Tub and Transmission assembly tip over. 12.Use Spanner Wrench to remove Hub. 16026502 ©2005 Maytag Services...
-
Page 25: Tub Seal/Transmission Disassembly
2. Remove Transmission Assembly from washer, see “Agitator/Spinner/Outer Tub/Transmission Removal” procedure. 3. Remove Transmission from Transmission Support by removing screws on Verticle Support Legs. 16. Mark location of Transmission Support with respect to the Outer Tub for ease of assembly. 16026502 ©2005 Maytag Services... -
Page 26: Drive Pulley And Cam Removal
Pulley and Cam arrangement is to drive the Clutch assembly during the agitate and spin cycle, and to NOTE: Be sure not to get any grease on Brake Snubber, disengage the Brake assembly during the spin cycle. Stater, or Brake Lining. 16026502 ©2005 Maytag Services... -
Page 27: Tub Seal Replacement
3. When installing the replacement bearing into the housing cavity, be sure to press against the outer race of the bearing to avoid damage to the bearing shield and causing premature failure. 16026502 ©2005 Maytag Services... -
Page 28: Installing Thrust Bearing
4. Remove Front Panel, see “Front Panel Removal” As stated previously, the Drive Pulley and Cams provide procedure. a cam action which raises the Drive Pulley during the 5. Remove Motor, see “Motor Removal” procedure. counterclockwise (spin) direction of the Motor. When the 16026502 ©2005 Maytag Services... -
Page 29: Transmission Operation
Brake disengages the Stator should be checked and adjusted as necessary. Reference points have been molded into the Pulley as an aid in 13.Reinstall Motor and Pump to new Base. checking the point of Brake disengagement. 16026502 ©2005 Maytag Services... -
Page 30: Check Brake Disengagement
2. If the position of the Cam Reference Arrow is more than the Max Pulley Hub reference mark, add a (.032 thickness) Thrust Washer to the standard Thrust Washer. Recheck disengagement 3 times to verify proper adjustment. Thrust Washer Placement 16026502 ©2005 Maytag Services... - Page 31 Appendix A 16026502 A–1 ©2005 Maytag Services...
- Page 32 NOTES 16026502 ©2005 Maytag Services...
- Page 33 Automatic Washing Machine Laveuse automatique/Lavadora automática Installation Instructions/Instructions d’installation/Instrucciones de Instalación Printed in USA ©2003 Maytag Corporation 2201432 Rev A 16026502 A–3 ©2005 Maytag Services...
- Page 34 • Instale la lavadora en un lugar seco al abrigo del mal tiempo y que pueda soportar el peso de la lavadora completamente llena de ropa. • El tomacorriente debe ser de 120 V CA, 60 Hz y puesto a tierra. No use un cordón de extensión. A–4 16026502 ©2005 Maytag Services...
- Page 35 Minimum de 23 gallons par minute; tuyau vertical d’évacuation – diamètre sur un circuit indépendant./El tomacorriente de la lavadora debe estar en un recommandé : 2 po//Mínimo de 23 galones por minuto; se recomienda un tubo circuito independiente. vertical de evacuación de 2" de diámetro 16026502 A–5 ©2005 Maytag Services...
- Page 36 Fasten to faucets and tighten with pliers./Fixez les tuyaux aux robinets et serrez- Place screens and washers in hoses./Installez les tamis et les avec des pinces./Instale las mangueras en las llaves y apriete con pinzas. les joints dans les tuyaux./Coloque las mallas y arandelas en las mangueras. A–6 16026502 ©2005 Maytag Services...
- Page 37 16026502 A–7 ©2005 Maytag Services...
- Page 38 à l’arrière. Puis, resserrez les écrous contre la base.Ouvrez les robinets./Afloje las tuercas de las patas delanteras y destornille las patas hasta que la lavadora esté nivelada de lado a lado y de frente hacia atrás. Después cierre la tuerca contra la base. A–8 16026502 ©2005 Maytag Services...
- Page 39 Desconecte las mangueras de admisión del agua desagüe y vierta el exceso de agua en un balde. de las llaves. 16026502 A–9 ©2005 Maytag Services...
-
Page 40: Installation Instructions
A–10 16026502 ©2005 Maytag Services... - Page 41 The Use and Care information provided in this service manual is representative of a limited number of models. Reference the customer’s Use and Care literature included with the product, order a copy, or consult the manufacturer’s website for the specific model (www.maytag.com). 16026502 B–1 ©2005 Maytag Services...
- Page 42 NOTES B–2 16026502 ©2005 Maytag Services...
- Page 43 Care & Cleaning ... 13 Troubleshooting ... 14 Form No. A/06/05 Part No. 2204617 www.amana.com Litho U.S.A. ©2005 Maytag Appliances Sales Co. 16026502 B–3 ©2005 Maytag Services...
-
Page 44: Important Safety Instructions
WARNING and stacked while warm. WARNING – Hazards or unsafe practices which COULD result in severe personal injury or death. CAUTION CAUTION – Hazards or unsafe practices which COULD result in minor personal injury. B–4 16026502 ©2005 Maytag Services... - Page 45 Check the hoses periodically for bulges, kinks, hot water faucets and let the water flow from each cuts, wear or leaks and replace them every five years. for several minutes. This will release any SAVE THESE INSTRUCTIONS 16026502 B–5 ©2005 Maytag Services...
-
Page 46: Operating Tips
• When laundering wrinkle free items or items of delicate construction, washable woolens or loosely knit items, never use less than the MEDIUM water level setting. This will minimize shrinkage, wrinkling and pulling of seams. • Close lid carefully to avoid slamming. B–6 16026502 ©2005 Maytag Services... - Page 47 • The washer will pause briefly throughout each cycle. will stop. When the lid is closed and the washer is These pauses are normal. restarted, the washer will continue the cycle at the point it was interrupted. 16026502 B–7 ©2005 Maytag Services...
-
Page 48: Using The Controls 2 Speed Combo Models
2/3 – Full Note: ° In wash water temperatures below 60 detergents do not dissolve well or clean well. Care Note: Items must circulate freely for best results. ° labels define cold water as up to 85 B–8 16026502 ©2005 Maytag Services... - Page 49 Extra Heavy. No Iron Fabrics Cycle Provides normal agitation and normal spin speeds with a spray rinse to reduce wrinkling. Handwash Cycle Provides intermittent agitation and soak for delicates and knits. 16026502 B–9 ©2005 Maytag Services...
- Page 50 Note: ° In wash water temperatures below 60 items. detergents do not dissolve well or clean well. Care labels define cold water as up to 85 ° B–10 16026502 ©2005 Maytag Services...
- Page 51 The control dial must be completely remove laundry additives, suds, perfumes, pushed in (off position) when you change the setting. etc. Note: Do not attempt to turn the control dial counterclockwise. Damage to the timer will result. 16026502 B–11 ©2005 Maytag Services...
-
Page 52: Electronic Control Models
Provides optimum cleaning at lower temperatures. May add hot water to the incoming cold water as the washer fills. This ATC Cold/Cold assures that the water will be warm enough to properly activate detergent. B–12 16026502 ©2005 Maytag Services... - Page 53 The End of Cycle Signal will sound once the cycle is for most loads. completed. On select models, the End of Cycle Signal Heavy Use for cleaning heavily soiled loads. can be canceled by setting the switch to Off. 16026502 B–13 ©2005 Maytag Services...
- Page 54 2. Press the cycle selector dial. The Spin light illuminates and the washer starts the rinse or spin. Power Off To cancel the cycle and turn off the washer, turn the Cycle Selector dial to Power Off and push the dial in. B–14 16026502 ©2005 Maytag Services...
-
Page 55: Special Features
Provides a flow of water when holding the immediately stop. This is for your personal safety. If switch in the On position. your washer does not stop, call your service technician immediately. When the lid is closed, the operation will automatically resume. 16026502 B–15 ©2005 Maytag Services... -
Page 56: Care & Cleaning
Remove all spills with a damp, soft cloth. 11. If you close your home for the winter, have a service technician drain the washer. Unplug cord from electrical outlet and disconnect hoses from faucets. B–16 16026502 ©2005 Maytag Services... -
Page 57: Troubleshooting
Cycle Selector • Extra Rinse (select models) is selected. Advances Through For further assistance, call Maytag Customer Assistance toll-free at 1-800-688-9900 USA or 1-800-688-2002 Canada. U.S. customers using TTY for deaf, hearing impaired or speech impaired, call 1-800-688-2080. 16026502 B–17... - Page 58 NOTES B-18 16026502 ©2005 Maytag Services...
- Page 59 ..7-8 4 Speed Select Models 9-11 Electronic Control Models ..Form No. A/06/05 Part No. 6 2621890 www.maytag.com Litho U.S.A. ©2005 Maytag Appliances Sales Co. 16026502 B–19 ©2005 Maytag Services...
-
Page 60: Important Safety Instructions
WARNING and stacked while warm. WARNING – Hazards or unsafe practices which COULD result in severe personal injury or death. CAUTION CAUTION – Hazards or unsafe practices which COULD result in minor personal injury. B–20 16026502 ©2005 Maytag Services... - Page 61 Check the hoses periodically for bulges, kinks, hot water faucets and let the water flow from each cuts, wear or leaks and replace them every five years. for several minutes. This will release any SAVE THESE INSTRUCTIONS 16026502 B–21 ©2005 Maytag Services...
-
Page 62: Operating Tips
• When laundering wrinkle free items or items of delicate construction, washable woolens or loosely knit items, never use less than the MEDIUM water level setting. This will minimize shrinkage, wrinkling and pulling of seams. • Close lid carefully to avoid slamming. B–22 16026502 ©2005 Maytag Services... - Page 63 • The washer will pause briefly throughout each cycle. will stop. When the lid is closed and the washer is These pauses are normal. restarted, the washer will continue the cycle at the point it was interrupted. 16026502 B–23 ©2005 Maytag Services...
- Page 64 Brightly colored, lightly soiled Cold/Cold items; washable woolens. Note: ° In wash water temperatures below 60 detergents do not dissolve well or clean well. Care ° labels define cold water as up to 85 B–24 16026502 ©2005 Maytag Services...
- Page 65 The control dial must be pushed in (off position) when you change the setting. Note: Do not attempt to turn the control dial counterclockwise. Damage to the timer will result. 16026502 B–25 ©2005 Maytag Services...
- Page 66 Intermittent slow agitation and soak Handwash to reach the proper water temperature. Ex. Gentle/Slow to gently wash the most delicate items Note: ° In wash water temperatures below 60 detergents do not dissolve well or clean well. B–26 16026502 ©2005 Maytag Services...
- Page 67 (select models) Provides 4 minutes of agitation, then soak. Avoid extended soaking – soak for 30 minutes or less. The control dial must be manually advanced to a spin setting to spin and drain the water. 16026502 B–27 ©2005 Maytag Services...
-
Page 68: Using The Controls
(select models) for rinsing. Use the chart as a guide. May add hot water to the incoming cold water as the washer fills. This ATC Cold/Cold assures that the water will be warm enough to properly activate detergent. B–28 16026502 ©2005 Maytag Services... - Page 69 Wrinkle Control For “wash and wear” and synthetic Medium/Slow fabrics and lightly to normally soiled garments needing a slower spin speed to reduce wrinkling. Regular For most sturdy fabrics including Medium/Fast cottons, linens and normally soiled garments needing maximum water extraction. 16026502 B–29 ©2005 Maytag Services...
- Page 70 To drain the washer: 1. Select the Rinse and Spin or Spin Only cycle. 2. Press the cycle selector dial. The Spin light illuminates and the washer starts the rinse or spin. B–30 16026502 ©2005 Maytag Services...
-
Page 71: Special Features
This is for your personal safety. If your washer does not stop, call your service technician immediately. When the lid is closed, the operation will automatically resume. 16026502 B–31 ©2005 Maytag Services... -
Page 72: Care & Cleaning
Remove all spills with a damp, soft cloth. 11. If you close your home for the winter, have a service technician drain the washer. Unplug cord from electrical outlet and disconnect hoses from faucets. B–32 16026502 ©2005 Maytag Services... -
Page 73: Troubleshooting
Cycle Selector • Extra Rinse (select models) is selected. Advances Through For further assistance, call Maytag Customer Assistance toll-free at 1-800-688-9900 USA or 1-800-688-2002 Canada. U.S. customers using TTY for deaf, hearing impaired or speech impaired, call 1-800-688-2080. 16026502 B–33... - Page 74 NOTES B-34 16026502 ©2005 Maytag Services...
- Page 75 Operating Tips ... . . 9 Special Features ..10-11 Form No. A/07/05 Part No. 2205438 Litho U.S.A. ©2005 Maytag Appliances Sales Co. 16026502 B–35 ©2005 Maytag Services...
-
Page 76: Important Safety Instructions
WARNING and stacked while warm. WARNING – Hazards or unsafe practices which COULD result in severe personal injury or death. CAUTION CAUTION – Hazards or unsafe practices which COULD result in minor personal injury. B–36 16026502 ©2005 Maytag Services... - Page 77 Check the hoses periodically for bulges, kinks, hot water faucets and let the water flow from each cuts, wear or leaks and replace them every five years. for several minutes. This will release any SAVE THESE INSTRUCTIONS 16026502 B–37 ©2005 Maytag Services...
-
Page 78: Using The Controls
Note: ° In wash water temperatures below 60 (16° C), detergents do not dissolve well or clean ° well. Care labels define cold water as up to 85 (29° C). B–38 16026502 ©2005 Maytag Services... - Page 79 The control dial must be pushed in (off position) when you change the setting. WRINKLE- Warm/Cold Note: Do not attempt to turn the control dial FREE counterclockwise. Damage to the timer will result. FABRICS Cold/Cold Warm/Cold DELICATES Cold/Cold 16026502 B–39 ©2005 Maytag Services...