
Related Manuals for Philips HTS7200


Summary of Contents for Philips HTS7200
- Page 1 Register your product and get support at www.philips.com/welcome HTS7200 EN User manual DE Benutzerhandbuch ES Manual del usuario FR Mode d’emploi NL Gebruiksaanwijzing...
-
Page 4: Table Of Contents
4 Get started Insert the remote control batteries Find the correct viewing channel Use the Home menu Select menu display language Set up network Use Philips EasyLink 5 Play Play a disc Play video Play music Play photo Play from USB device... -
Page 5: Important
1 Important Copyright Safety and important notice This product incorporates copyright protection technology that is protected Warning by method claims of certain U.S. patents • Risk of overheating! Never install the product and other intellectual property rights in a confi ned space. Always leave a space owned by Macrovision Corporation and of at least 4 inches around the product for other rights owners. -
Page 6: Trademark Notice
Disposal of your old product and Trademark notice batteries HDMI, and HDMI logo and High-Defi nition Multimedia Interface are trademarks or Your product is designed and manufactured registered trademarks of HDMI licensing LLC. with high quality materials and components, which can be recycled and reused. Windows Media and the Windows logo are trademarks, or registered trademarks of When this crossed-out wheeled bin symbol... -
Page 7: Care
ENERGY STAR and the ENERGY STAR mark Manufactured under licence from Dolby are registered U.S. trademarks. Laboratories. Dolby and the double-D symbol are trademarks of Dolby Laboratories. LASER RADIATION DO NOT VIEW DIRECTLY WITH OPTICAL INSTRUMENTS Manufactured under licence under U.S. Patent CLASS 1M LASER PRODUCT #s: 5,451,942;... -
Page 8: Your Product
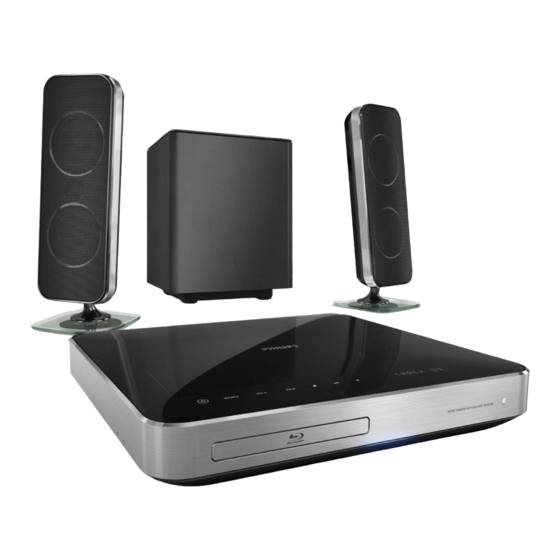
(e.g. refreshed previews Congratulations on your purchase, and and exclusive special features). You can also welcome to Philips! To fully benefi t from the enjoy next generation possibilities, such as support that Philips offers; register your product ringtone/wallpaper downloads, peer-to-peer at www.philips.com/welcome. -
Page 9: Product Overview
i Disc compartment Product overview j MP3 LINK jack Connect a portable audio player. Main unit USB jack c d e f g Connect a USB supported device. Remote control ( Standby-On ) Turn on the Home Theatre System or switch to standby mode. -
Page 10: Sound Mode
( Standby-On ) ( Pause ) • Turn on the home theatre or switch • Pause play. it to standby mode. • Move the paused picture one step • When EasyLink is enabled, press forward. and hold for at least three seconds ( Stop ) to turn all connected HDMI CEC- •... -
Page 11: Top Menu
SURR. SOUND • Switch audio output to multi-channel surround or stereo mode. • For HTS7200 only: Switch audio output to DOLBY Virtual speaker or Stereo mode. ( Previous/Next ) • In video mode, skip to previous or next title, chapter or track. -
Page 12: Connect
3 Connect Make the following connections to use your Home Theatre System. For a comprehensive interactive guide, see www.connectivityguide. philips.com. Basic connections: • Video Place this Home Theatre System near to • Speakers and subwoofer the TV • Power Place the speakers system at normal... - Page 13 Option 1: Connect to the HDMI jack Option 2: Connect to the component video jack Connect the HDMI cable to the HDMI OUT jack on this Home Theatre System and the HDMI input jack on the TV. • If the TV has a DVI connector only, connect via a HDMI/DVI adapter.
-
Page 14: Connect Speaker Cables To Speakers
Option 3: Connect to the Video Connect speakers and (CVBS) jack subwoofer Connect a composite video cable (not supplied) to the VIDEO jack on this Home Theatre System and the VIDEO input jack on the TV. Note • The video input jack on the TV might be labelled as A/V IN, VIDEO IN, COMPOSITE Connect the speakers and subwoofer to or BASEBAND. -
Page 15: Connect Audio Cables/Other Devices
Connect the FM antenna to the FM75 Note jack on this Home Theatre System • To listen to the audio output from this (for some models, this cable is already connection, press AUDIO SOURCE connected). repeatedly until ‘AUX1’ is displayed on the display panel. - Page 16 Connect to optical jack Note • To listen to the audio output from this connection, press AUDIO SOURCE repeatedly until ‘AUX2’ is displayed on the display panel. OPTICAL Connect to coaxial jack DIGITAL IN OPTICAL DIGITAL OUT COAXIAL Connect an optical cable (not supplied) DIGITAL IN to the DIGITAL-IN-OPTICAL jack COAXIAL...
-
Page 17: Connect Lan
• Use an RJ45 straight cable. Do not use a crossover cable. • Internet access to Philips website for software updates may not be allowed, depending on the router you use or the Internet Service Provider’s policy. Contact your Internet Service Provider for more information. -
Page 18: Get Started
Go to the lowest channel on your • Batteries contain chemical substances, they TV, then press the Channel Down should be disposed of properly. button until you see the Philips or the Home menu screen. • Press the SOURCE button repeatedly on the remote control of your TV. -
Page 19: Use The Home Menu
Use the Home menu • You can set the default language for DVD disc, see (‘Adjust settings’ > ‘Video Setup’ > [Disc Menu]). Play Disc Settings Set up network Press ( Home menu). • Select [Play Disc] to start disc play. •... -
Page 20: Use Philips Easylink
HDMI TV and other HDMI devices have the TV and other connected devices. See been connected to the audio input jacks on this Home Theatre System. TVs/devices manual for details. You can now enjoy the following Philips EasyLink controls. EasyLink Video Setup EasyLink... - Page 21 Philips TV Aux1 Recorder Aux2 Coaxial DVD player Optical Select a connected device on the left of the menu, then press . Select the connector that is used for the device, then press OK. » Repeat steps 6–7 to map other devices.
-
Page 22: Play
5 Play Information on disc contents The contents of a disc are generally divided into sections or folders (groups of titles/fi les) Play a disc as shown below. BD-video, DVD-video Caution title 2 title 1 chapter 1 chapter 2 chapter 1 chapter 2 chapter 3 •... -
Page 23: Play Video
Change video play Play video Play a title. Control video play Use the remote control to change the video play. Play a title. Use the remote control to control the Button Action title. AUDIO Selects an audio language or channel. Button Action SUBTITLE... -
Page 24: Display Menu
Display menu Quick skip to a specifi c time During play, press OPTIONS. » The play options menu is displayed. Select [Time Search] in the menu, then press OK. Press the Numeric buttons to change the time where you want to skip to, then BD-video disc press OK. -
Page 25: Sync Audio Output With Video Play
View video play from different camera Play BD-video angles Blu-ray video disc has a larger capacity and supports features such as high-defi nition During play, press OPTIONS. » videos, multi-channel surround sound, The play options menu is displayed. interactive menus and so on. Select [Angle List] in the menu, then Insert a BD-video disc. -
Page 26: Play Music
Select the language to play, then press Note • You can only play DivX videos that were rented or purchased with the DivX registration code of this player (see ‘Adjust Enjoy BD-LIVE Settings’ > ‘Advanced Setup’ > [DivX® VOD (applicable only to BD Live enabled BD-Video) Code]). -
Page 27: Play Photo
Play MP3/WMA music Play photo MP3/WMA is a type of highly compressed Play photo as slideshow audio fi le (fi les with .mp3, .wma extensions). Insert a disc or USB that contains the You can play JPEG photos (fi les with .jpeg or MP3/WMA music. -
Page 28: Play From Usb Device
Control photo play Play musical slideshow Play photo slideshow. Play MP3/WMA music fi les and JPEG photo fi les simultaneously to create musical Use the remote control to control the slideshow. The MP3/WMA and JPEG fi les photo. must be stored on the same disc or USB Button Action device. -
Page 29: Play From Portable Media Player
Connect a USB device to the Connect a 3.5 mm stereo audio cable jack. (not supplied) from the MP3 LINK jack on this Home Theatre System to the Press , select [USB], then press OK. ‘headphone’ jack on the portable media »... -
Page 30: Listen To Radio
First time tuning Reinstall all the radio stations When you access radio mode for the fi rst Press RADIO. time, follow the instruction to install the radio Press and hold PROGRAM for more than stations. 5 seconds. » Press RADIO. All previously stored radio stations are »... -
Page 31: Adjust Sound
6 Adjust sound Option Description DOLBY VS Dolby Virtual surround sound STEREO Stereo sound from two Control the volume front speakers. Press +/- to increase or decrease the Note volume. • To mute, press • This product also contains the capability to •... -
Page 32: Adjust Settings
[Subtitle] 7 Adjust settings Selects the default subtitle language for disc play. You can customise various kinds of settings as [Disc Menu] you prefer. Refer to the following instructions to Selects the language for the disc menu. navigate through the setup menus. Note Note •... -
Page 33: Audio Setup
[Picture Settings] Note Selects a predefi ned set of picture colour settings. • If the setting is not compatible with your TV, a blank screen appears. Wait for 15 seconds for • [Standard] – Original colour setting. auto recover or press HDMI repeatedly until •... -
Page 34: Preference Setup
[Night Mode] Preference Setup Makes the loud sound level softer and the soft sound level louder so that you can watch Press the disc at a low volume, without disturbing others. Select [Settings], then press OK. • [On] – For quiet viewing at night. Select [Preference Setup], then press . -
Page 35: Easylink Setup
[Parental Control] [Auto Standby] Restricts access to discs that are unsuitable Turns off or turns on standby switching mode. for children. These types of discs must be It is an energy saving feature. recorded with ratings. • [On] - Switches to standby after 30 To access, enter your last set password or minutes of inactivity (for example, in ‘0000’... -
Page 36: Advanced Setup
[On] - Enables system audio control feature. Then proceed to [Audio Input [EasyLink] Mapping] to scan and map all the Your product supports Philips Easylink, which connected devices. uses the HDMI CEC (Consumer Electronics • [Off] - Disables system audio control Control) protocol. - Page 37 Updates the software of this product (if a fi nd out if a newer software version is available at the Philips website that you may download newer version is available on Philips website) and install on this Home Theatre System.
-
Page 38: Update Software
8 Update software Update software via USB Go to the www.philips.com/support to To check for new updates, compare the current check the latest software version available software version of your home theatre with for this Home Theatre System. the latest software version (if available) on the Create a folder named ‘UPG’... -
Page 39: Specifi Cations
9 Specifications • Compatibility: Hi-Speed USB (2.0) • Class support: UMS (USB Mass Storage Class) Note • File system: FAT16, FAT32 • Specifi cation and design are subject to change without notice Main Unit • Power supply: 220-240V; ~50 Hz Playback media •... -
Page 40: Troubleshooting
• If this happens when you change the HDMI video resolution, press HDMI If you contact Philips, you will be asked for the repeatedly until the picture appears. model and serial number of your product. The model number and serial number are on the back or bottom of your product. - Page 41 No sound on HDMI connection. Data fi les (JPEG, MP3, WMA) cannot be • If the connected device is not HDCP- played or read. compliant or is only DVI-compatible, you • Ensure that the data fi le was recorded in cannot transmit sound through an HDMI the UDF, ISO9660 or JOLIET format.
-
Page 42: Glossary
11 Glossary DivX Video DivX® is a digital video format created by DivX, Inc. This is an offi cial DivX Certifi ed device that plays DivX video. Visit www.divx. AVCHD com for more information and software tools AVCHD is a new format (standard) for high to convert your fi... - Page 43 HDCP High-bandwidth Digital Content Protection. A fi le format with a sound data compression This is a specifi cation that provides a secure system. MP3 is the abbreviation of Motion transmission of digital contents between Picture Experts Group 1 (or MPEG-1) Audio different devices (to prevent unauthorised Layer 3.