Table of Contents
Advertisement
Advertisement
Table of Contents

Related Manuals for Grundig Music Boy 71


Summary of Contents for Grundig Music Boy 71
- Page 1 PORTABLE RADIO Music Boy 71...
- Page 2 ___________________________________________________________________ Sicherheit/Informationen Einstellungen DEUTSCH Auf einen Blick Betrieb Stromversorgung Informationen Safety/Information Settings ENGLISH Overview Operation Power supply Informations Sécurité/Informations Réglages FRANÇAIS Vue d’ensemble Fonctionnement Alimentation électrique Informations Sicurezza/informazioni Impostazioni ITALIANO In breve Funzionamento Alimentazione elettrica Informazioni Segurança/Informações Regulações PORTUGUÊS Vista geral Funcionamento Alimentação de corrente Informação...
-
Page 3: Technical Data
SAFETY, INFORMATION _____________________ ENGLISH Safety To ensure that this device provides you with long-term satisfaction and enjoyment, please observe the following instructions. This device is designed for the playback of audio signals. Any other use is expressly prohibited. Protect the device from moisture (water drops or splashes). Do not place any vessels such as vases on the device. -
Page 4: Alarm On Off
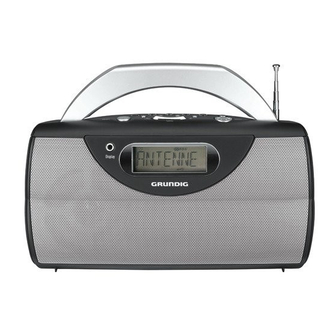
OVERVIEW ___________________________________________ DISPLAY u s i c B o y 7 1 TIME TEXT SLEEP ALARM MEMO ON/OFF SNOOZE DOWN TUNING Controls on the top Switches the device on and off; switches off the alarm ON/OFF signal (signal tone or radio station) when the alarm function is activated. -
Page 5: Controls On The Front
OVERVIEW ___________________________________________ TONE VOLUME • FM • MW • LW • SW • DIST. • LOCAL Controls on the front For displaying the time and alarm time; switches the dis- DISPLAY play between the station name, frequency and time while the radio is on. -
Page 6: Controls On The Back
OVERVIEW ___________________________________________ Controls on the back Battery compartment cover. 9kHz 10kHz In the battery compartment; changes the frequency 9 kHz 10 kHz increments. The display Shows that the time is set; flashes during TEXT MEMORY automatic time setting. 00 00 0000 The 12-hour format is set. -
Page 7: Power Supply
POWER SUPPLY ___________________________________ Mains operation Note: Check that the mains voltage on the type plate (on the bottom of the device) corresponds to your local mains supply. If this is not the case, contact your specialist dealer. Insert the supplied power cable into the »AC ~«... -
Page 8: Additional Information For Units Sold In The Uk
“E”, earth symbol “ ”, coloured green, or green & yel- low. Replacement mains lead sets can be obtained from your local dealer, or by contacting Grundig Consumer Relations (01788 570088) Moulded 3-pin lead set, suitable for UK use: Ref: Leadset UK... - Page 9 SETTINGS ______________________________________________ Setting and storing radio stations ..with the automatic station search When the device is first connected to the mains or the batteries are first inserted, the device begins an automatic FM station search and stores the first ten stations with strong signals on the preset buttons 1/6, 2/7, 3/8, 4/9, 5/10.
-
Page 10: Tuning Down
SETTINGS ______________________________________________ Setting the clock ..with the RDS time synchronisation When the device is first connected to the mains or the batteries are first inserted, the time and day of the week are set automatically during the demo program after the automatic station search is completed – provided an RDS station with an RDS signal is received. -
Page 11: Setting The Alarm Time
SETTINGS ______________________________________________ Setting the alarm time With the device switched off, press »ON ALARM OFF«. – Display: the last alarm time set. : 30 AL Hold down »ON ALARM OFF« until the hour flashes in the display. Note: If you do not press any button within 8 seconds, the device will quit set-up mode. -
Page 12: Switching On And Off
OPERATION __________________________________________ Switching on and off Press »ON/OFF« to switch on the device. FANTASY – The most recently selected station is activated regardless of the set frequency band (Last Station Memory). Press »ON/OFF« to switch off the device. – Display: »GOOD BYE« briefly, then the current time and day of the GOOD BYE week. -
Page 13: Rds Station Service
OPERATION __________________________________________ Changing frequency increments »9 kHz 10 kHz« (in the battery compartment) to change the frequency increments (FM 50/100 kHz, MW 9/10 kHz). Note: Switching the frequency increments deletes all stored settings (reset). RDS station service RDS (Radio Data System) is an information system which is transmitted additionally by most FM stations. -
Page 14: Radio Text
OPERATION __________________________________________ Radio text Some RDS stations provide radio text as additional information. The radio text appears as ticker text in the display. To call up radio text, briefly press »TEXT«. TEXT RADIO TEXT E – The information appears after a short time. For a fast run-through of the radio text, press and hold down »TEXT«. - Page 15 OPERATION __________________________________________ Briefly press »ON ALARM OFF« to check the alarm time. 7 : 50 AL – Display: the set alarm time and » «. – After a short time, the display changes to the current time. – The selected radio station switches on at the set alarm time. Briefly displaying the alarm time With the device switched on, briefly press »ON ALARM...
-
Page 16: General Information
OPERATION __________________________________________ Timer mode The device possesses a sleep timer, which switches it off in radio mode at a preset time. It is possible to set nine switch-off times between 90 and 10 minutes. Switching on the sleep timer Press »SLEEP« to switch on the device. SLEEP 90 –... - Page 17 Grundig Multimedia B.V. Atrium, Strawinskylaan 3105 NL-1077 ZX Amsterdam http://www.grundig.com • • 06/38...