Table of Contents
Advertisement
www.GEAppliances.com
. . . . . . . . .2-6
Owner's Manual
Operating Instructions
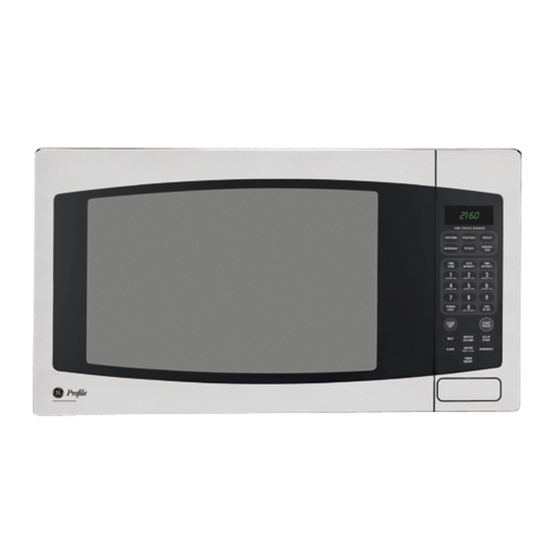
JE2160
Auto Features . . . . . . . . . . . . . .12
Microwave Terms . . . . . . . . . . . .18
Other Features . . . . . . . . . . .16-18
Oven Features . . . . . . . . . . . . .7, 8
Power Levels . . . . . . . . . . . . . . . .9
Sensor Features . . . . . . . . . .13-15
Time Features . . . . . . . . . . . .9-12
. . . . . . . . .19
. . . . . . .20
Things That Are Normal . . . . . .20
Consumer Support
Consumer Support . . .Back Cover
Product Registration . . . . . .21, 22
Warranty . . . . . . . . . . . . . . . . . .23
Write the model and serial
numbers here:
Model # __________________
Serial # __________________
You can find them on a label
inside the oven.
164D3370P285
49-40355
06-03 JR
Advertisement
Table of Contents

Related Manuals for GE JE2160


Summary of Contents for GE JE2160
-
Page 1: Table Of Contents
..2–6 Owner’s Manual Operating Instructions JE2160 Auto Features ....12 Microwave Terms ... .18 Other Features . -
Page 2: Important Safety Instructions
Do not mount this appliance over a sink. s Do not mount the microwave oven over or near any portion of a heating or cooking appliance. (c) Do Not Operate the oven if it is damaged. It is... -
Page 3: Save These Instructions
IMPORTANT SAFETY INSTRUCTIONS. Use this appliance only for its intended purpose as described in this Owner’s Manual. s This microwave oven is not approved or tested for marine use. s Do not store this appliance outdoors. Do not use this product near water—for example, in a wet basement,... -
Page 4: Important Safety Information
Such use of the microwave oven could result in injury. s Do not boil eggs in a microwave oven. Pressure will build up inside egg yolk and will cause it to burst, possibly resulting in injury. -
Page 5: Grounding Instructions
MICROWAVE-SAFE COOKWARE Make sure all cookware used in your microwave oven is suitable for microwaving. Most glass casseroles, cooking dishes, measuring cups, custard cups, pottery or china dinnerware which does not have metallic trim or glaze with a metallic sheen can be used. -
Page 6: Adapter Plugs
If you use an extension cord, the interior light may flicker and the blower sound may vary when the microwave oven is on. Cooking times may be longer, too. READ AND FOLLOW THIS SAFETY INFORMATION CAREFULLY. - Page 7 NOTE: Rating plate, oven vent(s) and oven light are located on the inside walls of the microwave oven. www.GEAppliances.com Optional Accessories Available at extra cost from your GE supplier. Choose the appropriate Installation Kit below to convert this oven to a built-in wall oven. For 27″ installations:...
-
Page 8: Cooking Controls
About the features of your microwave oven. You can microwave by time, with the sensor features or with the auto feature. Cooking Controls Check the Convenience Guide before you begin. Time Features Press TIME COOK Press once or twice TIME DEFROST... - Page 9 Press START. Variable power levels add flexibility to microwave cooking. The power levels on the microwave oven can be compared to the surface units on a range. Each power level gives you microwave energy a certain percent of the time. Power level 7 is microwave energy 70% of the time.
- Page 10 About the time features. Cooking Guide for Time Cook NOTE: Use High power level (10) unless otherwise noted. Vegetable Amount Asparagus (fresh spears) 1 lb. (frozen spears) 10-oz. package Beans (fresh green) 1 lb. cut in half (frozen green) 10-oz. package (frozen lima) 10-oz.
- Page 11 When defrosted, food should be cool but softened in all areas. If still slightly icy, return to the microwave oven very briefly, or let it stand a few minutes. Comments Rearrange after half the time.
-
Page 12: Auto Features
About the time features. Express Cook This is a quick way to set cooking time for 1–6 minutes. Press one of the Express Cook pads (from 1 to 6) for 1 to 6 minutes of cooking at power level 10. For example, press the 2 pad for 2 minutes of cooking time. - Page 13 Never use tight sealing plastic containers—they can prevent steam from escaping and cause food to overcook. Vented s Be sure the outside of the cooking containers and the inside of the microwave oven are dry before placing food in the oven. Beads of moisture turning into steam can mislead the sensor.
- Page 14 About the sensor features. Popcorn To use the Popcorn feature: Follow package instructions, using Time Cook if the package is less than 1.75 ounces or larger than 3.5 ounces. Use only with prepackaged Place the package of popcorn in the microwave popcorn weighing center of the microwave.
- Page 15 Reheat The Reheat feature reheats 4–36 ounces of previously cooked foods or a plate of NOTE: Do not use this feature twice leftovers. in succession on the same food portion—it may result in severely Place covered food in the oven. Press overcooked or burnt food.
-
Page 16: About The Other Features
About the other features. Help The HELP pad displays feature information and helpful hints. Press HELP, then select a feature pad. Scroll Speed The scroll speed of the display can be changed. Press and hold the AM/PM pad about 3 seconds to bring up the display. Select 1–5 for slow to fast scroll speed. - Page 17 Clock Press to enter the time of day. Press CLOCK. Enter the time of day. Select AM or PM. Press START or CLOCK. To check the time of day while microwaving, press CLOCK. Start/Pause In addition to starting many functions, START/PAUSE allows you to stop cooking without opening the door or clearing the display.
-
Page 18: Microwave Terms
About the other features. Display On/Off To turn the clock display on or off, press and hold 0 for about 3 seconds. The Display On/Off feature cannot be used while a cooking feature is in use. Beeper Volume The beeper sound level can be adjusted. Press BEEPER VOLUME. -
Page 19: Care And Cleaning
Case Clean the outside of the microwave oven with a sudsy cloth. Rinse with a damp cloth and then dry. Wipe the window clean with a damp cloth. Control Panel and Door Wipe with a damp cloth. -
Page 20: Troubleshooting Tips
What To Do • Replace fuse or reset circuit breaker. • Unplug the microwave oven, then plug it back in. • Make sure the 3-prong plug on the oven is fully inserted into wall outlet. • Open the door and close securely. - Page 21 You can rest easy, knowing that all your valuable household products are protected against expensive repairs. Place your confidence in GE and call us in the U.S. toll-free at for more information. *All brands covered, up to 20 years old, in the continental U.S.
- Page 22 Year * Please provide your e-mail address to receive, via e-mail, discounts, special offers and other important communications from GE Appliances (GEA). Check here if you do not want to receive communications from GEA’s carefully selected partners. FAILURE TO COMPLETE AND RETURN THIS CARD DOES NOT DIMINISH YOUR WARRANTY RIGHTS.
- Page 23 Any part of the microwave oven which fails due to a defect in materials or workmanship. From the date of the During this full one-year warranty, GE will also provide, free of charge, all labor and related service original purchase costs to repair or replace the defective part.
-
Page 24: Consumer Support
Caution must be exercised, since improper servicing may cause unsafe operation. Contact Us If you are not satisfied with the service you receive from GE, contact us on our Website with all the details including your phone number, or write to: General Manager, Customer Relations Register Your Appliance Register your new appliance on-line—at your convenience! Timely product registration will allow for...