
Related Manuals for AIRLESSCO LP460


Summary of Contents for AIRLESSCO LP460
- Page 1 IRLESS AINT PRAYER ERVICE PERATION ANUAL IRLESSCO LP460 - LP540 - LP690 ALLPRO 510E - 710E - 810E Form No. 001-492 July 2004...
-
Page 2: Table Of Contents
Electrical Board Calibration - 5/6 Series Electrical Troubleshooting - 5/6 Series Replacement of Electrical Components Manufactured by: AIRLESSCO BY DUROTECH CO. P.O. Box 8006, Moorpark, CA. 93020-8006, Ship to: 5397 Commerce Ave., P.O. Box 8006, Moorpark, CA. 93020-8006, Ship to: 5397 Commerce Ave., Moorpark, CA 93021Tel: 805-523-0211 Fax: 805-523-1063 www.airlessco.com email: techsupport@airlessco.com... -
Page 3: Introduction
INTRODUCTION Your new Airlessco airless paint sprayer is designed to meet the demands of the professional painting contractor as well as the homeowner. The famous Airlessco slow-stroking stainless steel piston pump delivers extra long life for the piston, packings, valve seats and balls. The patented Triple-Life packing system is externally adjustable, extending packing life and reducing repacking costs. -
Page 4: Safety Warnings
SAFETY WARNINGS HIGH PRESSURE SPRAY CAN CAUSE EXTREMELY SERIOUS INJURY. Handle as you would a loaded firearm. Follow the PRESSURE RELIEF PROCEDURE DO NOT USE HALOGENATED SOLVENTS IN THIS SYSTEM. The prime valve, and most airless guns have aluminum parts and may explode. Cleaning agents, coatings, paints or adhesives may contain halogenated hydrocarbon solvents. - Page 5 SAFETY WARNINGS ALWAYS INSPECT SPRAYING AREA HOSES • Tighten all of the fluid connections securely before each • Keep the spraying area free from obstructions. use. High pressure fluid can dislodge a loose coupling or • Make sure the spraying area has good ventilation allow high pressure spray to be emitted from the coupling to safely remove vapors and mists.
- Page 6 SAFETY WARNINGS UL RECOMMENDATION FOR MINIMUM GAUGE EXTENSION CORD AMPERAGE VOLTAGE LENGTH OF CORD IN FEET RATING RANGE 5 - 6 6 - 8 8 - 10 10 - 12 • ALWAYS use approved high pressure fittings and Always Follow Recommended Pressure replacement parts.
-
Page 7: Flushing
FLUSHING 1. New Sprayer 5. Storage Your sprayer was factory tested in an oil solution which Always relieve pressure (See pressure relief was left in the pump. Before using oil-base paint, flush procedure on page 10) prior to storage or when with mineral spirits only. - Page 8 HOW TO FLUSH (continued) 1. Be sure the gun safety latch is engaged and there 6. Disengage the gun safety latch and squeeze the is no spray tip in the gun. Refer to page 14 on how gun trigger. Turn the ON-OFF Toggle Switch to the to lock the safety latch and the gun's safety features.
-
Page 9: Setting Up
2. Fill the packing nut/wet cup with object being sprayed, as instructed in the safety warning section of this manual. 5 drops of Airlessco Throat Seal Oil (TSO). See (Figure 6). 5. Flush the sprayer FIGURE 6... -
Page 10: Starting Up
STARTING UP STARTING UP 2. Prepare the material 1. Learn the functions of the controls. PRIME/PRESSURE (PR) RELIEF VALVE is used to a. Prepare the material according to the material prime pump and to relieve pressure from gun, hose and tip. manufacturer's recommendations. - Page 11 Clean the tip & gun as recommended on page 15 for Always point the gun toward the ground Airlessco 007 gun or separate gun instruction manual for or into a waste container when checking all others.
-
Page 12: Pressure Relief Procedure
Service Center. DAILY MAINTENANCE 1. Keep the displacement pump packing nut/wet cup lubricated with Airlessco TSO (Throat Seal Oil) at all times. The TSO helps protect the rod and the packings. 2. Inspect the packing nut daily. Your pump has a patented Triple Life Packing System. Packing life will be extended a minimum of three times if the following "Packing Adjustment"... -
Page 13: Spray Gun Operation
SPRAY GUN OPERATION SPRAY GUN Attach spray gun to airless unit and tighten fittings securely. Set the gun safety latch. (Also may be called gun safety lock, or trigger lock) * The gun safety latch should always be set when the gun is not being triggered. -
Page 14: Spray Gun Troubleshooting
AIRLESS SPRAY GUN TROUBLESHOOTING DEFECTS CAUSE CORRECTION Coarse spray Low pressure Increase the pressure Excessive fogging High pressure Reduce pressure for satisfactory pattern (overspray) Material too thin Use less thinner Pattern too wide Spray angle too large Use smaller spray angle tip Pattern too narrow Spray angle too small Use larger spray angle tip. -
Page 15: Spray Tip Selection
SPRAY TIP SELECTION Spray tip selection is based on paint viscosity, paint type, Spray tip size is based on how many gallons of paint per and job needs. For light viscosities (thin paints), use a minute can be sprayed through the tip. Do not use a tip smaller tip;... -
Page 16: Electric Motor Maintenance
NOTE: For longer life, new brushes (Part No. 331-131) need to have a run in period. After changing brushes, set up the machine for spraying. Use a bucket of water and Airlessco Pump Conditioner mixture, a 50 foot x 1/4" airless hose, airless gun with 0.017 tip on unit, turn the Prime/PR Control Valve to the Prime position and turn the unit on. -
Page 17: Field Troubleshooting
FIELD TROUBLESHOOTING PROBLEM CAUSE SOLUTION Unit doesn't prime †Airleak due to: • Loose Suction Nut • Tighten Suction Nut • Worn O-Rings • Replace O-Ring (106-011) on suction seat, & O-Ring (106-020) below suction seat • Hole in Suction Hose •... -
Page 18: Servicing The Fluid Pump
7. Tighten the packing nut counter clockwise until resistance is felt against the Belleville Springs, then go 3/4 of a turn more. Put five drops of Airlessco Throat Seal Oil into the packing nut. 8. Run the machine at full pressure for several minutes. -
Page 19: Gear & Pump Assembly
GEAR AND PUMP ASSEMBLY FIGURE 12 Do not operate machine without cover guard in place. Part Number Description 331-234 Cover 331-046 Bearing 331-038 Crosshead Assembly 331-406 Gear Crank (4 Series) 331-407 Gear Crank (5 Series) 331-408 Gear Crank (6 Series) 331-047 Bearing 331-040... -
Page 20: Servicing Piston Rod, Outlet Valve
Servicing the Piston Rod - Outlet Valve DISASSEMBLY OF THE OUTLET VALVE Piston REFER TO FIGURE 13 Figure 13 1. Disconnect the Fluid Pump. 331-195 2. Place piston holder (331-195) in a vise. Slide piston into the holder & lock in place with a 3/8” dowel (331-196). 3. -
Page 21: V-Packing Replacement
Packing Replacement Procedures Replacement Instructions: REASSEMBLY - Figure 15 & 16 1. Take lower male gland (331-014) & place it down on Fluid Pump Removal - Refer to Figure 11 the fl at side. 1. Follow the Pressure Relief Procedure above. 2. - Page 22 7. Tighten packing nut counter clockwise until resistance is felt against the Belleville Springs, then go 3/4 of a turn more. Put fi ve drops of Airlessco Throat Seal Oil into the packing nut. 8. Run the machine at full pressure for several minutes.
-
Page 23: Carry Frame Machine Parts List
CARRY FRAME MODELS FIGURE 17 Part Number Description Part Number Description 100-003 Swivel 331-111 Shield 100-180 Prime P/R Valve 331-143 Frame 100-312 Screw (4) 331-212 100-318 Screw (2) 331-213 Fan Cover 106-500 Sensor Seal 331-215 Screw (LP 5/6 only) 111-037 Screw (4) 331-234 Cover... -
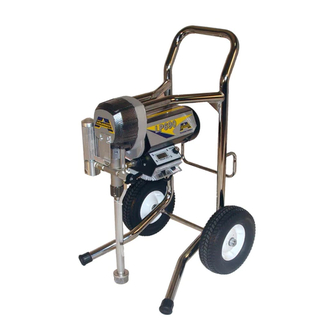
Page 24: Lo-Boy Machine Parts List
LO-BOY MODELS FIGURE 18 Part Number Description Part Number Description 100-003 Swivel 331-171 Frame 100-170 331-174 Handle 100-180 Prime Valve 331-175 Spacer (2) 100-318 Screw (2) 331-176 Bushing (2) 100-377 Screw (4) 331-212 106-500 Sensor Seal 331-213 Fan Cover 113-019 Wheel 10”... -
Page 25: Hi-Boy Machine Parts List
HI-BOY MODELS FIGURE 19 Part Number Description Part Number Description 100-003 Swivel 331-111 Shield 100-180 Prime Valve 331-212 100-318 Screw (2) 331-213 Fan Cover 106-500 Sensor Seal 331-215 Bolt (5/6 Series) 113-019 Wheel 10” (2) 331-234 Cover 113-031 Spacer (2) 331-248 Motor Cover 117-044... -
Page 26: Suction Assemblies
SUCTION ASSEMBLIES FIGURE 20 - LoBoy & Carry Part Description Number 106-020 O-Ring Teflon 111-016 Nylon Tie 331-034 Suction Nut 331-035 Suction Elbow 331-090R Fitting 331-135 Spring Clip 331-217 Inlet Strainer 331-231 Bypass Hose Ass’y 331-290 Suction Hose Ass’y (Inc. strainer) FIGURE 21 - HiBoy PN 331-284 (Hi-Boy Chassis) -
Page 27: Electrical Board Calibration - 4 Series
1. Attach a 50', 1/4" airless hose, airless gun with 0.017 tip and a 5000 psi glycerin filled pressure gauge to the pump. 2. Place the suction tube into a bucket of Airlessco Pump Conditioner and water. 3. Turn prime/pressure relief valve to the prime (open) position. -
Page 28: Electrical Troubleshooting - 4 Series
TROUBLESHOOTING Machine does not start (4 Series) CAUSE STEPS (SEE FIGURE 22) Control Settings STEP 1: After making sure that the machine is plugged into the wall, verify that the on-off switch is in the ON position and that the pressure control knob is turned all the way to the right (clockwise for maximum pressure). -
Page 29: Electrical System Drawing - 4 Series
ELECTRICAL SYSTEM (4 Series) FIGURE 22 Part Number Description 117-044 Knob 331-138 Screw 331-168 Electrical Power Cord 331-184 Spacer 331-185 Strain Relief 331-256 Fuse 15A Slow Blow 331-294-99 Sensor 331-297 Potentiometer 331-311 Toggle Switch 331-312 Fuse Holder 331-316 .6 HP DC Motor 331-488-99 Pressure Control Ass’y... -
Page 30: Electrical Board Calibration - 5/6 Series
ELECTRICAL BOARD CALIBRATION (5/6 Series) Note: Anytime a sensor, pressure control assembly (board) or both are replaced, the following calibrations must be performed. 1. ZERO CALIBRATION 1. Place prime/pressure relief valve in the prime (open) position. 2. Set the pressure control knob to the minimum setting (CCW). 3. - Page 31 ELECTRICAL BOARD CALIBRATION (CONTINUED) 4. PHASE LIMIT TRIMPOT CALIBRATION Formerly known as the Low Voltage or Master Voltage Calibration 1. Attach a 50', 1/4" airless hose, airless gun with .017 tip and a 5000 psi glycerin filled pressure gauge to the pump.
-
Page 32: Electrical Troubleshooting - 5/6 Series
TROUBLESHOOTING - Machine does not start (5/6 Series) CAUSE STEPS (SEE FIGURE 23) Control Settings STEP 1: After making sure that the machine is plugged into the wall, verify that the on-off switch is in the ON position and that the pressure control knob is turned all the way to the right (clockwise for maximum pressure). -
Page 33: Electrical System Drawing - 5/6 Series
ELECTRICAL SYSTEM (5 & 6 Series) FIGURE 23 Part Number Description 117-044 Knob 117-207 Jumper 331-068 .8 HP DC Motor 331-168 Electrical Power Cord 331-184 Spacer 331-185 Strain Relief 331-294-99 Sensor 331-297 Potentiometer 331-311 Toggle Switch 331-312 Fuse Holder 331-315-99 Pressure Control Ass’y 331-328 Fuse 20A Slow Blow... -
Page 34: Replacement Of Electrical Components
REPLACEMENT OF ELECTRICAL COMPONENTS Always unplug the electrical cord before servicing machine. NOTE: Anytime the pressure control assembly, sensor or both are replaced, perform the calibrations. PRESSURE CONTROL ASSEMBLY (Electrical Control Board) 1. Unplug machine's power cord. 2. Remove four screws (Fig. 15, Item 20) from pressure control assembly. 3. -
Page 35: Quick Reference Guide
Note: Turn unit ON. Turn pressure control 2B. Lock gun trigger safety lock knob to low pressure. (Airlessco gun shown) 2A. Lift suction tube and return tube out of Note: Plug into 3 pronged grounded electri- paint and hold over paint bucket. Any cal outlet. - Page 36 24” Long SWIVEL EXTENSION, “G” THREAD 032-184 36” Long 032-012 "F to G" gun adapter to attach Graco tips to Airlessco 007 Spray Guns. ® EXTENSIONS (BARE POLES) Add Tip Extension or Swivel Extension to create desired length 032-053 24” Long 032-054 36”...