
Related Manuals for LG LG-840G


Summary of Contents for LG LG-840G
- Page 1 ENGLISH ESPAÑOL User Guide LG 840G www.lg.com Printed in China P/NO : MFL67580401(1.0)
- Page 3 Congratulations on your purchase of the advanced and compact LG 840G phone by LG, designed to operate with the latest digital mobile communication technology. Some of the contents in this manual may differ from your phone depending on the software of the phone or your service provider.
-
Page 4: Table Of Contents
Contents Getting to know your phone ....4 SIM Management ........42 My Business Card ........43 Installing the SIM Card and Battery ..6 Messages ........44 Charging your phone ........8 Installing a memory card ......10 Create Message ......... 44 On-Screen Icons ...........11 Inbox ..............48 Menu Tree ........ - Page 5 Browser ........... 75 Settings ...........77 Display ............77 Phone .............77 Call ..............81 Touch .............82 Sound ............82 Bluetooth ............84 Accessories ........87 Technical data ........ 88 For Your Safety ....... 89...
-
Page 6: Getting To Know Your Phone
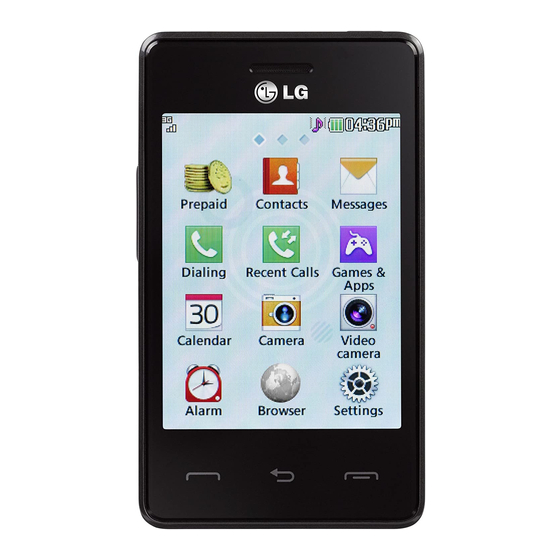
Getting to know your phone 3.5 mm Headset Jack Power/Lock Key Earpiece • Powers your phone on/off by Lets you hear the caller and pressing and holding the key. automated prompts. • Turns your screen on and off Main LCD and locks it. Displays phone status icons, menu items, web items, web information, pictures... - Page 7 Side Volume Keys • When on the standby screen: Allows you to set the Ringtone volume. Hold the Down key to toggle the Vibration Mode On and Off. • During a call: Allows you to change the Earpiece volume. • When playing background music: Allows you to change the music volume.
-
Page 8: Installing The Sim Card And Battery
Installing the SIM Card and Battery 1. Remove the battery cover Hold the phone on your hand firmly. With the other hand, lift the back cover using the fingertip cutout located on the bottom of the cover and remove it. 2. - Page 9 WARNING Do not remove the battery when the phone is switched on, as this may damage the phone. 3. Install the SIM card Slide the SIM card into the SIM card slot. Make sure that the gold contact area on the card is facing downward. To remove the SIM card, pull it gently in the opposite direction.
-
Page 10: Charging Your Phone
Charging your phone Lift the charger port cover on the top side of your LG 840G. Insert the charger connector to the phone (ensure that side ‘B’ of the connector is facing up) and then plug the other end into the wall socket. Your LG 840G will need to be charged until you receive a ‘Battery Full’... - Page 11 NOTE: Always unplug the charger from the wall socket after the phone is fully charged to save unnecessary power consumption of the charger. WARNING Use of unauthorized accessories could damage your phone and void your warranty.
-
Page 12: Installing A Memory Card
Installing a memory card You can expand the available memory space on your phone by using a microSD™ memory card. The LG 840G will support up to a 32 GB microSD™ memory card. Tip! A memory card is an optional accessory. -
Page 13: On-Screen Icons
On-Screen Icons The table below describes various display indicators or icons that appear on the phone’s display screen. Icon Description Network signal strength (number of bars will vary) No network signal Battery empty New text message New email An alarm is set Ring profile in use Silent profile in use Call Forward... -
Page 14: Icon Description
Icon Description Ring and Vibration mode Speakerphone Call in Progress Voicemail Battery Full Battery Charging Flight Mode Wi-Fi is connected 12 LG840G | User Guide... -
Page 15: Menu Tree
Menu Tree 1.1 Prepaid [Multi Tank -Straight Talk] 1.1 Add Airtime [Single Tank -TF / Net 10] 1.2 My Phone Number 1.1 Add Airtime 1.3 My Balance Info 1.2 Buy Airtime 1.4 Serial Number 1.3 My Phone Number 1.5 SIM Number 1.4 My Airtime Info 1.6 Code Entry Mode 1.5 Airtime Display... - Page 16 1.3 Messages 1.6 Games & Apps 3.1 Create Message 6.1 Buy Games 3.2 Inbox 3.3 Drafts 1.7 Calendar 3.4 Outbox 3.5 Message Settings 1.8 Camera 3.5.1 Message Alert 3.5.2 Save To 1.9 Video Camera 3.5.3 Signature 3.5.4 Text Message 3.5.5 Multimedia Message 1.10 Alarm 3.5.6 Voicemail Number 3.5.7 Service Message...
- Page 17 1.12 Settings 2.1 Email 12.1 Display 1.1 Write e-mail 12.2 Phone 12.2.1 Languages 2.2 SNS 12.2.2 Auto Screen Lock 2.1 Facebook 12.2.3 Set Flight Mode 2.2 Twitter 12.2.4 Security 2.3 MySpace 12.2.5 Memory 12.2.6 Reset Settings 2.3 Voice Recorder 12.2.7 Phone Information 12.3 Call 12.3.1 Send My Number 2.4 File Manager...
- Page 18 2.6 Music Player 2.10 Sound Settings 6.1 Now Playing 10.1 Ringtone 6.2 All Songs 10.2 Message Tone 6.3 Playlists 10.3 Alert Tone 6.4 Artist 10.4 Dial Readout 6.5 Album 10.5 Keypad Tone 6.6 Genre 10.6 Multimedia 6.7 Shuffle 10.7 Call 6.8 Favorites 2.11 Wi-Fi 2.7 Notepad...
- Page 19 3.1 Calculator 3.2 Tasks 3.3 Stopwatch 3.4 Tip Calculator 3.5 Unit Converter 3.6 SIM Application...
-
Page 20: Connecting To Networks And Devices
• In this case, if your phone has access to 3G data, it may connect to the 3G network automatically and additional charges may apply. • The LG 840G supports WEP, WPA/WPA2-PSK and 802.1x EAP security. • If your Wi-Fi service provider or network administrator sets encryption for network security, enter the key into the pop-up window. -
Page 21: Connecting To Bluetooth Devices
Connecting to Bluetooth Devices Bluetooth is on Connected to a Bluetooth device To turn Bluetooth on or off 1. Touch . 2. Touch Bluetooth to turn the function on or off. Working With Secure Certificates If your organization’s VPN or Wi-Fi network relies on secure certificates, you must obtain the certificates and store them in your phone’s secure credential storage before you can configure access to that VPN or Wi-Fi network on your phone. - Page 22 5. Touch the file name of the certificate to install. Only the names of certificates that you have not already installed on your phone are displayed. 6. If prompted, enter the certificate’s password and touch OK. 7. Enter a name for the certificate and touch OK. 20 LG840G | User Guide...
-
Page 23: General Functions
General Functions Making a Call 1. Make sure your phone is powered on. 2. Touch and enter a phone number using the touch pad. To edit a number on the display screen, simply press the key to erase one digit at a time. Press and hold the key to erase the entire number. -
Page 24: Answering A Call
Making a Call from the Contacts You can store frequently called names and phone numbers in the SIM card as well as in the phone memory known as the Contacts. You can dial a number by simply selecting a name in the Contacts List and pressing the [SEND] key. -
Page 25: Setting Profiles
Setting Profiles Press either of the side volume keys. You can adjust the ringtone volume from the Ringtone and you can also set your ringtone profile to Ring, Vibrate All, Silent All. Profiles Vibration Mode (Quick) Vibration Mode can be activated by touching and holding from the dial pad. -
Page 26: Entering Text
Entering Text You can enter alphanumeric characters by using the phone’s touch pad. For example, storing names in the Address Book, writing a message or scheduling events in the calendar all require text to be entered. The following text input modes are available on the phone. Using the Symbol Mode The Symbol Mode enables you to enter various symbols or special characters. - Page 27 Using the Mode The predictive text input mode allows you to enter words easily with a minimum number of key presses. As you touch each key, the phone begins to display the characters that it thinks you are typing based on a built-in dictionary.
- Page 28 Using the ABC Mode Use the touch pad keys to enter your text. 1. Touch the touch key labeled with the required letter: Once for the first letter Ƭ Twice for the second letter Ƭ And so on Ƭ 2. To insert a space, touch .
- Page 29 Refer to the table below for more information on the characters available using the keys. Description Upper Case Lower Case . , ‘ @ ? ! - : / 1 . , ‘ @ ? ! - : / 1 A B C 2 a b c 2 D E F 3...
- Page 30 Using the 123 (Numbers) Mode The 123 Mode enables you to enter numbers in a text message (a telephone number, for example) more quickly. Touch the keys corresponding to the required digits before manually switching back to the appropriate text entry mode. My Dictionary The My Dictionary is a feature that allows the user to add any unique or personal words to the standard language database.
-
Page 31: In-Call Menu
In-Call Menu Your phone provides a number of control functions that you can use during a call. To access these functions during a call, touch During a Call Making a Second Call You can select a number you wish to dial, to make a second call. Press , enter the 2nd phone number and press Dialpad... -
Page 32: Conference Calls
If Call Waiting is turned on, you can put the first call on hold and answer the second call by pressing the [SEND] key. Rejecting an Incoming Call You can reject an incoming call without answering by simply pressing the [END] key or touching Muting the Microphone You can mute the microphone during a call by touching... - Page 33 Once a conference call is set up, calls may be added, disconnected or separated (that is, removed from the conference call but still connected to you) by the person who set up the conference call. These options are all available from the In-Call menu. The maximum number of callers in a conference call is five.
- Page 34 Private Call in a Conference Call To have a private call with one caller from a conference call, touch When the numbers of the callers are displayed, select the one you wish to speak in private with. Only the person who initiates the Conference Call can initiate a Private Call.
-
Page 35: Your Standby Screen
The standby screen is also a great place to get accustomed to the Ƭ touch screen. To select an item, touch the icon accurately. Your LG 840G can be set Ƭ to vibrate slightly when it recognises you’ve touched an option. - Page 36 The Quick Keys The quick keys on your standby screen provide easy, one-touch access to your most used functions. Touch to bring up the touch dialpad, to make a call. Input the number as you would using a normal key pad and touch or press the key.
-
Page 37: Home Screen
Home Screen LG 840G provides three types of Home Screens. To swap between the Home Screens, just swipe quickly over the display from left to right or right to left. Widget Allows you to use Widgets and even add them to your Home screen. - Page 38 Favorite Contacts Allows you to easily contact your friends and family by displaying your favorite contacts on the standby screen. First, touch from the standby screen. Then touch Ƭ Favorite Contacts Select to register your favorite contacts. You can add up to 30 Ƭ...
- Page 39 If you want to delete a contact from this screen, touch Ƭ Touch to finish editing the Contacts on this screen. Ƭ Done To access your Contacts, simply touch on their corresponding icon. Ƭ Touch to call, to send a message and to check messages received from that person.
- Page 40 Shortcuts Add your favorite menu on the standby screen. Ƭ Touch from the standby screen. Ƭ To turn to the Edit Screen, touch Ƭ Shortcuts Touch to add another application, touch to delete the Ƭ application from Shortcuts, touch to finish. Done 38 LG840G | User Guide...
-
Page 41: Contacts
Contacts From the standby screen, touch and touch . You will see following Address Book options. Contact List This menu allows you to save and manage contact address information. The Contact List’s functions allow you to add a new address or search saved contact addresses by name. - Page 42 Touch here to go back to previous screen. Touch here to add a photo Type in the First name. Touch here to save. 1. From the standby screen, touch and touch Add New. 2. Touch to set a Picture ID for a contact by using a saved picture from Pictures or taking a new picture of the contact person.
-
Page 43: Groups
Groups This menu allows you to manage group information. By default, there are 7 groups: BUSINESS, Colleague, Company, Family, Friends, PERSONAL, and School. Or you can put a contact in No Group. You can also configure a ring tone for a group so that the group ring tone sounds when a call from a specific contact address within that group is received and there is no ring tone configured for the specific contact address. -
Page 44: Sim Management
To see your Speed Dial entries: 1. From the standby screen, touch and touch All Contacts. 2. A drop-down menu will appear, touch Speed Dial. SIM Management This menu allows you to copy information from your SIM card, e.g. name, handset number, etc. -
Page 45: My Business Card
My Business Card This displays your own contact information. You can edit and create the contact information. Depending on the SIM card, the number of Biz Cards you can enter can vary. 1. From the standby screen, touch and touch 2. -
Page 46: Messages
Messages This section includes functions related to SMS (Short Message Service), MMS (Multimedia Message Service), Voicemail as well as the network’s service messages. Create Message 1. From the standby screen, touch 2. Touch Create New Message. Editing a message The following options are available when editing a Message. Symbol: You can insert symbols ranging from sentence notes to Ƭ... - Page 47 Take New Picture: You can insert a new image taken from the camera Ƭ by touching Record New Audio: You can record a new audio clip by touching REC. Ƭ • Quality: Allows you to select between Normal, Economy or Fine. •...
- Page 48 - Show/Hide Candidate: When in Entry Mode, you can see the word candidates as you type. - Show/Hide Next Word - My Dictionary: Here you can add/delete/reset/modify words to the My Dictionary. • Copy & Paste • Preview: Allows you to preview your message. •...
- Page 49 Next Word and access the My Dictionary to delete/add/modify words. - Cancel Message: Allows you to cancel the message. Message folders The folder structure on your LG 840G was designed to be fast and easy to use. Inbox: All the messsages you receive are placed into your Inbox. Ƭ...
-
Page 50: Inbox
Inbox You will be notified when you receive a message. They will be stored in the Inbox. In the Inbox, you can identify each message by icons. To reach the Inbox, from the standby screen, touch The following Options are available in Inbox folder. Delete: You can pick a message and delete it. -
Page 51: Drafts
Move to SIM/Phone: Allows you to move the message to the SIM card Ƭ or the phone. Message Details: You can view information about received messages; Ƭ message Type, Subject, Sender’s address, and message Time. Drafts You can view the messages saved as drafts. To see the Drafts folder, touch from the standby screen, then touch Inbox and touch Drafts from the drop-down menu. -
Page 52: Message Settings
The Outbox will display all failed, sent and pending messages in the order in which they are sent. Touch to use options available from the Outbox. Delete: Deletes a message you choose. Ƭ Sort by: Sorts by Date, To and Subject. Ƭ... - Page 53 Signature This feature allows you to create your signature. Text Message Text Templates Ƭ There are 6 predefined messages in the list. You can view and edit the template messages or create new ones. The following options are available when you touch - Delete: Allows you to delete the selected template message.
-
Page 54: Email
Voicemail Number This menu allows you to set the voicemail center number if this feature is supported by Tracfone. Please check with Tracfone for details of their service in order to configure the handset correctly. Service Message You can set the Service option to determine whether or not you will receive service messages. - Page 55 4. From Options choose update and the phone will connect to your email account and retrieve your new messages. Message folders Touch the Menu key and select E-mail. The folder structure used on your LG 840G should be self-explanatory. New Email: Create your new message. Ƭ Mailboxes Inbox: All the e-mails you receive are placed into your Inbox.
- Page 56 Drafts: If you don’t have time to finish writing a e-mail, you can save Ƭ what you have written so far in here. Outbox: This is a temporary storage folder while e-mail are being sent Ƭ or stores the messages that are failed to sent. Sentbox: Copies of all the e-mail you send are kept into your Sent Ƭ...
-
Page 57: Multimedia
Multimedia Games & Apps Allows you to download and play JAVA games and Java applications to your enjoyment. To access Games & Apps from the standby screen, touch , and then Allows you to access Facebook, Twitter and Myspace. To access SNS from the standby screen, touch and then Camera From the standby screen, touch... -
Page 58: Getting To Know The Viewfinder
Getting to know the viewfinder Zoom Back: Touch here to exit camera mode or return to the previous screen. Camera mode: Indicates that camera mode is selected. Image size Album: Shows the image taken previously. When no pictures taken previously, this would show you the file list from the album. - Page 59 Settings Menu White Balance: Choose between Auto, Daylight, Cloudy, Illuminate or Ƭ Indoors. Night Mode: Allows you to set night mode On or Off. Ƭ Shot Mode: Choose between Normal or Continuous Shot. This is great Ƭ for taking photos of moving objects or at sporting events. Image Review: If you select On, you can review the image you have Ƭ...
-
Page 60: Record Video
Record Video When recording video, you have many of the same Settings options as with taking a photo. Getting to know the viewfinder Zoom Back: Touch here to return to the standby screen. Video mode: Video mode is selected. Video Size Album: Shows the video taken previously. - Page 61 Settings Menu White Balance: Choose between Auto, Daylight, Cloudy, Illuminate or Ƭ Indoors. Color Effects: Choose between Off, Mono, Sepia, Negative or Blue. Ƭ Video Size: Sets the size of video to 320*240 or 176*144. The selected Ƭ size appears on the capture screen. Primary Storage: Choose to save a video clip to Phone or Memory Ƭ...
-
Page 62: Music Player
Music Player Music Player To launch Music Player while in the standby screen, touch , and select Music Player. Now playing: Shows the currently playing music screen. Ƭ All Songs: You can view all the songs in your music library. Ƭ... - Page 63 2. You can select from All Songs, Playlists, Artist, Album, Genre, Favorites, and Shuffle songs to select your Music. The Now Playing menu will be only available when music is playing. 3. Touch the song you wish to play. Repeat Minimize Shuffle Favorite...
- Page 64 Adding Music To Your Handset Music files can be added to your handset by using one or more of the following methods: Download music and ringtones over the network directly to your device Ƭ via the Buy Ringtiones link in the Audio. From your existing digital media collection on your PC via Windows Ƭ...
- Page 65 Drag and Drop Music Using LG 840G As A Mass Storage Device 1. Make sure the microSD™ card is inserted properly into the headset. 2. Connect the device to a PC using a LG 840G USB data cable. 3. A bubble may appear on the PC, “Found New Hardware LG USB Modem”.
- Page 66 Deleting Music Files The following are the three options available to delete Music from your Phone: 1. Delete a file using Mass Storage. 2. Delete a file by directly inserting the microSD™ external memory onto the PC. 3. Delete a file using delete function on the phone. NOTE: If you delete a playlist from the phone, the songs in the playlist will not be removed and remain in All Songs folder.
-
Page 67: Audio
Audio From the standby screen, touch , and then to access the Audio folder. Voice Recorder: Allows you to record your own audio by touching Ƭ Buy Ringtones Ƭ You can view the audio files in the list. Ƭ Pictures From the standby screen, touch , and then to access the Pictures... -
Page 68: Voice Recorder
Voice Recorder From the standby screen, touch and then to access the Voice Recorder. Voice Recorder Use the Voice Recorder to record voice memos or other sounds. Settings Ƭ • Quality: You can assign the default quality to the Normal, Economy or Fine. - Page 69 Touch to start recording. Touch to pause recording. Ƭ Pause To continue recording, touch . To stop recording, touch Resume Stop The recording will be saved automatically. To start a new recording, touch . To play the recording, touch Ƭ Record New Audio .
-
Page 70: Calendar
Calendar When you enter this menu, a calendar will be displayed. The blue square cursor is used to locate a particular day. The bottom bar on the calendar indicates schedule(s) for that day. This function helps to remind you of the schedule. -
Page 71: Notepad
Notepad You can create up to a maximum of 30 memos. 1. From the standby screen, touch , and choose Notepad. 2. To create a new Note, touch New Note, input the memo and touch to save. Tasks This feature allows you to save and manage a task. To add a New Task 1. -
Page 72: Stopwatch
View Calendar: The calendar window will display, from there you will be Ƭ able to create New Tasks. Stopwatch This menu allows you to record the elapsed time of an event. The duration of an individual lap time (up to 99 times) and the total time can also be displayed. -
Page 73: Calculator
Calculator The calculator function allows you to calculate simple mathematical equations. To access the Calculator 1. From the standby screen, touch and select Calculator. Tip Calculator This feature allows you to quickly and easily calculate the tip amount based on the total bill as well as the split of the total bill based on the number of people. -
Page 74: Alarm
Alarm The alarm function allows you to set up multiple separate alarms. You can set the time, repetition interval and desired alarm tone. To set a New Alarm 1. From the standby screen, touch 2. Select New Alarm. 3. Configure the following settings: Time: Input your desired alarm time by specifying the hour and Ƭ... -
Page 75: File Manager
Quick alarm In the Alarm Clock menu, touch Quick Alarm to set a Quick Alarm. 1. Drag the bar from left to right to set the time; 60 minutes is maximum set value. 2. Scroll down to configure the options Alarm Tone, Alarm Volume, Alarm Type, Memo and Snooze Interval. - Page 76 Delete All: You can delete all files and folders. Ƭ NOTE: Limits: System files/folders cannot be listed. 74 LG840G | User Guide...
-
Page 77: Browser
Browser This application connects you to the Internet. By default, the account connects you to web site. Browser is one of the services provided by Tracfone and it gives you access to all the cool things you can do with your wireless phone. NOTE: Check the availability of WAP services, pricing and tariffs with your network operator and/or the service provider whose service you wish to use. - Page 78 Using the WAP Browser Menu Online menu Once you are connected to the Internet, the following menu options are available when you touch [Options]: Home: Moves to the initial homepage. Ƭ Windows: You can have several browser windows to navigate different Ƭ...
-
Page 79: Settings
Settings Display , and then Display to access the From the standby screen, touch Display settings menu. Wallpapers This menu allows you to set a picture or color as your background. You may also choose to have no background wallpaper. Fonts You can configure the font size and color of the numbers which appear in the Dialing screen when you make a call. - Page 80 Auto Screen Lock This allows you to set the amount of time before your screen locks automatically. Set Flight Mode This allows you to use only the phone’s features that do not require the use of the wireless network when you are in an airplane or in places where the wireless network is prohibited.
- Page 81 : You cannot make (or receive) any calls, including emergency calls or Ƭ use other features that require network coverage. : Deactivates Flight Mode and re-establishes your wireless Ƭ connections. Security Various codes and passwords are used to protect the features and settings of your phone.
- Page 82 Memory Used Space: You are allowed to see the used storage. Ƭ Set Storage Default: You are allowed to set the default storage. Ƭ Reset Settings This function allows you to restore factory settings. To do this, you need the security code. Master Reset: Restores the settings (e.g.: Audio, Display, Language, Ƭ...
-
Page 83: Call
Phone Information This menu is used to view My Numbers, Manufacturer, Model Name, Device ID, Hardware Version, Software Version and Language. Call From the standby screen, touch , and then Call to access the Call settings menu. Send My Number This network service allows you to set your phone number to be displayed (On) or hidden (Off) from the person you are calling. -
Page 84: Touch
Touch , and then Touch to access the From the standby screen, touch Touch settings menu. You can customize the Touch settings and change Touchscreen Feedback. When you set Sound as Touchscreen Feedback type, you can choose your desired sound type and adjust its volume. Sound From the standby screen, touch , and then... - Page 85 Alert Type: Supports 4 message alert types: Ring, Ring & Vibrate, Ƭ Vibrate and Silent. Alert Interval: Supports 5 message alert interval: Once, Every 2 Min., Ƭ Every 5 Min., Every 10 Min. and Every 15 Min. NOTE: Full length music tracks cannot be set as either ringtones or message tones.
-
Page 86: Bluetooth
Call This menu allows you to adjust your call volume. Bluetooth From the standby screen, touch to access the Bluetooth function settings menu. Your phone has built-in Bluetooth® wireless technology, which makes it possible for you to connect your phone wirelessly to other Bluetooth® devices such as a hands-free device, PC, PDA, a remote screen or other phones. - Page 87 A2DP profile This icon appears when the A2DP profile is used between the stereo headset device and the phone. This allows you to listen to an audio clip. A2DP is the Advanced Audio Distribution Profile, which provides support for streaming either mono or stereo audio using Bluetooth ®...
- Page 88 3. If you want to stop searching, touch Cancel 4. All of the devices found are displayed. 5. Touch the desired device and enter the password. If you would like to search again, touch Refresh My Devices: This function allows you to view the list of all devices that Ƭ...
-
Page 89: Accessories
This adapter allows you to charge the battery. Battery Standard battery is available. NOTE: Always use genuine LG accessories. Failure to do this may invalidate your • warranty. • Accessories may be different in different regions; please check with our... -
Page 90: Technical Data
Technical data Ambient Temperatures Max: +50°C (discharging), +45°C (charging) Min: -10°C Battery Standby and Talk Time Standby and talk times will vary depending on phone usage patterns and conditions. Battery power consumption depends on factors such as network configuration, signal strength, operating temperature, features selected, frequency of calls, and voice, data, and other application usage patterns. -
Page 91: For Your Safety
For Your Safety The highest SAR value for this model phone when tested for use at the ear is 1.15 W/kg and when worn on the body, as described in this user guide, is 0.67 W/kg (body-worn measurements differ among phone models, depending upon available accessories and FCC requirements). - Page 93 Felicidades por comprar el teléfono avanzado y compacto LG 840G de LG, diseñado para funcionar con la más reciente tecnología de comunicación digital móvil. Parte del contenido de este guía puede no coincidir con el teléfono dependiendo del software del teléfono o del proveedor de servicios.
- Page 94 Contenido Características del teléfono .....4 Mi información de contacto ....44 Mensajería ........45 Instalación de la tarjeta SIM y la batería 6 Cargar el teléfono .........9 Nuevo mensaje........... 45 Instalación de una tarjeta de memoria 10 Buzón de Entrada ........49 Iconos en pantalla ........
- Page 95 Browser ........... 78 Configuraciones ......80 Pantalla ............80 Teléfono ............80 Llamar ............85 Táctil ............... 86 Sonido ............86 Bluetooth ............88 Accesorios ........92 Por su seguridad......94...
-
Page 96: Características Del Teléfono
Características del teléfono Toma para auriculares de 3,5 mm Tecla de encendido/bloqueo Auricular • Enciende y apaga el teléfono Permite escuchar a la persona al mantenerla presionada. que llama e indicaciones • Enciende y apaga la pantalla, automatizadas. y la bloquea. Pantalla LCD Muestra los iconos de estado del teléfono, los elementos... - Page 97 Teclas laterales de volumen • En la pantalla de espera: Permite establecer el volumen del tono de timbre y del tono táctil. Mantenga presionada la tecla hacia abajo para activar o desactivar el modo de vibración. • Durante una llamada: Permite cambiar el volumen del auricular.
-
Page 98: Instalación De La Tarjeta Sim Y La Batería
Instalación de la tarjeta SIM y la batería Extraiga la tapa de la batería Sostenga el teléfono firmemente en una mano. Con la otra mano, use la abertura de dedo en la parte inferior de la tapa posterior para levantarla y quitarla. Extraiga la batería Sostenga el borde superior de la batería y quite la batería del compartimiento con la uña. - Page 99 Advertencia No extraiga la batería cuando el teléfono está encendido porque puede dañarlo. Inserte la tarjeta SIM Deslice la tarjeta SIM en la ranura para la tarjeta SIM. Asegúrese de que el área de contactos dorados de la tarjeta esté orientada hacia abajo.
- Page 100 Inserte la batería Primero inserte la parte superior de la batería en el borde superior del compartimiento de la batería. Asegúrese de que los contactos dorados de la batería estén alineados con los terminales del teléfono. Presione la parte inferior de la batería hasta que encaje en su sitio. 8 LG840G | Guía del Usuario...
-
Page 101: Cargar El Teléfono
Cargar el teléfono Levante la tapa del puerto para el cargador ubicada en la parte superior del teléfono LG 840G. Inserte el conector del cargador en el teléfono (el lado “B” del conector debe orientarse hacia arriba al conectarlo en el teléfono) y luego enchufe el cargador en la toma de la pared. -
Page 102: Instalación De Una Tarjeta De Memoria
Instalación de una tarjeta de memoria Puede expandir la memoria disponible en el teléfono con una tarjeta de 840G memoria microSD™. El teléfono LG admite una tarjeta de memoria microSD™ de hasta 32 GB. Sugerencia! La tarjeta de memoria es un accesorio opcional. - Page 103 NOTA: Si la tarjeta de memoria contiene archivos, se guardarán automáticamente en la carpeta correspondiente. Por ejemplo, se podrá acceder a los videos desde la carpeta de videos. Si tiene contenido protegido (como canciones o gráficos cargados de otro teléfono que estén protegidos por la administración de contenido de derechos digitales), no serán accesibles.
-
Page 104: Iconos En Pantalla
Iconos en pantalla La tabla a continuación describe varios indicadores o iconos que aparecen en la pantalla de visualización del teléfono. ICONO/ DESCRIPCIÓN INDICADOR Intensidad de señal de la red (el número de barras varía) Sin señal de red Batería agotada Nuevo mensaje de texto Nuevo correo electrónico Hay una alarma establecida... - Page 105 ICONO/ DESCRIPCIÓN INDICADOR Timbrar después de Modo de vibración Timbrar y Modo de vibración Altavoz Llamada en curso Correo de voz Batería llena Cargando la batería Modo de vuelo El Wi-Fi está relacionado...
-
Page 106: Árbol De Menús
Árbol de menús 1.1 Prepago [Multi Tank -Straight Talk] 1.1 Añadir Tiempo Celular [Single Tank -TF / Net 10] 1.2 Mi Número Telefónico 1.1 Añadir Tiempo Celular 1.3 Mi Balance 1.2 Comprar Tiempo Celular 1.4 Número de Serie 1.3 Mi Número Telefónico 1.5 Número de SIM 1.4 Mi Saldo de Tiempo Celular 1.6 Mode Ingreso de Código... -
Page 107: Llamadas Recientes
1.3 Mensajes 1.6 Juegos 3.1 Nuevo Mensaje 6.1 Comprar juegos 3.2 Buzón de Entrada 3.3 Borradores 1.7 Calendario 3.4 Buzón de Salida 3.5 Config. de Mensaje 1.8 Cámara 3.5.1 Alerta de Mensajes 3.5.2 Guardar en 1.9 Videocámara 3.5.3 Firma 3.5.4 Mensaje de Texto 3.5.5 Mensaje Multimedia 1.10 Alarma 3.5.6 Número de Correo de Voz... - Page 108 1.12 Configuraciones 2.1 E-mail 12.1 Pantalla 1.1 Escribir e-mail 12.2 Teléfono 2.2 Redes Sociales 12.2.1 Idiomas 12.2.2 Bloqueo aut de pant. 2.1 Facebook 12.2.3 Establecer Modo de Vuelo 2.2 Twitter 12.2.4 Seguridad 2.3 MySpace 12.2.5 Memoria 12.2.6 Restaurar Configuraciones 2.3 Grabador de Voz 12.2.7 Información del teléfono 12.3 Llamada 12.3.1 Enviar Mi Número...
- Page 109 2.6 Reproductor de Música 2.10 Config. de sonido 6.1 Reproduciendo Ahora 10.1 Timbre 6.2 Todas Las Canciones 10.2 Tono de Mensaje 6.3 Listas de Reproducción 10.3 Tono de Alerta 6.4 Artista 10.4 Lectura de Marcación 6.5 Álbum 10.5 Tono de Teclado 6.6 Género 10.6 Multimedia 6.7 Aleatorio...
- Page 110 3.1 Calculadora 3.2 Tareas 3.3 Cronómetro 3.4 Calc. de propinas 3.5 Conversor de Unidad 3.6 SIM Aplicación 18 LG840G | Guía del Usuario...
-
Page 111: Unión A Redes Y Dispositivos
• En este caso, si el teléfono tiene acceso a datos 3G, puede conectarse automáticamente a la red 3G y pueden aplicarse cargos adicionales. • El teléfono LG 840G admite seguridad WEP, WPA/WPA2-PSK y 802.1x EAP. • Si su proveedor de servicio Wi-Fi o administrador de red configuran... -
Page 112: Conectarse A Aparatos Bluetooth
la clave en la ventana emergente. Si la encriptación no está configurada, la ventana emergente no se muestra. Puede obtener la clave a través de su proveedor de servicio Wi-Fi o su administrador de red. Conectarse a aparatos Bluetooth Bluetooth encendido Conectado a un dispositivo Bluetooth Para encender o apagar Bluetooth 1. - Page 113 2. Desde la pantalla principal, toque la Tecla Menú 3. Toque Ajustes > Ubicación y seguridad. 4. Toque Instalar desde la micro SD. 5. Toque el nombre de archivo del certificado para instalarlo. Solamente se mostrarán los nombres de certificados que no haya instalado anteriormente en el teléfono.
-
Page 114: Funciones Generales
Funciones generales Hacer una llamada 1. Asegúrese de que el teléfono esté encendido. 2. Toque e introduzca un número de teléfono con el teclado táctil. Para modificar un número que aparece en la pantalla de visualización, sólo tiene que presionar la tecla y borrar los dígitos uno por uno. -
Page 115: Responder Una Llamada
Finalizar una llamada Cuando la llamada haya finalizado, presione la tecla [TERMINAR]. Hacer una llamada desde contactos Es posible guardar nombres de personas y números de teléfono a los que llama con frecuencia en la tarjeta SIM y en la memoria del teléfono. Se puede marcar un número simplemente seleccionando un nombre de la lista de contactos y presionando la tecla [ENVIAR]. -
Page 116: Ajuste Del Volumen
Ajuste del volumen Si desea ajustar el volumen de los auriculares durante una llamada, use las teclas de volumen laterales del teléfono. En la pantalla de espera, puede ajustar el volumen del timbre y el sonido del tono táctil con las teclas de volumen laterales. Configuración de perfiles Presione cualquiera de las teclas laterales de volumen. -
Page 117: Introducir Texto
El teléfono exhibirá el mensaje “Modo vibración encendido”. Si desea desactivar el Modo de vibración, toque y mantenga presionada la tecla nuevamente. Potencia de la señal Si está dentro de un edificio, ubicándose cerca de una ventana puede mejorar la recepción. Se puede conocer la potencia de la señal a través del indicador de señal que aparece en la pantalla de visualización del teléfono. - Page 118 Modo ABC Este modo le permite introducir letras tocando la tecla etiquetada con la letra deseada. Modo 123 (Modo de números) Para escribir números, realice una pulsación de tecla por número. Para cambiar al modo 123 en un campo de entrada de texto, toque Usando el Modo El modo de entrada de texto predictivo permite introducir palabras fácilmente presionando una mínima cantidad de teclas.
- Page 119 Si la palabra deseada no aparece en la lista de opciones de palabras, Ƭ agréguela. Para ello, presione y seleccione para Añada Palabras introducir la nueva palabra. Luego presione Guardar para guardar la palabra en el diccionario incorporado. 2. Escriba toda la palabra antes de editar o borrar alguna de las letras. 3.
- Page 120 Caracteres en orden de aparición Tecla Mayúsculas Minúsculas . , ‘ @ ? ! - : / 1 . , ‘ @ ? ! - : / 1 A Á B C 2 a á b c 2 D E É F 3 d e é...
- Page 121 Usando el Modo 123 (modo de números) El modo 123 le permite escribir números en un mensaje de texto (un número telefónico, por ejemplo) con mayor rapidez. Toque las teclas correspondientes a los dígitos deseados antes de regresar manualmente al modo adecuado de entrada de texto. Mi diccionario El diccionario le permite al usuario agregar palabras únicas o personales a la base de datos estándar de.
-
Page 122: Menú En Llamada
Menú En llamada El teléfono brinda una cantidad de funciones de control que pueden utilizarse durante una llamada. Para acceder a estas funciones durante una llamada, toque Durante una llamada Hacer una segunda llamada Es posible seleccionar un número y hacer una segunda llamada. Presione , introduzca el segundo número de teléfono y presione Teclado... - Page 123 conoce como Llamada en espera, sólo podrá utilizarse si la red admite ese servicio. Si la llamada en espera está activada, es posible poner en espera la primera llamada y contestar la segunda presionando la tecla [ENVIAR]. Rechazar una llamada entrante Es posible rechazar una llamada entrante y no contestarla simplemente presionando la tecla [TERMINAR] o...
-
Page 124: Llamadas De Conferencia
Llamadas de conferencia El servicio de conferencia le brinda la posibilidad de mantener una conversación simultánea con más de una persona. La función de llamada en conferencia puede usarse sólo si su proveedor de servicios de red admite esa función. Una vez que se establece una llamada en conferencia, la persona que la estableció... - Page 125 Activar la llamada en conferencia en espera Para activar una llamada en conferencia en espera, presione la tecla Agregar llamadas a una llamada en conferencia Para agregar una llamada a una llamada en conferencia actual, toque [Opciones] y seleccione Unir. Establecer una conversación privada durante una llamada en conferencia Para tener una conversación privada con una persona que participa en...
-
Page 126: Pantalla De Espera
Para seleccionar un elemento, toque el icono con precisión. Se puede Ƭ configurar el teléfono LG 840G para que vibre con suavidad cada vez que reconozca que usted tocó una opción. Para desplazarse por las listas, toque el último elemento visible y Ƭ... - Page 127 Teclas rápidas Las teclas rápidas de la pantalla de espera proporcionan un acceso fácil a las funciones que usted más utiliza en un toque. Toque esta tecla si desea que aparezca el teclado de marcado táctil para realizar una llamada. Escriba el número como lo haría con un teclado normal y toque Llamada...
-
Page 128: Pantalla De Inicio
Pantalla de inicio El teléfono LG 840G proporciona tres tipos de pantallas de inicio. Para intercambiar enter las pantallas de inicio, deslice rápidamente de izquierda a derecha o de derecha a izquierda. Widget Le permite utilizar widgets e incluso agregarlos a la pantalla de inicio. - Page 129 Contactos favoritos Le permite comunicarse fácilmente con sus amigos y familiares mostrando sus contactos favoritos en la pantalla de espera. En primer lugar, toque en la pantalla de espera. Luego toque Ƭ Contactos favoritos Seleccione para elegir un contacto. Puede agregar hasta 30 Ƭ...
- Page 130 Si desea borrar un contacto desde esta pantalla, toque Ƭ Toque para finalizar la edición de los contactos en esta pantalla. Ƭ Ejec. Para acceder a los contactos, sólo toque en el icono correspondiente. Ƭ Toque para llamar, para enviar un mensaje, para revisar los mensajes recibidos de esa persona o para revisar el...
- Page 131 Si desea editar uno de los contactos, toque la foto. Aparecerá la Ƭ pantalla de edición. Atajos Agregue su menú favorito a la pantalla de espera. Ƭ Toque en la pantalla de espera. Ƭ Para acceder a la pantalla de edición, toque Ƭ...
-
Page 132: Agenda
Agenda En la pantalla de espera, toque y luego . Verá las siguientes opciones de la agenda. Lista de Contactos Este menú permite guardar y administrar información sobre las direcciones de los contactos. Las funciones de la lista de contactos permiten agregar nuevas direcciones o buscar las direcciones de contactos guardadas por nombre. - Page 133 Toque aquí para volver a pantalla anterior Toque aquí para añadir una foto Teclee el Nombre Toque aquí para ahorrar 1. En la pantalla de espera, toque y seleccione Agreg. nueva. 2. Toque para establecer una ID de imagen para un contacto. Puede usar una fotografía guardada en Imágenes o tomar una nueva fotografía de la persona de contacto.
-
Page 134: Grupos
Elija si quiere guardar el contacto en el teléfono o en la tarjeta SIM. Ƭ 3. Toque Guardar para guardar el contacto. Grupos Este menú permite administrar información sobre los grupos. De manera predeterminada, hay 7 grupos: TRABAJO, Compañero, Empresa, Familia, Amigos, PERSONAL y Escuela. - Page 135 6. Toque la ubicación de Marcación rápida desde 2 hasta 9 y luego toque Guardar. El correo de voz ya está establecido en la opción de marcado rápido 1. Ƭ Esta es la configuración predeterminada y no se puede cambiar. Para llamar a un número de marcado rápido asignado, toque en la Ƭ...
-
Page 136: Administración De La Tarjeta Sim
Administración de la tarjeta SIM Este menú permite copiar al teléfono la información de la tarjeta SIM, por ejemplo, nombre, número de teléfono, etc. Si durante el proceso de copiado hay un nombre duplicado, la información también se duplicará. También puede copiar entradas de la tarjeta SIM a la memoria del teléfono y entradas de la memoria del teléfono a la tarjeta SIM (no se copiarán todos los datos). -
Page 137: Mensajería
Mensajería Esta sección incluye funciones relacionadas con el servicio de mensajes cortos (SMS por su sigla en inglés), el servicio de mensajes de multimedia (MMS por su sigla en inglés) y el correo de voz, además de los mensajes de servicio de la red. Nuevo mensaje 1. - Page 138 Tomar otra foto: Puede tocar para insertar una nueva imagen que Ƭ haya tomado con la cámara. Grabar nuevo audio: Puede tocar Grabar para grabar un nuevo clip de Ƭ audio. • Calidad: Permite que usted seleccione entre Normal, Economía o Penalidad.
- Page 139 - Mostrar/Ocultar lista de palabras más probables: En el Modo de entrada, puede ver las palabras posibles cada vez que introduzca letras. - Predicción de palabras activada/desactivada - Diccionario: Permite agregar/borrar/restablecer/modificar palabras en el Diccionario. • Copiar y pegar • Vista previa: Permite ver el mensaje antes de enviarlo. •...
- Page 140 - Cancelar mensaje: Permite cancelar el mensaje. Carpetas de mensajes La estructura de carpetas del teléfono LG 840G se diseñó para ofrecer un uso rápido y sencillo. Buzón de Entrada: Todos los mensajes que reciba se guardarán en Ƭ...
-
Page 141: Buzón De Entrada
Borradores: Si no tiene tiempo para terminar de escribir un mensaje, Ƭ puede guardarlo como Borrador. Buzón de Salida: Todos los mensajes que se están enviando y los ya Ƭ enviados se guardan en este buzón. NOTA: Si aparece el mensaje “No hay espacio para mensajes USIM”, deberá borrar algunos mensajes del buzón de entrada. -
Page 142: Borradores
Vista estándar Permite ver los mensajes individualmente. Cuando está viendo un mensaje, las siguientes opciones están disponibles en la vista estándar: Agregar a la agenda: Permite guardar el número de teléfono del Ƭ remitente en la Lista de Contactos. Seleccionar diapositiva: Si el mensaje multimedia contiene más de Ƭ... -
Page 143: Buzón De Salida
Buzón de Salida El Buzón de Salida es el lugar donde puedes encontrar tus mensajes enviados. Para ver la carpeta Buzón de Salida, toque en la pantalla de espera y luego toque Buzón de Entrada y toque Buzón de Salida del menú... -
Page 144: Configuración De Mensajes
Ver archivo adjunto: Permite ver el archivo adjunto del mensaje. Ƭ Detalles del mensaje: Permite ver la información del mensaje. Ƭ Configuración de mensajes Para establecer la Configuración de mensajes, toque desde la pantalla y luego seleccione Config. de mensaje para las de espera, toque siguientes opciones.. - Page 145 - Borrar todos: Permite borrar todas las plantillas de la carpeta. Para editar una plantilla existente, tóquela (para abrirla) y luego toque el texto. La pantalla Editar plantilla se abrirá automáticamente. Número del centro de mensajes: Los detalles del centro de mensajes Ƭ...
-
Page 146: E-Mail
E-Mail E-Mail le permite acceder a las cuentas de Yahoo! Mail, AOL Mail, AIM Mail, Windows Live Hotmail, Mail, Gmail y otros proveedores desde el teléfono. Así que puede revisar el correo electrónico fácilmente y sin perder tiempo, aun cuando no tenga su computadora a mano. Para configurar E-Mail Abra E-Mail: En la pantalla de espera, toque y luego... - Page 147 4. Ingrese el texto con su teclado y oprima la Tecla OK Enviar para enviar el correo electrónico. Recuperar mensajes de correo electrónico 1. Oprima la Menú y seleccione E-mail. 2. Seleccione la cuenta que desee usar. 3. Seleccione Buzón de Entrada. 4.
- Page 148 Enviado: Las copias de todos los mensajes de correo electrónico Ƭ enviados se guardarán en esta carpeta. Basura: Todos los mensajes de correo electrónico que se eliminen se Ƭ colocan en la carpeta Basura. Cambiar la configuración del correo electrónico 1.
-
Page 149: Multimedia
Multimedia Juegos Permite que usted descargue y juegue a juegos de JAVA y aplicaciones de Java a su placer. Tener acceso a Juegos de la pantalla de reserva, toque Redes Sociales Permite que usted tenga acceso Facebook, Twitter y Myspace. Tener acceso a Redes Sociales de la pantalla de reserva, toque Cámara En la pantalla de espera, toque... - Page 150 Uso del visor Zoom Salir: Toque aquí para salir del modo de cámara o volver a la pantalla anterior. Modo de cámara: Indica que está seleccionado el modo de cámara. Tam. imagen Álbum: Muestra la imagen tomada antes. Cuando ningunos cuadros tomados antes, este le mostraría la lista de archivo del álbum.
- Page 151 Menú Configuración Balance de blancos: Elija entre Auto, Luz de dia, Nublado, Iluminar o Ƭ Interior. Modo nocturno: Permite que usted ponga el modo de la noche En o Ƭ Lejos. Modo disparo: Elija entre Normal o Toma continua. Este es grande para Ƭ...
- Page 152 Resolución Escala del zoom 1600*1200 Nivel 1 1280*960 Nivel 1 640*480 Nivel 1 a nivel 10 320*240 Nivel 1 a nivel 10 Grabar video Al grabar un video, tiene muchas opciones de configuración iguales a cuando toma una foto. Uso del visor 60 LG840G | Guía del Usuario...
- Page 153 Zoom Salir: Toque aquí para salir del modo de video o volver a la pantalla anterior. Modo de vídeo: Indica que está seleccionado el modo de video. Tamaño del video Álbum: Muestra el vídeo tomado antes. Cuando ningún videos tomado antes, este le mostraría la lista de archivo del álbum.
- Page 154 Menú Configuración Balance de blancos: Elija entre Auto, Luz de dia, Nublado, Iluminar o Ƭ Interior. Tamaño del video: Permite establecer el tamaño del video en 320*240 Ƭ ó 176*144. El tamaño seleccionado aparece en la pantalla de captura. Almacenamiento: Permite guardar un clip de video en el teléfono o la Ƭ...
-
Page 155: Reproductor De Música
Reproductor de música Reproductor de música Para iniciar la función Música mientras se encuentra en la pantalla de Reproductor de Música. espera, toque , y luego seleccione Ahora juego: Muestra la pantalla de música que juega actualmente. Ƭ Todas Las Canciones: Permite ver todas las canciones de la biblioteca Ƭ... - Page 156 1. En la pantalla de espera, toque para abrir la ficha Multimedia y toque 2. Puede elegir entre Todas Las Canciones, Listas de Reproducción, Artista, Álbum, Género y Aleatorio. El menú Reproduciendo Ahora sólo estará disponible cuando la música se esté reproduciendo. 3.
- Page 157 Agregar música al teléfono Pueden agregarse archivos de música al teléfono a través cualquiera de los siguientes métodos: Descargar música y tonos de timbre de la red de directamente Ƭ al teléfono a través del enlace De audio de la carpeta Compra Ringtiones.
- Page 158 2. Conecte el teléfono a una computadora vía un cable de datos USB del LG 840G. 3. En la computadora, aparecerá el mensaje “Found New Hardware LG USB Modem”. 4. En la computadora, accede My Computer. 5. La tarjeta de memoria aparecerá en “Devices with Removable Storage”...
- Page 159 9. Acceda al reproductor de música del teléfono. Borrar archivos de música Para borrar música del teléfono, tiene disponibles las siguientes tres opciones: 1. Borrar un archivo con la función de Almacenamiento masivo. 2. Borrar un archivo insertando directamente la tarjeta de memoria externa microSD™...
-
Page 160: Audio
Audio En la pantalla de espera, toque , y luego para acceder la carpeta Audio. Grabar voz: Permite grabar su propio audio al tocar Ƭ Grabar Registrador de Voz Ƭ Puede ver los archivos de audio en la lista. Ƭ Imágenes En la pantalla de espera, toque , y luego... -
Page 161: Registrador De Voz
Registrador de Voz En la pantalla de espera, toque , y luego para acceder la carpeta Registrador de Voz. Grabador de Voz Utilice el Grabador de Voz para grabar notas de voz u otros sonidos. Configuración Ƭ • Calidad: Puede asignar la calidad predeterminada en los valores Normal, Económica o Fina. - Page 162 Touch to start recording. Touch to pause recording. Ƭ Pausa Grabar To continue recording, touch . To stop recording, touch Rean. Parar The recording will be saved automatically. Para iniciar una nueva grabación, toque . Para reproducir la Ƭ Grabar nuevo audio grabación, toque .
-
Page 163: Calendario
Calendario Cuando ingrese a este menú, aparecerá un calendario. El cursor azul y cuadrado se utiliza para ubicar un día en particular. La barra inferior del calendario muestra las citas para ese día. Esta función lo ayuda a recordar sus citas. El teléfono hará sonar un tono de alarma si ha sido configurado para un elemento específico de la agenda. -
Page 164: Bloc De Notas
Bloc de Notas Es posible crear un máximo de 30 memos. 1. En la pantalla de espera, toque y luego Bloc de Notas. 2. Para crear una nueva nota, toque Nueva nota, escriba la nota y toque para guardarla. Tareas Esta función le permite guardar y administrar una tarea. -
Page 165: Cronómetro
Ver calendario: Permite abrir la ventana del Calendario en la cual podrá Ƭ crear nuevas tareas. Cronómetro Este menú le permite registrar el tiempo transcurrido de un evento. Puede mostrar también la duración de una vuelta individual (hasta 99 veces) y el tiempo total. Nuevo tiempo Ƭ... -
Page 166: Calculadora
Calculadora La función de la calculadora permite realizar cálculos matemáticos simples. Para acceder a la Calculadora 1. En la pantalla de espera, toque y seleccione Calculadora. Calculadora de Propinas Esta función permite calcular la propina rápido y fácilmente según el total de la factura y también dividir el total de la factura entre la cantidad de personas. -
Page 167: Alarma
Alarma La función alarma permite establecer múltiples alarmas separadas. Puede establecer el sonido de la alarma deseado, la hora y el intervalo de repetición. Para establecer una Nueva alarma 1. En la pantalla de espera, toque 2. Seleccione Nueva alarma. 3. -
Page 168: Administrador De Archivos
Intervalo de repetición: Permite establecer el intervalo de repetición en Ƭ 5 minutos, 15 minutos, 30 minutos, 45 minutos, 1 hora o Apagado. 4. Toque Guardar para guardar la nueva alarma. Alarma rápida En el menú Alarma, toque Alarma rápida para establecer una alarma rápida. - Page 169 Copiar: Permite copiar los archivos seleccionados a la memoria del Ƭ teléfono o a la tarjeta de memoria. Renombrar: Permite editar el nombre del archivo seleccionado. Ƭ Nueva carpeta: Permite crear nuevas carpetas manualmente. Ƭ Ordenar por: Permite ordenar los archivos por nombre, fecha y tipo de Ƭ...
-
Page 170: Browser
Browser Esta aplicación permite conectarse a Internet. La cuenta lo conecta a la página de inicio de manera predeterminada. Browser es uno de los servicios proporcionados por Tracfone y brinda acceso a todas las cosas interesantes que se pueden hacer con el teléfono inalámbrico. - Page 171 Uso del menú del navegador WAP Menú en línea Una vez que se conecte a Internet, las siguientes opciones de menú estarán disponibles cuando toque [Opciones]: Inicio: Permite ir a la página de inicio. Ƭ Ventanas: Puede tener abiertas varias ventanas del navegador para Ƭ...
-
Page 172: Configuraciones
Configuraciones Pantalla y luego Pantalla para acceder a las En la pantalla de espera, toque configuraciones de la Pantalla. Fondos de Pantalla Este menú le permite establecer una imagen o color como fondo de pantalla. También puede elegir mantener la pantalla sin fondo. Fuentes Permite configurar el tamaño y el color de los números que aparecerán en la pantalla de marcación al realizar una llamada. - Page 173 Idiomas Puede cambiar el idioma para el texto que se visualiza en su teléfono. Este cambio también afectará al modo de Entrada de idioma. Bloqueo automático del teclado Esta función le permite configurar un periodo de tiempo antes de que la pantalla se bloquee automáticamente.
- Page 174 : No se puede hacer (ni recibir) llamadas, incluidas las de Ƭ emergencia, ni usar otras funciones que requieran cobertura de red. : Desactiva el modo de vuelo y restablece las conexiones Ƭ inalámbricas. Seguridad Existen diversos códigos y contraseñas para proteger las funciones y la configuración del teléfono.
- Page 175 Cambiar Códigos: Esta función permite cambiar la contraseña actual Ƭ por una nueva. Para eso, debe introducir la contraseña actual antes de especificar la nueva. Es posible cambiar los códigos de acceso a: Código de seguridad Memoria Espacio Usado: Le permiten ver el almacenaje usado. Ƭ...
- Page 176 Borrado Maestro: Permite borrar el contenido descargado o creado por Ƭ el usuario (por ejemplo, imágenes o videos) del teléfono y de la tarjeta de memoria externa. • Teléfono - Borra de la memoria del teléfono todas las imágenes, videos y sonidos descargados o creados por el usuario.
-
Page 177: Llamar
Llamar y luego Llamar para acceder las En la pantalla de espera, toque configuraciones de Llamada. Enviar Mi número Este servicio de red permite establecer que se muestre (Encendido) o se oculte (Apagado) su número de teléfono a la persona que usted está... -
Page 178: Táctil
Táctil y luego Toque para acceder a las En la pantalla de espera, toque configuraciones de la funcionalidad Táctil. Puede personalizar la configuración táctil y cambiar los tipos de efecto de respuesta táctil, elegir el tipo de vibración y ajustar la intensidad. Cuando configura Sonido como efecto de respuesta táctil, puede elegir el tipo de sonido y ajustar el volumen. - Page 179 Volumen: Permite ajustar el volumen de tono de alerta de un nuevo Ƭ mensaje. Tipo de alerta: Compatible con 4 tipos de alerta de mensaje: Timbre, Ƭ Timbre y vibración, Vibración y Silencio. Tipo de Alerta: Los apoyos 5 mensaje alertan el intervalo: Una vez, Ƭ...
-
Page 180: Bluetooth
Tono de Teclado Esta opción de menú permite seleccionar un tono que suene cuando se presiona una tecla. Sonidos: Permite seleccionar un conjunto de tonos para el teclado. Ƭ Admite 3 tipos de tonos para el teclado: Entone 1, Entone 2 y Entone 3. Volumen: Permite ajustar el volumen de tono para el teclado. - Page 181 También puede intercambiar, por ejemplo, tarjetas de visita, elementos de calendario e imágenes. Las funciones de Música son compatibles con los auriculares Bluetooth®. Perfil manos libres Este icono aparece cuando se usa el perfil de manos libres vía el aparato de manos libres. Esto le permite realizar llamadas usando una conexión Bluetooth®.
- Page 182 Bluetooth: Recomendamos que su teléfono y el aparato Bluetooth® Ƭ con el que se esté comunicando estén un máximo de 10 metros de distancia. La conexión puede mejorarse si no hay objetos sólidos entre su teléfono y el otro aparato Bluetooth®. Para emparejar con otro aparato 1.
- Page 183 - Mi Nombre: Permite cambiar el nombre del teléfono para que los puedan encontrar otros aparatos Bluetooth fácilmente al intentar de emparejar con usted. - Servicios Admitidos: Muestra todos los servicios compatibles con el teléfono. - Mi Dirección de Bluetooth: Espectáculos usted la dirección de Bluetooth de su dispositivo.
-
Page 184: Accesorios
Este adaptador permite cargar la batería. Batería Baterias estandares disponibles. NOTA: Utilice siempre accesorios LG originales. Si no lo hace, la garantía puede • anularse. • Los accesorios pueden variar según la región; para más información, consulte con la empresa o el agente de servicio técnico de su región. - Page 185 Datos técnicos Temperatura ambiente Máx.: +50 °C (descarga), +45 °C (carga) Mín.: -10 °C Tiempo de espera y de conversación de la batería Los tiempos de espera y de conversación varían dependiendo en los patrones de uso y condiciones del teléfono. El consumo de energía de la batería depende en factores como la configuración de la red, potencia de la señal, temperatura de operación, características seleccionadas, frecuencia de llamadas y patrones de uso de voz, datos y otras...
-
Page 186: Por Su Seguridad
Por su seguridad El valor más elevado de la SAR para este modelo de teléfono cuando se lo probó para usarse en el oído es de 1,15 W/kg y cuando se lo usa sobre el cuerpo, según lo descrito en esta guía del usuario, es de 0,67 W/kg. (Las mediciones del uso en el cuerpo varían en función de los modelos de los teléfonos y dependen de los accesorios disponibles y los requisitos de la FCC).